This site is supported by our readers. We may earn a commission, at no cost to you, if you purchase through links.
A tangled mess of thread, a skipped stitch, or fabric that refuses to move—these frustrations often trace back to a single culprit: improper threading. Most sewing problems start before you even touch the pedal, when thread doesn’t follow the right path through your machine.
The good news? Threading a sewing machine correctly isn’t complicated once you understand the logic behind each step. Your machine has a specific route designed to create balanced tension and smooth stitches. Learning this path transforms sewing from a battle with your equipment into a reliable skill.
With the right technique, you’ll thread confidently in under a minute and avoid the headaches that derail projects before they start.
Table Of Contents
- Key Takeaways
- Threading Sewing Machine Basics
- Threading Sewing Machine Correctly
- Preparing Thread and Bobbin
- Threading Upper Machine Path
- Threading Needle and Bobbin
- Setting Up Machine for Threading
- Troubleshooting Threading Issues
- Maintaining Sewing Machine
- Final Threading Checks
- Frequently Asked Questions (FAQs)
- Conclusion
Key Takeaways
- Proper threading prevents 60–80% of sewing problems before they start, making it the single most critical skill for reliable stitch quality and frustration-free sewing.
- Following the exact thread path through tension discs and the take-up lever controls thread flow and tension balance—skipping even one guide causes loops, breakage, and skipped stitches.
- Matching your spool orientation to your pin type (vertical pins for stacked spools, horizontal pins for cross-wound spools) and using the correct needle size for your thread weight eliminates most tension issues.
- Regular maintenance including needle replacement every 6–8 hours, lint removal after each project, and using high-quality thread reduces machine wear by 30% and extends equipment life.
Threading Sewing Machine Basics
Before you can thread your machine, you need to know what you’re working with. Every sewing machine has the same core parts that guide thread from the spool to the needle.
Let’s look at the key components you’ll use during threading.
Sewing Machine Components
You can’t thread your machine well without knowing its key parts first. The spool pin holds your thread spool securely in place at the top. Tension discs grip the thread to control its flow and prevent loops or puckering. The take-up lever moves up and down with each stitch, pulling thread through the needle at the right moment.
Down below, feed dogs advance your fabric forward in small, precise steps. The machine’s frame ensures overall stability during sewing.
When you understand how these sewing machine parts work together, threading a sewing machine becomes straightforward and reliable.
Thread Spool Pin Location
Most domestic machines place the primary spool pin on the top right side of the machine arm, aligning with your first upper thread guide. You’ll find it’s either vertical—standing upright—or horizontal, lying flat. Pin orientation matters because cross-wound spools need horizontal placement for smooth thread path flow, while stacked spools work best on vertical pins.
Use the correct spool caps to prevent your thread from snagging. Improper placement causes tension issues and threading process failures, so matching your thread spool type to pin design prevents frustration when threading a sewing machine. A smooth process requires understanding the importance of threading.
Tension Discs and Take-Up Lever
After locating your spool pin, you’re ready to master the two components that make or break every seam. Tension disks grip your thread with adjustable clamping force—usually set between 3 and 5 on most domestic machines—while the takeup lever feeds and retrieves slack during each stitch cycle. Disc tension effects directly control whether your stitches lie flat or pucker. Lever synchronization with those disks determines stitch quality.
Here’s what these parts control:
- Thread flow resistance through adjustable pressure between disk faces
- Stitch loop formation as the lever drops and rises
- Thread retrieval timing—up to 59 inches per fabric inch
- Seam appearance, preventing loops or thread nests underneath
- Overall tension balance between upper and bobbin threads
Thread path diagrams in your manual show tension disks positioned before the takeup lever, which matters when threading a sewing machine. Miss either component and you’ll face bunching, breakage, or skipped stitches. Even auto-tension systems need manual adjustment when you switch fabrics.
Regular tension maintenance—cleaning lint from disk faces and inspecting for grooves—keeps sewing machine threading consistent and prevents frustration down the line.
Threading Sewing Machine Correctly
Now that you know the parts, let’s talk about threading sewing machine correctly. It’s your first line of defense against common threading mistakes and frustrating sewing machine troubleshooting sessions later. Get this right, and you prevent 60–80% of stitch problems before they start.
Start by consulting your machine’s threading diagram. Every model follows a specific path. Use high-quality thread that matches your fabric—poor thread quality causes breakage even when everything else is correct. Check needle compatibility with your thread weight. A size 90/14 needle works well with 40-weight thread. Tension balance depends on following these steps exactly.
Preparing Thread and Bobbin
Before you thread the upper path of your machine, you need to set up your thread spool and bobbin correctly. This prep work makes the actual threading process much easier and prevents issues down the line.
Let’s walk through the essential steps to get your thread and bobbin ready for sewing.
Placing Thread Spool on Pin
Setting up your thread spool correctly is like laying a solid foundation—skip it, and everything that follows can crumble. Your machine’s spool pin type determines how thread should feed into the first guide. Match your spool style to the right pin to avoid twisting and tension headaches down the road.
Follow these spool placement essentials:
- Vertical pins work best with stacked spools—thread peels off the side, not the end
- Horizontal pins need cross-wound spools—thread exits from the top to reduce twisting effects
- Always use a spool cap sized to your spool—prevents wobbling and snagging
- Add a felt pad under vertical spools—stops thread from wrapping around the pin base
Check your thread exit direction before threading the path forward.
Winding Bobbin Thread
Pull thread from your spool pin through the bobbin winding tension disc—this small step controls thread quality during the winding process. Wind thread clockwise around your empty bobbin by hand two or three times to secure it. Engage the bobbin winding mechanism and control your speed for even distribution. Stop when it’s two-thirds full to prevent overfilling jams.
Bobbin winding errors like skipping the tension disc cause loose, uneven thread that ruins stitches later.
Securing Bobbin on Pin
After winding a few wraps of thread around your bobbin, push it firmly onto the bobbin pin until you hear an audible click. That sound confirms correct alignment and prevents the bobbin from flying off during high-speed winding.
Check these five critical points for secure bobbin placement:
- Bobbin pin types vary—match your bobbin’s center notch to the spindle’s alignment feature
- The bobbin shouldn’t rock when tapped lightly with your finger
- Slide the pin right to engage the automatic stop sensor
- Misalignment causes eccentric rotation and winding noise within seconds
- Proper seating prevents over-winding beyond the rim
A wobbling bobbin means you need to reseat it completely before starting the motor.
Cutting Excess Thread
Once your bobbin is wound, grip the excess thread firmly and snip it with sharp scissors, leaving a 3–4 inch tail length. This prevents thread breakage and tangled thread when you start sewing.
Clean cutting tools make the difference—dull blades crush fibers and cause fraying that triggers thread tangles later. Proper cutter maintenance and seam safety mean holding the thread taut while cutting, never yanking.
These efficiency effects add up: clean cuts reduce rework and improve thread tension consistency throughout your project.
Threading Upper Machine Path
Now that your thread and bobbin are ready, it’s time to guide the thread through the upper part of your machine. This path runs from the spool pin through several guides and tension points before reaching the needle.
Follow these steps carefully to help your thread move smoothly through each checkpoint.
Following Thread Guides
Most sewing machine threading problems start when you rush past the thread guides. Your machine has between 3 and 6 fixed upper thread guides that control direction from spool to needle. Skipping even one guide can cause thread breakage within the first 10–20 cm of stitching.
Follow this thread path carefully:
- Start at the first guide near your spool pin
- Check that thread enters guides at the correct angle
- Move through each numbered guide in sequence
- Keep thread taut but relaxed as you work
Proper guide placement maintains tension stability and prevents skipped stitches throughout your sewing.
Looping Thread Around Tension Discs
Before your thread reaches the tension discs, confirm your presser foot is raised—this opens the discs and allows the thread to slip between them without resistance. Pull the thread down into the right-hand channel, loop it firmly around or between the discs following your machine’s U-shaped path, then guide it back up. Missing this loop creates stitch quality issues like loose loops underneath your fabric. Proper disc pressure settings depend on your fabric type and thread weight.
Check that the thread sits snugly in the disc groove with no visible jumping. Thread tension settings around 4 work for medium-weight fabrics, but you’ll need tension adjustment for heavier materials. Tension issues often trace back to this single step, so take your time and follow your machine’s diagram exactly.
| Issue | Likely Cause |
|---|---|
| Loops underneath fabric | Thread bypassed tension discs |
| Thread breakage | Excessive disc pressure setting |
| Inconsistent stitch length | Thread path deviations around discs |
| Loose stitches after cleaning | Tension disc cleaning needed |
Threading Take-Up Lever
Once your thread loops up from the tension discs, you’ll reach the takeup lever—your machine’s stitch rhythm keeper. Position the lever at its highest point by turning your handwheel toward you. This simple move opens a clear path to the lever’s eye and prevents your top thread from slipping out later.
Thread insertion techniques matter here:
- Grasp the thread with both hands and “floss” it back and forth through the lever slot until you feel it snap into place
- Confirm the thread sits fully inside the eye, not just resting in front of the opening
- Follow every thread guide before and after the lever to maintain proper thread angle
Miss this step and you’ll face mis-threading consequences—loose loops underneath your fabric, thread jams around the bobbin, and frustrating bird’s nests that waste time and materials.
Regular lever maintenance keeps stitch consistency reliable: brush away lint from the takeup lever path after every few projects to prevent debris from restricting thread movement during sewing.
Threading Needle and Bobbin
You’re almost at the finish line now that the upper threading is complete. The final steps involve getting the thread through the needle eye and bringing up the bobbin thread from below.
These last moves set you up so both threads work together when you start sewing.
Threading Needle From Front to Back
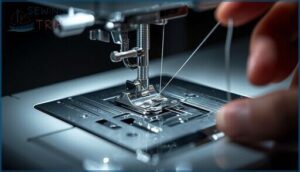
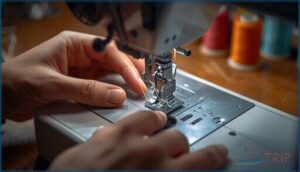
After weaving your thread through the upper path, you’re ready for the needle eye. Always insert the thread from front to back—this aligns the thread with the groove on the needle’s rounded side, reducing thread breakage causes and optimizing your thread path. Trim the thread cleanly or moisten the tip for easier insertion through the needle eye. If you struggle with small eyes, an automatic needle threader or handheld needle threader simplifies the task.
Proper needle eye direction ensures the thread settles correctly in relation to the tension disc influence, preventing skipped stitches. Groove alignment importance can’t be overstated for smooth threading and reliable stitch formation.
Pulling Bobbin Thread
Once your needle is threaded, you need to connect top and bottom threads. Turn the handwheel toward you one full rotation to drop the needle down and back up. This catches the bobbin thread underneath.
Gently tug the top thread upward—a loop of bottom thread will appear through the needle plate. Pull both thread tails to about four inches and position them together toward the back of your presser foot.
This simple step prevents common issues like thread nests and improves stitch quality from your first seam.
Preparing for Sewing
Before your first stitch, complete a quick safety check. With both threads positioned behind the presser foot, lower it to engage the feed dogs. Verify your needle selection matches your fabric weight and check that all guards are secure.
Test your machine setup on scrap material under proper lighting conditions. This routine maintenance habit prevents threading problems and keeps your workspace safe.
Setting Up Machine for Threading
Before you thread your machine, you need to get it ready. Think of this like setting up your workspace before starting a project—everything needs to be in the right position.
Here’s what you’ll do to prepare your machine for smooth threading.
Raising Take-Up Lever and Presser Foot
Before you tackle sewing machine threading, position your machine properly. Turn the handwheel until the take-up lever reaches its highest point—this ensures full thread path access.
Next, raise the presser foot using its lever. This step triggers tension disc release, opening the discs so your top thread can slip between them smoothly. Skipping this creates threading errors and ruins stitch quality impact.
Take-up lever alignment and a raised presser foot set you up for success from the start.
Following Thread Paths
Your machine’s printed guides—numbered or marked with arrows—map the entire thread path from spool to needle. These markings exist because domestic machines route the top thread through eight to twelve distinct contact points, and missing even one causes threading mistakes that sabotage stitch quality.
Start at guide #1 near the spool pin, then move through the tension discs for proper tension disc engagement, up to the take-up lever, and down to the needle eye. Following this sequence ensures thread path reliability and prevents the common thread path errors that lead to loops, skips, and breakage.
Preparing Thread for Threading
Before you place the thread spool, inspect thread quality—old or sun-damaged fibers snap during setup. Proper thread storage matters—fresh polyester resists breakage better than dried cotton when loading or winding a bobbin.
Check your diagram for spool placement: vertical pins need horizontal spools; horizontal pins reverse that rule. Position the thread spool so it unwinds counterclockwise, preventing twists that jam tension discs.
Troubleshooting Threading Issues
Even when you follow every step perfectly, your sewing machine might still act up. The good news is that most threading problems have simple fixes once you know what to look for.
Let’s walk through the most common issues and how to solve them quickly.
Checking Thread Tension
When your stitches look wrong, your thread tension settings need checking. Sew a test seam on scrap fabric and inspect both sides closely. Balanced tension places the interlock point in the fabric center.
Tension visual cues include dots of bobbin thread on top or needle thread underneath—these signal tension issues. A diagonal pull test reveals uneven stitches: if one thread breaks first, your tension disc needs attention.
Adjusting Tension Settings
When tension troubleshooting reveals unbalanced stitches, start with small adjustments. Turn your tension dial one number at a time—most machines use a 0–9 range, with 4–5 ideal for medium fabrics.
Fabric-specific tension matters: lightweight materials need settings around 2–3, while heavier fabrics require slightly higher values. Always test on scrap fabric after each change.
Remember, bobbin tension balance rarely needs adjustment—focus on your upper tension disc first for practical adjustments that solve most tension issues.
Replacing Dull or Incorrect Needles
Your needle works harder than any other part of your machine—and when it fails, threading problems multiply fast. Replace needles every 6–8 hours of stitching to prevent thread breakage causes and fabric hole prevention issues. Watch for these needle replacement indicators:
- Skipped stitches appearing on previously smooth seams
- Audible punching sounds when penetrating fabric
- Frequent upper-thread snapping during sewing
- Visible bending or burrs on the needle point
- Increased motor strain or jamming
Match needle size to fabric weight: 70/10 for lightweight materials, 80/12–90/14 for cotton, 100/16 for denim. Correct needle threading eliminates most sewing machine troubleshooting headaches while reducing needle safety risks and motor stress reduction needs.
Maintaining Sewing Machine
A well-threaded machine won’t stay that way if you don’t take care of it. Regular maintenance keeps your sewing smooth and prevents most threading headaches before they start.
Here’s what you need to do to keep your machine running like it should.
Cleaning Machine Regularly
Regularly scheduled machine maintenance keeps threading problems at bay and extends the life of your sewing machine. Machines used moderately need cleaning and oiling every 500 hours, while heavy use calls for attention every 300 hours.
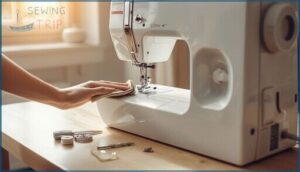
Lint removal is your first line of defense—clear the bobbin area and feed dogs after each project with a small brush. Weekly cleaning of exterior machine components prevents dust from interfering with tension discs and thread guides.
Oiling frequency matters too: apply one drop of sewing machine oil monthly to designated points in your manual. Fabric impact plays a role as well—fleece and flannel shed heavily, requiring immediate cleaning after projects.
Professional servicing every one to two years handles deeper issues, ensuring machine longevity through consistent sewing machine troubleshooting and care.
Replacing Needles and Bobbins
Beyond routine cleaning, sharp needles and correctly loaded bobbins keep your machine running smoothly. Replace your needle every 6–8 hours of sewing—dull needle effects include skipped stitches and fabric snags. Needle replacement frequency increases with heavy fabrics like denim.
Match needle type to your project: ballpoint for knits, universal for wovens. Check bobbin placement regularly and inspect the bobbin case for cracks that cause tension problems.
Using High-Quality Thread
Sharp needles lay the foundation—now thread strength determines whether your seams hold. Polyester thread delivers roughly 30% higher tensile strength than cotton, which means fewer breaks during sewing. High-quality thread reduces machine wear by approximately 30% over time because smooth surfaces create less friction through tension discs.
When you choose premium thread, you’ll notice these four improvements:
- Consistent bobbin thread tension between 25–35 grams for balanced stitches
- Minimal lint buildup protecting your top thread path
- Stable tension stability at higher sewing speeds
- Enhanced project outcomes with seams that withstand repeated washing
Final Threading Checks
Before you start sewing, you need to double-check your work. A quick inspection now saves you from frustration later when things go wrong mid-project.
Here’s what to verify before you take that first stitch.
Checking Thread Alignment
After you’ve finished threading, you need to verify that everything lines up correctly. Start by checking the upper path from spool to needle—your thread should sit snugly between the tension discs and loop smoothly through the take-up lever without any bypassed guides.
Next, examine bobbin alignment by confirming the thread unwinds in the correct direction under the case spring. Visual indicators tell the story: balanced stitches that look identical on both sides mean proper tension balance, while random loops signal threading mistakes.
Test stitch performance on scrap fabric—puckering or visible knots reveal misaligned thread tension settings that you’ll need to correct before starting your project.
Making Final Adjustments
Once threading is complete, you’ll need to fine-tune your machine for best performance. Start by adjusting the tension dial—set it around 4 to 4.5 for most fabrics, then make small one-unit adjustments if needed. Check that your presser foot sits flat and verify the thread path runs smoothly through every guide without resistance.
Turn the handwheel slowly to watch how your thread feeds. Test your stitch quality on scrap fabric that matches your project material. Look for balanced stitches on both sides—no puckering or visible loops.
These thread tension tips prevent frustrating troubleshooting later and help deliver professional results from your first seam.
Frequently Asked Questions (FAQs)
How do you thread a sewing machine left to right?
Most domestic machines guide the top thread threading across the top from right to left at the take-up lever, following numbered guides printed on the housing for proper tension disc engagement.
Why is threading a sewing machine important?
Correct threading controls tension and prevents jams, ensuring strong stitches. When your top thread and bobbin thread flow smoothly through the machine, you’ll reduce downtime, protect components from wear, and achieve consistent stitch quality every time.
Should you learn how to thread a sewing machine step-by-step?
Learning the machine threading process step-by-step builds your foundation for error reduction and stitch quality.
Mastering threading Singer sewing machine models or any brand improves learning efficiency, machine safety, and project outcomes from your first seam forward.
How do you rethread a sewing machine?
You’ll follow the same threading path you used initially. Raise the presser foot and needle position, then guide thread through each tension disc and bobbin area, checking for proper thread path alignment and lint removal before sewing.
How do you take up a sewing machine?
The take-up lever synchronizes with your needle, pulling upper thread through fabric to form each stitch.
Threading this lever correctly prevents loose loops underneath and ensures proper tension balance along the entire thread path.
How do you thread a bobbin on a sewing machine?
Picture a small spool spinning steadily—that’s your bobbin winding into action. Start by placing the empty bobbin on the bobbin winder spindle, threading through the tension disc, then engaging the winder at moderate bobbin winding speed.
What should I know before threading a sewing machine?
Before threading, raise your presser foot and needle to release tension discs. Review your user manual for machine-specific paths.
Check that you have quality thread, a sharp needle, and good lighting ready.
How to thread a sewing machine for beginners?
Like threading a needle in dim light, your first machine setup tests your patience. Raise your presser foot and take-up lever first. Follow numbered guides through tension discs, then thread your needle front to back.
How do you use a thread guide on a sewing machine?
Thread guides keep your top thread aligned from spool to needle, preventing tangles and maintaining proper thread tension.
You’ll thread through each guide sequentially, following numbered arrows, ensuring smooth material feeding and consistent stitches during sewing machine threading.
Do you need a sewing machine to thread up?
Yes, you need your sewing machine for proper threading. Hand-threading tasks and manual stitching work without machines, but threading Singer sewing machine components—top thread paths, bobbin thread guides, and tension discs—requires the actual equipment.
Conclusion
Threading your machine is like learning the alphabet before writing—it’s the foundation everything else builds on. Once you know how to thread a sewing machine correctly, those tangles and skipped stitches disappear.
The path becomes automatic, your hands move with confidence, and your machine responds exactly as it should. Master this skill once, and you’ll never second-guess yourself again.
That’s when sewing stops being frustrating and starts being exactly what you wanted: productive, reliable, and yours.
- https://www.wikihow.com/Thread-a-Sewing-Machine
- https://www.sailrite.com/sewing-machine-part-names
- https://www.maximizemarketresearch.com/market-report/sewing-machine-market/84626/
- https://itchinforsomestitchin.com/sewing-machine-parts-and-functions/
- https://www.goldstartool.com/blog/the-different-sewing-machine-parts-explained.htm

