This site is supported by our readers. We may earn a commission, at no cost to you, if you purchase through links.
Examine your bobbin case for lint buildup or damage. Test your tension on scrap fabric first.
If stitches look loose on top, tighten the upper tension dial by turning it to a higher number. If the bottom thread shows on top, loosen the tension.
Replace your needle if it’s bent or dull, and make certain you’re using matching thread weights. Clean your machine’s tension discs regularly.
Most tension problems stem from simple threading mistakes or maintenance issues that mastering these fundamentals will solve.
Table Of Contents
Key Takeaways
- Start with the basics every time – rethread your entire machine with the presser foot up, check for proper threading through all guides, and examine your bobbin case for lint buildup before making any tension adjustments.
- Make small, incremental changes to your upper tension dial (quarter-turns only) and always test on scrap fabric first – most tension problems stem from the upper thread, not the bobbin, so adjust this first.
- Keep your machine clean and well-maintained by removing lint from tension disks monthly, oiling moving parts regularly, and scheduling annual professional servicing to prevent tension issues before they start.
- Match your thread quality and weight to your fabric type – poor thread quality often masquerades as tension problems, and mismatched combinations create constant headaches that no amount of dial adjustment will fix.
Thread Tension Basics
Thread tension controls how tightly your sewing machine pulls the upper and lower threads together to create balanced stitches.
You’ll need to understand how your machine’s tension disks, springs, and bobbin case work together before you can fix common problems like puckering, thread breaks, or loose seams.
Definition and Importance
Thread tension is your sewing machine’s push-and-pull balance between upper and lower threads.
Thread tension is the secret handshake between your upper and lower threads—when they work together, magic happens.
When you’ve got proper tension balance, you’ll create balanced stitches that interlock perfectly in the middle of your fabric layers.
This tension balance directly impacts seam strength, stitch durability, and fabric appearance.
Without it, you’ll face thread tension issues that cause weak seams, breakage, and sewing machine troubleshooting headaches.
Incorrect threading can cause issues, so check thread guides to confirm proper setup.
Tension Mechanism Components
Your sewing machine’s tension mechanism works like a precision orchestra, with each component playing a vital role.
Understanding these parts helps you troubleshoot issues faster and maintain better stitch quality.
Here are the five key components that control your thread tension:
- Thread Guides – Direct thread path through multiple strategic points on your machine
- Tension Disks – Apply controlled pressure to thread passing between spring-loaded metal plates
- Tension Dial – Controls pressure applied through numbered settings for different fabrics
- Bobbin Springs – Regulate lower thread tension via small screw adjustments in the case
- Check Spring – Manages thread slack during needle movement for consistent flow
The tension spring and tension screw work together with these components.
When you turn the tension dial, it adjusts how tightly the tension disks grip your thread.
Meanwhile, bobbin springs maintain consistent lower thread control.
Perfect stitches are achieved when you balance the top and bobbin thread tension.
Component maintenance of these precision parts guarantees your regulator function operates smoothly, preventing frustrating tension problems that can ruin your projects.
Maintenance and Cleaning
Regular sewing machine maintenance keeps your tension running smoothly.
Clean lint from tension disks monthly using a small brush or compressed air. Remove the bobbin case for thorough bobbin cleaning, checking for thread buildup.
Oil moving parts according to your manual’s schedule. Using the correct oil can help, so consider specialized machine lubricants.
Professional servicing annually guarantees peak performance. Proper tension cleaning prevents most common stitching problems before they start.
Troubleshooting Thread Tension
When your stitches look wonky, it’s time to play detective with your sewing machine tension. Start by examining stitch formation on both sides of your fabric – this tells you everything about what’s happening inside your machine.
Check if your upper thread tension and lower thread tension are working together properly. Poor thread quality often masquerades as tension problems, so swap out that bargain thread for something better.
Your needle type matters too – a dull or wrong-sized needle throws off fabric feed and creates bogus tension diagnostics. Begin troubleshooting by re-threading your entire machine with the presser foot up.
This simple step fixes about half of all sewing machine tension issues. Test on scrap fabric after each adjustment. Remember, bobbins tension problems are less common than upper thread issues, so start there first before diving deeper into mechanical adjustments.
Identifying Tension Issues
You’ll spot tension problems by looking at your stitches and checking where the threads lock together in the fabric.
When your machine creates uneven stitches, puckered seams, or threads that break frequently, these clear signs tell you the tension needs adjustment, indicating a problem with tension.
Common Problems and Solutions
Looking at your fabric after stitching reveals specific clues about thread tension issues.
Each problem has a clear solution once you identify the symptoms.
- Seam Puckering: Fabric bunches up when thread tension is too tight – decrease upper tension setting
- Thread Breaking: Happens when tension exceeds thread strength – lower tension dial and check needle size
- Looping Thread Underside: Visible loops indicate loose upper tension – increase tension gradually
- Gaps in Seams: Weak stitches from insufficient tension – tighten upper thread tension
- Skipped Stitches Sewing: Often caused by uneven tension – rethread machine completely
Incorrect tension causes noticeable seam issues.
Thread Breakage and Puckering
When your thread breaks often or fabric puckering seams appear, you’re dealing with classic tension troubleshooting scenarios.
Tension too tight causes threads to snap under pressure, while lightweight fabrics bunch up from excessive pull.
Check your needle type matters for fabric weight, and examine thread quality for consistency.
Fabric feed issues can also create these frustrating problems during sewing.
Uneven Tension and Gaps
Uneven tension creates stitch imbalance that’s easy to spot.
When your needle thread appears loose on the fabric’s underside, you’re dealing with classic tension troubleshooting scenarios.
Skipped stitches often accompany this problem, especially when fabric feed isn’t consistent.
Check for needle issues like dullness or bending.
Bobbin problems frequently cause these thread tension issues, requiring immediate attention to prevent further complications, including skipped stitches.
Adjusting Thread Tension
Once you’ve identified your tension problems, you’ll need to make precise adjustments to fix them.
Start with your upper thread tension dial since this controls most sewing issues, and make small changes while testing on scrap fabric to avoid overcorrecting. Small changes
Upper Thread Tension Adjustment
Most tension issues stem from improper upper thread settings. You’ll find the tension dial on your machine’s front or side panel. Start with the presser foot position raised to guarantee proper thread path influence through the tension disks.
Thread breakage and tangling are common tension symptoms.
- Check tension dial settings between 3-5 for most fabrics
- Test incremental adjustments on scrap fabric before sewing projects
- Adjust needle thread tension gradually using quarter-turn movements
- Monitor upper thread behavior during test stitches
- Document successful settings for different fabric types to ensure proper thread tension and prevent thread breakage. This will help you achieve the best results with your sewing machine, especially when dealing with delicate fabrics or complex sewing projects, and always remember to make incremental adjustments.
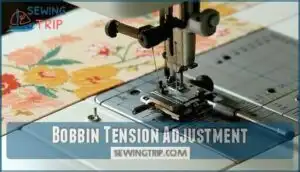
Bobbin Tension Adjustment
Fine-tuning your machine’s bobbin tension requires a delicate touch.
Start by removing the bobbin case and locating the small casing screw.
Turn clockwise to tighten, counterclockwise to loosen—quarter turns only!
Test your spring adjustment by holding the thread tail and letting the case drop.
Proper bobbin winding prevents unbalanced stitches and backlash prevention.
The bobbin case screw is essential for this adjustment.
| Adjustment | Direction | Result |
|---|---|---|
| Tighten | Clockwise | Reduces bobbin thread flow |
| Loosen | Counterclockwise | Increases bobbin thread flow |
| Test Drop | Hold thread tail | Case drops 1-2 inches |
Auto-Adjusting Tension Features
Modern sewing machines take the guesswork out of tension with advanced sensor technology.
These smart features detect material thickness and automatically adjust settings for you. Digital tension systems offer enhanced reliability compared to manual adjustments.
- Sensor technology reads fabric thickness and adjusts tension automatically
- Saved profiles store settings for different fabric types and projects
- Material adaptation guarantees consistent stitches across varying textures
- Tension override lets you manually adjust when needed
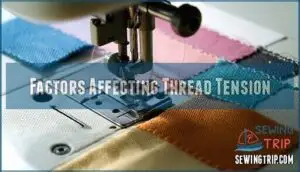
Factors Affecting Thread Tension
Several factors directly influence your sewing machine’s thread tension, and understanding these elements helps you achieve consistent, balanced stitches.
Your thread quality, fabric thickness, and machine’s maintenance schedule all work together to determine whether your tension settings will produce professional results or frustrating problems.
Thread Quality and Type
Quality thread makes all the difference in your sewing success.
Choose quality thread—your stitches will thank you with flawless results every time.
Thread Material impacts tension control—core-spun polyester delivers 40-50% higher strength than standard options.
Thread Weight affects flow through tension disks, while Thread Finishes provide lubrication and durability.
Specialty Threads require adjusted settings for ideal performance.
Thread Compatibility between brands prevents tension conflicts.
A good choice is to think about buying core-spun thread for enhanced strength.
Avoid low-quality thread that breaks easily and creates uneven stitches, as it can negatively impact your sewing experience, and consider core-spun thread for better results.
Fabric Choice and Thickness
Your fabric choice directly impacts thread tension performance.
Heavy fabric weight requires looser tension settings, while lightweight materials need tighter adjustments.
Knit vs. woven fabrics behave differently—knits stretch and need gentler tension.
When working with layered fabrics, you’ll face additional tension challenges.
Material weave density affects thread flow.
Always test tension settings on fabric scraps before starting your project to prevent costly tension problems.
Machine Maintenance and Servicing
Your sewing machine needs regular TLC to keep tension running smoothly.
Remove lint from tension assemblies weekly and oil moving parts monthly—this oiling frequency prevents sticky mechanisms.
Schedule professional checkups annually for motor maintenance and part replacements that you can’t handle.
Neglecting sewing machine maintenance turns simple tension troubleshooting into major sewing machine repair headaches, requiring more than just regular TLC.
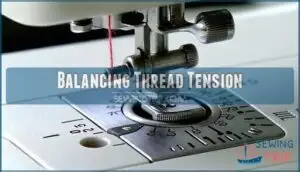
Balancing Thread Tension
You’ll achieve perfect stitches when your top thread and bobbin thread work together with equal tension.
Start by adjusting your upper tension dial first, then check that your tension disks and bobbin case stay clean and properly maintained.
Top Thread and Bobbin Thread Balance
Perfect thread tension happens when your upper thread tension matches your bobbin tension perfectly.
You’ll see balanced stitches with threads meeting in the fabric’s center, not pulling to either surface.
This balance affects everything from stitch appearance to seam strength across different fabric types and thread weights.
Here’s what balanced tension gives you:
- Rock-solid seams that won’t fail when you need them most
- Professional-looking stitches that make your projects shine
- No more thread breakage during those marathon sewing sessions
- Smooth fabric feed without puckering or bunching
- Consistent results regardless of fabric type or thread weight
When tension ratios match, your sewing machine tension works like a well-oiled team.
Upper thread tension and bobbin tension problems disappear when both sides pull equally.
This balanced tension prevents common thread tension issues that frustrate sewers at every skill level.
Tension Disk and Bobbin Case Maintenance
Keep your tension disks spotless by removing lint buildup that causes uneven thread flow. Use a small brush for disk cleaning and lint removal from the tension assembly.
Check your bobbin case for debris and inspect the spring integrity regularly. Don’t forget the oiling points around moving parts.
Proper thread tension is essential for quality stitches. Proper thread tension problems often stem from neglected maintenance of these components.
Regular Machine Servicing
Beyond daily upkeep, annual professional inspection keeps your machine running smoothly.
Expert servicing includes motor maintenance, proper oiling frequency checks, and thorough lint removal from tension assembly areas you can’t reach.
This extends component lifespan substantially while preventing costly tension problems before they start.
Professional sewing machine maintenance catches worn parts early, saving you from frustrating tension troubleshooting sessions later.
Advanced Tension Troubleshooting
When basic tension adjustments don’t solve your sewing problems, you’ll need to use advanced troubleshooting techniques that address computerized settings, mechanical adjustments, and specialized thread combinations.
These methods help you tackle complex tension issues that standard dial adjustments can’t fix, ensuring your machine handles any fabric or thread type with perfect stitch formation.
Computerized Machine Tension Settings
Modern computerized machines revolutionize sewing machine tension control through digital dial settings and saved tension profiles.
You’ll access precise adjustments via LCD touchscreens, while sensor technology automatically adapts to fabric thickness.
These auto-adjusting benefits eliminate guesswork in tension troubleshooting, and firmware updates enhance tension accuracy.
Making computerized machines superior for consistent results across various projects, utilizing sensor technology is key.
Mechanical Machine Tension Adjustment
Unlike their digital counterparts, mechanical machines rely on your hands-on approach for tension dial settings. You’ll need to make incremental adjustments using the numbered dial, typically ranging from 0-9.
Manual adjustments require patience and testing on scrap fabric to find the sweet spot. The thread path influence affects how your sewing machine tension responds to each dial change.
Here’s your step-by-step approach for tension adjustment sewing:
- Start with dial at 4 – This baseline setting works for most standard fabrics and threads
- Make quarter-turn adjustments – Small changes prevent overcorrecting and maintain control over tension dial setting
- Test on fabric scraps first – Always verify adjustments before working on your actual project pieces
- Check both thread sides – Examine top and bottom stitch formation to identify thread tension issues
- Document successful settings – Write down working tension dial settings for different fabric and thread combinations on mechanical machines
Specialized Thread and Fabric Considerations
Different thread types and fabric combinations create unique sewing machine tension problems.
Delicate fabrics like silk need reduced tension by 20-30%, while heavyweight threads require 30-50% higher settings.
Metallic threads demand 15-25% lower tension than standard options.
Elastic materials stretch during sewing, affecting thread quality and balance.
Quilting cotton works best with medium tension settings for consistent results.
Consistent issues may require adjusting tension dials to resolve sewing machine tension problems and achieve consistent results with unique sewing machine setups.
Preventing Future Tension Issues
You can avoid most tension problems by maintaining your machine regularly and making smart choices about thread and fabric combinations.
Clean your tension disks monthly, use quality thread that matches your fabric weight, and always thread your machine with the presser foot up to guarantee proper tension from the start, which helps in maintaining proper tension.
Regular Maintenance and Cleaning
Your sewing machine needs regular tender loving care to prevent tension issues.
Start with lint removal from the tension disks and bobbin area every few projects. Clean these parts with a small brush, then follow your servicing schedule for oiling parts.
Proper disk cleaning and bobbin care keep your machine running smoothly, preventing costly repairs and frustrating tension problems.
Proper Threading and Bobbin Winding
Proper sewing machine threading prevents most thread tension issues.
Follow your machine’s threading steps exactly, ensuring thread passes through all thread guides.
Wind bobbins at moderate winding speed for consistent winding – too fast creates uneven tension.
Different bobbin types require specific winding techniques.
Always thread with the presser foot up and check your bobbin winding tension regularly.
Choosing The Right Thread and Fabric Combination
When thread compatibility and fabric weight don’t match, you’ll face constant sewing machine tension headaches.
Your thread weight should complement your fabric type—lightweight threads for delicate materials, heavy threads for thick fabrics.
- Match thread brand quality to prevent tension inconsistencies
- Choose thread weight based on your project requirements
- Consider stitch appearance when selecting thread and fabric combinations
- Test color matching on scraps before starting major projects
Frequently Asked Questions (FAQs)
How to fix thread tension issues?
Like untangling a stubborn knot, you’ll need patience.
Start by re-threading your machine with the presser foot up, then adjust the upper tension dial gradually, testing on scrap fabric until stitches balance perfectly, which requires patience.
How to tell if thread tension is correct?
Check your stitches on both fabric sides.
Balanced tension shows threads interlocking in the middle, creating even stitches.
If you see loops or puckering, or threads pulling through to either side, you’ll need adjustments.
Why does my thread keep bunching up underneath?
Bird’s nesting underneath happens when your upper thread tension is too loose.
The bobbin thread pulls the needle thread down, creating tangles.
Increase your upper tension dial gradually and rethread your machine completely to fix the issue, which is often related to upper thread tension.
Why does my thread keep looping under fabric?
Back in your grandmother’s quilting circle days, this frustration would’ve stopped projects cold.
Your upper thread tension’s too loose, letting thread pool underneath.
Tighten the tension dial incrementally and test on scrap fabric until loops disappear.
Can I use different thread weights together?
You can mix different thread weights, but it’ll create tension headaches and uneven stitches.
Your machine’s tension system works best when both threads match in weight and quality for balanced, professional results.
Why does tension change with needle size?
Needle size dramatically affects thread tension like a domino effect.
Larger needles create bigger holes, reducing fabric resistance and loosening tension.
Smaller needles increase resistance, tightening tension. You’ll need to adjust your dial accordingly to manage the domino effect of needle size on thread tension.
Does room temperature affect thread tension settings?
Room temperature doesn’t directly affect your tension settings, but extreme cold can make threads brittle and more prone to breaking.
You’ll typically adjust tension based on fabric and thread type rather than temperature changes.
Can decorative stitches require different tension adjustments?
Approximately 70% of decorative stitch problems stem from tension issues.
Yes, you’ll need different tension settings for decorative stitches.
They use more thread than straight stitches, so reduce your upper tension slightly for balanced results.
Should I adjust tension for twin needles?
Yes, you’ll need to reduce your upper thread tension for twin needles.
The dual threads create extra drag, so decrease the tension dial by 1-2 numbers from your single needle setting to prevent thread breakage.
Conclusion
Mastering thread tension is like tuning a guitar – once you understand the basics, everything clicks into place.
You’ll find that most issues stem from simple threading errors or maintenance neglect.
Start with proper threading, check your bobbin case regularly, and test adjustments on scrap fabric.
When you know how to troubleshoot thread tension systematically, you’ll spend less time fighting your machine and more time creating beautiful projects.
Regular maintenance prevents most tension headaches.
- https://www.researchgate.net/publication/283692984_The_effects_of_sewing_thread_properties_on_the_needle_thread_tension_in_an_industrial_sewing_machine
- https://er.knutd.edu.ua/bitstream/123456789/29881/1/Assessing_the_impact_of_sewing_machine_thread_take.pdf
- https://www.groz-beckert.com/en/news/newsletter/sewing/2018/m2_sewing_sewing_problems.html
- https://www.slideshare.net/slideshow/sewing-machines-problems-and-remedy/246816941
- https://www.colessewingcentre.co.uk/blog/post/common-sewing-machine-problems-and-fixes.html?srsltid=AfmBOorDsEhvpT-JBiTWnl32FElN-thyx1sp2ifbJqYzIw4BYoUenhw2

