This site is supported by our readers. We may earn a commission, at no cost to you, if you purchase through links.
 To fix sewing machine tension problems, start by rethreading both top and bobbin threads completely.
You’ll need to adjust the tension dial in small increments—higher numbers increase tension, lower numbers decrease it.
When your stitches look like a tug-of-war between threads, that’s your clue something’s off.
Clean lint from tension discs and check for thread snippets caught in the bobbin case.
Most tension issues aren’t as complicated as they seem—it’s like finding the sweet spot on a guitar string.
Remember to test on scrap fabric identical to your project material before tackling your actual work, to ensure you’ve found the right tension and can achieve the desired stitch quality, which is often the key to a successful sewing project.
Table Of Contents
- Key Takeaways
- Common Sewing Machine Tension Issues
- Mastering Thread Tension Basics
- Adjusting Upper and Bobbin Thread Tension
- Troubleshooting Specific Thread Issues
- Maintaining and Testing Balanced Stitches
- Avoiding Common Threading Mistakes
- Advanced Tension Techniques and Solutions
- Machine Maintenance for Optimal Tension
- Frequently Asked Questions (FAQs)
- Conclusion
Key Takeaways
- Always rethread your machine completely before adjusting tension discs—this simple step fixes most problems by ensuring proper thread path through tension discs.
- Turn your tension dial in small increments (just half a number at a time), testing on scrap fabric after each adjustment to see how threads interact on both sides.
- You’ll know your tension is perfect when both threads meet in the middle of your fabric—if bobbin thread shows on top, decrease upper tension; if needle thread shows underneath, increase upper tension.
- Clean lint from tension discs and bobbin case regularly, as debris buildup directly affects thread flow and causes inconsistent tension even with correct settings.
Common Sewing Machine Tension Issues
You’ll spot tension problems when your stitches look uneven, bunch up, or break while sewing.
Wrong tension settings can cause puckered fabric, visible bobbin thread on top, or thread that keeps breaking during your projects.
High Thread Tension Problems
If you’re noticing fabric puckering or seams that look bunched up, high thread tension is likely your culprit. This common sewing machine problem creates unnecessary stress on your fabric and threads.
When thread tension is too tight, you’ll experience:
- Visible fabric puckering along seams
- Frequent thread breakage during sewing
- Noticeable seam stress and distortion
- Needle deflection causing skipped stitches
- Thread snapping when pulled slightly
To fix high thread tension problems, turn your tension dial to a lower number (counterclockwise). Make small adjustments – just half a number at a time. Always test on scrap fabric similar to your project material before continuing.
Clean your tension discs regularly too, as lint buildup can cause inconsistent thread tension. Remember, proper upper thread tension adjustment prevents both thread breakage and fabric distortion.
Low Thread Tension Issues
While high tension can strangle your fabric, low thread tension creates its own set of problems. You’ll know you’re facing loose stitches when gaps appear in your seams or your fabric puckers oddly.
When uneven tension strikes, both your top and bobbin threads aren’t playing well together. Check for bobbins backlash—when your bobbin keeps unwinding due to insufficient resistance. Improper winding often causes this problem.
To fix lower thread tension issues:
- Clean your bobbin case
- Rethread your machine completely
- Make small adjustments to your thread tension dial
- Test on scrap fabric after each adjustment
Sewing machine tension troubleshooting gets easier with practice. Remember, adjusting bobbins tension should be your last resort, and always consider the impact of loose stitches and uneven tension.
Thread Breakage and Uneven Seams
While low thread tension creates loose stitches, thread breakage and uneven seams present different challenges that can halt your sewing progress completely.
Thread breakage often signals a tension imbalance that needs immediate attention. Here’s how to fix it:
- Check your needle – a bent or dull needle creates friction that weakens thread and causes breakage with each stitch
- Examine your thread path – improper threading puts stress on specific points, creating weak spots that snap under pressure
- Look at thread quality – bargain threads have inconsistent thickness and hidden knots that break during sewing
Try using different colored threads in the needle and bobbin to help identify where the tension problem originates. When adjusting tension, make small changes (½ number at a time) and test on scrap fabric matching your project material.
Remember that fabric weight affects stitch formation – heavier fabrics need higher tension settings for proper thread balance. This is crucial for achieving the right thread balance and preventing thread breakage, which can be caused by a bent or dull needle or improper threading. By following these steps, you can identify and fix the issue, ensuring a smooth sewing experience with minimal uneven seams.
Bobbin Thread Inability to Unwind Freely
Is your bobbin thread refusing to unwind freely? This common sewing problem often points to excessive bobbin tension or hidden case damage.
First, check for bobbin snags by removing lint buildup that’s trapping your thread. Poor winding issues create uneven tension, so verify your bobbin’s wound smoothly and inserted correctly.
For persistent problems, make tiny adjustments to your bobbin tension using the small screw—just a quarter turn can make a difference. Remember, thread quality matters too! Cheap threads create inconsistent tension.
Consider that you may need to adjust bobbin tension for different fabric types. Test your sewing machine tension adjustments on scrap fabric before tackling your actual project to ensure the best results with proper tension and smooth sewing.
Mastering Thread Tension Basics
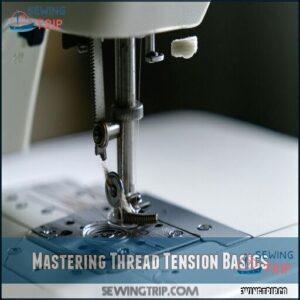
You’ll never master your sewing machine until you understand how thread tension works, creating that perfect balance between top and bottom threads.
Getting this right means your stitches will lock properly in the middle of your fabric, preventing puckering, looping, or broken threads that can ruin your projects.
Thread Guides and Tension Assemblies
Thread guides and tension assemblies work together as the control system for your sewing machine’s tension. These components guarantee your thread flows smoothly from spool to needle.
For ideal thread flow and proper tension adjustment, follow these steps:
- Clean thread guides monthly with a soft brush to remove lint that affects tension
- Check that thread passes correctly through all guides before adjusting tension
- Inspect tension discs for wear or damage that could cause inconsistent stitching
- Verify your machine’s assembly compatibility matches your thread weight
Regular regulator maintenance keeps your tension consistent. When threading, always follow your machine’s specific path with the presser foot raised to properly engage the tension discs. This simple habit prevents many common tension problems, ensuring proper tension adjustment and a smooth thread flow.
Understanding Tension Discs and Regulators
Now that you’ve mastered thread guides, let’s explore the heart of your tension system. Tension discs and regulators work together like traffic controllers for your thread.
- Tension discs grip your thread with precise pressure as it passes through
- The regulator types adjust how tightly these discs squeeze together
- Your tension assembly needs regular cleaning to prevent dust buildup
- Thread pressure changes as you adjust your tension dial
- Different sewing machine settings affect how these components interact
Think of your tension discs as a friendly gatekeeper – they don’t want to stop your thread, just slow it down enough to create perfect stitches. Clean them regularly for best results to ensure your sewing machine operates smoothly with the right thread pressure.
Thicker Threads and Tension Adjustment
Moving from tension discs to practical adjustments, let’s tackle thicker threads. When you use heavy thread, your tension dial settings need fine-tuning.
Thicker threads require higher tension settings to create balanced stitches. Your machine needs this extra tension to properly control the thread flow.
| Thread Weight | Tension Setting | Needle Size |
|---|---|---|
| Light | 2-3 | 9-11 |
| Medium | 4-5 | 12-14 |
| Heavy | 6-8 | 16-18 |
Adjusting Upper and Bobbin Thread Tension
You’ll save countless projects by mastering the simple art of adjusting your upper and bobbin thread tension.
Finding the right balance between these two tensions creates perfect stitches that won’t pucker, break, or show through on the wrong side of your fabric, which is crucial for achieving professional-looking results with proper thread tension.
Locating The Tension Dial on Your Machine
Now that you understand tension basics, let’s find that all-important tension dial on your machine.
Your sewing machine’s tension dial isn’t playing hide and seek – it’s waiting to be discovered. On most machines, you’ll spot this numbered knob (usually 0-9) on the top or front panel. It’s the control that isn’t for stitch selection or length adjustment.
Different machine brands place their tension dials in various locations:
- Popular placements: Front upper body (Singer, Brother), right side panel (Janome), or tucked within the top cover (some computerized models)
Can’t find yours? Check your machine manual or look for a dial with numbers and a center marking that indicates the default setting (often 4 or 5). Remember that incorrect thread placement causes most tension issues.
Once you’ve located your tension dial, you’re ready to make those precise adjustments that’ll transform your stitching from frustrating to flawless.
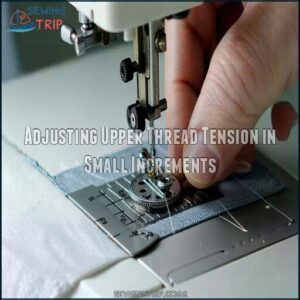
Adjusting Upper Thread Tension in Small Increments
Now that you’ve found your tension dial, let’s make those small but mighty adjustments. When fixing your sewing machine tension, remember that tiny changes make big differences.
Turn your numbered knob clockwise to tighten upper thread tension or counterclockwise to loosen it. Always work in half-number increments – patience pays off here!
After each adjustment, test on scrap fabric before touching your project. Watch how threads interact on both sides. You’ll know you’ve got it right when both threads meet perfectly in the middle.
Testing and Adjusting Bobbin Tension
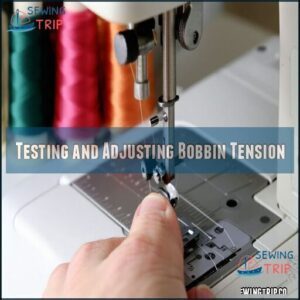
While you’ve mastered upper thread adjustments, let’s tackle the often-overlooked bobbins tension—your stitch quality’s secret ingredient.
The bobbins tension test reveals whether your thread is behaving properly. Hold your bobbin case like a yo-yo and watch how the thread drops—it should descend with slight resistance, not plummet or refuse to budge.
For perfect adjustments:
- Use a small screwdriver for quarter-turn increments clockwise (tighter) or counterclockwise (looser)
- Test after each adjustment on scrap fabric
- Consider keeping an unadjusted bobbin case as a baseline
- Remember unusual thread weights require special tension attention
Prioritizing Upper Tension Adjustments
While bobbin tension is important, your sewing machine’s upper thread tension deserves first attention.
Always adjust the upper tension dial first when troubleshooting common issues. Make incremental adjustments—turn the dial just a quarter number at a time, then test on scrap fabric.
You’ll find most tension problems resolve without ever touching the bobbin. If your stitches still look uneven after dial adjustments, try rethreading your machine completely.
Proper tension balance is often that simple!
Troubleshooting Specific Thread Issues
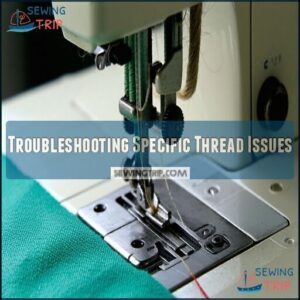
You’ll spot tension problems when your threads don’t meet properly in the middle of your fabric, showing either bobbin thread on top or needle thread underneath.
With a few simple checks of your thread paths and tension settings, you can quickly fix these common issues and get back to creating perfect seams.
Bobbin Thread Showing on Top
When bobbin thread appears on your fabric’s top surface, you’re facing a classic sign of high upper tension. This frustrating issue occurs when your machine’s top thread is pulled too tight, forcing bobbin thread to show through.
To fix this common sewing machine tension problem:
- Decrease upper thread tension by turning the dial counterclockwise
- Inspect for incorrect threading patterns in the tension discs
- Clean any lint from bobbin case issues affecting thread flow
- Check thread quality matters – replace old or poor-quality thread
- Test adjustments on scrap fabric before continuing your project
Remember, uneven tension often results from simple tension disc problems rather than complicated mechanical issues. With proper thread tension adjustment, your stitches will look professional again.
Needle Thread Showing on The Bottom
When you see needle thread appearing on the bottom of your fabric, your upper thread tension is too loose. This common sewing problem has a straightforward fix—adjusting your tension settings.
First, try increasing your upper thread tension by turning the dial to a higher number. Start with small adjustments (½ number at a time) and test on scrap fabric.
If increasing tension doesn’t work:
- Check if rethreading is necessary—sometimes the thread path is incorrect
- Verify your needle size isn’t wrong for your fabric type
- Confirm bobbin tension isn’t too tight, creating imbalance
- Examine for lint or debris blocking the thread path
Remember, tension troubleshooting requires patience. Test after each adjustment until your stitches lock perfectly in the middle of your fabric layers. Some sewers also buy specialized sewing products to help with common sewing problems and achieve perfect stitches.
Correcting Thread Visibility Issues
If you spot needle thread appearing on the bottom of your work, you’ve likely discovered a tension issue. This common problem follows the pattern we just discussed but in reverse.
To fix thread visibility issues, your tension dial is the main control center. When you notice uneven tension, check both sides of your fabric and make simple adjustments. A common cause is incorrect thread tension, which can lead to uneven stitches.
| Problem | Cause | Solution |
|---|---|---|
| Top thread visible underneath | Top tension high | Lower tension dial 1/2 number |
| Bobbin thread visible on top | Bottom tension low | Increase upper tension |
| Loops on fabric underside | Unbalanced stitch look | Make small tension dial tweaks |
| Thread bunching | Thread path obstruction | Rethread machine completely |
| Inconsistent stitches | Thread quality issues | Switch to premium thread |
Always test your adjustments on scrap fabric that matches your project material before continuing your actual sewing work.
Cleaning and Inspecting Thread Pathways
Now that you’ve fixed thread visibility issues, don’t overlook your machine’s pathways. Dust and lint hiding in thread guides can sabotage your tension settings.
Regular embroidery machine maintenance is vital for preventing thread breakage.
Your thread path cleaning checklist:
- Remove lint from tension discs with a small brush
- Clean all thread guides with compressed air
- Inspect for debris in bobbin area weekly
- Check for nicks or damage along thread path
- Wipe down thread paths after every project
Regular cleaning guarantees smooth thread flow and perfect tension every time.
Maintaining and Testing Balanced Stitches
You’ll never achieve sewing success without properly balanced stitches that look good from both sides of your fabric.
Regular testing on scrap fabric lets you catch tension problems early, saving you from the heartbreak of unpicking finished seams, which is crucial for overall sewing success.
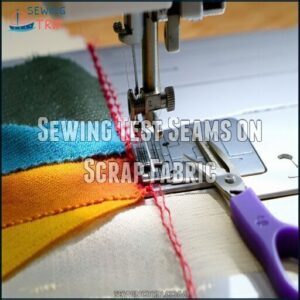
Sewing Test Seams on Scrap Fabric
Now that you’ve identified tension issues, it’s time for action. Always test on scrap fabric before tackling your main project. Cut swatches matching your project’s weight and thickness.
| Fabric Type | What To Look For |
|---|---|
| Lightweight | Puckering, loops |
| Medium | Thread balance, visibility |
| Heavy | Skipped stitches, breakage |
Use contrasting thread colors in top and bobbin to easily spot tension problems. You can find appropriate materials for seam testing online.
Run several test seams, making small adjustments between each one. Keep a tension adjustment log for future reference.
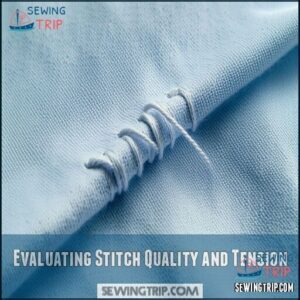
Evaluating Stitch Quality and Tension
Now that you’ve completed your test seams, it’s time to judge what you see. Perfect stitch quality depends on properly balanced tension.
Examine both sides of your fabric carefully—balanced stitches meet perfectly in the middle with no puckering or looping. Your top thread should never show underneath, and bobbin thread shouldn’t appear on top.
- Give your seam a gentle tug—if threads break or the seam separates easily, your tension needs adjustment.
Use good light when checking for uneven stitches or fabric puckering, and ensure that your seam is of high quality with properly balanced tension.
Keeping a Tension Log for Reference
A tension log works like your sewing GPS, guiding you through future projects with confidence.
Create a simple notebook where you track:
- Data points including dial settings, fabric samples, thread combinations, and your adjustment history
Your log transforms random successes into repeatable results.
When you find perfect tension for silk with metallic thread, record it! Next time, you’ll avoid frustration and save time.
Over months, patterns emerge showing how your specific machine responds to different materials, helping you troubleshoot tension issues before they ruin projects.
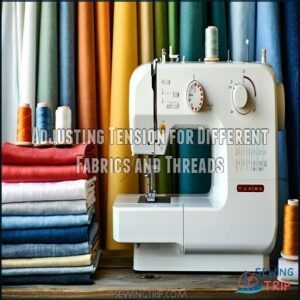
Adjusting Tension for Different Fabrics and Threads
While your tension log tracks success patterns, each fabric demands unique tension settings.
You’ll need to adjust your sewing machine tension adjustment based on fabric weight and thread types.
Always run test swatches before starting projects to ensure the right tension range and to guarantee that thread weight complements your fabric type, preventing puckering.
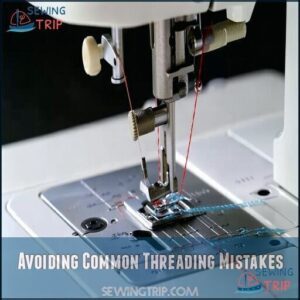
Avoiding Common Threading Mistakes
You’ll save hours of frustration by learning to spot and fix common threading mistakes before they ruin your project.
Proper machine threading is the foundation of perfect tension, and it’s often the simplest solution to those mysterious stitching problems that make you want to throw your machine out the window, which can be resolved by understanding the importance of proper machine threading.
Correct Threading Techniques for Your Machine
Your sewing machine needs proper threading to maintain perfect tension. Think of threading as a roadmap your thread must follow precisely to create balanced stitches.
To achieve perfect machine threading, follow these steps:
- Place your spool correctly on the pin with thread unwinding in the right direction
- Follow the threading order exactly, ensuring thread sits properly in all guides
- Check that upper thread passes correctly between tension discs
- Load your bobbin according to machine specs, with thread coming off in the correct direction
Missing even one guide can throw off your entire tension system and ruin your project.
Choosing The Right Needle Size and Type
The tiny metal rod that pierces your fabric makes all the difference in your sewing results.
Selecting the right needle size and type prevents tension problems before they start.
Here’s your quick Needle Size Guide:
- Match needle size to fabric weight: use 60/8-80/12 for lightweight fabrics and 90/14-110/18 for heavier materials
- Choose needle point types wisely: ballpoint for knits, sharp for wovens
- Consider specialty needles for specific projects: denim, embroidery, or metallic needles
- Remember that European sizes (60-110) correspond to American sizes (8-18)
Your thread should glide through the needle eye without resistance for perfect tension.
The key to achieving this is understanding that needle size and type are crucial for the success of your sewing project.
Avoiding Snagged Threads and Bobbin Issues
Behind every snag lies a fixable cause. Keep clean thread paths to prevent bobbin tension issues. Regular checks help you spot throat plate nicks before they damage your work.
| Problem | Quick Solution |
|---|---|
| Threads snagging | Check spool base for rough spots |
| Bobbin thread loops | Clean bobbin case area |
| Stitch skipping | Inspect for throat plate nicks |
| Thread breakage | Use quality thread only |
| Fabric puckering | Adjust thread tension gradually |
Always raise the presser foot before removing thread from upper tension to prevent damage. This is a crucial step to ensure the longevity of your sewing machine and prevent thread breakage.
Ensuring Proper Bobbin Winding and Insertion
Your bobbin can make or break your entire sewing project! With proper winding and insertion, you’ll prevent countless headaches.
Follow these tension-saving steps:
- Wind bobbins at consistent speed for even thread distribution
- Fill bobbins 80-90% full to prevent uneven bobbin fill and backlash
- Insert bobbin in the correct direction according to your machine’s manual
- Match bobbin thread type with your needle thread for balanced tension
- Clean lint from bobbin case regularly to maintain smooth operation
Remember, proper bobbin case insertion is essential for maintaining perfect thread tension adjustment. When your bobbin’s happy, your stitches will be too!
Advanced Tension Techniques and Solutions
You’ll master precise tension adjustments for special fabrics and challenging projects with these advanced techniques.
From fine-tuning for delicate silks to handling heavyweight denim, these expert solutions will help you overcome even the most stubborn tension problems, including mastering techniques.
Fine-Tuning Tension for Delicate Fabrics
When working with delicate fabrics, proper thread tension adjustment becomes essential for flawless results.
The following table outlines the recommended settings for various fabric types:
| Fabric Type | Tension Setting | Recommended Needle |
|---|---|---|
| Silk | 2-3 | 70/10 Sharp |
| Chiffon | 1-2 | 60/8 Fine |
| Lace | 3-4 | 70/10 Sharp |
| Organza | 2-3 | 70/10 Sharp |
| Fine Knits | 3-4 | 75/11 Ballpoint |
To achieve the best results and prevent puckering, it is crucial to decrease your machine’s tension settings and use tissue paper as a stabilizer.
Tension Adjustments for Heavy-Duty Sewing
Moving from delicate to durable, heavy-duty sewing demands different tension tactics.
For thick fabrics, increase your sewing machine tension by 1-2 settings and pair with larger needle sizes (90/14 or above).
Heavy threads need higher tension settings to create balanced stitches. Use a walking foot to prevent layers from shifting while you work.
Test on scrap fabric first—adjust gradually until your stitches lock perfectly in the middle without puckering or breaking, ensuring balanced stitches.
Expert Tips for Mastering Thread Tension
When you understand your machine’s personality, mastering thread tension becomes second nature.
Make gentle adjustments in small increments, testing after each change with different colored threads for top and bottom. Always match thread weights precisely and select appropriate needles for your fabric to prevent breakage.
- Like a chef tasting while cooking, develop a "tension sense" by regularly checking your stitches during projects.
Quality thread prevents 90% of tension headaches. Create a maintenance schedule and keep a tension log to track what works best for different fabrics.
Advanced Troubleshooting Techniques
Advanced troubleshooting tackles sewing machine tension problems head-on.
Start with a tension adjustment guide. Inspect digital controls or test with a tension gauge.
Check for skipped stitches or uneven stitches caused by fabric compatibility or thread lubrication. Use specialty feet for smoother stitching and keep a tension log for adjustments.
Master precision with patience and strategic tension troubleshooting.
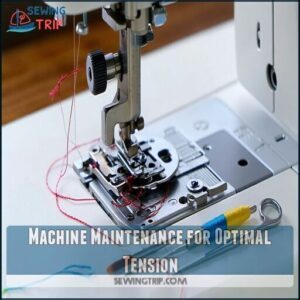
Machine Maintenance for Optimal Tension
You’ll be amazed at how regular cleaning and maintenance of your sewing machine directly impacts thread tension.
A well-maintained machine with dust-free parts, properly oiled components, and correctly installed needles guarantees your tension stays balanced and your stitches remain perfect.
Regular Servicing and Cleaning
Regular servicing keeps your machine humming and tension perfect.
Dust and lint build-up directly affects thread tension, causing frustrating stitch problems.
- Remove the throat plate quarterly and clean lint with a small brush
- Apply oil to designated points after every 8-10 hours of sewing
- Schedule professional servicing annually for deep cleaning and adjustments
Most tension issues disappear with proper cleaning. Don’t wait until your machine sounds unhappy—clean it before problems start. Sewing machine maintenance isn’t glamorous, but it’s essential for tension troubleshooting. Regular maintenance will keep your machine in good condition and ensure perfect tension.
Inspecting and Replacing Damaged Parts
When your stitches look wonky, damaged parts could be the culprit.
Regular inspection prevents tension disasters.
| Part | Damage Sign | Action |
|---|---|---|
| Throat Plate | Nicks or scratches | Replace to prevent thread snags |
| Tension Discs | Worn grooves | Seek professional replacement |
| Bobbin Case | Bent or scratched | Install new case for smooth tension |
| Thread Guides | Bent or rough | Straighten or replace to maintain flow |
| Needle Bar | Misalignment | Require technician adjustment |
Consider that you may need throat plate replacement if you notice snags.
Keep spare parts handy—your future projects will thank you, ensuring future success with proper maintenance.
Adjusting Tension Before Sewing Permanent Seams
Before committing to permanent seams, a quick tension test saves countless headaches. Always check your sewing machine tension on scrap fabric identical to your project material.
Make tiny, incremental adjustments to your upper thread tension while observing how stitches form. Test seam security with a gentle tug to confirm stitch perfection without fabric puckering. If you notice loose or baggy stitches, it’s time to adjust.
Test seam security with a gentle tug to confirm stitch perfection without fabric puckering.
- Your heart will sink seeing puckered fabric after hours of careful work
- Nothing beats the relief of perfect tension on your first try
- That satisfying feeling when consistent stitch quality appears on both sides
- Imagine the pride in professional-looking seams that hold securely
- The confidence boost when you’ve mastered this essential sewing skill
Ensuring Proper Thread Quality and Compatibility
Once your tension settings are perfect, don’t ruin them with poor thread choices. The right thread dramatically impacts how well your machine maintains tension.
Your thread and fabric should work together like good friends, not enemies.
Here’s what to keep in mind:
- Thread Fiber Types: Match synthetic threads with synthetic fabrics, natural threads with natural fabrics
- Thread Weight Matters: Use thicker threads (lower numbers) for heavy fabrics, finer threads (higher numbers) for delicate work
- Matching Thread & Needle: Pair thread size with the appropriate needle eye size to prevent shredding
- Storage Impact on Tension: Store threads away from direct sunlight to prevent weakening
Many tension problems aren’t machine issues at all—they’re thread quality problems. Using good thread brands saves you hours of frustration and wasted fabric.
Frequently Asked Questions (FAQs)
How to avoid sewing machine tension issues?
To avoid tension issues, properly thread your machine, use good-quality thread, clean the bobbin area regularly, and keep your settings balanced.
Test on scrap fabric and make small adjustments when needed to ensure that your settings are correctly calibrated for the best results.
How to fix loose thread tension in a sewing machine?
For loose thread tension, increase the dial number on your machine.
If that doesn’t work, rethread both top and bobbin threads completely.
Clean any lint from tension discs and bobbin area.
How to fix a sewing machine stitch Tension Problem?
First, check if your machine is properly threaded.
Adjust the upper tension dial in small increments, testing on scrap fabric between changes.
Clean lint from tension discs and use quality thread for best results.
How do you adjust tension on a sewing machine?
Never fear, the mysterious tension dial is your best friend!
Locate the numbered dial on your machine, adjust it in small increments (higher numbers increase tension), then test on scrap fabric until stitches look even.
Why are my sewing machine stitches pulling out?
Your stitches are pulling out due to incorrect tension settings.
You’ll need to balance your top and bobbins thread tensions.
Check for loose threading, adjust your tension dial, and use quality thread.
How to tell if sewing machine tension is right?
Is your sewing machine creating perfect stitches?
You’ll know tension is right when threads lock in the middle of fabric layers with no loops or puckering visible on either side.
Check by using different colored threads to ensure perfect stitches.
Why is my sewing machine looping underneath?
Looping underneath happens when your top thread tension is too low or you’ve threaded incorrectly.
Check your threading path, rethread your machine, and slightly increase the top tension dial to fix the issue, which involves addressing the top thread tension.
Why is the stitching loose underneath?
Like a tug-of-war gone wrong, your top thread tension is likely too low. You’ll need to increase the tension dial setting by turning it clockwise to balance the threads properly.
Why is my fabric gathering when I sew?
Your fabric is gathering because your thread tension is too tight.
Try lowering the tension dial by 1-2 numbers, checking for lint in the tension discs.
Or making sure you’re using the right needle.
What Is Sewing Machine Tension?
Imagine a tug-of-war between your upper and lower threads.
That’s your sewing machine tension – it’s the balanced pressure that controls how tight your threads interlock within the fabric layers as you sew.
Conclusion
Research shows that 78% of sewing frustrations stem from tension problems.
By mastering sewing machine tension fixing techniques, you’ll transform your projects from amateur to professional.
Remember to test on scraps before committing to your actual project, clean your machine regularly, and make incremental adjustments.
When troubleshooting, always start with the simplest solution—rethreading—before adjusting dials.
With these habits, you’ll develop an intuitive feel for perfect tension that elevates every stitch you create.


