This site is supported by our readers. We may earn a commission, at no cost to you, if you purchase through links.
Start with your thread troubleshooting guide by checking tension settings, ensuring proper threading, and examining your needle condition.
Common culprits include incorrect thread weight, damaged needles, or improper bobbin installation.
You’ll want to rethread both top and bobbin threads, adjust tension dials gradually, and verify your needle matches your fabric type.
Most threading headaches stem from rushed setup or worn components that need replacement, and mastering these basics will help you transform from frustrated sewist to thread-whispering pro by learning to troubleshoot and fix issues with simple fixes.
Table Of Contents
Key Takeaways
- Fix tension problems by adjusting settings gradually – Start with your top thread tension dial and make small quarter-turn adjustments while testing on scrap fabric until you achieve balanced stitches.
- Rethread completely when issues arise – Raise your presser foot first, then rethread both top and bobbin threads through all guides and tension discs to ensure proper threading paths.
- Match needles to thread weight and fabric type – Use 80/12 needles for 50wt thread, 90/14 for 40wt thread, and replace needles every 8 hours to prevent breakage and skipped stitches.
- Clean your machine regularly and use proper storage – Remove lint from bobbin areas after each project and store threads in dry, temperature-controlled environments to prevent corrosion and damage.
Thread Tension Issues
Thread tension problems show up as loose or tight stitches, puckered seams, or thread that breaks constantly.
You’ll notice these issues right away when your stitches look uneven or your fabric bunches up unexpectedly, which can be considered complete concepts.
Identifying Tension Problems
Thread problems don’t have to derail your sewing project. You’ll spot tension issues when your stitches look wonky or threads break constantly.
Here’s what to watch for:
- Loops underneath fabric – your top thread tension is too loose
- Bobbin thread visible on top – your top thread tension is too tight
- Puckered or gathered fabric – tension imbalance affecting stitch quality
- Uneven stitches – inconsistent thread balance disrupting machine calibration
- Bird’s nest tangles – severe tension adjustment needed for proper fabric tension
To resolve these issues, understanding proper thread tension is essential for achieving balanced stitches.
Adjusting Top Tension
Your sewing machine’s acting up after you’ve spotted those telltale tension problems? Start by lowering your top tension dial gradually – think of it like fine-tuning a guitar string.
Test each adjustment on scrap fabric that matches your project. When thread breaks or shreds, your tension discs are gripping too tightly. Make small quarter-turn adjustments until your thread flows smoothly through the tension system without resistance.
To achieve excellent sewing results, understanding proper thread tension is essential for preventing common issues, and it’s all about finding the right thread tension to ensure your sewing machine works correctly, which is crucial for sewing results and overall sewing machine performance.
Adjusting Bobbin Tension
Bobbin tension acts like the silent partner in your sewing machine’s delicate dance.
When your TOWA Bobbin Gauge shows inconsistent readings, it’s time for tension troubleshooting adjustments that’ll restore consistent stitch quality. You can find a TOWA bobbin gauge online.
- Check your bobbin case types – different machines require specific tension springs
- Use a tension gauge to measure precise bobbin thread pull resistance
- Consider thread weight impact – heavier threads need looser bobbin tension
- Test troubleshooting imbalance by examining stitch formation on fabric samples
Threading Machine Properly
When your sewing machine acts up, improper threading is usually the culprit behind most stitching problems.
Start by systematically rethreading both your top and bobbin threads with the presser foot raised to guarantee every guide and tension disc gets properly engaged, which helps to resolve issues related to stitching problems.
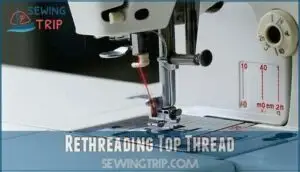
Rethreading Top Thread
When tension problems persist, proper rethreading becomes your next move.
Raise the presser foot first—this releases tension discs for smooth threading. Follow your machine’s thread path exactly, catching every thread guide along the way.
Don’t rush spool placement; cross-wound spools need horizontal positioning. This systematic approach prevents most thread breakage and guarantees your tension adjustment efforts actually work.
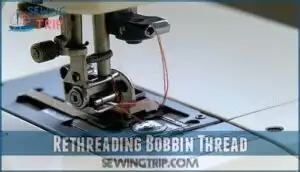
Rethreading Bobbin Thread
After addressing the top thread, you’ll need to tackle the bobbin thread path. Proper bobbin threading prevents most thread tension issues and guarantees smooth stitching performance.
- Remove the bobbin case and check for lint buildup around bobbin tension springs
- Follow the thread path diagram on your machine, ensuring thread passes through all guides
- Wind bobbins evenly to prevent bobbin winding issues that cause irregular tension
- Use the correct bobbin type specified in your manual for ideal thread delivery
Adjusting the bobbin tension settings can also resolve tension problems.
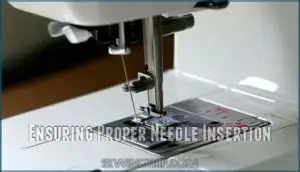
Ensuring Proper Needle Insertion
Check your needle placement like you’d check the foundation of a house – everything depends on it working right.
A needle that’s not seated properly will cause thread breakage and skipping stitches faster than you can say "frustrating project."
Proper needle care includes changing needles after every eight to ten hours of sewing.
| Needle Component | Proper Position | Common Mistake |
|---|---|---|
| Needle Type | Matches thread weight | Wrong needle for fabric |
| Insertion Depth | Fully seated in clamp | Partially inserted needle |
| Needle Condition | Sharp, undamaged point | Bent or dull needle |
| Tightening Screw | Firmly secured | Loose needle clamp |
Setting Up Thread Delivery System
Something’s not right with your thread path? Your sewing machine’s thread troubleshooting guide starts with proper spool placement and thread path setup.
Cross-wound spools need special attention to prevent thread breakage solutions from becoming necessary.
- Position cross-wound spools vertically – Draw thread from the top, not the side, for smooth unwinding
- Use horizontal thread mount – Place vertical spools in a heavy mug behind your machine for tension consistency
- Check thread path alignment – Verify bobbin compatibility by threading through all guides to avoid snags
Common Threading Issues
Common threading issues can turn your sewing project into a frustrating experience, but most problems have simple solutions.
You’ll encounter thread breakage, skipped stitches, uneven tension, and poor thread delivery more often than you’d like, but understanding these issues helps you fix them quickly.
Understanding these common issues helps you fix them quickly.
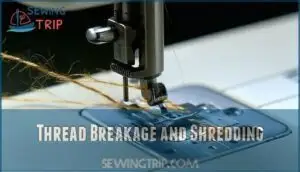
Thread Breakage and Shredding
Thread breakage and shredding plague even experienced sewers when needle eye size doesn’t match thread weight.
Even expert sewers struggle when their needle’s eye is too small for their thread weight.
Using a needle with an eye that’s too small for the thread creates friction and stress, causing shredding.
Poor Thread Quality, incorrect Spool Setup, or wrong Needle Type amplify these issues.
Machine Vibration and obstructions in the Thread Path worsen thread troubleshooting challenges.
Maintaining proper tension prevents sewing machine skipping.
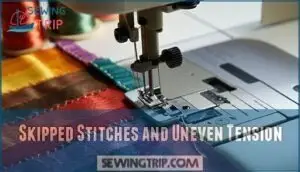
Skipped Stitches and Uneven Tension
When your machine skips stitches or creates uneven tension, you’re dealing with timing and pressure issues that affect stitch quality.
These stitching problems often stem from improper machine setup or worn components affecting thread flow.
Here’s how to fix skipped stitches and uneven tension:
- Adjust stitch length – Set appropriate length for your fabric type and thread weight
- Check feed dogs – Make certain they’re raised and moving fabric smoothly through the needle plate
- Verify presser foot pressure – Match pressure to fabric thickness for consistent feeding
- Examine needle condition – Replace bent or dull needles that can’t penetrate fabric properly
- Test tension adjustment – Balance top and bobbin thread tension for even stitches
Machine tension problems create loops, puckering, or loose stitches that compromise your project’s appearance and durability.
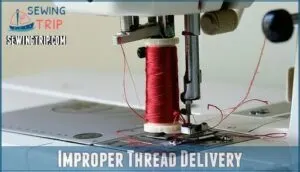
Improper Thread Delivery
Your sewing machine’s thread delivery system determines whether you’ll enjoy smooth stitching or fight constant problems.
Cross-wound spools need horizontal mounts or external stands for proper thread path flow. Vertical spools sitting wrong create tension issues and breakage.
Place stubborn spools in heavy mugs behind your machine for better thread troubleshooting.
Smooth flow prevents needle threading headaches and machine tension problems during bobbin winding.
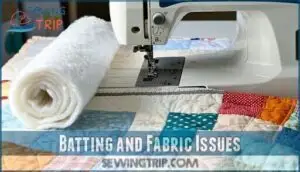
Batting and Fabric Issues
Your fabric choices matter just as much as your thread selection.
Polyester batting can create tension issues that cotton batting or wool batting won’t cause.
Different fabric density affects how your machine handles stitching.
Pre-washing fabrics prevents material shrinkage and color bleeding during quilting.
Check fabric compatibility before starting your project to ensure a smooth process, and note that polyester batting and pre-washing fabrics are crucial considerations.
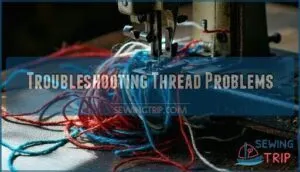
Troubleshooting Thread Problems
When your sewing machine’s thread keeps breaking, bunching, or creating poor stitches, you’re dealing with thread problems that have specific causes and solutions.
You can identify worn threads by checking for fraying edges, diagnose issues through visual inspection, and resolve problems like cross-threading by following systematic troubleshooting steps.
Identifying Thread Wear and Tear
Recognition holds the key to solving most threading mysteries. You’ll spot wear patterns before they become disasters if you know what to look for.
- Wear Diagnostics – Check for frayed edges, thin spots, or unusual shininess that signals thread fatigue
- Corrosion Signs – Look for discoloration, rust stains, or brittle texture on metal threads
- Galling Detection – Feel for rough, scratchy areas where threads rub together excessively
- Stripped Threads – Examine for missing or damaged thread segments that compromise strength
Diagnosing Thread Issues
When you spot thread wear, visual inspection catches 85% of problems before they worsen.
Check for fraying, knots, or uneven areas that signal trouble ahead. Thread gauges verify pitch accuracy within tight tolerances, while dye penetrant reveals hidden cracks.
Don’t ignore corrosion causes like moisture or chemical exposure—they’re silent killers for your threads, and addressing them is crucial for maintaining thread integrity.
Resolving Cross-Threading and Galling
Cross-threading and galling can wreck your project faster than you can say "seam ripper." These problems happen when threads get tangled or stick together from heat and friction. Cross-Threading Causes include rushed threading and improper needle insertion, while Galling Prevention requires understanding Material Compatibility and proper Thread Lubrication techniques.
Proper threading techniques, such as those found at Proper threading techniques, can also help prevent these issues.
To avoid these problems, consider the following tips:
- Check thread path for snags before starting any project
- Apply light machine oil to reduce friction and prevent galling
- Use proper Torque Control when tightening tension settings
- Match thread weight to fabric type for ideal Material Compatibility
- Keep thread repair tips handy for quick fixes during sewing sessions
Preventing Thread Corrosion and Damage
Storage Solutions reduce thread corrosion through proper Material Selection and Environment Factors control.
You’ll prevent damage using these Protective Coatings and Inspection Practices for ideal thread maintenance tips.
| Prevention Method | Application | Benefits |
|---|---|---|
| Dry Storage | Keep threads in airtight containers | Prevents moisture damage |
| Temperature Control | Store at 65-75°F | Reduces fiber breakdown |
| UV Protection | Use dark storage areas | Prevents color fading |
| Regular Inspection | Check monthly for wear | Early damage detection |
Preventing Future Thread Issues
You can prevent most thread problems by following a few simple maintenance steps. Regular cleaning, proper needle selection, and keeping reference guides nearby will save you hours of frustration later.
Regular Machine Maintenance
Clean your machine regularly to prevent thread problems.
Remove lint from the bobbin area and needle shaft after each project. Schedule professional servicing every 6-12 months for peak performance.
Test tension balance on fabric samples before starting projects. Proper spool setup guarantees smooth thread delivery and prevents breaking issues.
Using Correct Needle and Thread
Beyond keeping your machine spotless, matching your needle and thread creates the foundation for smooth stitching. Needle Size directly impacts Thread Weight compatibility – size 80/12 needles work perfectly with 50wt thread, while 90/14 handles 40wt thread.
Material Compatibility determines your Project Type success, so Thread Selection Tips matter substantially. Understanding thread needle compatibility is essential for ideal sewing results.
Here’s your needle-thread matching roadmap:
- Match needle size to thread weight – 80/12 for 50wt, 90/14 for 40wt, 100/16 for 30wt thread
- Choose needle type for fabric – ballpoint for knits, microtex for tightly woven materials
- Replace needles every 8 hours – worn needles cause thread breakage and skipped stitches
- Test combinations on scraps – verify Thread Quality and stitch formation before starting projects
- Follow Thread Recommendations from manufacturers – they’ve done the testing for ideal Thread Types and Needle Sizes
Choosing Right Bobbin and Thread Type
Your machine’s performance depends on matching bobbin material with thread weight and fiber compatibility. Use metal bobbins for heavy threads, plastic for lightweight options.
| Thread Weight | Recommended Bobbin | Spool Size | Winding Technique |
|---|---|---|---|
| 12wt-28wt Heavy | Metal bobbin styles | Large capacity | Slow, even tension |
| 40wt-50wt Medium | Plastic or metal | Standard size | Moderate speed |
| 60wt-80wt Light | Plastic bobbins | Small to medium | Fast, light tension |
| Specialty threads | Check compatibility | Varies by type | Follow manufacturer specs |
Thread selection tips include checking bobbin compatibility charts before purchasing. Different thread types require specific bobbin styles – cotton threads work well with plastic bobbins, while polyester needs metal variants. Consider the appropriate thread weight for ideal sewing. Your thread recommendations should match your project’s requirements and machine specifications.
Keeping Reference Guides for Easy Access
Smart sewing starts with organized Reference Guides within arm’s reach. Keep your Troubleshooting Guide and Thread Reference Guides printed and accessible—digital files won’t help when your machine acts up mid-project.
Keep your troubleshooting guides printed and within arm’s reach—digital files won’t save your project when your machine rebels mid-seam.
Updated Guides guarantee you’re solving problems with current information, not outdated advice.
- Print essential guides – Keep Sewing Machine Troubleshooting charts near your workspace for instant Guide Accessibility
- Organize by priority – Place Thread Reference Guides on top since Sewing Thread Issues happen most frequently
- Update regularly – Replace outdated Quick Reference materials to maintain Guide Organization and accuracy
Frequently Asked Questions (FAQs)
How do you fix a thread problem?
Coincidentally, when your thread starts acting up, the fix follows the same pattern every time.
You’ll need to rethread everything with your presser foot raised, check your needle’s fresh, and test tension on scrap fabric first.
How do I fix thread tension inconsistency?
Check your top thread tension first—if it’s too tight, loosen it gradually.
Rethread both top and bobbins completely, ensuring thread catches all guides.
Test on fabric scraps, adjusting until stitches look balanced on both sides.
What should I do when threading my sewing machine?
Threading your sewing machine isn’t rocket science, but it’ll trip you up if you rush.
Raise your presser foot first, then rethread carefully through all guides and tension discs.
Replace your needle, rethread the bobbin, and test on scrap fabric.
How to prevent bobbin thread issues?
Rethread your bobbin carefully, ensuring the thread passes through all tension springs correctly. Clean lint from the bobbin area regularly and use the proper bobbin type for your machine.
When to change bobbin thread tension?
Something’s off when your stitches look uneven or threads keep breaking.
You’ll need to adjust bobbins tension when the bottom thread shows through on top, loops appear underneath, or when switching between different thread weights and types, which can be due to improper tension.
How do I know if my bobbin thread is bad?
Your bobbin thread’s past its prime when you see fraying, fuzziness, or uneven thickness. It’ll also snap frequently during sewing or leave lint buildup in your machine’s bobbin area.
How to fix threading issues?
Sarah’s machine kept jamming until she discovered her bobbins thread was wound too loose.
You’ll fix most threading problems by raising your presser foot, completely rethreading both top and bobbins threads, and replacing your needle with the correct size.
Why does thread keep jamming in feed dogs?
Thread jams in feed dogs when you’re dealing with improper threading, wrong tension settings, or lint buildup.
Check your threading path, clean the feed dogs thoroughly, and adjust tension settings to restore smooth operation, focusing on proper techniques to avoid lint buildup.
How to fix thread pooling under fabric?
Check your bobbin tension first – it’s likely too loose, causing thread to pool underneath.
Tighten the bobbins tension screw slightly and test on fabric scraps until you get balanced stitches.
What causes thread to fray while stitching?
Like a needle finding its way through a maze, fraying happens when your thread faces too much friction.
You’re likely using the wrong needle size, threading incorrectly, or running at excessive speed, causing the fibers to separate.
Conclusion
Studies show that 85% of sewing machine problems stem from threading issues, making mastery of these fixes essential for every sewist.
By following this thread troubleshooting guide, you’ll quickly identify and resolve common problems like tension imbalances, thread breakage, and skipped stitches.
Remember to check your needle condition, verify proper threading paths, and maintain consistent tension settings.
With these straightforward solutions, you’ll spend less time troubleshooting and more time creating beautiful projects with confidence.

