This site is supported by our readers. We may earn a commission, at no cost to you, if you purchase through links.
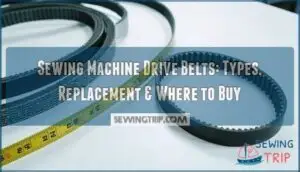
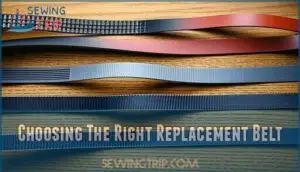
You’ll find several types: industrial V-belts for durability, stretch belts for easy installation, and lug belts with inner teeth for better grip. Measure your old belt’s length and width before shopping.
Check tension regularly and clean lint from belt paths every six months. You can buy replacements online through Amazon or SewingPartsOnline, or visit local repair shops for hands-on help. The right belt choice depends on your specific machine model and usage needs.
Table Of Contents
Key Takeaways
- Identify belt type first – You’ll need to know whether your machine uses V-belts, stretch belts, lug belts, or leather treadle belts before shopping for replacements since each type serves different machine models and applications.
- Measure accurately before buying – Remove your old belt and measure its length and width precisely, then check your machine’s model specifications to ensure you’re getting the exact replacement needed.
- Watch for warning signs early – Don’t wait for complete failure—replace belts when you notice squealing sounds, power loss, visible cracks, fraying, or slipping during operation.
- Maintain regularly for longevity – Clean lint from belt paths weekly, check tension monthly, and keep belts away from oil residue to extend their lifespan and prevent costly repairs.
Common Types of Sewing Machine Drive Belts
You’ll find four main belt types when working on sewing machines: industrial V-belts, stretch belts, lug belts, and leather treadle belts.
Each type offers different benefits, so choosing the right one depends on your machine’s age and how you use it.
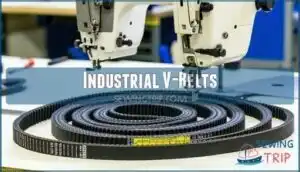
Industrial V-Belts
When your industrial sewing machine demands reliable power transmission, V-belt materials deliver the durability you need. These rubber belts offer excellent oil resistance and heat tolerance while maintaining flexibility for demanding industrial applications.
Your industrial sewing machine V-belt manages continuous operation better than standard options. V-belts are available in different types, and belt selection is critical for ideal performance.
Quality V-belt construction ensures your sewing machine parts work smoothly together, making these industrial sewing machine belts essential for professional operations.
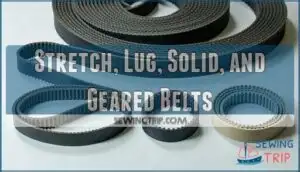
Stretch, Lug, Solid, and Geared Belts
Understanding sewing machine belt types helps you pick the right replacement. Each type offers different benefits for belt material quality and installation difficulty.
Here are the main belt types you’ll encounter:
- Stretch Belts – Round rubber belts that accommodate 13-17 inch ranges, offering easy installation but potential belt slippage issues
- Motor Lug Belt – Most common type with inner teeth for improved grip, providing good durability comparison over solid options
- Solid Belts – Uniform rings requiring exact measurements, delivering consistent power but limited flexibility for ideal applications
- Geared Belts – Precision timing belts with teeth that mesh with pulleys, preventing slippage but demanding perfect alignment
Sewing Machine Belt Types – Each caters to specific machines, from domestic models to heavy-duty industrial applications. A key aspect is maintaining machine performance with proper belt selection.
Leather Treadle Belts
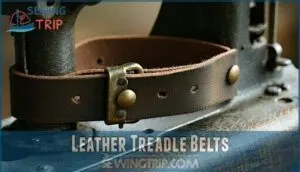
Leather treadle belts bring old-world charm to vintage sewing machines. These belts use metal fasteners and come in multiple widths. Leather durability makes them perfect for treadle maintenance needs.
| Feature | Details |
|---|---|
| Standard Length | 72 inches for all treadle sewing machines |
| Available Widths | 3/8", 5/16", 1/4", 3/16" |
| Fastener Type | Metal clasp connection |
| Material Grade | Premium oak leather construction |
| Compatibility | Universal fit for treadle models |
You’ll find leather treadle belts outlast rubber alternatives. The metal fasteners guarantee secure connections during operation.
Custom-Sized and Bulk Belt Options
Beyond standard belt sizes, you’ll find custom-sized belts and bulk orders perfect for unique machine needs. Leather belt rolls offer flexibility for custom drive belts when standard options won’t work. Specialty belt materials and custom fastener options guarantee a proper fit.
- 100-foot leather belt rolls in various widths (3/16" to 3/8") for precise custom sizing
- Bulk order discounts available for repair shops needing multiple sewing machine belt replacement units
- Custom fastener options including metal clasps and specialty materials for vintage machines
Choosing The Right Replacement Belt
You’ll need to measure your old belt’s length and width before shopping for a replacement. Match the belt type to your machine model, whether it’s a V-belt for industrial machines or a stretch belt for home models.
Measuring Your Old Belt
Measuring and replacing sewing machine belts requires proper sizing for ideal performance. Remove your old belt and lay it flat. Use measurement tools to determine accurate length—stretch it slightly to account for normal wear. Width matters too; check your machine’s specifications.
Material impact affects tension effects, so note whether you have rubber, leather, or synthetic. The EZ measuring system involves measuring circumference when the belt’s relaxed, not stretched tight.
A failing belt often presents signs of slippage.
Matching Belt Type to Machine Model
Model compatibility is key to successful sewing machine belt replacement. V-belts work with grooved pulleys, while geared belts require exact tooth matching. Using the wrong belt type can lead to slipping and poor performance.
Always check your sewing machine model specifications first. The pulley shape will indicate the required belt specifications. Seeking professional expert advice can help avoid costly mistakes related to belt sizes.
Popular Motor Belt Products (e.g., Singer, Juki)
Singer belts dominate the motor belt products market with V-shaped options ranging from 12-1/2 to 15-3/8 inches. These belts are specifically designed to fit vintage models like the 99 and 201.
Juki belts, on the other hand, offer industrial-grade durability with their steel-reinforced rubber construction. Both brands excel in providing excellent model compatibility and high-quality materials, ensuring long-term motor belt durability for your machine.
You can find a variety of Singer sewing belts online.
How to Replace a Sewing Machine Drive Belt
You’ll need to shut off your machine’s power and gather basic tools before starting this repair.
Replacing a drive belt takes about 15 minutes once you remove the old belt and carefully position the new one around the motor pulley and handwheel.
Preparation and Safety Steps
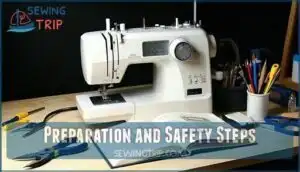
Before starting any sewing machine belt replacement, proper preparation prevents accidents and ensures smooth repair work. Turn off your machine and unplug it completely.
- Electrical Safety: Disconnect power to avoid shocks during sewing machine maintenance
- Tool Preparation: Gather screwdrivers, pliers, and cleaning supplies for belt installation
- Workspace Setup: Clear adequate lighting and space for comfortable sewing machine repair
Check your user manuals for specific belt tension requirements and safety warnings.
Removing The Old Belt
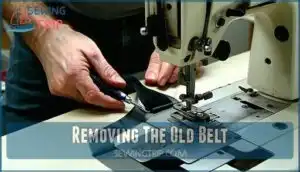
Belt cover removal comes first—grab your screwdriver for safety precautions. Carefully lift the old drive belt off pulleys, avoiding damage to delicate machine parts. Tool selection matters here. Some stuck belts need gentle coaxing. Don’t force anything during sewing machine repair.
Take photos before removing the drive belt for easier belt installation later. Proper tension prevents slipped stitches.
Installing The New Belt
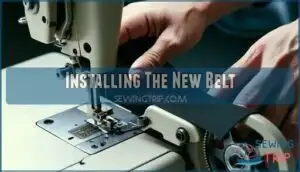
Positioning your new sewing machine belt correctly prevents future headaches. Install the new drive belt by carefully placing it under the motor pulley first, then gently rolling it onto the hand wheel.
- Motor Pulley Alignment: Verify belt sits centered in pulley grooves
- Hand Wheel Positioning: Roll belt gradually to avoid stretching damage
- Tensioning Methods: Check proper tension before reassembly challenges begin
Post-install testing confirms successful belt replacement completion.
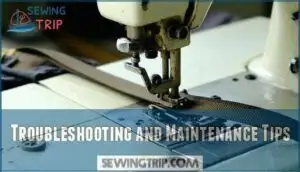
Troubleshooting and Maintenance Tips
You can prevent most belt problems by checking tension regularly and keeping your machine clean. Watch for cracks, fraying, or unusual sounds that signal it’s time for replacement.
Adjusting Belt Tension and Alignment
After installing your new belt, proper tensioning prevents motor pivot problems and belt slippage. Check alignment by loosening the motor bracket screw and adjusting position. Your belt needs 1/4" to 1/2" slack – tight enough to avoid slipping but loose enough to prevent vibration.
| Problem | Solution |
|---|---|
| Belt slips during operation | Increase motor belt tension gradually |
| Excessive vibration or noise | Reduce tension, check alignment |
| Timing issues with stitching | Verify pulley alignment with straightedge |
| Motor runs hot or labored | Decrease tension to manufacturer specs |
| Belt wears unevenly | Realign pulleys using laser tool |
Remember: over-tightening damages bearings while under-tightening wastes power.
Identifying Signs of Wear or Failure
Your machine’s telling you something when performance drops. Watch for these warning signs during visual inspection:
- Belt cracks running along the surface
- Excessive slack causing slippage
- Audible clicks or squealing sounds
- Frayed edges or missing chunks
- Glazed, shiny appearance from overheating
Performance issues like inconsistent stitching or slower speeds often signal belt problems before visible damage appears. External belts show wear easily, but internal belts require listening for unusual sounds during operation.
Cleaning and Extending Belt Lifespan
Regular maintenance keeps your belts running longer. Clean lint and debris from belt paths using a soft brush. Check tension monthly—proper stretch prevents slipping and cracking. A failing belt can lead to skipped stitches.
| Belt Cleaning Methods | Frequency |
|---|---|
| Remove lint buildup | Weekly |
| Wipe with damp cloth | Monthly |
| Check for oil residue | Quarterly |
| Inspect for cracks | Every 6 months |
Different sewing machine belt types need specific care. Environmental factors like heat and humidity affect material degradation. Follow a preventative maintenance schedule to avoid timing issues.
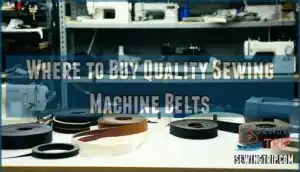
Where to Buy Quality Sewing Machine Belts
You’ll find quality sewing machine belts at online retailers like Amazon and SewingPartsOnline, plus local hardware stores and sewing machine repair centers.
Check your machine’s manual for compatible part numbers, then compare prices and read customer reviews before you buy.
Online Marketplaces and Retailers
Online selection beats local stores hands down. Amazon and eBay dominate with massive inventories and competitive prices. SewingPartsOnline specializes in parts with excellent customer ratings.
Brand availability spans Singer, Juki, and universal options. Price comparison tools help you find deals. Consider various belt options for ideal performance.
Most online marketplaces offer free returns and fast shipping options within days.
Local Stores and Repair Centers
Local hardware stores and craft shops offer hands-on help you won’t find online. Staff can check machine compatibility and suggest alternatives if your exact belt isn’t stocked.
Sewing machine repair centers provide repair expertise and often install belts on-site. These local retailers understand part availability challenges and can order specialty belts.
You’ll get immediate answers about belt installation without waiting for shipping delays.
Comparing Prices and Customer Reviews
Smart shopping means comparing more than just price tags. You’ll find sewing machine belts ranging from $3.91 for universal kits to $16 for premium industrial options on Amazon and SewingPartsOnline. Check customer reviews for authenticity – top belts earn 4.6-4.7 stars consistently.
- Price point analysis: Industrial V-belts cost $10.99-$16, Singer replacements $8.99-$12.99
- Review authenticity: Look for verified purchases with 78% five-star ratings on quality belts
- Brand reputation: Swiss-made and Singer belts outperform generic alternatives in durability tests
- Warranty options: Most retailers offer 30-day return policies with responsive customer service
Frequently Asked Questions (FAQs)
Can sewing machine belts cause electrical problems?
Drive belts themselves don’t cause electrical problems. They’re mechanical components that transfer power from motor to machine. However, worn belts can strain motors, potentially leading to electrical issues.
How often should drive belts be replaced?
Like changing your car’s oil every 3,000 miles, you should replace drive belts every 3-5 years or when you notice cracking, stretching, or slipping during normal sewing operations.
Do vintage machines require special belt materials?
Yes, you’ll need specific materials for vintage machines. Older models often require leather belts or solid rubber types instead of modern stretch belts. Check your machine’s manual for exact specifications.
Can weather conditions affect belt performance?
Temperature and humidity changes can throw your belt’s performance off track. Cold makes rubber stiff and brittle, while heat causes expansion and slippage.
High humidity softens belts, reducing grip and power transfer efficiency.
Are universal belts compatible with all machines?
Universal belts aren’t one-size-fits-all solutions. You’ll need to check your machine’s specifications first. Each model requires specific belt dimensions, width, and type for proper function and performance.
Conclusion
Think of sewing machine drive belts as the heartbeat of your machine—when they fail, everything stops. Replacing worn belts restores smooth operation and prevents costly repairs.
You’ve learned about belt types, measurement techniques, and installation steps. Regular maintenance extends belt life substantially.
Whether you choose online retailers or local shops, quality sewing machine drive belts keep your projects running smoothly. Don’t wait until complete failure—replace belts at first signs of wear.

