This site is supported by our readers. We may earn a commission, at no cost to you, if you purchase through links.
 Sewing a bathing suit might seem like a tough task, but it’s totally doable – and fun!
Whether you’re aiming for a vintage vibe, sleek and sporty, or something unique, we’ll show you how to sew bathing suit fabric with confidence.
From choosing the right stretchy fabric to mastering essential tools and techniques, you’ll be well on your way to creating a one-of-a-kind swimsuit that fits like a dream.
Table Of Contents
- Key Takeaways
- How to Sew Bathing Suit Fabric
- Choosing the Right Fabric
- Understanding Stretch Types
- Essential Sewing Tools
- Techniques for Sewing Swimsuit Fabric
- Tips for Success
- Construction Tips
- Sewing a Bathing Suit Bottom
- Sewing a Bathing Suit Top
- Caring for Your Swimsuit
- Frequently Asked Questions (FAQs)
- Conclusion
Key Takeaways
- When sewing a bathing suit, opt for stretchy fabric like a nylon-spandex blend or polyester knits, and use special needles and threads designed for stretch fabrics.
- Master essential tools like ballpoint pins, stretch needles, polyester thread, and an overlock or sewing machine with stretch stitch capabilities.
- Learn the art of stretch stitches, such as zigzag, triple zigzag, or lightning bolt, to allow for movement and flexibility.
- Practice makes perfect: experiment with different fabrics, stitches, and techniques, and always test on scrap fabric before starting your project.
How to Sew Bathing Suit Fabric
Sewing swimwear fabric needs the right tools and techniques to handle stretchy knit fabrics.
You’ll want to use a stretch needle and polyester or woolly nylon thread.
Avoid standard polyester elastic, as it won’t hold up in water. Instead, opt for chlorine-resistant cotton or rubber elastic designed for swimwear.
When stitching, use a zig-zag stitch or other stretch stitch to allow for flexibility and movement.
Test your stitch settings on scrap fabric first to make sure the fabric stretches without popping stitches.
With the right tools and techniques, you can master sewing stretchy swimwear fabric.
Choosing the Right Fabric
When choosing the right fabric for your bathing suit, there are a few key options to keep in mind. Go for a nylon and spandex blend for 4-way stretch and durability, or opt for polyester knits, which are a good alternative but may not be as long-lasting.
Nylon-Spandex Blend
When choosing the right fabric for your bathing suit, a nylon and spandex blend, often called lycra, is an excellent choice.
This blend offers a 4-way stretch, ensuring your swimsuit moves with you, and has a spandex content of at least 10%, providing durability and chlorine resistance.
This fabric is designed to withstand the elements while keeping its shape and stretch, making it ideal for swimwear.
Polyester Knits
While nylon-spandex blends are a great option for swimwear, polyester knits are another fabric to think about.
They offer good stretch and recovery, and are generally more affordable.
However, they may not be as durable as nylon-spandex blends, so keep that in mind when making your decision.
When working with polyester knits, use stretch stitches like a zigzag or lightning bolt stitch to allow for movement.
Choose a stretch needle suitable for the fabric weight, and opt for polyester thread for durability.
Power Mesh
Power mesh is a great option to add strength and support to your swimsuit. It’s often used in lingerie and activewear, and it can give your swimsuit a more secure fit. Here are some things to keep in mind when working with power mesh:
- Power mesh is typically made from nylon, a durable and flexible fabric that can withstand the demands of swimwear.
- When sewing power mesh, use stretch stitches like zigzag or lightning bolt stitches to allow for movement and flexibility.
- Check your stitches on a scrap piece of power mesh to make sure they stretch without popping.
- Power mesh can add structure and support to areas like the bust or torso, enhancing the overall fit of your swimsuit.
Understanding Stretch Types
Sewing your own swimsuit? Knowing the different stretch types is key.
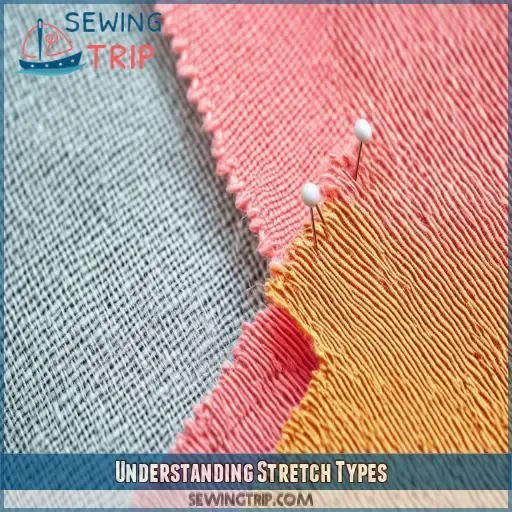
There are two main stretches you need to know: 2-way stretch and 4-way stretch.
2-way stretch fabric only stretches horizontally, while 4-way stretch fabric stretches equally in both directions, giving you more flexibility.
Matching the stretch type to the pattern’s specs helps get the right fit and performance.
Plus, think about how you want your swimsuit to fit when choosing the stretch.
For a comfortable and flattering swimsuit, the stretch should work with the design and if you like a looser or tighter fit.
Essential Sewing Tools
To make sure your stretchy swimwear looks pro, you’ll need a few key tools. Here are the top 5:
- Ballpoint pins: These slip smoothly into stretchy fabrics without leaving those annoying snags.
- Stretch needles: You want Schmetz brand 90/14 stretch needles. They’re made for sewing stretchy fabrics, so your stitches will look perfect.
- Polyester thread: This thread is super durable and stretchy, so your seams will last.
- Overlock machine: This machine rocks for creating stretchy, secure seams that move with your fabric.
- Sewing machine with stretch stitch or zig-zag stitch: If you don’t have an overlock machine, a regular sewing machine with these special stitches will do the trick.
Techniques for Sewing Swimsuit Fabric
Sewing swimsuit fabric has its own set of tricks. First, let’s talk about stitches. You’ll want to use stretch stitches like the zigzag, triple zigzag, or lightning bolt. These stitches allow the fabric to stretch without popping. Experiment with different stitch widths and lengths to find the perfect combination for your fabric.
| Stitch Type | Description | Benefits |
|---|---|---|
| Zigzag | Basic stretch stitch | Easy to sew, widely used |
| Triple Zigzag | Variation of zigzag | Stronger, more durable |
| Lightning Bolt | Specialty stretch stitch | Very stretchy, secure |
Another important technique is to avoid pulling the fabric taut while sewing. This can distort the shape of your swimsuit and reduce its stretchiness. Instead, let the fabric feed naturally through your machine.
Lastly, skip the iron and use finger pressing instead. Synthetic fabrics can melt with too much heat, so it’s best to avoid direct contact with an iron.
Tips for Success
Now that you’ve learned some essential techniques for sewing swimsuit fabric, it’s time to get into some tips that will help you master the art of stitching stretchy swimwear. Here are some pointers to help you succeed:
- Practice makes perfect: Experiment with different fabrics, stitches, and tools to improve your skills.
- Test before you sew: Always test stitch combinations and techniques on scrap fabric before starting your final garment. This way, you can perfect your technique and avoid any mishaps.
- Fold and layer: Fold your fabric to practice sewing over various layers, simulating the real-deal sewing experience.
- Patience is key: Sewing swimwear can be challenging, but with patience and persistence, you’ll master the techniques and soon be stitching like a pro.
Construction Tips
Now, let’s get into the nitty-gritty of constructing your swimsuit. We’ll cover how to apply elastic for a snug fit, finish the edges for a polished look, and even create your own stripes for a unique design.
How to Apply Elastic
Now that you’ve practiced and perfected your skills, it’s time to get started building your swimsuit. Applying elastic is a key step, and here’s how to do it like a pro:
| Technique | Application | Benefits |
|---|---|---|
| Placement | Position elastic along the seam or hem. | Makes sure it fits securely and prevents fabric distortion. |
| Tension | Stretch elastic slightly while sewing. | Creates a snug fit without compromising comfort. |
| Width | Select the appropriate width for your elastic. | Wider elastic provides more support and structure. |
| Stitch Type | Use stretch stitches like a zig-zag stitch. | Allows for flexibility and movement. |
How to Finish the Edges
To finish the edges of your swimsuit, you can use an overlock stitch or a serger. These techniques create stretchy, secure seams and prevent fraying. Flatlock seams are another option for a professional finish. Remember to use polyester thread for durability and to check your stitch settings to make sure the fabric stretches without popping stitches.
D.I.Y. Stripes
Ideas for a Stylish Swimsuit
- Create unique DIY stripes by sewing together fabric panels of different colors.
- Tailor the stripes to your preferred width and style.
- Experiment with various sewing patterns to achieve the desired look.
- Use contrasting colors for a bold statement, or opt for subtle shades to create a sophisticated vibe.
Sewing a Bathing Suit Bottom
When sewing a bathing suit bottom, picking the right pattern is key.
Make sure the pattern is designed for stretchy fabrics and that the fit is snug, as swimwear should be form-fitting.
Pay attention to the leg opening, making sure it’s not too tight or loose.
Use the right sewing tools, like stretch needles, and go for stretch stitches to allow for movement.
Practice on scrap fabric first to get your technique down.
Sewing a Bathing Suit Top
Sewing a bathing suit top requires attention to support and shaping, especially for strapless styles. Here are some tips:
- Focus on support and shaping: Use the right needles, basting, sewing thread, and sewing accessories to make sure it fits well.
- Experiment with different techniques: Try a double needle for topstitching or a walking foot for even fabric feed.
- Practice: Test different stitch combinations and techniques on scrap fabric to find the best approach for your project.
- Be patient: Sewing a bathing suit top can be challenging, but with persistence, you’ll master the techniques.
Caring for Your Swimsuit
Now that you’ve sewn your swimsuit, it’s time to learn how to care for it properly. Caring for your swimsuit is key to making it last longer and keeping its shape, color, and elasticity. Here are some tips:
- Rinse your swimsuit in cold water after each swim to remove chlorine, salt, and sun exposure. You can either rinse it in the shower or soak it in a bowl of cold water for 30 minutes.
- Avoid using harsh detergents or bleach, as these can damage the fabric and elastic.
- Air dry your swimsuit instead of using a dryer, as the heat can cause shrinkage and damage.
- Store your swimsuit in a cool, dry place to prevent mildew and fading.
Frequently Asked Questions (FAQs)
What is the best stitch for a bathing suit material?
Zigzag stitch is a popular choice for sewing bathing suits. You can also use a triple zigzag stitch, lightning stitch, or a stretch stitch. For topstitching, a straight stitch with a zig-zagging bobbin thread works well.
Can you sew bathing suit material?
You can sew a bathing suit, but it’s not as simple as stitching together a few pieces of fabric. It’s more like facing a tricky challenge—you need the right tools and techniques to avoid any problems.
Can you sew swimwear on a regular sewing machine?
Yes, you can sew swimwear on a regular sewing machine. You’ll need to use stretch stitches like a zigzag stitch, triple zigzag stitch, or lightning bolt stitch.
Why won’t my sewing machine sew bathing suit material?
The sewing machine mightn’t be working because of skipped stitches. Try using a different type of thread, or adjust the stitch width and length.
Can I use a straight stitch on a bathing suit?
You can use a straight stitch on a bathing suit, but you must stretch the fabric as you sew. Otherwise, the fabric will break when you put it on.
What kind of thread should I use for swimwear?
For swimwear, polyester thread is the way to go. It’s durable, chlorine-resistant, and won’t leave you with skipped stitches. Go with a name brand like Gutermann for the best results.
How do I cut swimwear fabric?
Cut the fabric on a single layer to avoid slipping. Use a rotary cutter and pattern weights for precision. Pay attention to the grainline. Don’t stretch the fabric while cutting.
Whats the best way to store my swimsuit?
Store your swimsuit in a cool, dry place. Use a sealed container or a plastic bin for easy access. Avoid cardboard boxes, and never hang a wet swimsuit.
What do I need to know about stretch types?
When choosing stretch fabric, look for 2-way or 4-way stretch. 2-way stretch fabrics stretch horizontally, while 4-way stretch fabrics stretch equally in both directions. Match the stretch type to the pattern specifications for the best fit and performance.
Conclusion
Now you’re ready to start sewing your own swimsuit. With the right fabric, tools, and techniques, you can create a unique and dream-fit bathing suit. So, go ahead and make a splash with your new skills!

