This site is supported by our readers. We may earn a commission, at no cost to you, if you purchase through links.
For professional results, invest in an edgeguide presser foot and learn French seams for delicate fabrics. Clean finishes prevent fraying by folding edges under seam allowances.
These game-changing techniques transform wonky stitching into straight, professional seams that’ll make you look like a seasoned pro.
Table Of Contents
Key Takeaways
- You’ll create perfectly straight seams using simple items like Post-it notes as machine guides and quilting rulers taped to your sewing bed—these cost-effective hacks beat expensive equipment every time.
- Master the rubber-banded pencil trick for consistent seam allowances by wrapping bands around pencils at your desired width, though it works best on straight lines rather than curves.
- Invest in essential tools like an edge-guide presser foot and learn French seams for delicate fabrics to achieve professional-quality finishes that prevent fraying and reduce bulk.
- Keep your machine clean using bent pipe cleaner brushes to reach tight spots, and troubleshoot wavy seams by adjusting tension settings and using walking feet for even fabric feeding.
Essential Tools for Perfect Seams
You don’t need fancy equipment to sew perfect seams, but the right tools make all the difference between frustrating mistakes and professional results.
Simple items like post-it notes, quilting guides, and even pipe cleaner brushes can transform your sewing from wobbly amateur work into straight, clean seams that’ll make you look like a pro.
Must-Have Sewing Tools and Accessories
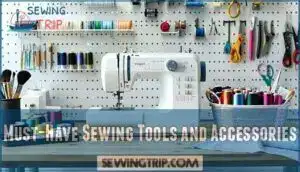
Quality sewing starts with the right arsenal of tools at your fingertips. You’ll need essential sewing notions that transform amateur stitching into professional results. Smart thread management and the right machine accessories make all the difference.
- Edgeguide presser foot for perfectly straight seams every time
- Zipper foot that hugs close to tricky closures without skipping
- Quality measuring tools that won’t lie to you mid-project
- Sewing machine feet collection for specialized techniques
- Reliable sewing aids that actually solve real problems.
Investing in the right sewing machine feet can greatly improve overall sewing quality.
DIY Seam Guides and Rulers
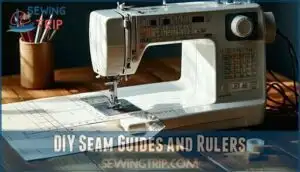
You don’t need fancy equipment to create perfect seam guides. Attach a quilting guide or edge ruler directly to your machine’s bed using masking tape—this creates a reliable fence for consistent seam allowances. An edgeguide presser foot works wonders for straight topstitching.
The Sew Straight Tool offers gridded guidance when taped down. Custom guides made from cardboard or plastic give you control over unique measurements, turning any sewing project into a precision operation.
Understanding sewing tool essentials is vital for achieving professional results in your projects.
Using Sticky Notes and Tape for Precision
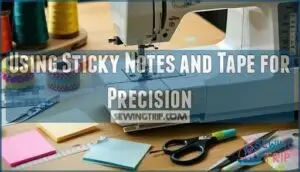
Sometimes the simplest adhesive rulers work best. Masking tape creates perfect precision guides along your machine bed—just stick it parallel to your needle. Post-it notes stack nicely as sticky markers for consistent seam allowances. Washi tape adds style while marking fabric edges.
These sewing hacks transform tape measurements into reliable note alignment systems. Your seams stay straight** when these adhesive tools guide every stitch.
Simple Hacks for Straight Stitching
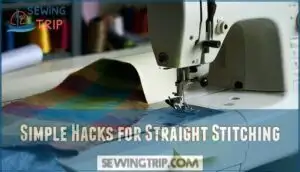
You’ll transform your wonky seams into perfectly straight lines using these simple tricks that cost almost nothing.
We’re talking about Post-It notes as seam guides, quilting rulers that stick right to your machine bed, and finally making those built-in guidelines actually work for you.
Creating Seam Guides With Post-It Notes
Post It Hacks transform your sewing game with zero investment. Stack several Post-it notes against your machine’s throat plate to create instant fabric guides for seam alignment.
The sticky edge acts as a gentle barrier, helping you maintain consistent stitch accuracy without marking your fabric. This simple sewing tip beats expensive edge control tools every time.
Just peel and reposition as needed for different seam allowances.
Attaching Quilting Guides and Rulers
Beyond sticky notes, you’ll want to explore quilting guides and rulers for rock-solid accuracy. Attach a Sew Straight Tool or Grid Glider directly to your machine bed using masking tape—these gridded mats give you visual reference points for perfect seam guide placement. Position an edge ruler alongside your needle, ensuring proper ruler calibration before starting. These quilting guide attachments transform wobbly stitching into laser-straight lines.
Most sewing machine accessories work universally, but double-check compatibility with your specific model for best results.
Using Machine Guidelines Effectively
Your machine’s built-in guidelines offer reliable sewing alignment without extra attachments. These markings help with precision sewing and straight stitching when visibility isn’t compromised. However, poor lighting can make guidelines hard to see.
- Use the Sew Straight Tool or Grid Glider mat for enhanced machine calibration
- Position your fabric edge along the appropriate guideline for consistent seam guide accuracy
- Combine guidelines with ideal feed settings for guided stitching control
Seam Allowance Tips and Tricks
Getting your seam allowances right can make or break your project, and you don’t need fancy tools to nail them every time. We’ll show you clever tricks like the rubber-banded pencil hack and smart measuring shortcuts that’ll save you time and frustration, especially when you’re tackling tricky curves.
Rubber-Banded Pencil Hack for Seam Allowances
Using rubber bands to transform pencils into measuring tools sounds ingenious, but this hack delivers mixed results. Bundle two pencils with rubber bands for a 7mm seam allowance—too narrow for most fabric compatibility needs. Three pencils create a proper ⅝" measurement, perfect for sewing accuracy. However, these pencil seam guides prove tricky on curves and frustrate left-handed sewers.
| Pencil Count | Seam Allowance | Best Use |
|---|---|---|
| 2 Pencils | 7mm (0.27") | Delicate fabrics |
| 3 Pencils | ⅝" (1.6cm) | Standard seaming |
| 4 Pencils | ¾" (1.9cm) | Heavy materials |
| Curved Lines | Variable | Not recommended |
| Left-handed | Challenging | Consider alternatives |
This sewing hacks test reveals that while the concept works for straight stitching on simple projects, professional measuring tools offer better reliability for consistent sewing tips and techniques. Mastering sewing machine maintenance is vital for achieving perfect seams and extending the life of your equipment.
Seam Allowance Rulers and Measuring Tools
Professional seam allowance rulers and measuring tapes beat makeshift solutions every time. Fabric gauges offer precise marking for consistent seam widths, while the Sew Straight Tool provides gridded guidance right on your machine bed. Grid Glider attachments work similarly, creating visual reference points.
These ruler accessories eliminate guesswork when precision marking matters most. A quality quilting guide attached to your machine creates perfect parallel lines without wrestling multiple pencils. Utilizing accurate seam allowance tools is essential for achieving professional results.
Challenges With Curves and Left-Handed Sewing
Traversing curves throws many sewers off balance. The rubber-banded pencil hack becomes tricky on curved seam allowances since pencils resist following smooth arcs.
Left-handed sewers face additional hurdles—most sewing machine feet and quilting guides favor right-handed positioning. Try reverse sewing methods for better control, or invest in asymmetrical patterns designed for lefties.
The Sew Straight Tool helps with straight lines but struggles with curve techniques.
Pro Techniques for Seam Finishing
You’ll transform your homemade projects from amateur to professional once you master these essential seam finishing techniques.
The right finish prevents fraying, reduces bulk, and creates clean edges that’ll make even store-bought garments jealous of your handiwork.
Choosing The Right Seam Finish for Fabric
Your fabric selection dictates which seam finish works best. Heavy fabrics like denim handle pinked edges well, while lightweight materials need gentler approaches.
Match your thread choices to fabric weight – delicate silks require fine threads, sturdy cottons can handle topstitching thread. Consider fray prevention early in your project planning.
A good seam guide helps you maintain consistent seam allowances regardless of finish type. **Understanding the different seam finishing techniques is essential for achieving professional-looking garments.
French Seams, Serged Edges, and Clean Finishes
Three seam finishing techniques will transform your fabric selection game. French seams double-stitch and enclose raw edges, perfect for sheer fabrics and lingerie. Clean finishes fold and stitch edges under seam allowances, creating professional results without bulk. Serging wraps thread around trimmed fabric, preventing fray while maintaining stretch.
Each sewing technique offers specific advantages: French seams for delicate work, clean finishes for visible interiors, and serged edges for speed and flexibility in everyday garments. Understanding the basics of seam finishing techniques is essential for achieving professional-looking results.
Preventing Fraying and Puckering
Nothing beats the frustration of watching your beautiful seam fall apart or pucker like a wrinkled shirt. Start with fray prevention by choosing the right seam finishing technique for your fabric weight. Use fabric stabilization methods like stay tape or interfacing on bias cuts.
Control puckering by adjusting thread tension and using a zipper foot for precise topstitching. Mastering seam finishing techniques will help you achieve professional-looking results. These sewing techniques will transform your edge finishing game completely.
Maintenance and Troubleshooting for Flawless Seams
You’ll keep your seams looking professional when you maintain your machine properly and know how to fix common problems. Even the best sewers run into tension issues and wavy stitches, but with the right troubleshooting steps, you can get back to creating immaculate seams in no time.
Cleaning Your Sewing Machine With Pipe Cleaner Brushes
Lint builds up like dust bunnies in forgotten corners, clogging your machine’s essential parts. Regular maintenance involves addressing sewing machine issues to guarantee peak performance.
Make DIY sewing tools by bending pipe cleaners into tiny brushes for machine cleaning. These homemade pipe cleaner tips reach narrow spots where standard brushes can’t venture. Twist the fuzzy wire into loops for effective lint removal and brush maintenance. This sewing hack beats expensive cleaning kits every time.
Adjusting Tension and Differential Feed
With proper Tension Control and Feed Adjustment, you’ll transform frustrating seam battles into smooth victories. Start with medium tension settings, then make quarter-turn adjustments while testing on fabric scraps. For stretch fabrics, raise your differential feed above 1.0 to prevent wavy disasters. Understanding the importance of proper tension control settings is vital for achieving seamless seams.
Your DropDown Sewing Desk becomes command central for Thread Management and Sewing Precision through these systematic tweaks.
Troubleshooting Uneven or Wavy Seams
Wavy seams usually signal fabric distortion from excess presser foot pressure or incorrect thread tension. **First, reduce your presser foot pressure for stretchy materials.
** Check thread tension settings—mismatched upper and bobbin threads create seam puckering.
**Use a walking foot to feed both fabric layers evenly.
** Add seam stabilization with tissue paper or fusible tape on bias cuts.
**Create a seam guide with masking tape or try the Grid Glider for sewing straight lines consistently.
Frequently Asked Questions (FAQs)
How do you prevent seam rippling on knit fabrics?
Picture your favorite t-shirt stretching out of shape after one wash—that’s seam rippling in action.
You’ll prevent this by using a ballpoint needle, lowering your machine’s tension, and engaging differential feed settings. These adjustments control fabric stretch perfectly.
What causes skipped stitches in stretch seams?
Using the wrong needle type causes most skipped stitches on stretch fabrics. You’ll need stretch or ballpoint needles specifically designed for knits.
Bent needles and incorrect tension also create gaps in your seam.
How to fix puckered seams after sewing?
Frustrated seams bunching up like accordion pleats? You’ve got tension trouble. Lower your machine’s tension setting, switch to a ballpoint needle, and use a walking foot.
Press seams with steam, not heat.
Which needle size works best for heavy denim?
Grab a size 90/14 or 100/16 denim needle for most heavy jeans. These sturdy needles won’t break when punching through thick layers, and they’ll keep your stitches even and professional-looking.
How do you backstitch without thread bunching?
Ever feel like your backstitch turns into a tangled mess? Start slowly, keep your tension consistent, and pull the thread straight through each stitch.
Don’t rush the motion—smooth, deliberate pulls prevent bunching every time.
Conclusion
Mastering these easy sewing hacks for perfect seams will literally transform your projects from amateur disasters to pro-level masterpieces overnight! You’ve got fifteen game-changing techniques that cost almost nothing but deliver remarkable results.
From Post-it note guides to rubber-banded pencils, these tricks solve common stitching problems instantly. Your seams will be straighter, your finishes cleaner, and your confidence sky-high.
Start with one hack today—you’ll wonder how you ever sewed without them.
- https://sewcanshe.com/20-pro-tips-for-sewing-a-straight-line-because-its-not-as-easy-as-they-say/
- https://blog.gettransport.com/trends-in-logistic/on-the-seams-the-ultimate-guide-to-stitch-techniques-and-sewing-tips/
- https://successfulfashiondesigner.com/stitch-defects-in-garments/
- https://www.amefird.com/wp-content/uploads/2010/01/seam_quality_defects.pdf
- https://4h.okstate.edu/projects/design-and-construction/site-files/files/curriculum-and-patterns/sample-technique-cards-all-30.pdf

