This site is supported by our readers. We may earn a commission, at no cost to you, if you purchase through links.
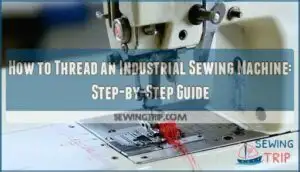
Use polyester or nylon thread matched to a diamond-point needle sized for your material—sizes 22-28 handle heavy upholstery best. Keep tension balanced between top thread and bobbin to prevent bunching or skipped stitches.
Miss one guide along the way, and you’ll end up with bird’s nests instead of clean seams. The secret isn’t just following the threading path—it’s knowing which adjustments keep everything running smooth when problems pop up.
Table Of Contents
Key Takeaways
- Threading follows a specific path from the spool pin through tension discs to the take-up lever and needle eye, and skipping any guide along the way causes bird’s nests and stitch failures.
- Matching your needle size (22-28 for heavy materials) to thread type (polyester or nylon) prevents 60% of skipped stitches and ensures clean seams through thick upholstery.
- Balanced tension between top thread and bobbin is critical—clean tension discs monthly and adjust the bobbin case screw in quarter-turns to eliminate puckering, looping, and thread breakage.
- Replace needles every 6-8 hours and oil your machine every 7-8 hours to maintain 91% factory performance and prevent the majority of threading and stitching problems.
Essential Tools for Industrial Sewing Machine Threading
Before you start threading your industrial machine, you’ll need a few specific items on hand. Let’s look at the key components, materials, and choices that’ll set you up for success.
Key Components of Industrial Sewing Machines
Threading an industrial sewing machine starts with understanding its anatomy. Here are the essential components you’ll encounter:
Your machine runs on either a clutch motor or a servomotor—clutch types engage instantly when you press the pedal, while servomotors give you speed control. The presser foot clamps material down, often lifted by a knee-operated arm. Feed mechanisms like walking-foot or triple-feed move thick layers through.
The thread tensioner regulates top thread tightness, the takeup lever pulls thread during stitching, and the bobbin case holds your lower thread. The needle system pierces multiple material layers to form lockstitches.
Required Tools and Materials for Threading
Now that you know the main parts, let’s gather what you actually need to get that thread through your machine. Here’s your shopping list:
- Thread spool types – industrial-grade polyester or nylon that won’t snap under tension
- Bobbins and bobbin case – metal bobbins beat plastic for consistent tension
- Diamond-point needles – sized right for your material thickness
- Basic tools – scissors, screwdrivers for adjustments, and vinyl remnants for practice runs
Material compatibility matters—match your needle size guide to thread weight, or you’ll fight skipped stitches all day.
Choosing The Right Needle and Thread for Upholstery
Once you’ve got your tools lined up, matching your needle size to thread material makes or breaks your stitch quality. Think of it like pairing tires to terrain—wrong combo means trouble. For heavy upholstery, you’ll want size 22–28 needles with bonded polyester or nylon thread. A key factor in thread selection is its high tensile strength, which determines its ability to withstand force before breaking.
Here’s the quick reference:
| Needle Size | Thread Type | Best For | Cost Analysis |
|---|---|---|---|
| 100/16–110/18 | Tex 70 polyester | Medium upholstery | $8–15/spool |
| 19–22 | Bonded polyester 138 | Heavy-duty fabrics | $12–25/spool |
| 22–28 | Tex 207+ nylon | Extra heavy materials | $15–30/spool |
| 18–22 w/ titanium coating | PTFE lifetime thread | Marine/outdoor | $40–150/spool |
Mismatch these and you’ll see 60% more skipped stitches. Fabric density dictates everything—thicker materials need larger needles to punch through cleanly without shredding your thread or throwing off bobbin tension.
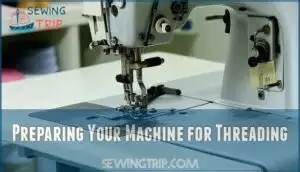
Preparing Your Machine for Threading
Before you start threading, you need to get your machine and workspace ready.
Let’s start by getting familiar with your controls and making sure your machine and workspace are clean, organized, and ready to go.
Setting Up The Sewing Machine and Workspace
Your workspace setup is the foundation of everything that follows. Position your industrial sewing machine on a stable table where vibration won’t throw off your precision.
Good lighting considerations matter—you can’t thread what you can’t see clearly. Make sure your foot pedal accessibility is comfortable and motor placement doesn’t cramp your style.
Proper sewing machine setup saves headaches later.
Understanding Machine Controls and Motor Types
Once you’ve got your workspace dialed in, understanding your motor type changes everything. Most older machines run clutch motors—they’re always spinning and engage hard when you press the foot pedal. Servomotors are the upgrade you’ll find in over 65% of newer machines, offering precise speed control and 60–80% better energy efficiency.
Knowing the difference between these, such as brushed and brushless options, is key for maintenance. Digital control panels on 85% of post-2022 models let you tweak stitch length and speed instantly, while programmable logic controllers cut errors by 40% and drop noise by 15–25 decibels.
Cleaning and Maintaining Tension Mechanisms
If you skip cleaning your tension discs, you’re asking for frustration—lint and thread debris build up fast and choke smooth operation. Monthly cleaning of the thread path debris and bobbin case cuts downtime by 33%.
Use a small brush to clear the tension discs, check your spring tension adjustment, and wipe the bobbin case. That preventative maintenance schedule keeps your threading techniques smooth and your bobbin tension consistent.
Step-by-Step Upper Threading Instructions
Threading the upper part of your machine is simpler than it looks—you’re just guiding thread through a specific path.
Let’s walk through each checkpoint so you get it right the first time.
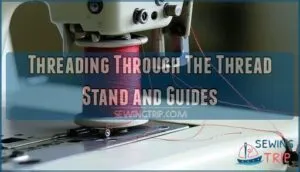
Threading Through The Thread Stand and Guides
Once you’ve got your thread spool loaded, the first stop is guiding it through the thread stand and into those initial guides that keep everything running smooth. Pass your thread through the eyelet at the top, then down through the upper and lower holes of the spool pin.
Different thread stand types and threading techniques matter here—taking your time prevents tangles and keeps thread quality high as you move toward the tensioner.
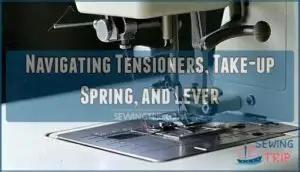
Navigating Tensioners, Take-up Spring, and Lever
After the thread leaves the guides, it needs to wrap around a grooved pin and slide down to the right of your tensioner—this is where things get a little more hands-on and you’ll need to pay attention to keep tension just right.
Loop it over the take-up spring, then hook it around the small lever mechanics point so it emerges cleanly. Pull upward through the top threading guides until you reach the take-up lever—pass it from right to left. That thread path keeps ideal tension locked in during the sewing machine threading process.
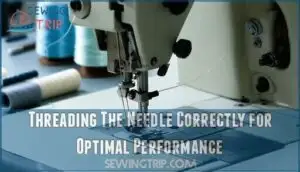
Threading The Needle Correctly for Optimal Performance
Threading the needle really is that make-or-break moment—if you miss, the whole sewing process can grind to a halt.
Make sure your thread matches the eye of the needle, and always guide it through from left to right.
Check that your needle’s seated firmly—a loose needle kills stitch quality fast. Take your time with this step in the threading process, because installing the needle correctly means you won’t damage material or skip stitches down the line.
Bobbin Winding and Installation Techniques
Before you get sewing, a properly set bobbin keeps your stitches smooth and even on both sides of the fabric.
You’ll need to wind it right, snap it into the case, and get the tension dialed in—then you’re ready to roll.
Proper Bobbin Winding Procedures
Before you can thread a bobbin into your machine, you need to wind it properly—think of it as loading the magazine before you fire. Most machines have a bobbin winding area on top with a thread spool placement spot and a spindle. Slip your bobbin onto the spindle, guide the thread through the tension disc, and wrap it around the bobbin a few times by hand.
Engage the winding mechanism and let it run—winding speed impact matters, so don’t go full throttle or you’ll get uneven fill. A consistent bobbin fill prevents bobbin tension balance headaches later. Metal bobbins outperform plastic ones for reliability.
Inserting The Bobbin Into The Case
Now that your bobbin is fully wound, it’s time to drop it into the case—and this part trips up more people than you’d think. Slide the bobbin into the bobbin case with the thread facing top right. Pull the thread through the slot and guide it under the tension spring—thread directionality matters here.
Metal bobbins seat more securely than plastic ones. Check that it clicks into place and rotates freely before closing.
Adjusting Bobbin Tension for Smooth Operation
If your stitches start puckering, looping, or pulling uneven seams, the culprit is almost always bobbin tension that’s too tight or too loose. Use a small screwdriver to adjust the tension screw on your bobbin case—turn it clockwise to tighten, counterclockwise to loosen.
Test with scrap material after each quarter-turn adjustment. Your thread weight matters too; heavier thread needs slightly looser tension to prevent needle breakage and skipped stitches.
Troubleshooting and Maintenance Best Practices
A solid machine setup means nothing if you’re skipping routine maintenance or brushing off early warning signs.
Let’s walk through the most common problems and what you can do to keep your machine running smoothly for years.
Resolving Common Threading and Stitching Issues
When things go sideways with your industrial machine, knowing what you’re looking at saves hours. Thread bunching under fabric hits 34% of shop-floor problems, and incorrect threading—especially skipping the tension disks—causes 46% of nesting issues. Here’s what to watch for:
- Thread bunching: Check if your presser foot was down during threading and verify all tension disks are engaged properly
- Tension problems: Clean your tension discs monthly—it cuts threading downtime by 33% and fixes uneven stitches in 82% of cases
- Skipped stitches: Inspect needle orientation first, since improper insertion causes 68% of skipping in maintenance checks
- Needle issues: Replace needles every 6-8 hours to reduce tension complications by 38% and catch worn tips early
- Machine jamming: Clear lint from bobbin area and feed dogs—obstructions account for 39% of repetitive jams
Always test on scrap material first. It catches 92% of issues before you touch your good fabric.
Preventing Thread Breakage and Skipped Stitches
Once you’ve spotted the problem, the real work is making sure it doesn’t come back to haunt you on the next seam. Match your thread weight top and bottom—mismatched weights cause 36% more skipped stitches.
Swap needles every 6-8 hours since worn tips trigger most stitch skipping. Adjust tension for material thickness, and don’t skip monthly cleaning of your sewing machine’s tension discs—it prevents 21% of thread breakage issues.
Regular Cleaning, Oiling, and Efficiency Tips
Consistent maintenance keeps your machine running smoothly through project after project. Oil every 7–8 hours to maintain 91% of factory performance, and clean tension discs and bobbin areas monthly to cut downtime by 33%.
Oil every 7–8 hours to hold 91% factory performance. Clean tension discs and bobbin areas monthly—it cuts downtime by 33%.
A high-lift presser foot helps with material feed through thick layers, and never run your needle without fabric underneath.
Frequently Asked Questions (FAQs)
How do I adjust upper thread tension properly?
Think of tension as a conversation between the top thread and the bobbin—they have to get along.
As you test on a scrap piece that matches your project’s fabric, use the tension dial to find that sweet spot.
If stitches look loose on top, increase tension; if thread snaps, decrease it. Match your thread weight to needle size for clean, even weaving.
What causes uneven stitch length in industrial machines?
Uneven stitches usually stem from feed dog issues, tension inconsistencies, or incorrect presser foot pressure. Needle plate damage and erratic motor speed control also disrupt stitch length.
Check your stitch length knob and tension knob settings, then inspect the thread path and perform routine sewing machine maintenance.
How often should I replace the needle?
To keep your stitches looking sharp and your machine running smoothly, swap out your needle every eight hours of sewing—or as soon as you notice any damage, like burrs, a bent tip, or skipped stitches.
Can I use household thread on industrial machines?
You can’t use household thread on an industrial sewing machine. It lacks the thread strength for high-speed operation and thick materials, causing thread breakage, poor stitch quality, and potential machine damage.
Always match thread compatibility to your project suitability and tension requirements.
Whats the difference between clutch and servo motors?
Here’s the thing about clutch motors: they’re either on or off. When you engage one on an industrial sewing machine, it jumps straight to full speed—which makes comparing speed control options pretty confusing if you’re just getting started.
Servomotors offer precise motor energy efficiency and variable speed control, reducing noise level impact while requiring less motor maintenance needs. For upholstery application suitability, servos win hands-down.
Conclusion
Threading an industrial sewing machine is simpler than most people expect—getting over that initial hesitation is usually the biggest hurdle.
Once you trace the thread path from spool pin down through the tension discs and into the needle, the process becomes second nature.
Keep your workspace clean, check tension regularly, and don’t skip any guides along the way. With practice, you’ll thread faster and troubleshoot problems before they happen.
Your machine runs best when you understand its quirks and give it proper care.
- https://www.youtube.com/watch?v=ByMZ_x4DyIk
- https://wunderlabel.com/en-gb/blog/p/17-common-sewing-machine-problems-solve/
- https://whip-stitch.com/sewing-machine-maintenance-a-sample-schedule/
- https://www.mhthread.com/blog/products/sewing-machine-thick-thread
- https://www.coats.com/en-us/info-hub/thread-consumption-guide/

