This site is supported by our readers. We may earn a commission, at no cost to you, if you purchase through links.
 Your first sewing project sits abandoned because threading the machine at the kitchen table—hunched over with poor lighting and supplies scattered across three rooms—turned a joyful hobby into physical punishment. Most beginners blame their skills when the real culprit is their workspace. A dedicated sewing room isn’t about luxury; it’s about creating conditions where your body doesn’t fight against you and your tools live within arm’s reach.
The difference between sewing for twenty minutes before quitting and losing yourself in a project for hours comes down to smart spatial planning. When your cutting mat sits at the right height, your iron stays hot three steps away, and your thread collection doesn’t require archaeological digs, the technical challenges of sewing become manageable instead of overwhelming. You don’t need a mansion or unlimited funds—just strategic choices about furniture placement, storage systems, and ergonomic basics.
This guide walks you through transforming any available space into a functional sewing room that backs your craft instead of sabotaging it. You’ll learn exactly where to position each work zone, which tools deserve your budget, and how to organize supplies so you spend time creating rather than searching.
Table Of Contents
- Key Takeaways
- Choosing The Best Space for Sewing
- Planning Your Sewing Room Layout
- Selecting Essential Sewing Furniture
- Must-Have Tools and Equipment for Beginners
- Smart Fabric and Supplies Storage Solutions
- Organizing Your Sewing Room for Efficiency
- Creating a Comfortable and Ergonomic Workspace
- Setting Up a Sewing Room on a Budget
- Top 10 Products for Beginner Sewing Rooms
- 1. Folding Desk with Storage Shelves
- 2. White Arts and Crafts Table
- 3. Studio Designs Craft Cutting Table
- 4. Yellow L Shaped Office Desk
- 5. Fabric Storage Cubes Organizer Set
- 6. Retro Pendulum Sewing Machine Clock
- 7. Soft White Shag Area Rug
- 8. Ergonomic Office Chair with Lumbar Support
- 9. Boho Green Eucalyptus Leaf Wallpaper
- 10. Burnt Orange Mid Century Pillows
- Frequently Asked Questions (FAQs)
- Conclusion
Key Takeaways
- A dedicated sewing room eliminates physical strain and wasted time by placing your machine at the right height, keeping your iron within three steps, and organizing thread so you spend more time creating than searching for supplies.
- The work triangle layout—positioning cutting, sewing, and pressing stations three to four feet apart—reduces unnecessary movement by 20% and turns your workspace into an efficient production zone instead of an obstacle course.
- You don’t need expensive furniture to start sewing effectively; repurposed desks, garage sale tables, and DIY storage solutions using mason jars and shoe racks create a functional room while keeping your initial investment between $800 and $3,000.
- Ergonomic setup matters more than aesthetics—adjustable seating with lumbar support, proper task lighting positioned 18-24 inches from your work surface, and alternating between sitting and standing reduces fatigue by up to 33% during long projects.
Choosing The Best Space for Sewing
Creating your sewing room begins with choosing the right space—one that balances size, accessibility, and comfort.
Here’s what matters most when picking your spot.
Assessing Room Size and Layout
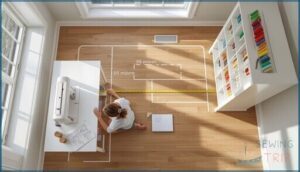
Before committing to any space, take a step back and measure not just the room, but how you’ll move through it. Smart layout planning involves thinking about traffic flow, door swings, and clearance around your workspace.
Here’s what to measure:
- Room dimensions – length, width, and any awkward angles or alcoves
- Clearance zones – at least 36 inches around your sewing table for easy movement
- Furniture placement – sketch where each piece will go before buying
Planning this way means you’ll avoid a cramped workspace before you even unpack your first spool of thread.
Utilizing Offices, Bedrooms, or Shared Spaces
You don’t need a dedicated studio to start sewing—offices, spare bedrooms, and even corners of shared living spaces work perfectly when set up thoughtfully.
Home offices can easily double as crafting spaces with movable furniture, while shared areas in family rooms handle multi-use setups beautifully.
The trick isn’t finding more square footage—it’s using what you have wisely. With the right setup, any corner becomes a productive sewing space that fits naturally into your home.
Importance of Electrical Outlets and Ventilation
Power and airflow aren’t glamorous, but they’re the backbone of a safe, functional sewing room setup. Electrical outlets spaced every six to twelve feet prevent tangled extension cords and fire hazards, while proper ventilation clears fumes from adhesives and keeps your workspace comfortable.
Smart outlet placement and fire prevention are key—especially when irons and machines run simultaneously. A well-planned sewing room also requires attention to safe storage practices safety sewing rules to minimize accidents and injuries.
- Place outlets at counter height for easy access and cord management
- Use dedicated circuits for high-wattage equipment like irons
- Install exhaust fans or open windows to reduce airborne particles by up to 80%
- Avoid extension cords in permanent setups to lower electrical risks
Maximizing Natural and Task Lighting
Good lighting can make the difference between squinting through seams and stitching with confidence—so let’s set up your sewing room to work with daylight and add targeted light where you need it most.
Position your sewing table near windows for natural light, but use adjustable window treatments to control glare.
Layer task lighting—think adjustable-arm lamps at your machine and cutting area—to cut eye strain by 31%. Lamp placement at eighteen to twenty-four inches from your work surface creates even illumination across your workspace layout, making every stitch clearer.
Planning Your Sewing Room Layout
Once you’ve picked your spot, it’s time to figure out where everything goes.
Smart layout choices keep your projects moving and save you from wrestling with extension cords or stretching across the table every five minutes.
Creating a Functional Work Triangle
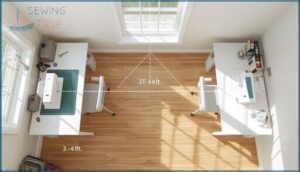
Your work triangle is where the magic happens—it links your cutting table, sewing machine, and ironing station into one smooth circuit. Keep each station three to four feet apart, never more than twelve feet between any two points.
Getting this right eliminates about 20% of those pointless back-and-forth trips and speeds up every project.
Smart workstation layout and workspace flow reduce strain, boost sewing efficiency, and keep your sewing space humming with ergonomic design built right in. By incorporating proper posture techniques into your sewing routine, you can further improve your overall sewing experience and reduce the risk of muscle strain.
Measuring for Furniture and Equipment
Grab your tape measure and a notepad—accurate dimensions prevent 89% of furniture-fit headaches before you spend a single dollar. Sketch your room dimensions, then chart every door swing, window, and outlet for smart space planning and equipment placement.
- Sewing table: Allow 48–60 inches width, 24–30 inches depth
- Storage space: Reserve 12–18 inches clearance around shelving units
- Walkways: Maintain 36-inch paths for comfortable sewing room organization
Furniture sizing now means fewer returns later.
Zoning for Cutting, Sewing, and Pressing
Divide your sewing room into three zones—cutting, sewing, and pressing—to cut wasted motion by nearly half while keeping every step of your project within arm’s reach. Place your cutting table centrally so you can walk around it, position your sewing machine near outlets, and keep your ironing board close by for quick pressing between seams.
| Zone | Essential Equipment | Ideal Placement |
|---|---|---|
| Cutting Stations | Rotary cutter, mat, rulers, fabric | Center of room, accessible from all sides |
| Sewing Zones | Sewing machine, task lamp, thread | Near wall outlets, ample counter space |
| Pressing Areas | Iron, pressing board, steam | Adjacent to sewing machine, heat-safe surface |
| Workflow Optimization | Rolling cart for tools | Between zones for smooth transitions |
| Space Utilization | Wall storage, pegboards | Vertical surfaces to free floor area |
With everything in its place, you’ll move through projects faster and keep your space clutter-free.
Designing for Minimal Distractions
Your sewing room won’t be much help if every notification, family interruption, or messy surface distracts you from keeping that seam straight.
Choose a room with a door you can close, set up your sewing machine facing a calm wall instead of a busy hallway, and keep things simple.
Clear surfaces and tucked-away devices turn your workspace into a peaceful spot where productivity and efficiency come naturally.
Selecting Essential Sewing Furniture
Good furniture transforms a messy sewing corner into a workspace that actually works. Here’s what makes the difference between frustration and flow.
Choosing a Sturdy Sewing Table
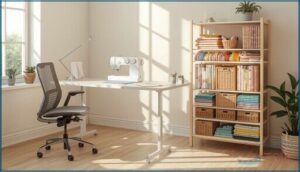
A good sewing table is the backbone of any sewing room. It needs to handle the weight of your machine, the pull of fabric, and long hours of work without wobbling. Here’s what to look for:
- Table Material: Go for solid wood or metal frames instead of particle board to avoid sagging.
- Height: Aim for 28–30 inches for a comfortable workspace.
- Storage: Drawers or shelves keep your tools handy.
- Foldable Designs: Great if your sewing space doubles as something else.
- Sturdiness: A stable IKEA trestle table or repurposed desk can work well.
Always test the table’s stability before buying.
Options for Cutting Tables
Cutting fabric on a sewing table feels like wrapping gifts on a coffee table—cramped, awkward, and guaranteed to leave you with crooked lines. A proper cutting table should be 36–40 inches high, so you can work comfortably without bending over.
If space is tight, consider a folding table. Otherwise, invest in a sturdy worktable with storage underneath for your fabric. Portable cutters and custom tables offer flexibility for any sewing room setup.
Comfortable and Ergonomic Seating
Ditch that old kitchen stool—a proper sewing chair with adjustable heights and lumbar backing makes all the difference when you’re spending hours at your machine. Look for ergonomic chairs with seat cushioning and back backing that let you fine-tune positioning.
Chairs with adjustable height save your shoulders and neck from cramping up, and good cushioning means you won’t be shifting around every twenty minutes.
A proper chair built for sewing work isn’t about treating yourself—it’s about keeping your body from paying the price while you stitch.
Repurposing and Upcycling Furniture
Before buying new furniture, take a walk around your home—that unused desk or old bookshelf could be perfect for your sewing room.
You can find tables at garage sales or give old dressers a fresh look, saving money and adding character.
Reusing shelves and making your own storage solutions turns furniture recycling into a smart, personal, and budget-friendly sewing space design.
Must-Have Tools and Equipment for Beginners
With your space and furniture ready, it’s time to gather your tools. Here are the essentials every beginner needs to get started.
Entry-Level Sewing Machine Features
Your first major investment deserves careful thought. Entry-level machines pack smart features that make learning easier and keep frustration at bay.
Here’s what to look for:
- Automatic threading and drop-in bobbins – Found in 75% of beginner models, these features eliminate the fiddly setup that trips up newcomers
- 6 to 27 stitch options – Straight, zigzag, and buttonhole stitches cover most early projects without overwhelming you
- Adjustable speed control – 90% of machines now offer this, letting you start slow and build confidence
- Built-in LED lighting – Standard in 95% of new models, proper illumination reduces eye strain during detailed work
- Free arm capability – Lets you tackle sleeves and cuffs with ease, available in 85% of best-sellers
Rotary Cutters, Rulers, and Cutting Mats
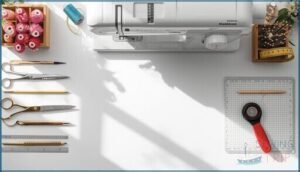
After choosing your machine, you’ll need three essential tools found in 81% of beginner kits: rotary cutters, acrylic rulers, and self-healing mats.
These tools make fabric preparation quick and precise. The cutting mat protects your work surface and heals minor blade marks, while the ruler ensures straight cuts every time.
Regularly replace rotary blades—dull ones fray fabric and slow you down. Together, these tools streamline measuring, marking, and cutting for cleaner results.
Irons and Pressing Boards
Pressing makes the difference between homemade-looking seams and professional results. It’s no accident that 61% of beginner sewing rooms include irons and pressing boards.
Here’s what you need:
- Steam iron with adjustable settings for fabric prep and different materials
- Sturdy ironing board or compact station that fits your sewing room
- Pressing cloth to protect delicate fabrics while pressing
- Spray bottle for moisture control when steam isn’t enough
- Board accessories like sleeve rolls, pressing hams for curves, and storage solutions
Keeping your iron in good condition keeps your workspace efficient and your projects looking crisp.
Task Lighting and Power Management
Good lighting can reduce eye strain by up to 31%—a big help when you’re focused on tiny stitches and seam allowances. Position task lighting directly over your worktable and sewing machine. Combine overhead fixtures with adjustable lamps for maximum flexibility.
Plan your power source layout early. Electrical safety is key—avoid overloading outlets and keep cords out of foot traffic in your sewing room setup.
| Lighting Element | Best Practice |
|---|---|
| Task Lighting | Adjustable desk lamp at machine height |
| Power Outlets | Multiple outlets near worktable |
| Cord Management | Cable clips or under-desk trays |
Smart Fabric and Supplies Storage Solutions
Your sewing room needs a storage system that keeps fabric and supplies organized without taking up too much floor space.
Here’s a simple guide to building a setup that works for both display and hidden storage.
Built-in Shelving and Wall-Mounted Units
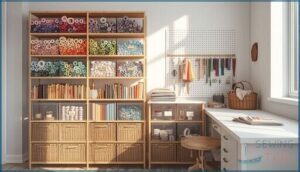
Wall units make the most of your vertical space, turning it into a storage powerhouse. In rooms under 120 square feet, wall-mounted shelving frees up 18 to 36 square feet of floor space—giving you room to move and work. Here’s why these setups work so well:
- Floor-to-ceiling built-ins double your storage compared to standard bookcases
- Modular systems, like 13-inch cubes, hold everything from fabric bolts to small tools
- Adjustable shelves fit items of all sizes, from thread spools to full fabric rolls
- Open shelves save time by letting you see what you have at a glance
- Proper anchoring above 4 feet keeps things stable and safe in your sewing area
Standard depths range from 9 to 14 inches—aim for at least 12 inches to handle fabric bolts easily. Start maximizing your space by using your walls.
Portable Bins and Fabric Storage Cubes
Portable bins and fabric storage cubes transform clutter into order without needing to drill holes in your walls. Clear containers let you quickly find your fabric stash—76% of beginners prefer them for this reason.
Stack cubes on shelves or slide bins under tables to make the most of every inch. Label each one by project, color, or fabric type.
These adaptable storage solutions grow with your sewing supplies, making your sewing room setup easy and stress-free.
Sorting Fabric by Type and Color
Sorting fabric by type and color keeps 67% of well-organized sewing rooms running smoothly—think of it as creating a visual library where every piece has its place. Group cottons, linens, and knits separately, then arrange each category by shade.
This textile organization system speeds up project planning and helps you spot gaps in your fabric stash. Clear storage solutions make color coding simple, turning your sewing supplies into an inspiring, accessible collection.
Concealing Vs. Displaying Supplies
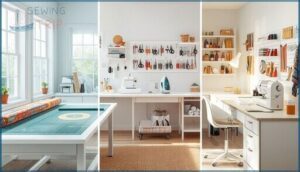
Your storage strategy—hidden behind cabinet doors or proudly on display—shapes both the function and personality of your sewing room. Consider these approaches:
- Hidden Compartments keep clutter out of sight
- Decorative Bins blend storage aesthetics with accessibility
- Shelf Organization turns sewing supplies into visual inspiration
- Supply Hiding works best for mixed-use spaces
- Open displays let you spot what you need instantly
Balance practicality with style to match your sewing room organization goals.
Organizing Your Sewing Room for Efficiency
An organized sewing room means less time hunting for supplies and more time actually creating. Here are four strategies that’ll turn your space into a place where everything flows.
Work Triangle Optimization
The three-point work triangle—cutting, sewing, and pressing—cuts your wasted steps nearly in half and keeps your creative flow going.
Position everything within arm’s reach so you can shift from cutting to sewing to pressing without getting up.
This setup keeps your workflow smooth and turns your sewing area into an organized studio where smart layout decisions make all the difference.
Labeling and Categorizing Supplies
Once you’ve mapped out your work triangle, smart labeling keeps every thread, button, and notion exactly where you need it—no more digging through mystery boxes mid-project. Grab a label maker and mark your storage bins clearly:
- Thread and needles by type and color
- Buttons, zippers, and trims in separate category bins
- Fabric scraps sorted by material or size
- Patterns and instructions filed alphabetically
This supply tracking system turns sewing room organization into smooth inventory management.
Modular and Clear Storage Containers
Clear containers let you quickly see what you have, and when paired with modular bins, they stack, slide, and rearrange as your collection grows.
Choose standard sizes so fabric organizers fit neatly on modular shelves, making the most of your storage space.
Label each bin to organize sewing supplies by project or material, keeping your fabric storage flexible as your sewing area changes.
Managing Small-Space Sewing Zones
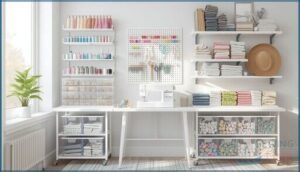
Even with smart storage in place, a compact sewing zone asks you to think vertically and get creative with every square foot you’ve got. Making the most of small sewing spaces means using wall-mounted shelves and pegboards to free up your sewing station floor. Here’s how to perfect your sewing room setup:
- Stack modular storage upward to triple your storage space without expanding your footprint
- Position your sewing room organization in an ergonomic layout that keeps tools within arm’s reach
- Embrace minimalist design by storing only active projects at your compact sewing space
Creating a Comfortable and Ergonomic Workspace
Your workspace setup matters more than you’d think—getting it right keeps strain at bay and adds hours to your sewing sessions.
Here’s how to set up your sewing area so each hour at the machine feels better than the last.
Adjustable Table and Chair Heights
Getting your table and chair heights right is key to comfort—it’s the difference between sewing for hours without a second thought and ending your day with an aching back and stiff shoulders. Look for ergonomic designs with height adjustment features—your worktable should let your elbows rest at 90 degrees when you’re seated.
Seating options with back cushioning matter, too. This sewing room setup detail can dramatically improve comfort for any beginner setting up their space.
Preventing Strain and Fatigue
Regular breaks can really cut down on fatigue. Studies show that just five minutes of stretching, done three times a week, can reduce muscle and joint complaints.
For a comfortable sewing setup, try changing positions every 20 minutes. Using adjustable, ergonomic tools also helps prevent injuries, and switching between sitting and standing can ease arm and shoulder strain by up to 33%.
These simple changes can turn your workspace into a more efficient and stress-free environment, especially for beginners.
Positioning for Lighting and Machine Use
Setting up your sewing machine and lighting properly can cut eye strain by up to 31% and ease tension in your shoulders and neck. Place your machine 18–24 inches from your seat, near an electrical outlet to keep cords tidy.
Combine overhead lights with task lamps focused directly on your work area. This setup improves visibility and makes your sewing space much more comfortable and efficient.
Alternating Sitting and Standing Tasks
Alternating between sitting and standing while sewing can reduce arm and shoulder fatigue by 33%. This simple change keeps your body comfortable during long projects.
Try standing for cutting and pressing, then sit for detailed machine work. This approach creates a practical, ergonomic workspace that keeps you feeling good throughout your project.
Setting Up a Sewing Room on a Budget
You don’t need deep pockets to set up a sewing room that actually works. Focus your budget where it counts and hunt down quality alternatives that won’t drain your wallet.
Average Costs and Financial Planning
Setting up a budget-friendly sewing room starts with realistic cost estimates and smart financial planning. Your initial investment will likely range from $800 to $3,000, depending on your space and choices.
Here’s how to approach expense tracking:
- Allocate 8–10% of annual take-home pay toward sewing purchases and upgrades for sustainable investment strategies
- Track equipment cost-per-use to get the most value and prioritize essential tools over impulse buys
- Shop your existing stash first to reduce monthly spending by up to 18% before purchasing new materials
Managing your sewing budget means balancing one-time setup costs with ongoing expenses like fabric and maintenance.
DIY Furniture and Storage Hacks
You don’t need to spend a fortune on furniture when creative DIY solutions can turn everyday items into practical sewing room essentials. Thrift store shelves can become fabric storage, and old bookcases can be transformed into thread organizers.
IKEA hacks offer clever space-saving ideas—attach wheels to cube units for movable storage or stack crates vertically for decor that also holds sewing supplies.
| Item to Repurpose | New Function in Your Sewing Space |
|---|---|
| Kitchen Cart | Rolling cutting table with bottom storage |
| Ladder Shelf | Vertical fabric bolt display rack |
| Drawer Organizers | Thread, bobbin, and notion sorting |
| Pegboard Panels | Wall-mounted tool and scissors holder |
| Shoe Organizer | Clear pocket storage for pattern pieces |
Upcycling furniture lets you create a functional sewing room without overspending.
Upcycling Household Items
Before spending money, take a look around your house—everyday items like mason jars, shoe racks, and old picture frames can be turned into sewing room organizers for free. Clear jars are perfect for storing buttons and zippers, while over-the-door shoe racks can hold scissors and seam rippers.
Old furniture like nightstands or kitchen carts can be repainted and transformed into cutting stations. Repurposing through DIY projects not only promotes sustainable crafting but also adds a unique touch to your sewing space.
Prioritizing Essential Investments
While DIY tricks can stretch your budget, it’s smart to spend your first dollars on the tools that do the heavy lifting. A reliable machine, sharp rotary cutter, and good lighting make the difference between frustration and finished projects.
Smart resource allocation means prioritizing essential sewing room items you’ll use daily:
- Entry-level sewing machine ($130–$320) with automatic threading
- Rotary cutter and self-healing mat for accurate fabric cuts
- Task lighting to reduce eye strain during detail work
- Ergonomic seating to prevent back pain
- Clear storage containers for an organized sewing space
This investment strategy keeps your cost analysis focused on function, not decoration.
Top 10 Products for Beginner Sewing Rooms
With the right setup, your sewing space can go from chaotic to comfortable.
Here are ten beginner essentials that actually work—combining smart storage, practical function, and a bit of personality.
1. Folding Desk with Storage Shelves
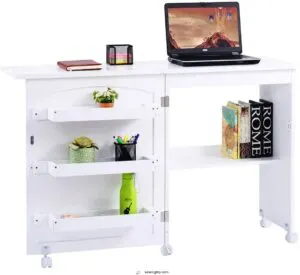
A folding desk with storage shelves can turn small spaces into a practical sewing area. When folded, it saves up to 60% of floor space, making it ideal for shared rooms or tight spots.
Hidden bins and adjustable shelves keep your thread, tools, and fabric organized and within reach.
The sturdy design can handle machines weighing 80 to 120 pounds, and lockable wheels let you move your setup as needed.
With everything stored in one place, you’ll spend less time searching and more time creating.
Best For: Home sewers and crafters who need a versatile workspace that folds away when not in use, especially those working in apartments or multi-purpose rooms.
- Saves up to 60% of floor space when folded, with lockable wheels making it easy to move and store between projects.
- Built-in storage bins and adjustable shelves keep thread, fabric, and tools organized and accessible, reducing setup time.
- Sturdy construction supports sewing machines up to 120 pounds, providing a stable work surface despite the compact design.
- Some users report cheap screws and hinges that may need replacement, along with a strong chemical smell when first unpacked.
- Not ideal for users over 5’9″ due to limited legroom and fixed height options that can cause discomfort during longer sessions.
- May wobble or transmit vibration during machine use compared to fixed desks, and shelves can fall off if not properly secured during assembly.
2. White Arts and Crafts Table
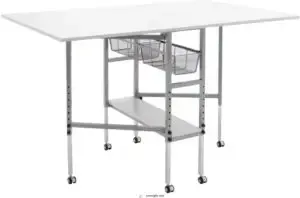
A white arts and crafts table combines workspace and storage in a sleek design. Most are 48 to 66 inches wide, giving you plenty of room to spread fabric, pin patterns, and organize sewing supplies without feeling cramped. Look for adjustable heights between 30 and 36 inches—this feature lets you sit or stand, reducing fatigue by up to 25% during long sessions. Built-in cubbies, drawers, and open shelves keep essentials like thread, rotary cutters, and rulers within easy reach. Laminate surfaces resist scratches and moisture, making them durable for everyday crafting and DIY projects. Prices range from $190 to $350, making it a great investment for a beginner sewing room.
Best For: Crafters who need a spacious, organized sewing table with ample storage and ergonomic workspace lighting options.
- Adjustable height from 30 to 36 inches reduces strain and allows for sitting or standing, improving comfort during extended use.
- Laminate surfaces resist water and scratches, protecting your furniture from frequent fabric work and heat exposure.
- Built-in storage cubes and shelves hold sewing supplies and tools, keeping your space organized without extra bins.
- Heavier models weigh up to 158 pounds and require 1 to 2 hours of self-assembly, which can be tricky for one person.
- Flat-packed shipping increases the risk of damage during transit, and some users report quality control issues with hinges or drawers.
- Standard desk height may not suit all users, and fixed designs lack the compact folding feature found in space-saving sewing tables.
Best For: Crafters who need a spacious, organized sewing table with adjustable height and built-in storage for fabric, thread, and tools.
Pros:
- Adjustable height (30-36 inches) lets you sit or stand while working, cutting fatigue by up to 25% during long sessions.
- Laminate surface resists scratches and moisture from glue guns, irons, and frequent fabric work, keeping the table looking new.
- Built-in cubbies and drawers organize thread, rotary cutters, and patterns without needing separate storage bins.
Cons:
- Heavy models weigh up to 158 pounds and require 1-2 hours of assembly, which can be challenging alone.
- Flat-pack shipping increases risk of transit damage, and some users report issues with drawer slides or hinges arriving broken.
- Fixed designs lack compact folding features, making them harder to store in small sewing rooms compared to collapsible tables.
3. Studio Designs Craft Cutting Table
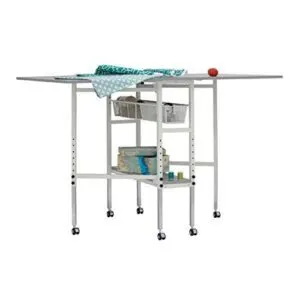
This foldable cutting table adjusts from 30.25 to 39.25 inches high, giving your sewing area the workspace flexibility needed for comfortable standing or seated fabric work. It expands to nearly 59 inches wide and 36 inches deep—ideal for quilting and large patterns—then folds down to just 12.25 inches for storage. Two mesh drawers and a bottom shelf hold sewing supplies, cutting mats, and tools without needing extra bins, keeping your craft space organized. The powder-coated frame and locking casters provide stability during cutting tasks.
Assembly takes about two hours and averages 4.4 stars from 292 reviews, with prices ranging from $138 to $200.
Best For: Sewers needing a height-adjustable, space-saving cutting table with built-in storage for small or multipurpose sewing rooms.
- Height adjusts in 1.5-inch increments, reducing strain by 42% and supporting both sitting and standing work.
- Folds to 12.25 inches wide for compact storage, perfect for shared spaces or rooms with limited square footage.
- Integrated mesh drawers and shelf store cutting mats, rulers, and fabric without needing separate storage furniture.
- Assembly requires two people and approximately two hours, with some users reporting confusing instructions or mismatched parts.
- Casters may wobble or fail to lock securely, and the table can tip when moved with side panels folded down.
- Heavier construction makes solo transport difficult, and delivery damage has been reported in roughly 10% of customer reviews.
Best For: Sewers and quilters who need a height-adjustable, space-saving cutting table with built-in storage for small or multipurpose sewing rooms.
Pros:
- Height adjusts from 30.25 to 39.25 inches in 1.5-inch increments, letting you switch between sitting and standing to reduce back strain during long cutting sessions.
- Folds down to just 12.25 inches wide for storage in closets or corners, then expands to 59 inches for full-sized quilts and pattern layouts.
- Two mesh drawers and a bottom shelf keep rulers, rotary cutters, and fabric organized without buying extra storage furniture.
Cons:
- Assembly takes about two hours and really needs two people—instructions can be confusing and parts don’t always match the manual.
- Casters sometimes wobble or don’t lock properly, and the table tips easily when you move it with the side panels down.
- Heavier than expected at full assembly, making it tough to move solo, and about 10% of buyers report delivery damage.
4. Yellow L Shaped Office Desk
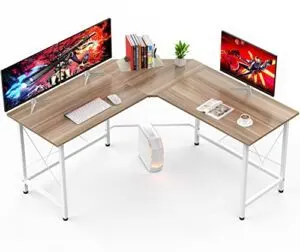
This L-shaped corner desk turns unused wall space into a dedicated sewing station with dual surfaces, each measuring 59 inches. There’s plenty of room for your machine, cutting mat, and pressing tools. The 30-inch height pairs well with lumbar-support chairs, helping reduce back strain during long projects.
The metal frame holds over 150 pounds of equipment, and assembly takes about 90 minutes with flat-pack instructions. A yellow wood-grain finish adds creative energy to any sewing space, and using the corner frees up 20–40% more floor area compared to rectangular tables.
Prices range from $110 to $180, making it a smart choice for beginners looking to organize and decorate their sewing room with a functional setup.
Best For: Beginner sewers and crafters who need an affordable, space-efficient workstation that can hold multiple machines and supplies in a corner setup.
- Dual 59-inch surfaces provide ample room for sewing machines, cutting mats, fabric storage, and pressing equipment all in one accessible L-shaped layout
- Sturdy metal frame supports over 150 pounds of equipment while the corner design frees up 20–40% more floor space compared to standard rectangular desks
- Budget-friendly pricing ($110–$180) with straightforward 90-minute assembly makes it accessible for beginners setting up their first dedicated sewing room
- Assembly can be time-consuming and instructions must be followed carefully to avoid damaging parts or misaligning components during setup
- Some users report quality control issues including uneven surfaces, damaged pieces upon arrival, or incorrect orders requiring returns and exchanges
- May not support extremely heavy loads beyond 200 pounds, limiting use for those with industrial machines or extensive equipment collections
5. Fabric Storage Cubes Organizer Set
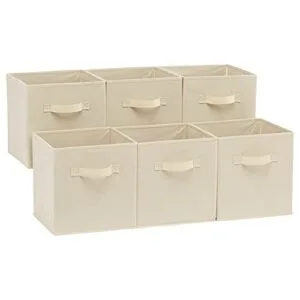
This six-cube organizer set from Amazon Basics keeps fabric, thread, and notions sorted by color or project—cutting search time in half. Each 10.5-inch beige cube holds up to five pounds and folds flat when not in use, making it ideal for sewing room organization and fabric management. Built-in grips let you easily move supplies between cutting, sewing, and pressing areas without hassle. At around $30 for the set, it’s a budget-friendly solution that turns chaos into calm.
Best For: Beginners who want portable, collapsible storage for fabric organization and sewing supplies without taking up permanent floor space.
- Collapsible cube design stores flat when not in use, saving space in small sewing rooms or shared areas
- Built-in fabric grips make it easy to relocate supplies between different work zones during projects
- Affordable set price and breathable material keep fabrics fresh while providing visible, accessible storage solutions
- Five-pound weight limit per cube restricts storage of heavier items like large fabric bolts or dense materials
- Some users report an unpleasant odor upon arrival that may require airing out before use
- Cleaning can be challenging due to fabric construction, limiting maintenance options for spills or stains
Best For: Beginner sewers who need affordable, portable storage to organize fabrics and notions by project without committing to permanent shelving.
Pros:
- Collapsible design folds flat for storage, perfect for small sewing spaces or shared rooms where you need flexibility.
- Fabric handles make it simple to carry supplies from your cutting table to your machine without juggling loose items.
- Budget-friendly price around $30 for six cubes gives you visible, breathable storage that keeps fabrics fresh and accessible.
Cons:
- Five-pound weight cap per cube means you can’t store heavy fabric bolts or dense materials like batting.
- Some customers mention a chemical smell when first unpacking that requires airing out before use.
- Fabric construction makes spot-cleaning tricky if you spill thread oil or other liquids during projects.
6. Retro Pendulum Sewing Machine Clock
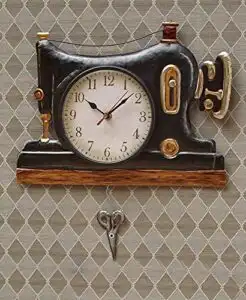
This retro pendulum clock brings vintage charm and accurate timekeeping to your sewing space. Its swinging scissors add a unique decorative touch.
Measuring 10.5 by 13.75 inches, it runs on a single AA battery and mounts easily via a keyhole slot. Maintenance is minimal—just replace the battery every nine to twelve months.
The silent pendulum won’t distract you during detailed work, and the large numbers make it easy to check the time between stitches.
Priced between $26 and $149 depending on design complexity, it’s a functional yet stylish addition to any sewing room. Collectors appreciate its handcrafted charm and steady resale value, making it a great conversation piece.
Best For: Sewing enthusiasts and craft room owners who want a functional timepiece with vintage charm and personality.
- Unique decorative design with swinging scissors pendulum adds character to any sewing space
- Silent or low-ticking mechanism won’t interrupt your work or concentration
- Easy maintenance with simple battery replacement every 9-12 months and straightforward wall mounting
- Quality inconsistency reported by some buyers, with cheaper models feeling flimsy or poorly balanced
- Difficult battery compartment access and potential hanging issues due to off-center hook placement
- Risk of receiving damaged products during shipping, as noted in multiple customer reviews
7. Soft White Shag Area Rug
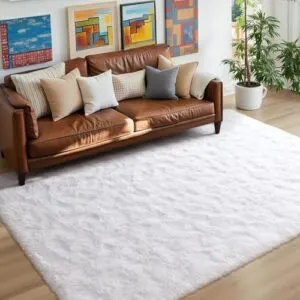
A soft white shag area rug transforms your sewing space into a cozy, quiet retreat. With a pile height of 1 to 4 cm, these rugs ease strain on your legs during long cutting and standing sessions—perfect for marathon sewing. Made from polypropylene or polyester, they resist stains and shedding, blending durability with style. However, deeper shags can trap dust and allergens, so regular vacuuming (two to three times weekly) is key if allergies are a concern. Prices range from $135 to $598, offering both comfort and style for your sewing room.
Best For: Sewers who spend hours standing at cutting tables and want warmth, comfort, and style underfoot.
- Cushions feet and reduces fatigue during long standing tasks
- Quiets hard floors, improving focus and creating a calmer environment
- Stain-resistant and shed-free, keeping the rug looking fresh with minimal upkeep
- High pile attracts dust, pet dander, and allergens, needing frequent vacuuming
- Larger sizes require professional cleaning every 12–18 months, adding to costs
- Shows wear and matting after 18–24 months in high-traffic areas with rolling chairs
Best For: Sewers who spend hours standing at cutting tables and want warmth, comfort, and a quieter workspace.
Pros:
- Cushions feet and reduces fatigue during long standing tasks
- Quiets hard floors, improving focus and creating a calmer environment
- Stain-resistant and shed-free, keeping the rug looking fresh with minimal upkeep
Cons:
- High pile attracts dust, pet dander, and allergens, needing frequent vacuuming
- Larger sizes require professional cleaning every 12–18 months, adding to costs
- Shows wear and matting after 18–24 months in high-traffic areas with rolling chairs
8. Ergonomic Office Chair with Lumbar Support
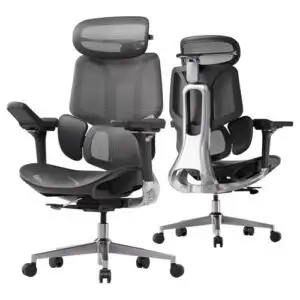
An ergonomic office chair with back support is your spine’s best friend during long sewing sessions. Almost half of American workers deal with back pain each year, but adjustable back support helps maintain your spine’s natural curve and reduces muscle strain by 42%. Look for chairs with 8-way back adjustment, 4D headrests, and seat heights between 18″–22″ for a great sewing room setup.
Mesh-backed designs keep you cool during long projects, and 360° swivel bases make it easier to move around your workspace. Prices range from $130–$320, offering comfort and back pain relief.
Best For: Sewers working on long projects who need adjustable comfort and back support.
- Reduces back and neck strain with adjustable back support
- Swivels and adjusts to different work areas easily
- Breathable mesh keeps you cool during long sessions
- Assembly takes two people and some time
- Mesh seats may feel too firm for sitting cross-legged
- Durability varies; some users report issues after heavy use
Best For: Sewers working on long projects who need adjustable comfort and lumbar support to prevent back pain during extended sessions.
Pros:
- Reduces back and neck strain with 8-way adjustable lumbar support and 4D headrest that maintain your spine’s natural curve.
- Swivels 360° and adjusts to different work areas easily, with seat heights between 18″–22″ perfect for moving around your sewing space.
- Breathable mesh keeps you cool during long sessions and helps prevent overheating while you work.
Cons:
- Assembly takes two people and some time to put together properly.
- Mesh seats may feel too firm for sitting cross-legged or for users who prefer softer cushioning.
- Durability varies among users, with some reporting issues after heavy use or needing piston replacements for taller individuals.
9. Boho Green Eucalyptus Leaf Wallpaper

Boho Green Eucalyptus Leaf Wallpaper transforms your sewing room with a nature-inspired design that boosts creativity and calm. Botanical wallpaper trends show eucalyptus designs reduce stress and improve mood by 28% in home spaces.
This peel-and-stick option covers 14.5 square feet, featuring waterproof material in soft spring colors—ideal for accent walls or backsplashes. Installation is quick, wall-friendly, and removable, perfect for renters. At around $5 per square foot, it’s a budget-friendly way to update your interior.
Best For: Sewers seeking a calming, nature-inspired workspace that sparks creativity and serenity.
- Reduces stress and boosts creativity with green botanical patterns proven to promote relaxation
- Simple peel-and-stick application, no tools required, and damage-free removal
- Waterproof and durable, suitable for kitchens, bathrooms, or high-moisture sewing areas
- Seams may be noticeable, and pattern matching can be tricky for perfectionists
- May not adhere well to textured or dirty surfaces
- Thin material can tear during installation if not handled with care
Best For: Sewers who want a calming, nature-inspired workspace that sparks creativity without permanent wall commitment.
Pros:
- Green botanical patterns proven to reduce stress and boost creativity by up to 15% in studies on nature-inspired environments
- Peel-and-stick application takes minimal time with no tools needed, plus removes cleanly without wall damage—perfect for renters
- Waterproof vinyl material works in moisture-prone areas like craft rooms near sinks or steamy sewing spaces
Cons:
- Seams show and pattern matching takes patience, which can frustrate detail-oriented decorators expecting seamless results
- Won’t stick properly to textured, rough, or unclean walls—smooth, prepped surfaces are essential
- Thin material tears easily during handling and installation if you’re not careful with positioning
10. Burnt Orange Mid Century Pillows
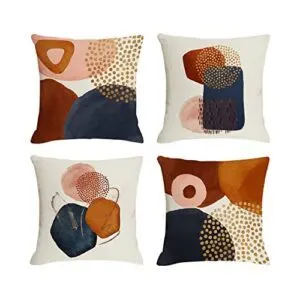
Burnt Orange Mid Century Pillows add instant warmth and on-trend style to your sewing room. Burnt orange is a top 2025 interior design color, with searches for these accents up 53% since 2023. These cotton-linen pillows feature boho geometric patterns and hidden zippers, perfect for sofas or window seats.
At roughly $30 for a four-piece set, they’re an affordable way to revive your sewing room decor. The burnt orange accents pair beautifully with neutrals or jewel tones, bringing mid-century charm to any home styling project.
Best For: Sewers wanting quick, budget-friendly color that follows current interior design trends.
- Burnt orange mid century decor aligns with 2025 color trends, adding sophistication and year-round versatility to sewing room setup
- Four-piece sets encourage creative pillow placement and mix-and-match styling across multiple seating areas
- Hidden zippers and washable fabric make maintenance simple for busy crafters
- Cotton-linen blend may feel rough to touch, not ideal if you have texture sensitivities
- Small zippers require patience when inserting pillow forms
- Color accuracy varies from screen images—burnt orange tones may differ slightly upon arrival
Best For: Sewers wanting affordable, on-trend burnt orange accents that add mid-century warmth to their workspace without breaking the bank.
Pros:
- Burnt orange follows 2025 design trends and pairs easily with neutrals or jewel tones for year-round sophisticated styling
- Four-piece sets let you mix patterns across sofas, chairs, or window seats for flexible creative styling
- Hidden zippers and washable cotton-linen fabric simplify care and pillow insert swapping
Cons:
- Cotton-linen texture feels rough to some users, which may bother you if you’re sensitive to fabric feel
- Small zippers take patience and effort when inserting pillow forms
- Burnt orange shade may look different than screen images, so actual color can vary from what you expect
Frequently Asked Questions (FAQs)
How to set up a sewing room?
Choose your sewing space wisely. Look for a room with a good layout, plenty of power outlets, and natural light.
Plan storage for fabrics and tools, keep ergonomics in mind to avoid strain, and set a realistic budget.
What makes a good sewing room?
A well-designed sewing room needs three essentials: ergonomic setup, smart storage solutions, and proper lighting.
Your sewing space should have easy-to-reach electrical outlets, organized areas for cutting and pressing, and flexible furniture that helps you maintain a comfortable posture during long projects.
Do you need a sewing room?
A dedicated sewing space can really transform your practice. It keeps your tools organized, boosts productivity, and protects your creative flow.
Even a small corner is better than constantly setting up and tearing down—your sewing benefits multiply when your home setup backs your craft.
How do you organize a sewing room?
To organize your sewing supplies, start by grouping items by function—keep thread with notions and sort fabric bins by type or color.
Use clear containers and labeled shelves to keep your sewing area tidy and efficient.
What are some tips for sewing in a dedicated room?
A dedicated space can turn your sewing from chaotic to controlled. Start by arranging your room with a work triangle that connects cutting, sewing, and pressing areas.
Smart fabric storage and ergonomic tips help prevent strain—place your machine 18–24 inches away and ensure good lighting.
Creating a sewing room is really about making the most of your space while keeping things safe—especially important if you’re working with limited square footage and lots of supplies to organize.
How do you create a comfortable sewing room?
A well-designed sewing space makes long sessions easier on your body. Look for a chair that adjusts to your height and supports your lower back—it matters more than you’d think.
Pair that with lighting that doesn’t strain your eyes, and you’ve got a setup that works.
Clever storage keeps your sewing area tidy and everything within reach.
What flooring works best for sewing rooms?
Flooring choices are just as important for comfort as they’re for functionality. Carpets soften the sound of dropped items and reduce machine noise, while hardwood floors allow chairs to move easily and make cleaning a breeze.
Vinyl flooring combines durability with style, making it a great option for your sewing room.
How do I control thread and lint buildup?
Lint builds up quickly in sewing rooms, jamming machines and dulling blades.
Keep a small brush and vacuum nearby to tackle the mess. Wipe down surfaces daily, clean your machine after each project, and store fabric in sealed containers to reduce airborne fibers.
Should I soundproof my sewing space?
Soundproofing your sewing area usually isn’t needed for home use, but adding acoustic panels or soundproofing materials can reduce noise if your machine bothers others.
This helps keep shared spaces quieter, especially when storing sewing supplies discreetly.
What insurance covers expensive sewing equipment?
Don’t leave your sewing machine and tools exposed when you can easily protect them. Homeowners can add policy riders or get specialized equipment insurance to cover their sewing room investments, like machines, fabric storage, and supplies.
If you sell your creations, business liability insurance is also an option.
Conclusion
Your sewing space won’t frustrate you once you set up a beginner-friendly area. Say goodbye to hunching, searching, and scattered supplies by arranging furniture thoughtfully, keeping tools handy, and lighting your workspace well.
Start with one area—cutting, sewing, or pressing—and expand as you get more comfortable. You don’t need everything ideal from the start; focus on creating a functional space that makes you want to return to your machine.
- https://arrowsewing.com/blog/sew-organized-how-to-effectively-organize-your-sewing-room/
- https://www.tandfonline.com/doi/full/10.1080/10803548.2024.2385786
- https://suzyquilts.com/need-sewing-room-ideas-see-my-renovated-attic/
- https://www.wiseguyreports.com/reports/sewing-equipment-market
- https://upcyclemystuff.com/sewing-room-organization-tips-no-cost-before-after-makeover/

