This site is supported by our readers. We may earn a commission, at no cost to you, if you purchase through links.
The beauty of sewing at home is that you control the pace, choose projects that excite you, and build skills one seam at a time. With the right foundation—quality tools, beginner-friendly fabrics, and simple techniques—you’ll move from fumbling with thread to finishing your first pillow cover faster than you expect.
Table Of Contents
Key Takeaways
- You don’t need expensive equipment or formal training to start sewing—just a reliable machine, basic supplies like sharp fabric shears and quality thread, and the willingness to learn from mistakes as you build skills one project at a time.
- Cotton fabric is the best choice for beginners because it’s forgiving, stable, and used in over 85% of successful first projects, while pre-washing and ironing fabric prevents up to 10% shrinkage that could ruin your finished piece.
- Mastering three fundamental stitches—straight stitch for seams, zigzag for preventing fraying, and backstitch for securing thread—gives you the foundation to tackle nearly every beginner sewing project with confidence.
- Starting with simple projects like envelope pillow covers or coasters lets you practice essential techniques like cutting accurately, maintaining proper seam allowance, and finishing edges professionally without the frustration of complex patterns.
Essential Sewing Tools for Beginners
Before you start stitching your first seam, you’ll need to stock up on a few basic tools that every beginner should have within arm’s reach.
Think of these supplies as your sewing starter kit—they’ll help you tackle everything from simple repairs to your first handmade projects.
Let’s walk through the essentials you’ll want to grab before you get started.
Must-Have Sewing Supplies
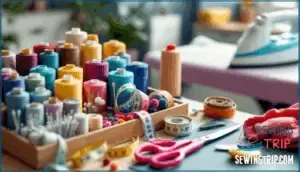
Think of your sewing toolkit as your creative arsenal—without the right supplies in hand, even the simplest project can turn into a frustrating puzzle. You’ll need quality thread types that match your fabric, a needle variety for different materials, and basic sewing tools like pins and measuring tape.
Don’t forget cutting mats for precision, ironing essentials to prep your fabric, and storage solutions to keep everything organized as you master sewing for beginners.
Choosing Quality Fabric Shears and Seam Rippers
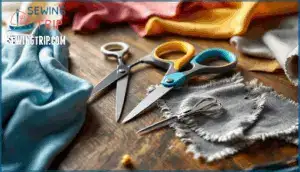
Now that you’ve got the basics covered, let’s talk about two tools that’ll make or break your sewing experience—fabric shears and seam rippers. These are worth spending a little extra on because cheap ones will fight you at every turn.
Look for shear blade material in stainless steel with comfortable grips that won’t cramp your hand during precision cutting. A quality seam ripper with a sharp, fine point becomes your best friend when mistakes happen.
Proper tool maintenance means keeping those scissors dedicated to fabric only—never paper.
Pins, Measuring Tools, and Fabric Markers
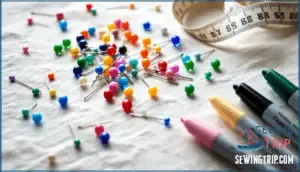
Once you’ve sorted your cutting tools, you’ll want to stock up on pins, measuring tools, and fabric markers—the unsung heroes that keep everything lined up and marked before you stitch. Glass-head pins won’t melt under your iron, while a flexible measuring tape gives you accurate measuring for curves and hems. Fabric markers (chalk or water-soluble) let you transfer pattern markings without leaving permanent traces. Keep your ergonomic tools organized for easy access.
How to Choose Your First Sewing Machine
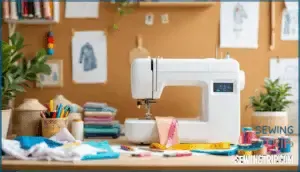
Picking your first sewing machine can feel overwhelming with so many options out there. The good news is you don’t need fancy bells and whistles to get started—just a reliable machine that fits your skill level and budget.
Let’s break down what matters most so you can choose with confidence.
Key Features for Beginners
When you’re shopping for your first sewing machine, think of it like choosing a reliable car—you don’t need every bell and whistle, just the features that’ll get you smoothly from point A to point B. Look for ease of use with clear controls and automatic threading.
You’ll want at least 10-15 stitch options to cover sewing basics. Speed control is key for beginner sewing—it lets you slow down while you’re learning.
Prioritize durability over flashy extras, and consider portability if you’ll move your machine around.
Mechanical Vs. Computerized Machines
At first glance, mechanical and computerized sewing machines feel worlds apart. Mechanical models—those with manual dials—offer 10–30 stitches and won’t break the bank (usually $80–$300). Computerized machines deliver 50–500+ patterns, automatic threading, and touchscreen guides, but they’ll run you $250–$2,800.
Here’s the tradeoff: 67% of beginners find computerized options easier for sophisticated techniques, yet 44% face a steeper learning curve initially. Mechanical machines last decades with simple DIY maintenance, while computerized units may need specialized servicing—39% of their service calls involve electronic parts.
Market trends favor automation (6.89% CAGR through 2030), but your choice depends on budget, patience, and long-term goals. For basic sewing tasks, a mechanical machine is suitable, while a computerized machine excels at complex projects.
Basic Maintenance and Troubleshooting Tips
Your machine won’t run forever on autopilot—a little regular care keeps threads flowing and prevents those mid-project meltdowns that turn a fun afternoon into a frustrating troubleshooting session.
Clean lint from the bobbin case weekly, swap needles every 8–10 hours of stitching, and oil mechanisms monthly per your manual.
If tension feels off or bobbin issues crop up, rethread everything first—that fixes 70% of sewing machine basics hiccups before you need sophisticated sewing techniques and tips.
Preparing Fabric for Your First Project
Before you can start stitching your first project, you need to get your fabric ready. This step mightn’t seem exciting, but it’s what separates wonky seams from professional results.
Let’s walk through how to pick the right material, prep it properly, and cut it like you mean it.
Selecting Beginner-Friendly Fabrics
Cotton fabric is your best friend when you’re just starting out—it’s stable, forgiving, and accounts for over 20% of global garment production. You’ll find it in weights from 70 to 200 grams per square meter, and here’s the best part: over 85% of beginners nail their first project using cotton. One excellent choice for beginners is quilting cotton, a medium-weight fabric ideal for home decor and basic garments.
Top beginner-friendly fabrics for your sewing journey:
- Cotton adaptability – Cotton poplin appears in over 60% of beginner tutorials for good reason
- Muslin benefits – Perfect for practice at 30–50% lower cost than other woven fabrics
- Linen properties – 30% stronger than cotton and incredibly forgiving during cutting
- Chambray ease – Looks like denim but 40–50% lighter, reducing cutting errors by 55%
- Polyester blends – Crease-resistant and budget-friendly for over 35% of starter projects
Washing and Ironing Fabric Before Use
Skipping the pre-wash and iron step is like building a house on sand—your fabric can shrink up to 10% after that first wash, turning your perfect pillow cover into a lumpy disaster. Proper fabric preparation prevents color bleeding and fabric shrinkage while giving you a smooth canvas to work with.
Skipping pre-wash is like building on sand—fabric shrinks up to 10%, ruining your finished project before it even begins
Wash your fabric in warm water, then press it on the ironing board using appropriate ironing temperatures for your material—cotton withstands high heat beautifully, while synthetic blends need gentler settings for wrinkle prevention.
Cutting and Marking Fabric Accurately
Think of cutting fabric like slicing a birthday cake at a party—one crooked line and everyone notices, but precision gives you clean, professional pieces that fit together like a dream. Sharp scissors or rotary cutters paired with pattern weights keep your fabric stable while you cut along the fabric grain. Use marking tools like fabric markers and measuring tape to transfer pattern details for accurate seams during fabric preparation.
- Lay fabric flat on a large surface to prevent shifting and help straight cuts
- Align patterns with fabric grain for pieces that hang properly and don’t twist
- Use pattern weights instead of pins to avoid fabric distortion during cutting
- Mark seam allowances and notches clearly with fabric markers for foolproof assembly
- Cut confidently in one smooth motion rather than choppy snips for cleaner edges
Basic Sewing Techniques Every Beginner Should Learn
Before you thread your first needle, you’ll want to nail down a few core techniques that make everything else click into place.
These basics—from securing your thread to understanding what those mysterious pattern markings mean—will show up in every project you tackle.
Let’s walk through the skills that’ll give you a solid foundation to build on.
Threading a Needle and Tying Knots
If you’ve never threaded a needle before, don’t worry—it’s one of those skills that feels tricky for about five minutes, then becomes second nature. Cut about 18 inches of thread, moisten the end slightly, and guide it through the needle eye. Pull a few inches through, then tie a small overhand knot at the longer end.
Here’s what affects your success:
| Factor | What to Keep in Mind |
|---|---|
| Needle Eye Size | Larger eyes make threading easier for beginners |
| Thread Types | Cotton thread works well for most sewing basics |
| Knot Security | Double knots prevent thread from pulling through fabric |
| Hand Dexterity | Gets better with practice—don’t get discouraged |
| Thread Condition | Fresh thread won’t fray as easily when threading |
Once you’ve mastered threading your sewing needle and tying secure knots, you’re ready to explore fundamental sewing techniques that’ll reveal your creative potential.
Practicing Straight, Zigzag, and Backstitch
Now that you’ve got the basics down, it’s time to build your stitching vocabulary—starting with three workhorses that’ll carry you through nearly every beginner project.
- Straight stitch: Your bread-and-butter for consistent seams—adjust stitch length based on fabric weight and keep your fabric feed steady.
- Zigzag stitch: Prevents fraying on raw edges and adds stretch to seams when working with knits.
- Backstitch: Locks your seams at start and finish points by reversing your sewing machine briefly.
- Practice tip: Test stitch tension and needle types on fabric scraps before tackling your actual project.
Master these sewing techniques and you’ll tackle any sewing for beginners pattern with confidence.
Understanding Seam Allowance and Pattern Markings
Seam allowance is the extra fabric between your stitching line and the raw edge—usually 5/8 inch on commercial sewing patterns. Getting this right matters because even a 1/8-inch deviation per seam can throw off your finished measurements by over an inch.
Pattern markings like notches, dots, and grainlines guide accurate assembly and fit adjustments. Transfer these symbols onto fabric using chalk or washable markers before cutting, and you’ll nail pattern interpretation every time.
Easy Sewing Projects to Build Your Skills
Now that you’ve got the basics down, it’s time to put your skills to work. The best way to build confidence is by making real projects—starting simple and working your way up.
Here are four beginner-friendly projects that’ll help you practice what you’ve learned while creating something actually useful.
Envelope Pillow Cover Tutorial
An envelope pillow cover is hands-down the best beginner project you’ll ever tackle—no zippers, no buttons, just clean, straight seams and a professional finish that’ll make you feel like a sewing superstar. Here’s your beginners guide to creating stunning DIY home decor:
- Fabric Selection – Choose cotton or linen for easy sewing and a crisp pillowcase finish
- Accurate Cutting – Measure twice, cut once for perfectly sized panels
- Seam Finishing – Press seams flat for that professional edge
- Pillow Closure – Overlap back panels to create the signature envelope opening
- Corner Accuracy – Trim excess fabric at corners before turning right-side out
This easy sewing project builds confidence fast!
DIY Scissor Holder Pattern
Once you’ve mastered that pillow cover, it’s time to make something that keeps your shears safe and your workspace looking sharp—a DIY scissor holder that takes less than an hour to sew.
This beginner project is perfect for sewing for beginners who want to organize their sewing tools while practicing straight seams.
Choose sturdy cotton fabric, add pockets for your sewing kit essentials, and experiment with pattern customization through embellishment ideas like ribbon trim—it’s also a thoughtful gifting option.
Simple Coaster and Placemat Set
Your next weekend project can pull double duty—a simple coaster and placemat set that protects your table and helps you practice clean quilting lines in one go.
Pick two fabric selection choices that coordinate, layer with batting, then try quilting techniques like straight-line or diagonal grid stitching.
Add binding methods for polished edges—this easy sewing project is perfect for sewing for beginners building confidence with DIY sewing while creating gifting ideas that actually get used.
Tips for Following Beginner Patterns
Before you cut a single piece of pattern paper, take five minutes to read through the entire instruction sheet—this simple habit saves hours of unpicking later. Focus on pattern comprehension first, then check your cutting accuracy and seam allowance markings.
Use marking transfer methods carefully, and don’t skip fitting adjustments—these sewing techniques and tips turn beginner sewing patterns into polished results.
Frequently Asked Questions (FAQs)
How do you learn sewing if you’re a beginner?
Learning to sew is like building muscle—you grow stronger through repetition. Start with online tutorials and beginner sewing projects, join sewing groups for mentorship programs, or take local classes to master easy sewing techniques and sewing machine basics through hands-on practice.
How do you start a sewing project if you’re a beginner?
Pick an Easy Sewing Project like a pillow cover or coaster. Choose beginner-friendly fabric—cotton works great.
Read your pattern reading basics, set up your workspace setup with everything handy, and practice Initial Practice stitches on scraps before diving in.
Can You Learn to sew on your own?
Absolutely. Self-taught sewing is entirely possible with online sewing courses, sewing tutorials, and independent practice.
The sewing learning curve becomes manageable when you tap into learning resources, beginner sewing techniques, and the sewing community for sewing tips and tricks.
Can a beginner sew clothes?
Yes, but start simple. Beginner sewing works best with easy garment construction like elastic-waist skirts or basic tops.
Choose forgiving fabrics and low pattern difficulty, and master fitting issues through alteration basics before tackling complex sewing projects.
How do I start sewing?
Start by gathering basic sewing tools like a sewing machine, fabric, thread, and quality shears. Set up a comfortable workspace, then dive into beginner projects from the sewing community and learning resources to build your skills.
How do I learn to sew clothes?
Thread the needle of garment construction by mastering pattern alterations and fitting techniques.
Start with simple projects like elastic-waist skirts using forgiving fabrics—cotton wovens work great.
Your sewing machine becomes second nature when you practice sewing curves on garment pieces.
How do I find my correct measurements?
Take body measurements over fitted clothing using a flexible measuring tape. For accurate bust measurement, wrap around the fullest part of your chest. Measure your natural waist at the narrowest point, hips at the fullest, and inseam from crotch to ankle for garment construction success.
Whats the best way to organize patterns?
Keep sewing patterns flat in labeled binders with clear sheet protectors, or store pattern envelopes vertically in magazine holders.
Digital pattern management works well too—scan them and create folders by category, adding pattern alteration notes directly on PDFs for easy reference.
How do I fix tension issues?
Don’t let tension get you all wound up—it’s easier to fix than you think. Start with upper tension adjustments on your sewing machine, then check bobbin tension and thread quality.
Regular machine maintenance prevents most issues.
Where can I find free beginner patterns?
You’ll discover free sewing patterns on websites like AllFreeSewing and So Sew Easy, pattern designers’ blogs, community centers offering library access, and Pinterest boards dedicated to beginner sewing and easy sewing projects perfect for upcycling.
Conclusion
So you thought learning how to start sewing at home would mean buying every gadget on the shelf and achieving Pinterest ideal by Tuesday? Spoiler: it won’t.
But armed with sharp scissors, forgiving cotton fabric, and a willingness to unpick crooked seams, you’ll actually finish projects that look intentional.
Start small, practice consistently, and remember—every expert sewist once threaded their machine backward and wondered why nothing worked. Your first pillow cover is waiting.
- https://www.kayeteede.com.au/news/sewing-a-timeless-art
- https://onlinelibrary.wiley.com/doi/pdf/10.1002/casp.70172
- https://www.statista.com/statistics/305555/us-expenditure-on-sewing-materials/
- https://www.factmr.com/report/2508/household-sewing-machines-market
- https://www.linkedin.com/pulse/north-america-domestic-sewing-machine-market-strategic-wostf

