This site is supported by our readers. We may earn a commission, at no cost to you, if you purchase through links.
You’ve spent hours on a garment only to try it on and find the shoulders droop, the waist gapes, or the hips strain—sound familiar? Here’s the truth: most fit problems happen long before you touch fabric, buried in skipped measurements or pattern choices that ignore your actual shape.
The difference between a garment that hangs in your closet unworn and one you reach for constantly comes down to mastering a handful of precise techniques. Once you know how to measure accurately, adjust patterns to match your body, and troubleshoot fit issues as they appear, you’ll transform every project from “almost right” to absolutely perfect.
Table Of Contents
Key Takeaways
- Accurate body measurements taken with proper tools (soft tape, sewing gauge) and updated regularly prevent most fit problems before you ever cut fabric, since commercial patterns use mathematical grading that’s completely different from retail sizing.
- Making a muslin prototype catches 85% of fit issues—including hidden asymmetries, ease requirements, and fabric behavior—before you waste good material, cutting alterations by up to 65% on basic projects.
- Strategic pattern adjustments like lengthening/shortening at marked lines, full bust modifications, and dart placement transform generic patterns into custom fits, but you must work in sequence (width adjustments before length) for accurate results.
- Knit fabrics stretch 18-75% and need negative ease while wovens require darts and seams for shape, so your fitting techniques must shift completely based on fabric type to achieve proper drape and comfort.
Essential Body Measurements for Perfect Fit
You can’t sew a garment that fits like a dream if you start with wonky measurements—it’s that simple. Getting your numbers right from the beginning saves you from a world of pattern adjustments, wasted fabric, and clothes that just don’t feel right.
Accurate measurements from the start prevent pattern headaches, fabric waste, and garments that never feel quite right
Let’s break down exactly what you need to measure, how to do it accurately, and why keeping those numbers updated will change your sewing game.
Tools for Accurate Measuring
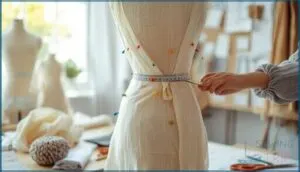
You’ll need a soft, flexible measuring tape—ideally under 1 cm wide—to capture your body’s curves accurately. Add a sewing gauge for hems and seam allowances, plus a set of rulers (straight, L-curve, and French curve) for pattern work.
Don’t skip chalk markers for noting key points, and consider digital tools if you want algorithm-backed precision that eliminates guesswork.
For accurate measurements, using sewing gauge tools can be very helpful.
How to Measure Bust, Waist, and Hips
Now let’s lock down your body proportions with the right measurement tools and sewing accuracy.
For precise bust, waist, and hip measurements:
- Bust: Wrap tape around your fullest point—typically 23–27 cm from shoulder to peak—keeping it parallel to the floor.
- Waist: Find where you bend side-to-side; measure at normal exhale.
- High bust measurement: Circle under your arms and across your back.
- Full hip measurement: Capture the widest point, usually 7–9 inches below your waist.
Repeat twice for garment simulation-level accuracy. To achieve a perfect fit, consider consulting a body measurement guide for detailed instructions.
Recording and Updating Measurements
Once you’ve captured those numbers, lock them into a sewing journal or tracking app—your secret weapon for pattern size chart mastery. Update your body measurements monthly if you sew often, or before each project if you’re a weekend stitcher. Tape measures lose accuracy every 3–5 years, so swap yours regularly.
Here’s a simple tracking layout:
| Measurement | Current | 3 Months Ago |
|---|---|---|
| Bust | ||
| Waist | ||
| High Bust | ||
| Full Hip |
This system transforms taking accurate body measurements from guesswork into precision, giving you complete control over body measurement and fit while slashing fabric waste and frustration.
Measuring for Specific Garment Types
Your tracking sheet is solid—now you’ll need to expand it depending on what you’re actually making. Each garment type demands its own measurement focus to nail garment fit and body proportions. That’s where sewing accuracy meets real-world wearing.
- Dresses and tops need shoulder width, back length, and high bust alongside your core measurements for pattern size chart accuracy.
- Pants and skirts require inseam, crotch depth, and thigh circumference—fabric considerations change everything here.
- Jackets and coats call for overarm span and sleeve length with bent elbow positioning.
- Stretch garments need both relaxed and stretched body measurements using proper measurement tools for true garment length.
Choosing The Best Sewing Patterns
You’ve got your measurements nailed down—now comes the fun part: finding a pattern that actually works with your body. Here’s the thing: pattern companies don’t all speak the same language regarding sizing, and what fits like a dream on one person might need serious tweaking for another.
Let’s break down how to read those cryptic size charts, match patterns to your unique shape, and decode the mysteries of ease and cup sizes so you can start with the right foundation.
Interpreting Pattern Size Charts
Pattern size charts aren’t riddles—they’re your roadmap to fit mastery. Commercial pattern sizing systems offer 16 to 24 distinct sizes, giving you four times the precision of retail clothing. Here’s the reality check you need:
| Measurement Standards | What You Need to Know |
|---|---|
| Size Conversion | Pattern sizes run 1-4 sizes larger than retail |
| Chart Analysis | Use bust, waist, and hip measurements—not your dress size |
| Sizing Systems | European charts differ from US/UK; compare carefully |
| Fit Formulas | Check finished garment measurements to calculate ease |
Ditch retail sizing completely when reading pattern size charts. Your measurements rule here, and those pattern pieces follow mathematical grading with 4-6 cm steps between sizes. Multi-size patterns display color-coded lines for each size—trace yours confidently.
The Big Four now include sizes up to 62-inch hips, while indie brands often specify cup sizes and height criteria. Always cross-reference your actual body measurements against the chart’s numbers, not what you think your size “should” be. That’s how you break free from fit frustration and sew garments that actually work.
Selecting Patterns for Your Body Shape
Body Type Analysis transforms pattern selection from guesswork into precision—cutting alterations by 65% on basic projects. Shape matching means choosing designs built for your actual silhouette, not fighting against it.
- Rectangle, pear, apple, or hourglass—52% of sewers prioritize body shape first, and those targeted patterns slash fit issues by 40%.
- Pattern databases now tag 70% of designs by body shape—search smarter, not harder.
- Shape-matched patterns score 32% higher on fit indices than generic blocks in simulation studies.
Understanding Pattern Ease and Fit
Ease distribution separates amateur from pro—it’s the secret breathing room between body measurements and garment fitting. Wearing ease (4–5 cm at bust, 2–4 cm at hip) lets you move; design ease creates silhouette drama.
Pattern ease analysis reveals why that bodice puckers or that waistband gaps. Master this, and fabric stretch becomes predictable, garment simulation turns accurate, and sewing patterns finally obey you.
Pattern Cup Sizes and Variations
Most commercial patterns assume a B cup (2 inches difference between high bust and full bust), but your measurements might tell a different story. Cup size calculation determines whether you’ll need full bust adjustments or a small bust adjustment—that’s pattern grading working for you.
Independent designers now offer multi-cup drafts, embracing sewing inclusivity. Master these fitting techniques, and pattern making becomes liberation, not guesswork.
Making and Using a Test Muslin
You’ve picked your pattern, you’ve taken your measurements—now it’s time to meet your secret weapon: the muslin. Think of it as a dress rehearsal for your fabric, a chance to catch fit issues before you cut into your good material.
Here’s how to make one work for you, from cutting that first prototype to fine-tuning every seam.
Why Muslins Improve Fit
Think of a muslin as your dress rehearsal—it catches what measurements alone can’t predict. Here’s why this prototype development stage transforms your garment fitting:
- Reveals hidden asymmetries and ease requirements unique to your body shape
- Validates design details like waist placement before cutting expensive fabric
- Simulates fabric behavior when you match the muslin weight to your final material
- Reduces waste by 20–40% through early detection of fitting issues
- Builds your confidence with hands-on practice in pattern adjustments and fitting techniques
Fabric testing through muslins improves fit precision by 50% compared to measurement-only approaches.
Steps to Create a Muslin Prototype
Your muslin fabric becomes the bridge between paper and reality. Start by tracing your pattern pieces onto inexpensive muslin using wax transfer paper and a tracing wheel—this pattern tracing method ensures accuracy.
Cut carefully along seam lines, adding slightly wider allowances at bust and waist for easier pattern alteration.
Baste pieces together with long stitches, skip facings, and press seams flat for proper garment simulation before your first fit evaluation.
Evaluating Fit With a Muslin
Once your muslin’s basted, slip it on or onto your live fit model—you’ll catch fit problems in 85% of garments this way. Look for wrinkles, pulling at armholes, and uneven hems that reveal where pattern adjustments belong. Digital fit simulation can’t replace what you see here:
- Check ease at bust, waist, and hips
- Mark alterations directly on the muslin fabric
- Assess balance front to back
This iterative fitting process builds your garment fitting confidence—92% of sewists agree.
Common Muslin Adjustments
Now you’ll fix what’s off. Seam allowance tweaks start around 1/4 inch—pinch side seams tighter for a slimmer silhouette or let them out where pulling screams “too snug.” Mark new lines with a permanent marker before unpinning anything, because muslin fitting memory fades fast. Address wrinkles, smile lines at the crotch, or baggy knees by adjusting incrementally—garment simulation can’t beat your real-world eye.
| Fit Issues | Pattern Alteration | Incremental Change |
|---|---|---|
| Tight crotch / smile lines | Increase crotch length | 1/4 inch |
| Excess fabric at legs | Decrease crotch length | 1/4 inch |
| Baggy side seams | Take in at sides | 1/8–1/4 inch |
| Tight knees or calves | Let out inseams evenly | 1/8–1/4 inch |
Key Pattern Adjustments for Better Fit
Once you’ve tested your muslin and identified what needs fixing, it’s time to make those pattern adjustments that’ll transform a decent fit into a perfect one.
These tweaks aren’t scary—they’re your ticket to garments that actually flatter your body instead of fighting it.
Here’s what you need to know to adjust patterns like a pro.
Lengthening and Shortening Patterns
Before you cut into that fabric, let’s talk length adjustment—your secret weapon for pattern alteration that actually works. You’ll slash along those marked lines, spread or overlap the pieces, then tape them down while keeping grainlines straight.
This fit modification prevents jumpsuits from riding up and tops from turning into crop tops. It’s all about garment proportion, and once you nail these measurements and seam allowances, you’re unstoppable.
Adjusting for Bust, Waist, and Hips
Now that your length’s on point, let’s tackle the curves. Full bust adjustments spread pattern pieces evenly through the middle—about 77% of you need these body measurements tweaked. Here’s your game plan for garment fitting:
- Add bust width gradually, not just at edges
- Balance waist modifications across both side seams
- Spread hip adjustments proportionally to keep alignment intact
Pattern adjustments work when you honor your body proportions.
Darts, Tucks, and Seams
Darts shape fabric to your curves—place them about an inch before your bust point to avoid puckering. Dart placement and tuck techniques work together for garment shaping.
Tucks, narrower at half a centimeter, create pleated texture when you need subtle fit enhancement. Press your seam allowances downward to reduce bulk.
These fitting adjustments transform flat patterns into three-dimensional clothes that actually flatter you.
Tools for Pattern Alterations
Your toolkit makes or breaks pattern alteration success. Grab pattern rulers with multiple curves, seam gauges for precise measurements, and notching tools to mark your pattern pieces accurately. Digital tools and grading software simplify complex adjustments, while a good muslin reveals where you need seam allowances tweaked.
Most professionals use French curves for smooth armholes—they’re worth every penny.
Sewing Techniques for a Custom Fit
Once your pattern’s adjusted, it’s time to bring that fit home with smart sewing moves.
The techniques you use at your machine can make or break how a garment hugs your body.
Here’s how to fine-tune your sewing for a truly custom result.
Taking in or Letting Out Seams
You’re not stuck with the fit you sew—seams are built-in escape hatches. Most home patterns include a ⅝-inch seam allowance, giving you wiggle room for garment alterations and fit adjustments.
Let out techniques reveal hidden fabric; taking in seams sculpts a closer silhouette. Just remember: sewing 3 mm off track across four seams shrinks circumference by nearly half an inch, so precision in seam engineering isn’t optional—it’s liberation.
Adjusting Sleeves and Armholes
Sleeves and armholes are your garment’s pivot point—get them wrong and everything pulls or gapes. Armhole fitting starts with measuring the armscye circumference and shoulder slope, then matching your sleeve cap adjustments to reality:
- Slash horizontally across the cap for bicep modifications
- Raise or lower underarm seams equally on bodice and sleeve
- Calculate cap ease by subtracting sleeve seamline from armhole length
- Smooth alterations with a designer’s curve
- Address fitting issues like diagonal folds or tight horizontal wrinkles before cutting fabric
Adding Panels or Gussets
When your garment needs extra breathing room, panels and gussets give you that liberation without compromising your design vision. Panels inserted at side seams add 2.5 to 3 inches per side for controlled fit adjustment, while strategic gusset placement under arms or at the crotch delivers comfort where movement demands it most.
Pattern alteration for panels requires measuring your garment flat and marking tapered edges that blend naturally. For gussets, precise placement and seam reinforcement at corners prevent tearing in high-tension zones—that’s where garment construction meets real-world wear. These sewing techniques tackle fitting issues head-on, giving you garments that move with you, not against you.
| Feature | Panels | Gussets |
|---|---|---|
| Primary Function | Increase width systematically | Add flexibility at stress points |
| Common Locations | Side seams, waistbands | Underarms, crotch, shoulders |
| Seam Allowance | 3/8 inch standard | Custom-sized for garment needs |
| Fit Impact | Accommodation without distortion | Enhanced range of motion |
| Construction Timing | During pattern alteration phase | After primary seams, before final assembly |
Fitting Knits Vs. Wovens
Knit construction behaves like a second skin, stretching 18% to 75% and recovering beautifully, demanding negative ease in your body measurements. Woven stability, by contrast, needs darts and seams for garment drape since fabric stretch barely exists.
Your fitting techniques shift dramatically: knits conform through elasticity, wovens through strategic pattern adjustments. Master both sewing techniques, and garment fitting becomes your superpower, not your struggle.
Troubleshooting and Refining Garment Fit
Even the most carefully sewn garment can throw you a curveball when you try it on. Maybe the shoulders pull, the waist gapes, or the hem sits crooked—don’t panic, because most fit issues have straightforward fixes.
Let’s walk through how to spot what’s gone wrong, tackle multiple tweaks without losing your mind, and keep your garments fitting beautifully long after you’ve snipped the final thread.
Diagnosing Common Fit Issues
You’ve sewn the garment, tried it on—and something’s off. Fit analysis starts with identifying where the fabric pulls, bunches, or gaps. Look for horizontal wrinkles across the bust, twisted side seams, or riding hems that betray body proportions clashing with pattern assumptions.
Fabric choice amplifies fitting issues: wovens reveal every sizing flaw, while knits forgive some sins. Master fit troubleshooting by understanding what each wrinkle tells you about garment silhouette and alterations needed.
Making Multiple Adjustments
Once you’ve spotted fitting issues, tackling them requires precision fitting and smart adjustment order. Start with width adjustments—bust, waist, hips—before length adjustments, since altering circumference shifts proportions.
Multi alterations demand iterative testing: fix one element, retest with your muslin, then move to the next. Pattern alteration done this way increases fit accuracy by 60% and slashes rework time dramatically.
Fit sequencing is your secret weapon for making multiple adjustments stick.
Maintaining Fit After Sewing
After all your adjustments land perfectly, textile care becomes your next battle for fit preservation. Wash in cold water to avoid shrinkage, skip the dryer, and inspect seams monthly—fabric fatigue sneaks up fast.
Regular sewing maintenance catches stretch before it ruins your work. Minor alterations, like reinforcing stress points, extend garment longevity by months, keeping that custom fit locked in through wear and laundering.
Frequently Asked Questions (FAQs)
How do I fit garments for posture differences?
Like sculpting clay around an armature, fitting for posture differences requires careful Posture Analysis.
Forward Shoulder and Kyphosis Adjustment involve Pattern Adjustments, Muslin Fitting, and Body Measurements to perfect Garment Fitting and Alterations using proven Fitting Techniques.
What causes fabric drag lines and wrinkles?
Drag lines emerge when fabric tension goes wrong—usually from tight sizing, incorrect dart placement, or off-grain cutting.
Fiber properties and moisture also play a role in wrinkle formation and textile deformation.
How do shoulder slopes affect overall fit?
Ever notice how a shirt just won’t hang right? Shoulder slope dramatically impacts garment silhouette—mismatched angles create drag lines, slipping straps, and pulling across your chest, while proper bodice adjustments using custom slopers guarantee everything sits beautifully.
Can I grade between multiple pattern sizes?
Yes, you can grade between multiple pattern sizes—it’s called size blending. Combine different sizes at bust, waist, and hips by drawing smooth connecting lines.
This pattern modification technique optimizes fit for your unique measurements perfectly.
How does fabric weight change garment drape?
Fabric weight fundamentally transforms drape effects and garment silhouette—heavier fabrics fall straight with structure, while lightweight materials flow freely.
Understanding fabric behavior and textile science ensures your fabric selection enhances, not fights, your design.
Conclusion
Funny how we’ll spend years learning to sew invisible zippers and French seams, yet skip the one step that actually makes garments wearable. Perfect fit isn’t about sophisticated techniques—it’s about measuring twice, making a muslin, and adjusting patterns before you cut.
Master these sewing tips for perfect garment fit, and suddenly every project becomes something you’ll actually wear. Your closet will thank you, and those “almost right” pieces? They’ll finally disappear.
- https://arxiv.org/html/2405.17609v3
- https://winslets.com/blogs/sewing-basics/guide-to-take-accurate-body-measurements-for-sewing
- https://thedailysew.com/blog/2025/02/get-the-right-fit/
- https://www.threadsmagazine.com/project-guides/learn-to-sew/how-to-measure-a-pattern-to-assess-its-fit
- https://www.youtube.com/watch?v=s4uVKxOXs68

