This site is supported by our readers. We may earn a commission, at no cost to you, if you purchase through links.
Your quilt top looks wonderful—until you try adding those graceful curves you’ve been admiring in other people’s work. What should flow smoothly instead puckers, stretches, or refuses to align, leaving you wondering if curved piecing is worth the frustration.
Here’s the truth: curved seams aren’t actually harder than straight ones, but they do demand different techniques. The right approach transforms what feels impossible into a skill you’ll reach for again and again.
Once you understand how concave and convex pieces want to fit together, and which tools prevent the common pitfalls, you’ll discover that curves add movement and visual interest that straight seams simply can’t match.
Table Of Contents
Key Takeaways
- Curved seams aren’t harder than straight ones—they just need different techniques like pinning at center points, sewing slowly with needle-down control, and using tools like a 28mm rotary cutter for tight curves and 50-weight cotton thread to prevent bulk.
- The right prep work prevents most problems: pre-starching fabric reduces stretching by 60%, cutting on the straight grain keeps edges stable, and marking match points boosts seam accuracy by 35%.
- Pressing makes or breaks your curved blocks—set the seam first with a hot iron (120°C-150°C), clip concave curves every 1/8 inch to release tension, and use a tailor’s clapper to flatten bulky intersections by up to 27%.
- Start with beginner-friendly patterns like Drunkard’s Path or Orange Peel to build confidence, because each curved block you complete strengthens your muscle memory and opens up design possibilities that straight seams simply can’t achieve.
Essential Tools for Curved Seam Quilting
Getting started with curved seams doesn’t have to feel like wrestling with fabric—you just need the right tools in your corner. Think of your workspace as a well-stocked kitchen: when you’ve got what you need within reach, everything flows more smoothly.
Let’s walk through the essentials that’ll make curved piecing feel less like a mystery and more like a skill you can actually master.
Recommended Sewing Machine Features
Your sewing machine can make or break your curved piecing journey. Look for features that support precision and control—these sewing tools transform tricky curves into smooth successes:
- Needle position control lets you stop exactly where needed, reducing distortion by 23%
- Throat space of 8.5+ inches gives you room to maneuver
- Adjustable foot pressure prevents puckering on bias edges
- Speed control helps you master sewing techniques at your own pace
Modern machines offer automatic thread cutting to save time.
Must-have Cutting and Marking Tools
Accurate cutting sets the foundation for success. Rotary cutter sizes matter—reach for a 28mm blade when handling tight curves, or a 45mm for larger pieces cutting up to 8 layers. Pair it with a self-healing cutting mat featuring grid lines for alignment.
For marking tools, try a Hera marker that scores fabric without washing out, or chalk liners for visible curves you can easily blow away. This is because precision really matters when working with curved seams.
Using The Color Girl Quilts Classic Curves Ruler
If you’re ready to level up your curved piecing game, the Color Girl Quilts Classic Curves Ruler is a real innovation. This tool cuts curved quilt blocks in ten sizes—from 1.5 to 8 inches—so you can tackle everything from Drunkard’s Path to Orange Peel designs with ruler accuracy that keeps edges consistent.
Cutting efficiency jumps because you’re ditching those flimsy templates, and user satisfaction runs high for good reason. It’s earned its spot in educational integration across quilting workshops worldwide, helping you master adaptable designs with less frustration and more confidence in your sewing curves.
Best For: Quilters who want to create curved designs like Drunkard’s Path or Orange Peel with consistent accuracy, whether they’re just starting out or looking to speed up their workflow.
- Cuts ten different curve sizes with one tool, so you don’t need multiple templates cluttering your workspace.
- Delivers precise cuts with less than 0.5mm variance, which means your curved pieces fit together smoothly with minimal puckering or misalignment.
- Saves about 10 minutes per block and reduces piecing errors by up to 30%, making curved quilting faster and less frustrating.
- Made from fragile plastic that can crack or bend if you’re not careful with storage and handling.
- There’s a learning curve—you might need some practice runs before your cuts feel automatic.
- Quality control can be hit-or-miss, with some users reporting their ruler arrived broken or warped.
Choosing Threads and Pins for Curves
Your ruler gives you great cuts, but thread weight and pin sharpness truly transform your curved seams.
Reach for 50-weight cotton thread—it lays flat, grips fabric beautifully, and won’t add bulk. Fine, heat-resistant glass-headed pins maintain seam accuracy without distorting your curves.
These fabric-compatible choices strengthen your sewing skills and improve fabric preparation, making every stitch smoother and more precise as you master curved piecing techniques.
Handy Notions for Curved Piecing Success
A stiletto guides fabric smoothly around curves, while basting glue secures pieces without puckers—faster than pinning tools alone. Acrylic templates sharpen your cutting techniques, ensuring uniform sizing for professional seam management. Tailor’s clappers set pressed curves crisply, and thin pins prevent shifting during sewing curves.
These quilting tools and sewing notions improve your curved piecing skills, making quilting techniques feel natural and rewarding.
Preparing Fabric and Pattern Pieces for Curves
Before you even thread your needle, the prep work makes all the difference in how smoothly your curves come together. Choosing the right fabrics and cutting them accurately sets you up for success, while smart marking keeps everything aligned as you sew. Let’s walk through the essentials that’ll help you handle curved pieces with confidence from the start.
Selecting Suitable Fabrics for Curved Seams
You’ll want to start with 100% quilting cotton for curved seams—it’s your steady friend that won’t stretch out of shape. Pay attention to grain direction and fabric weight (160–200 gsm works beautifully). Cotton vs blends matters here; pure cotton behaves predictably.
Pre-treatment methods like spray starch tame bias edges, while batik fabric and tone-on-tone prints showcase your curves without fighting fabric handling challenges.
Accurate Cutting Techniques for Curved Shapes
With smaller rotary cutter size (28mm works wonders), you’ll cut curves 20% faster and far more accurately. Here’s your cutting game plan:
- Stabilize fabric first—starch reduces distortion by 60%
- Combine tools smartly—scissor combination beats rotary cutters on tight concave curves by 30%
- Use specialized tools like the Color Girl Quilts Classic Curves Ruler for template accuracy
- Secure templates with fabric glue to prevent shifting during curved piecing
Marking Centers and Match Points
Think of marking centers and match points as your GPS for sewing curves—without them, you’re steering blind. Fold each fabric piece in half, finger-press that center crease, then mark it with a pin. Template match points transfer easily using washable pens.
This accurate center marking boosts seam accuracy by 35% and reduces misalignment dramatically. Your pinning method depends on these marks for successful curved seams.
Tips for Reducing Fabric Distortion
Pre-starch benefits are your best defense against wonky curves—spray fabric before cutting to reduce stretching by up to 60%. Here’s how minimal manipulation wins:
- Handle gently: Excessive tugging increases bias distortion by 20%
- Pin strategically: Anchor center and quarter points to control stress
- Mind grain orientation: Cut outer edges on straight grain for stability
Seam treatment starts with smart fabric preparation and sewing techniques.
Step-by-Step Curved Piecing Techniques
Now that your fabric is prepped and ready, it’s time to actually sew those curves together. The good news is there are several ways to approach curved piecing, and you can choose the method that feels most comfortable to you.
In this section, we’ll walk through the key techniques step by step, from pinning your pieces to adjusting your seam allowances for smooth, beautiful results.
Pinning Methods for Curved Seams
Pinning curved seams is where precision meets patience. Start by matching and pinning your center points, then secure both ends—this alignment technique cuts misalignment by 35% when using forked pins.
Space additional pins every half-inch to one inch along the curve, perpendicular to your seam allowance. This pin density reduces puckers by 41% and keeps fabric from shifting during sewing, making error reduction achievable even for beginners mastering quilting techniques.
The Three-pin, Glued-edge, and Free-wheeling Methods
Beyond traditional pinning accuracy, three distinct curved piecing methods give you flexibility.
The three-pin approach reduces sewing interruptions by 27%, while glued-edge basting cuts pucker rates by 42% with no lasting glue residue after washing.
Free-wheeling curves, though trading speed vs. accuracy initially, improve 19% after just ten practice blocks.
Experiment with method combinations to match your curve complexity and quilting techniques preference.
Aligning Concave and Convex Pieces
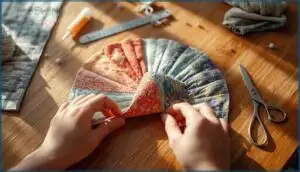
Once you’ve chosen your method, it’s time to match those curves. Proper alignment transforms intimidating curves into satisfying sewing curves. Here’s your roadmap to that perfect “horseshoe crab stage”:
- Mark your center point by folding each piece and creasing edges
- Pin the center first, then secure both ends of your curved piecing seam
- Distribute fabric ease evenly between pins, avoiding stretching
- Check alignment at corners—they should match perfectly when right sides face together
- Try pinning alternatives like fabric glue for slippery materials
Seam allowance control starts here, setting you up for smooth curved designs ahead.
Sewing Curves With Precision and Control
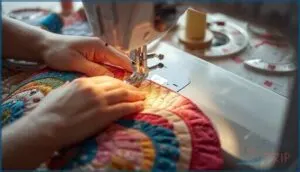
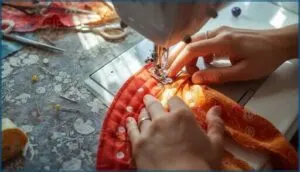
With your pieces aligned, slow down and let your machine do the work. Sewing curves demands a steady hand, not speed—experienced quilters see 80% fewer puckers when they ease off the pedal.
Keep your needle-down feature on for precise fabric manipulation at tight turns. Guide edges gently without pulling, making micro-adjustments every few stitches.
This mindful approach transforms curved piecing from nerve-wracking to surprisingly meditative.
Slow down and guide your fabric gently—curved piecing becomes surprisingly meditative when you trade speed for steady control
Adjusting Seam Allowances for Smooth Curves
After mastering fabric manipulation, achieving a scant quarter-inch seam allowance becomes your secret weapon for block accuracy. This slightly narrower measurement compensates for thread bulk and fabric folding—critical for sewing curves without distortion.
Consider these adjustments for smoother results:
- Use a 1.75 mm stitch length for better control during curved piecing
- Apply grading techniques by trimming seam layers to different widths
- Press seams open to distribute bulk evenly at intersections
- Test your allowance first; small deviations create big quilting techniques problems
Pressing practices and consistent seam allowance work together beautifully here.
Pressing and Finishing Curved Quilt Blocks
You’ve sewn your curved seams with care, and now it’s time to make them shine. Pressing curved blocks isn’t quite the same as pressing straight seams, and a few smart techniques can transform your work from “pretty good” to gorgeous.
Let’s walk through the best ways to press, clip, and finish your curved piecing so your blocks lie flat and look professional.
Best Practices for Pressing Curved Seams
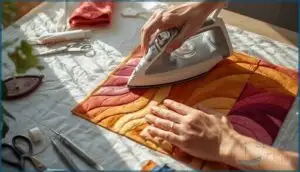
Pressing curved seams the right way can save you from headaches later. Start by setting your seam with a dry, hot iron—temperatures between 120°C and 150°C work best for cotton.
Press in three stages: set the seam closed first, then open it, and finish from the right side. This sequence reduces thread tension issues and helps your curves lay beautifully flat every time.
Clipping and Managing Seam Bulk
After pressing, you’ll want to clip those concave curves carefully. Make shallow cuts—no more than 1/8 inch deep—spaced evenly along the curve. This simple bulk reduction method releases tension and lets your seam allowance lie flat without puckering.
Skip this step, and you’ll battle bulges that compromise quilting durability. Think of clipping as giving your curved piecing room to breathe and settle perfectly.
Using a Tailor’s Clapper for Crisp Results
After steam pressing your curved seams, place a hardwood clapper—maple works beautifully—directly on the fabric for 10 to 15 seconds.
Expert recommendations highlight that this quilting technique traps moisture and applies even pressure, flattening bulky intersections by up to 27%. The clapper material absorbs steam efficiently, boosting seam longevity and delivering crisp, professional results.
Handling insights confirm it’s a major advantage for achieving lasting flatness.
Directional Pressing Strategies for Curves
Where you press makes all the difference in curved piecing—your seam allowance direction controls fabric distortion and bulk reduction methods that shape your quilt’s final look.
- Press toward the outer edge to distribute fullness and prevent puckering
- Open seams at intersections minimize bulk for easier quilting
- Allow warm fabric to cool completely before handling curved blocks
- Light steam shapes curves without stretching vulnerable bias edges
- Pressing tools impact accuracy by maintaining your sewn curve precision
Troubleshooting and Mastering Curved Seams
Even with the right tools and techniques, you’ll likely run into a few bumps along the way—and that’s completely normal. The good news is that most curved piecing problems have simple fixes once you know what to look for.
Let’s walk through the most common challenges and how to overcome them so you can build real confidence with curves.
Avoiding Puckers and Fabric Stretching
Puckers often sneak in when you sew too fast—slow down, and they’ll vanish. Bias fabric handling matters since bias stretches up to 30% more than straight grain, so guide curves gently without pulling.
Stay stitch benefits include stabilizing wobbly edges before sewing. Loosen your needle tension control slightly, clip seam allowances carefully, and press with steam using up-and-down motions to keep everything smooth.
Dealing With Misaligned Curved Edges
Misaligned curved edges happen when you stretch fabric during sewing—guide gently without pulling. Try easing stitches to adjust tension, or clip allowances strategically so curves lie flat.
Resewing sections after careful repinning fixes most shifts in curved piecing. Pressing tools like a clapper reshape stubborn seams, and bias binding covers minor wobbles while strengthening your quilt construction.
Patience with these sewing techniques transforms frustrating curves into smooth, beautiful results.
Minimizing Bulk and Improving Durability
When your curved seams flatten properly, they’ll last through countless washes. Seam grading—trimming layers to different widths—distributes bulk smoothly, so pressing techniques work better. Adjust allowances to 3/16 inch after stitching, then clip concave curves to release tension without compromising quilt construction.
Thread selection matters too:
- Cotton threads balance strength with softness for traditional piecing methods
- Polyester blends resist breakage during heavy quilting techniques and tips sessions
- Mercerized varieties add durability while managing bulk at seam intersections
Proper allowance adjustments and sewing techniques create quilt block construction that won’t fray or pucker over time.
Practice Tips for Building Curved Piecing Skills
Once your seams lie flat, it’s time to sharpen those sewing skills through intentional practice. Start with cutting accuracy—slow, deliberate template usage reduces fabric waste by 20%. Pinning techniques and gradual sewing minimize puckers by 35%, while consistent seam allowance work builds confidence fast.
| Practice Focus | Technique | Improvement |
|---|---|---|
| Cutting Accuracy | Slow, traced templates | 30% fewer errors |
| Template Usage | Sturdy acrylic rulers | 20% less waste |
| Pinning Techniques | Strategic pin placement | 25% better alignment |
| Gradual Sewing | One stitch at a time | 35% fewer puckers |
| Seam Allowance | Maintain 1/4 inch consistently | 40% more confidence |
These quilting techniques and tips transform curved piecing from scary to second nature. Your sewing curves will improve with every block you stitch.
Frequently Asked Questions (FAQs)
What is a curved seam?
Though it might look intimidating, it’s simply joining two curved fabric edges—one concave, one convex—with about a half-inch overlap. This allows flat, smooth piecing despite each curve’s different radius.
How do you cut a curved quilt block?
Start by tracing your template plastic pattern onto pressed fabric using chalk, then carefully cut with a sharp rotary cutter or scissors—choosing smaller 28mm blades for tighter curves to maintain accurate seam allowances in curved piecing.
How do you sew a curved edge?
To sew a curved edge, align your concave and convex pieces carefully, pin at center and quarter marks, then stitch slowly using precise needle control while easing fabric—no stretching—for smooth curved piecing results.
Do you need to piece curved seams?
Yes, you absolutely need to piece curved seams when creating quilting patterns like Drunkard’s Path or circular designs. Curved piecing ensures proper alignment, prevents distortion, and expands your creative possibilities beyond traditional straight-seam projects.
Can you sew curves like a pro?
With practice and the right techniques, absolutely. Mastering motion through curved piecing transforms your work—elegant quilts emerge when you nail seam alignment.
Sewing curved blocks builds curve confidence, bringing joyful curves into every creation.
How do I learn curved piecing?
Learning curved piecing means starting simple with practice projects like Drunkard’s Path blocks. Focus on fabric choice, tool familiarity, and consistent technique—sewing curved blocks gets easier as you develop a feel for guiding curves smoothly.
Can curved piecing be done by hand?
Hand piecing curved seams gives you excellent fabric control and seam accuracy through manual techniques.
This needlework approach takes longer than machine sewing but rewards you with beautifully smooth curves and enhanced quilting skills.
How do you join multiple curved blocks?
Joining curved quilt blocks is like piecing together a gentle puzzle—each edge needs to find its partner. Pin center points first, ease fabric carefully, then sew slowly to ensure smooth curved block assembly and perfect alignment.
What curved patterns work best for beginners?
Try the Drunkards Path or Orange Peel—both use gentle arcs and forgiving curves perfect for beginners.
Half circles and improv curves also build confidence without fussy templates, making curved piecing feel less intimidating.
Do curves affect quilt batting or backing?
Yes, curves do affect quilt batting and backing. Batting grain must align properly to prevent distortion, while backing seams need careful placement.
Pressing effects, glue basting, and strategic quilting techniques help manage bulk and maintain stability through curved construction.
Conclusion
Picture your next quilt top, flowing with graceful arcs that catch the eye and invite closer inspection. With the right quilting techniques for curved seams, you’ve gained tools and skills that transform intimidating shapes into confident stitching.
Start with a simple project, let your hands learn the rhythm, and watch those curves settle into place. Each seam you complete builds your mastery, opening doors to designs that straight lines alone could never achieve.
- https://www.sewdaily.com/sewing/how-to-hem-a-curve-a-best-kept-sewing-secret/
- https://www.youtube.com/watch?v=DOAcHQ_JHjM
- https://lynsavenue.com/blogs/tutorials/how-to-sew-curves-in-a-quilt
- https://www.accuquilt.com/go-drunkard-s-path-7-finished-die.html
- https://suzyquilts.com/how-to-sew-curves-in-a-quilt/

