This site is supported by our readers. We may earn a commission, at no cost to you, if you purchase through links.
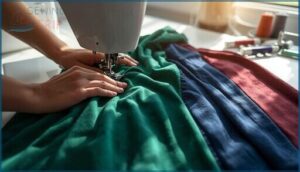
Knit fabrics have a reputation for being difficult—and it’s not entirely undeserved. The same stretch that makes them comfortable to wear can cause them to tunnel, distort, or refuse to cooperate under your presser foot.
But here’s the thing: most knit-sewing struggles aren’t about the fabric itself. They’re about using the wrong tools or techniques designed for wovens.
Once you switch to ballpoint needles, adjust your tension, and learn to work with the fabric’s natural give instead of fighting it, knits become surprisingly manageable. The secret isn’t magic—it’s understanding how these fabrics behave and setting yourself up for success from the start.
Table Of Contents
- Key Takeaways
- Essential Tools for Sewing Knits
- Choosing The Best Needle and Thread
- Understanding Different Knit Fabrics
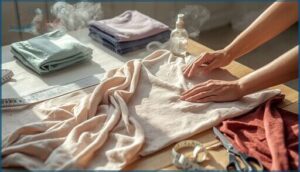
- Preparing Knit Fabrics Before Sewing
- Setting Up Your Sewing Machine for Knits
- Cutting and Handling Knit Fabrics Accurately
- Techniques for Sewing Stretchy Seams
- Achieving Professional Finishes on Knits
- Common Mistakes to Avoid With Knits
- Top 7 Products for Sewing Knits
- Frequently Asked Questions (FAQs)
- Conclusion
Key Takeaways
- Most knit-sewing problems come from using the wrong tools—switching to ballpoint needles, adjusting tension, and working with the fabric’s natural stretch instead of fighting it makes knits surprisingly manageable.
- The right equipment matters: ballpoint or stretch needles prevent fiber damage, a walking foot stops layers from shifting, and twin needles create professional hems that stretch with your fabric.
- Prep work prevents disasters—prewash to avoid shrinkage, cut in single layers to maintain grain alignment, and always test your stretch percentage before choosing a pattern.
- Your stitch choice determines durability—narrow zigzag or stretch stitches move with the fabric without popping, while stabilizers on shoulders and necklines keep garments from sagging or gaping over time.
Essential Tools for Sewing Knits
Sewing knits isn’t like working with woven fabrics—you need a few specialized tools to handle the stretch and movement. The right equipment makes all the difference between smooth, professional seams and frustrating puckers or skipped stitches.
Here are the essential tools that’ll set you up for success when working with stretchy fabrics.
Ballpoint and Stretch Needles
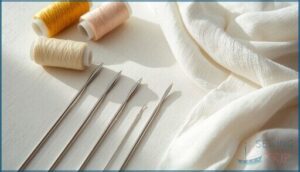
Ballpoint needles are your go-to for everyday knits like jersey and ribbing—they slide between loops instead of cutting fibers, protecting stitch quality and preventing fabric damage. Stretch needles take it further for high-elastane activewear, reducing skipped stitches when spandex content climbs. Application charts simplify needle selection, and proper needle types extend needle lifespan while you master choosing the right needle for each project. Schmetz needles are a trusted brand for sewing knits.
Key needle guidelines:
- Use 70/10–80/12 ballpoint for standard T-shirt jersey
- Switch to stretch needles when elastane percentage exceeds 20%
- Size up to 90/14 for sweatshirt fleece and thick seams
- Test on scraps—wrong needle choices cause runs and holes
Walking Foot Attachments
A walking foot keeps your knit layers moving together—no more fabric growth or seam puckering. When sewing knit fabrics, this even-feed attachment pairs upper and lower feed dogs so both layers glide through at the same pace.
That means better layer alignment on neckbands and cuffs, and smoother operational parameters than standard feet allow. It’s also great for projects needing specialty fabrics handled.
Using a walking foot transforms tricky sewing machine techniques into reliable, professional-looking seams.
Twin Needle for Professional Hems
If you want hems that look store-bought, try hemming with a twin needle on your sewing machine. This setup uses two needles mounted on one shank to create parallel rows of stitching that stretch with your knit fabrics.
For best results, pair a 4.0 mm size twin needle with a slightly longer stitch length—around 3 mm—and light tension settings. Adding a narrow stabilizer beneath the fold prevents tunneling on delicate jerseys.
Rotary Cutter and Cutting Mat
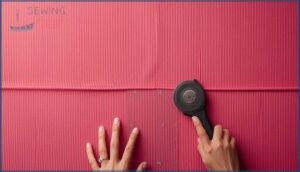
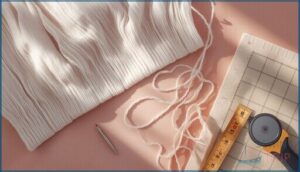
After perfecting your hems, precise cutting techniques make the rest of your project easier. A rotary cutter paired with a self-healing mat gives you clean, straight edges without lifting your fabric.
Choose a 45mm blade size for most knit cutting tasks—it balances control and coverage beautifully. Always cut in single layers on mat grids aligned with your fabric grain to prevent distortion and maintain that essential stretch direction.
Clear Elastic and Stabilizers
Clear elastic and stabilizers solve distortion before it starts. Clear elastic stabilizes shoulder seams, necklines, and waistlines—cut it 2.5 to 5 cm longer than your seam to anchor both ends securely. Fusible knit stay tape keeps fold-over necklines smooth and prevents gaping.
- Clear elastic maintains shape in high-stress areas without sacrificing stretch
- Fusible hem tape eliminates tunneling and lettuce edges on knit hems
- Power net provides strong recovery for activewear and fitted garments
- Self-fabric strips offer low-bulk stabilization for lightweight jerseys
Choosing The Best Needle and Thread
The right needle and thread can make or break your knit sewing project. If you’ve ever dealt with skipped stitches, puckered seams, or fabric snags, chances are your supplies weren’t up to the task.
Let’s look at which needles and threads work best so your knits turn out smooth and professional every time.
Ballpoint Vs. Stretch Needles
You’ll face an important needle selection moment with every knit project. Ballpoint needles gently push fibers aside, preventing fabric damage on stable knits like jersey. Stretch needles, with their deeper scarf, tackle skipped stitches on high-elasticity fabrics containing Lycra.
Machine compatibility is universal, but choosing the right needle type and needle size—usually 70/10 for lightweight or 90/14 for heavier knits—directly impacts seam integrity and needle lifespan.
Stretch or Knit-Specific Thread
For every knit project, thread selection becomes the foundation of seam durability. Polyester thread offers 10–15% stretch—ideal for most everyday knits—while textured nylon and woolly nylon deliver the higher elasticity activewear demands.
Your thread tension and machine setup directly influence seam performance:
- Core-spun polyester balances strength with flexibility for frequent laundering
- Woolly nylon provides enhanced stretch in serger loopers for high-movement areas
- Textured threads prevent seam grinning at 14–18 stitches per inch
Match thread elasticity to fabric stretch for lasting results.
When to Use a Twin Needle
A twin needle becomes your coverstitch substitute when hemming knit fabrics that need moderate stretch—think T-shirts and casual dresses. The two parallel lines on top with a zigzag beneath move with fabric stretch, preventing popped seams.
Check machine compatibility first: you’ll need zigzag capability and adequate needle width.
For ultra-lightweight jerseys or high-performance knits, alternative methods like a stretch stitch or serger often outperform twin needle techniques.
Understanding Different Knit Fabrics
Not all knits behave the same way, and knowing what you’re working with makes a real difference. The type of knit, the fibers it’s made from, and how it stretches all affect how you cut and sew it.
Let’s break down what you need to know before you start your next project.
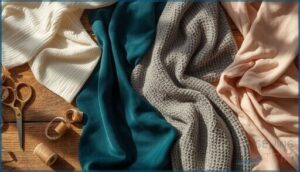
Types and Weights of Knit Fabrics
Understanding knit fabrics starts with recognizing the main types and their weights. Jersey knit—your go-to T-shirt material—generally sits around 150 to 250 gsm (grams per square meter). Double knits like interlock and ponte are heavier, usually 230 to 340 gsm, giving you more structure. Rib knits excel for cuffs and collars thanks to their increased stretch. Choosing the right fabric weight matters because lighter options drape beautifully, while heavier ones hold their shape in fitted garments.
- Jersey knit (150–250 gsm): Perfect for casual tops and everyday wear
- Double knits (230–340 gsm): Ideal when you need stability without losing stretch
- French terry (230–300+ gsm): Great for sweatshirts and cozy layers
- Rib knits: Your best friend for waistbands and necklines
- Ponte (230–340 gsm): The fitted choice for dresses and fitted pieces
How Fiber Content Affects Stretch
Fiber content dramatically shapes how far your knit can stretch. Cotton spandex blends—think 93% cotton with 7% elastane—deliver at least 50% stretch, while 100% cotton stays nearly rigid.
Synthetic fibers like polyester paired with just 5% spandex create true 4-way stretch.
Even wool knits surprise you: merino stretches 25–30% naturally, five times more elastic than cotton, thanks to its molecular structure.
Determining Fabric Grain and Stretch Direction
Knowing your fabric’s lengthwise grain prevents twisted seams after washing. Vertical ribs mark that grain—align pattern pieces parallel to them.
The crosswise stretch runs selvage to selvage and stretches most. Gently tug a scrap both ways: whichever direction bounces back faster shows your greatest stretch.
Misaligned grain causes droopy necklines and uneven hems, so visual tests before cutting knit fabric accurately save you from frustrating fit disasters.
Preparing Knit Fabrics Before Sewing
Getting your knit fabric ready before you even touch the sewing machine makes everything easier down the line. A little prep work now saves you from warped seams, surprise shrinkage, and wonky cuts later.
Let’s walk through the essential steps that’ll set you up for success.
Prewashing and Shrinkage Prevention
Before you cut a single piece, prewash your knit to avoid heartbreak later. Cotton knits often shrink 3%–7%, while rib knits can lose up to 12%. Washing machine settings matter—use cold water and low heat to minimize fiber shrinkage rates.
Plan for 2–3 inches of length loss per yard, especially with natural fibers. This relaxation technique ensures your finished garment fits as intended.
Identifying Stretch Percentage
Once your knit is prewashed, you’ll need to measure its stretch percentage to match the right pattern. Grab a 10-inch section along the crosswise grain and stretch it firmly—if it reaches 15 inches, that’s 50% stretch using the fabric stretch formula.
Cotton jerseys generally fall between 20%–50%, while high-spandex blends can hit 75% or more. This elasticity determines whether your knit suits fitted leggings or casual tees.
Cutting Techniques for Accurate Pieces
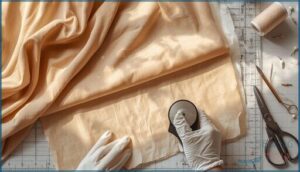
After checking stretch, you’re ready for precise cutting. Single-layer cutting prevents fabric distortion and keeps pattern pieces on-grain—place your knit flat, let it relax, and align wales with your pattern.
Rotary cutters glide smoothly along long edges, delivering cutting accuracy that scissors can’t match. Use pattern weights instead of pins to avoid shifting, and always support fabric edges on your cutting mat to minimize distortion.
Setting Up Your Sewing Machine for Knits
Your sewing machine needs a few simple tweaks before you start working with knits. These adjustments help the fabric move smoothly without stretching or puckering as it feeds through.
Let’s look at the two most important settings you’ll want to change.
Adjusting Tension and Foot Pressure
Your machine’s tension and pressure settings can make or break knit seams. Start with tension around 4, then test swatches—if you see bobbin thread on top, lower it; loops underneath mean you need to increase it.
Drop your sewing machine foot pressure to 1–2 to prevent rippling. A walking foot helps when fabric layers shift, keeping everything smooth and professional-looking.
Using a Stretch or Zig-Zag Stitch
Because straight stitches snap under tension, you need a narrow zigzag stitch—set width to 0.5 mm and length to 2.5–3.0 mm—for seam strength that won’t pop. This zigzag stitch offers stitch elasticity on stretch fabrics while avoiding distortion.
Never pull fabric while sewing; the zigzag naturally accommodates extension.
Test machine settings on scraps first, especially for garment applications like T-shirts and leggings where using stretch stitches matters most.
Cutting and Handling Knit Fabrics Accurately
Cutting knit fabric can feel like wrestling with something that has a mind of its own. The key is working with the fabric’s natural behavior instead of fighting against it.
Here are three practical approaches that’ll help you cut cleaner, more accurate pieces every time.
Cutting in a Single Layer
When your cutting tools meet knit fabric, every fold adds a layer of error. Cutting knit fabrics in a single layer transforms accuracy—studies show it cuts deviation in half compared to doubled fabric, keeping you within 1–2 mm instead of 3–4 mm.
Here’s why this matters for grainline control and quality control:
- Grainline stays perfectly aligned with ribs, reducing post-wash twist
- Layout efficiency improves across the full fabric width
- Your rotary cutter glides smoothly, preventing hidden ripples
This cutting technique keeps fabric grain true.
Using Pattern Weights Vs. Pins
Pattern weights outperform pins for cutting knit fabrics—they prevent distortion, boost cutting speed, and avoid fabric damage. Pins can pull jersey knits off-grain by 3–5 mm, while weights keep layout accuracy sharp.
You’ll cut faster with a rotary cutter and weights than pinning every edge. Pins do shine on small facings or tissue patterns, but for stretchy knits, weights are your cutting technique upgrade.
Preventing Fabric Distortion During Cutting
Ever notice how knit fabric seems to twist after you cut it? That’s torque—invisible tension stored in the loops. Fabric relaxation before cutting lets those forces settle, preventing wale distortion by several degrees.
Cutting techniques that stop fabric distortion:
- Let fabric relax flat overnight before layout to reduce construction risk from latent skew
- Check grain alignment at multiple points—distortion isn’t uniform across the width
- Use sharp rotary cutting tools with minimal pressure to avoid stretching cut edges
- Add tissue paper beneath slippery layers for layer stabilization during cutting knit fabrics
Techniques for Sewing Stretchy Seams
Sewing stretchy seams is where your knit projects either come together beautifully or fall apart at the first wear. The trick isn’t just about moving fabric under the presser foot—it’s about choosing stitches that flex with the fabric and keeping everything stable where it counts.
Let’s walk through the techniques that’ll give you seams strong enough to stretch without popping.
Choosing The Right Stitch Type
Your stitch selection can make or break a knit seam. A narrow zigzag stitch with 0.5–1.0 mm zigzag width and 2.5–3.0 mm length provides elasticity without tunneling. For highly stretchy seams, try a lightning stretch stitch at 0.5 mm width and 4.0 mm length.
Serger stitches like class 600 covering chains offer greater strength—tests show they reach 540 N compared to standard lockstitch’s 460 N. Stitch density and stitch types dramatically affect durability when hemming knits.
Avoiding Fabric Stretch While Sewing
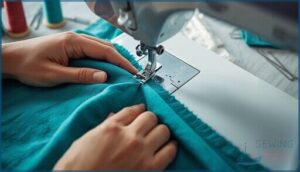
Machine settings matter more than you think. Drop your presser foot pressure by 25–50% and let the feed dogs do their job—avoiding pulling fabric keeps seams from growing.
A walking foot prevents layers from shifting while you guide gently, never stretching.
Test stitches on scraps first, and use temporary stabilizers like spray starch on slippery edges to maintain control throughout your seam.
Stabilizing Shoulders, Necklines, and Hems
Once you’re managing stretch, you can tackle structural issues. Clear elastic in shoulder seams prevents shoulder droop—it recovers 95–100% after stretching, perfect for maxi dresses.
Neckbands resist neckline gaping when stabilized with fusible interfacing types. For hems, stretch fusible tape cuts tunneling and controls hem stiffness without adding bulk.
Press your seam allowance toward the back to enclose stabilizers neatly.
Achieving Professional Finishes on Knits
Once your seams are sewn, the real magic happens in the finishing. Professional-looking knit garments rely on clean edges, smooth hems, and durable construction that holds up through wear and washing.
Let’s explore three key techniques that’ll take your knit projects from homemade to handmade with pride.
Using a Serger for Strong Seams
When you’re after seams that won’t pop when you stretch, a serger—also called an overlock machine—delivers the strength and flexibility knits demand. Its multi-thread construction locks fabric edges while accommodating movement, and with the right serger tension, differential feed, and stitch density settings, you’ll see professional seam finishes that outperform standard stitching.
- Adjust differential feed between 1.5 and 2.0 to prevent fabric stretching and wavy edges during serging.
- Fine-tune serger tension on each thread cone so stitches lie flat without puckering or loose loops.
- Calibrate stitch density carefully—too tight damages knit fibers, too loose allows seam slippage under stress.
- Run seam testing on scraps first; grab tests show that reinforced serger seams can handle more than double the pressure of basic construction, boosting knit productivity and garment durability.
Hemming With Twin Needles
While sergers lock edges, a twin needle brings that ready-to-wear look to your knit hems. Thread both needles with polyester for strength, then set a 2.5–3.0 mm stitch length. Tension settings matter—slightly lower upper tension to avoid tunneling.
On lightweight fabrics, press in a stabilizer before hemming. Test needle size and fabric type first; size 75–80 with 4.0 mm spacing works beautifully on jersey, mimicking professional sewing techniques without skipped stitches.
Applying Fusible Hem Tape or Stabilizer
With hem tape, you’ll lock in a crisp edge without visible stitching. Tape width selection starts at ½ inch for jersey—cut sections and position them 1/8 inch from the fabric edge. Application heat settings matter: medium, no steam, 20-second holds.
Preventing hem waviness means alternating tape with pins. For permanent bond issues, remember you can’t adjust later. Layering for stability works beautifully when cross-angled at 45 degrees on stretchy knit fabrics.
Common Mistakes to Avoid With Knits
Even with the right tools and techniques, knits can still trip you up if you’re not careful. A few common mistakes can turn a promising project into a frustrating mess, but they’re easy to sidestep once you know what to watch for.
Let’s look at the pitfalls that catch most sewers off guard and how you can avoid them.
Overstretching Fabric During Sewing
Pulling your knit while sewing is like tugging on a sweater—you’ll end up with wavy hems and permanent distortion. Studies show that stretching fabric by more than 20% can spike distortion scores by over 40%, killing seam elasticity and creating ripples that won’t press out.
- Let the machine feed stretchy fabrics naturally without pulling from behind
- Reduce presser foot pressure to prevent seam waviness on jersey and interlock
- Support fabric evenly at front and back to maintain fabric stretch
- Test your stretch percentage first—straight stitches under 2.5mm reduce elasticity by 30%
Watch your stretch direction and avoid tugging to keep those seams smooth and strong.
Using The Wrong Needle or Thread
When your stitches skip or your seams pucker, needle selection is often the culprit. Ballpoint or stretch needle types slip between knit loops instead of piercing them—technical guidance confirms that universal needles greatly raise laddering and skipped stitches.
Thread fiber content matters too: polyester thread elongates up to 26% before breaking, while cotton fails faster. Choosing the right needle and selecting the correct thread dramatically improve seam durability and eliminate tension troubleshooting headaches.
Ignoring Direction of Stretch
Placing your pattern pieces with stretch directionality wrong is like building sideways—the garment won’t hold its shape. Patternmaking sources confirm that greatest stretch should run horizontally around the body; vertical placement causes sagging garments at knees and elbows.
Cross-grain issues create diagonal ripples. Always check stretch percentage requirements—ignoring the direction of stretch leads to neckline problems and waistbands that won’t stay put.
Top 7 Products for Sewing Knits
Having the right tools changes everything when you’re working with knits. The products below will make your sewing smoother, your seams stronger, and your finished garments look more professional.
Here are seven items worth adding to your sewing kit.
1. Schmetz Stretch Sewing Machine Needles
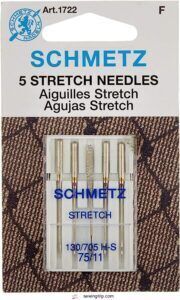
When your stitches skip or your stretchy fabric bunches, you’re probably using the wrong needle. Schmetz Stretch needles feature a special medium ballpoint tip and a deeper scarf that work together to prevent skipped stitches on highly elastic fabrics like spandex and jersey.
Available in sizes 75/11 and 90/14, these needles are marked with a yellow color code on the shank. Choose smaller sizes for lightweight jerseys and larger ones for thicker knits.
Replace your stretch needle every six to eight hours of sewing time to maintain consistent stitch quality and prevent breakage.
Best For: Sewists working with highly elastic fabrics like spandex, Lycra jerseys, and activewear who need reliable stitch formation without skipping or fabric damage.
- The deeper scarf and modified eye design sit closer to the hook, which dramatically reduces skipped stitches on stretchy fabrics compared to regular ballpoint needles.
- Yellow color-coded shank makes it easy to identify stretch needles at a glance, so you always grab the right one for your knit projects.
- Available in single and twin configurations with multiple size options (65, 75, 90) to handle everything from lightweight jersey to thick sweatshirting.
- Some users report needle breakage during use, especially on denser fabrics or when needles aren’t replaced frequently enough.
- The specialized scarf and eye design means these needles work best only on highly elastic knits—they’re overkill for stable cotton knits where a regular Jersey needle would do fine.
- Availability can be spotty, with customers occasionally reporting difficulty finding specific sizes or variants in stock.
2. Omnigrid Non Slip Quilting Ruler
Accurate cutting transforms the entire sewing process, especially when your knit fabric wants to stretch and shift. The Omnigrid Non-Slip Quilting Ruler features a textured backing that grips your fabric while its high-contrast neon markings stay visible on light and dark materials.
At 6 by 24 inches, it’s perfect for cutting strips with your rotary cutter without the ruler sliding mid-cut. The ruler’s laser-cut edges deliver precision within 0.002 inch, and its angle lines help you maintain proper grain alignment when cutting knit fabrics in single layers.
Best For: Quilters and sewists who need a reliable ruler that won’t slip during rotary cutting, especially when working with strips, borders, or bias pieces on both light and dark fabrics.
- Non-slip textured backing grips fabric firmly during cutting, preventing the frustrating mid-cut shifts that ruin precise measurements
- High-contrast neon markings stay visible on any fabric color, so you’re not squinting or guessing at lines when switching between light and dark materials
- Laser-cut edges deliver exceptional accuracy (within 0.002 inch) and the 6 by 24 inch size handles most strip-cutting tasks without being unwieldy
- The 6 by 24 inch size won’t cover larger projects like squaring big quilt blocks or cutting wide fabric pieces in one pass
- No significant durability feedback available, so it’s unclear how the non-slip backing holds up after months of heavy rotary cutter use
- The neon color and textured backing might not appeal to sewists who prefer traditional clear rulers or worry about potential residue on delicate fabrics
3. Ball Point Jersey Machine Needles
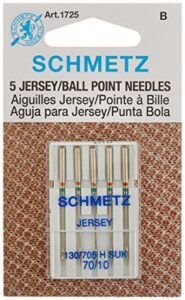
Once you’ve cut your pieces accurately, the right ballpoint needle makes all the difference in stitch quality. The Euro-Notions Jersey Ball Point Needle in size 70/10 glides between knit loops instead of piercing them, preventing snags and runs on lightweight jersey fabrics.
You’ll notice fewer skipped stitches and less visible needle tracks compared to universal needles. While some users report durability concerns, these needles offer solid fabric compatibility for T-shirts and yoga pants at a budget-friendly price.
For heavier knits, consider stepping up to larger needle sizes.
Best For: Sewers working with lightweight knit fabrics like T-shirt jersey, yoga pants, and interlock who need an affordable needle that prevents snags and runs.
- Medium ball point tip slides between knit loops instead of cutting fibers, reducing visible needle tracks and fabric damage
- Size 70/10 is ideal for lightweight jersey projects, minimizing holes while maintaining clean stitch formation
- Budget-friendly option that delivers fewer skipped stitches than universal needles on knit fabrics
- Some users report the needles break more easily than expected, raising durability concerns
- May not perform well on heavier sweater knits or highly elastic fabrics containing Lycra or elastane
- Occasional quality control issues, with reports of receiving incorrect needle types in packaging
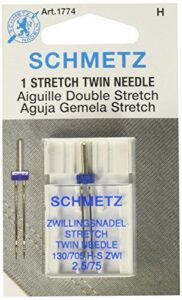
4. Schmetz Twin Stretch Sewing Machine Needle
When you’re ready to add that ready-to-wear double row hem to your T-shirts, the Schmetz Twin Stretch 2.5/75 needle gives you two parallel topstitches that move with your fabric. This twin needle setup threads two needles mounted on one shank—your machine forms straight lines topside while the bobbin thread zigzags underneath for stretch.
Lower your tension slightly to prevent tunneling between the rows, and test your stitch formation on scraps first. It’s perfect for hemming knits when you want professional results without a coverlocking machine.
Best For: Home sewists who want to add professional double-row hems to T-shirts, leggings, and other stretchy knits without owning a coverlock machine.
- Creates two parallel rows of stitching in one pass with a zigzag bobbin thread underneath that stretches with the fabric, preventing seam breakage
- Medium ball point pushes knit fibers aside instead of piercing them, which reduces holes and fabric damage on elastic materials
- Extra-large eye and special scarf design help prevent skipped stitches on high-stretch jerseys and activewear knits
- Threading requires specific technique and can be tricky—you may need to wind two separate bobbins if your machine lacks dual spool pins
- Some users report the needles break easily with heavy use, raising concerns about durability for frequent projects
- Tunneling (a raised ridge between stitch lines) can occur if tension isn’t adjusted correctly, requiring test runs on scrap fabric
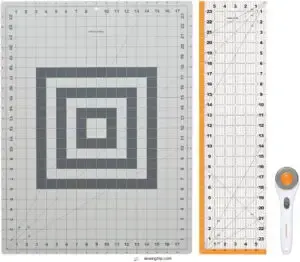
5. Fiskars Rotary Cutter Sewing Set
Once you’ve mastered hems, cutting knit fabric accurately becomes your next priority. The Fiskars 3-Piece Rotary Cutter Sewing Set gives you essential tools and supplies in one package: a 45mm rotary cutter, an 18×24-inch self-healing mat, and a 24-inch acrylic ruler.
The rotary cutter’s performance shines when you’re slicing through stretchy jersey without distortion—those precision-ground blades stay sharp longer than scissors ever could. Mat durability holds up beautifully across hundreds of cuts, while safety features like blade guards protect your fingers.
User reception consistently praises these cutting tools for beginners and pros alike.
Best For: Sewists who need reliable tools for cutting stretchy knits and multiple fabric layers without distortion or shifting.
- Complete starter kit with all three essentials (45mm cutter, 18×24-inch mat, ruler) at a mid-range price point around $49
- Sharp precision-ground steel blade cuts cleanly through jersey and layered knits while the self-healing double-sided mat extends usable life
- Ergonomic safety features like blade guards and retractable mechanisms protect users during storage and cutting sessions
- Blade can dull quickly with heavy use and requires periodic replacement to maintain cutting performance
- Self-healing mat isn’t fully scratch-proof and can show damage from deep cuts or improper storage in heat and sunlight
- Very sharp blade poses safety risks if users aren’t careful during handling and blade changes
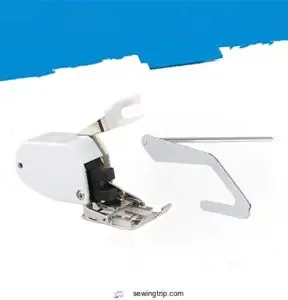
6. Even Feed Walking Foot Quilting Guide
A walking foot transforms how your sewing machine manages bulky layers and stretchy knits. The Gsiartvill Even Feed Walking Foot synchronizes upper and lower feed dogs, preventing slippage between fabric layers—a revelation when managing multiple thicknesses. Its adjustable quilting guide makes parallel stitching simple, maintaining consistent spacing across rows without constant measuring.
You’ll reduce sewing machine foot pressure worries since this metal-and-plastic accessory keeps jersey and fleece moving smoothly. Guide adjustments let you customize intervals for your specific sewing techniques, whether you’re topstitching seams or working with knit fabrics that shift unpredictably.
Best For: Quilters and sewers working with multiple fabric layers, bulky materials, or stretchy knits who need consistent stitch quality and parallel line spacing without constant fabric shifting.
- Synchronized upper and lower feed dogs prevent layer slippage and fabric drift, especially helpful when quilting through batting or sewing thick seams
- Adjustable quilting guide bar maintains even spacing for parallel rows, eliminating the need to mark lines across your entire project
- Low shank design fits most domestic machines from Brother, Singer, Janome, and other major brands without requiring specialized equipment
- Durability concerns reported by some users, with parts breaking or falling apart during regular use
- Mixed feedback on stitch quality, including occasional skipped stitches that can disrupt your project
- Instructions aren’t always clear, and you may need to hunt down YouTube tutorials to figure out proper installation and settings
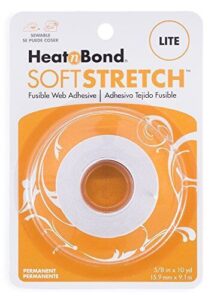
7. HeatnBond Soft Stretch Lite Adhesive
HeatnBond Soft Stretch Lite Adhesive offers a smart solution when you need adhesive bond strength without sacrificing stretch fabric compatibility. This sewable fusible web stabilizes hems and necklines on knit fabrics through proper heat application—just five seconds initially, then twenty with steam.
Its practical applications span jersey, spandex, and fleece projects where you’re sewing knit fabrics that demand flexibility. Long-term durability improves when you combine it with stitching rather than relying solely on the bond. It’s a fabric stabilizer that respects sewing techniques requiring movement.
Best For: Sewers working with knits, jersey, spandex, or stretch denim who want to stabilize hems and seams without losing fabric flexibility or adding bulk.
- Designed specifically for stretch fabrics—maintains bond strength while moving with the material, so your knit hems won’t crack or pull apart during wear.
- Sewable and non-gumming, meaning you can stitch right through the fused area without sticky residue building up on your needle or skipped stitches slowing you down.
- Keeps a soft hand after bonding, so your finished garment drapes naturally instead of feeling stiff or heavy where the adhesive was applied.
- Adhesion can weaken over time according to some users, especially on fabrics with heavy stretch or movement, so it’s best used with stitching rather than as a standalone bond.
- Requires a two-stage heat process (5 seconds without steam, then 20 seconds with steam), which takes more time and attention than a single-step application.
- May feel stiff if you accidentally use multiple layers or don’t follow the prep steps like prewashing without fabric softener, so testing on scraps is essential.
Frequently Asked Questions (FAQs)
How do I fix skipped stitches on knits?
Start with a fresh ballpoint or stretch needle—size 14/90 works best.
Check your machine settings, adjust tension, slow down, and don’t pull the fabric.
These fixes solve most skipped stitches instantly.
Can I use regular patterns for knit fabric?
You can use regular patterns for knit fabric, but they’re not ideal. Woven patterns lack stretch percentage consideration and proper ease.
Garment fit often requires alteration tips—adjusting seam allowance and pattern fabric recommendations ensures better garment construction results.
How do I store knit fabric without stretching?
Fold your knits flat instead of hanging them to prevent shoulder stretching.
Roll bulky yardage gently after folding to avoid sharp creases.
Store in cool, dry spaces away from light to preserve elasticity.
What causes wavy seams when sewing knits?
Ironically, it’s not the fabric itself causing those waves—it’s your machine setup.
Excessive foot pressure, imbalanced fabric feeding, incorrect stitch length, tension issues, and pulling fabric while sewing all create rippled seams.
How do I repair holes in knit garments?
Darning techniques like Swiss or woven darning work best for small holes. Matching yarn thickness ensures invisible joins. For holes under 1/4 inch, running stitches close gaps effectively.
Preventive steps include reinforcing thinning areas before damage spreads.
Conclusion
Mastering knits means moving past frustration and into flow. With the right needles, tension adjustments, and a willingness to let the fabric guide you, these expert tips for sewing knits transform struggle into skill.
You’re not wrestling with your material anymore—you’re working alongside it. The tools are simple, the techniques are learnable, and the results speak for themselves.
Now it’s your turn to stitch something stretchy, wearable, and undeniably yours.
- https://www.reddit.com/r/sewing/comments/13zxje8/skipping_stitches_on_stretch_fabric_with/
- https://www.thesewingdirectory.co.uk/sewing-hems-with-a-twin-needle/
- https://spandexpalace.com/blogs/everything-to-know-about-spandex-fabric/conquering-the-stretch-your-beginners-guide-to-sewing-knit-fabrics
- https://victorypatterns.com/blogs/victory-patterns-blog/sewing-with-knit-fabric
- https://www.madeformermaids.com/knittips/

