This site is supported by our readers. We may earn a commission, at no cost to you, if you purchase through links.
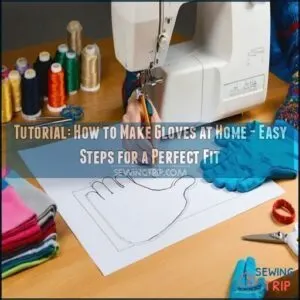
Lay your hand flat on paper, trace around it (fingers slightly spread), and add a little extra for seams—it’s like giving your hand a hug. Cut out the pattern, pin it to your fabric, and carefully cut the pieces.
Sew the fingers first, then attach the thumb. Don’t rush; those seams need patience! Add a cuff for comfort or style.
Flip it right side out, press the seams, and voilà—a custom glove that’s uniquely you. Ready to get creative?
Table Of Contents
Key Takeaways
- Trace your hand on paper with fingers slightly spread, add seam allowance, and cut the pattern from stretchy fabric for the best fit.
- Sew fingers first, attach the thumb, and use fourchettes for flexibility, ensuring durability with reinforced seams.
- Turn the glove right-side out carefully using tools like chopsticks for precision and press seams for a clean, professional finish.
- Customize with topstitching, decorative elements, or cuffs to add personal style and make the gloves uniquely your own.
Choose Your Fabric
Picking the right fabric is like choosing the perfect dance partner—it needs to move with you.
Go for something stretchy and comfortable, so your gloves fit like a second skin.
Selecting Stretchy Fabric
Choosing stretchy fabric is key for gloves that fit like a second skin.
Stretchy fabric ensures your gloves hug every curve, moving with you effortlessly for a flawless, second-skin fit.
Look for materials with good Stretch Percentage and Fabric Recovery, like spandex blends. Avoid cotton knits—they lose shape fast.
Test stretch direction before cutting to guarantee flexibility. For maximum comfort and fit, consider fabrics with high stretch recovery.
- Best picks: Spandex-blend knits or stretchy jersey.
- Avoid: Thin, flimsy fabrics or non-recovering cotton.
- Tip: Prioritize Knit Structure for durability.
Considering Fabric Weight
Fabric weight affects glove drape, dexterity, and seam bulk.
Light fabrics, like jersey, offer flexibility, while heavier ones, like fleece, provide warmth.
For seasonal weight, think about your glove’s purpose—breathable for spring or cozy for winter.
You can research different fabric options online.
| Fabric Type | Weight | Best Use | Dexterity Level |
|---|---|---|---|
| Jersey | Lightweight | Everyday wear | High |
| Fleece | Medium | Cold-weather gloves | Moderate |
| Leather | Heavy | Durable, stylish fit | Low |
| Mesh | Ultra-light | Opera-style elegance | High |
Pick what suits your project and consider the dexterity level for the best fit, ensuring a stylish fit and the right fabric weight for your needs.
Preparing Fabric for Cutting
Before you cut, prep your fabric like a pro! Wash and dry it to prevent shrinking fabric surprises later. Lay it flat, aligning with the fabric grain for smooth sewing.
Pin your pattern securely, focusing on precise pattern placement.
- Use sharp cutting tools for clean edges.
- Stabilize fabric with weights if it’s slippery.
- Double-check seam allowance before cutting!
Create Glove Pattern
Creating your glove pattern is like giving your hand its own blueprint.
Grab some paper, trace your hand, and don’t forget to add extra space for seams—your fingers will thank you!
Tracing Hand Shape
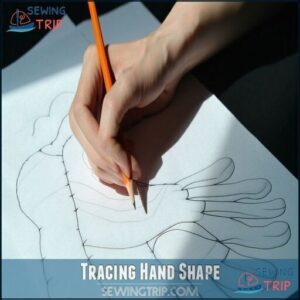
Lay your hand flat on tracing paper, fingers slightly spread—don’t squish them. Use a pencil for accuracy, following every curve. Extend the outline to your wrist or beyond for longer DIY gloves. Symmetry matters, so double-check. A steady hand guarantees a smooth, handshaped fabric pattern. Think of it as creating a 3D map of your hand for perfect fit.
Some crafters prefer using specialized tools for this type of project.
accuracy
style
sides
This process helps in achieving a perfect fit and ensures that your DIY gloves are both comfortable and functional. By following these steps, you can create a customized glove pattern that meets your specific needs.
Adding Seam Allowances
Now that you’ve traced your hand, it’s time to add seam allowances.
Precision matters here—add about 1/2 inch around the edges for smooth sewing.
Adjust widths slightly for curved seams or thicker fabric types.
This extra space guarantees easier glove construction and flexibility.
Remember that accurate body measurements are essential for a perfect fit.
Think of it as room to breathe—your sewing gloves will thank you, ensuring a more comfortable experience.
Drafting Finger and Thumb Areas
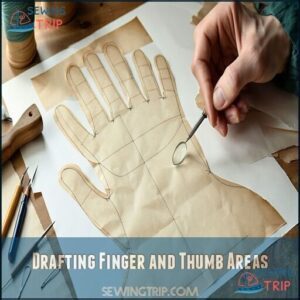
Now that you’ve added seam allowances, it’s time to shape your glove’s personality—those fingers and thumb.
For finger mobility, trace your hand with fingers slightly apart, capturing each digit’s length.
Use Fourchette shaping for snug fits.
Draft a thumb gusset by marking its projection and sketching a circle for 3D hand shapes.
Precision here guarantees perfect pattern adjustments!
Sew Glove Pieces
Now it’s time to bring your glove pieces to life with some stitching magic.
Don’t worry if you’re not a sewing pro—just follow along, and soon you’ll have something that actually looks like a glove!
Attaching Thumb and Finger Pieces
When attaching the thumb, align its seam with the trank, guaranteeing precise thumb placement.
For fingers, insert fourchettes between each to add mobility. Use finger gussets for a snug fit, reinforcing seams for durability.
Remember, glove sewing techniques like careful pinning prevent fabric shifts.
These glove sewing tips guarantee comfort, so don’t rush—precision makes glove making rewarding!
Sewing Glove Body and Hem
With the thumb and fingers ready, it’s time to shape the glove body.
Pin the fabric along the traced lines, then use a straight stitch for clean seams.
For a polished hem, fold the opening edge, sew 1/4 inch from the fold, and trim excess.
Creating the perfect sewing glove requires careful attention to detail.
These glove sewing tips guarantee neat Seam Finishing and professional results!
Adding Cuff or Wristband
For a polished glove cuff, choose materials like elastic or faux fur for style and function.
Stretchy knit wristband styles guarantee comfort, while decorative cuffs, like lace, add flair.
Secure with precise stitching or elastic integration for a snug fit, and follow knit gloves instructions or crochet gloves tutorials for custom wristwarmers.
Finish with a neat glove hem for durability.
Assemble Glove Parts
Now it’s time to bring your glove pieces together and make them look like, well, gloves.
Don’t worry if it feels tricky at first—sewing tiny seams can be like threading spaghetti through a needle, but you’ll get the hang of it.
Sewing Finger and Thumb Seams
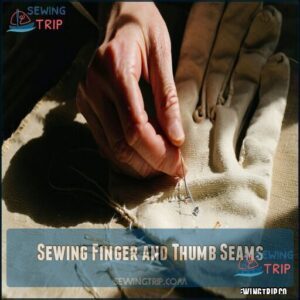
Start with the thumb seam—pin it carefully, ensuring thumb gussets align snugly.
For finger shaping, sew each glove seam with precision, using a straight stitch. Don’t skip seam reinforcement; it’s key for durability.
Attach fourchettes for mobility, especially if you’re avoiding fingerless gloves. Remember, sewing techniques like backstitching prevent unraveling.
It’s a sewing tutorial, not a race—take your time, and consider seam reinforcement for a more durable outcome.
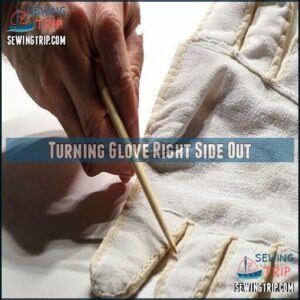
Turning Glove Right Side Out
Now that the seams are secure, it’s time to flip the glove.
Gently turn it right side out, being careful to maintain seam integrity and avoid fabric stress.
Use a blunt tool for precision:
- A pencil eraser to nudge corners.
- Chopsticks for finger dexterity.
- A knitting needle for tight spaces.
- Your fingers for control.
- Tweezers for stubborn spots.
Pressing Seams for Professional Finish
A hot iron can work wonders on glove seams.
Choose pressing tools wisely—ironing techniques matter. Use a cloth to prevent shine on delicate fabrics.
Press along the seams with care, following these tips:
| Action | Tool | Result |
|---|---|---|
| Apply pressure | Iron | Smooth edges |
| Cover fabric | Pressing cloth | Prevents fabric shine |
| Align seam direction | Presser foot technique | Neat, professional look |
Great seam finishes need attention—press, don’t skip this step.
For beginner seams, consider using pinking shears effectively.
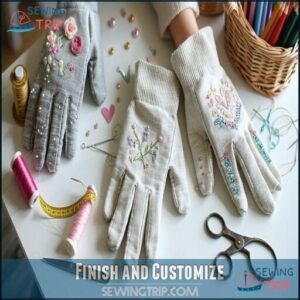
Finish and Customize
Now it’s time to give your gloves that personal touch and make them truly yours.
Whether you’re adding a fun stitch, a bit of bling, or just making sure they fit like a dream, this step is where your creativity shines!
Topstitching Glove Edges
Topstitching gives your gloves a neat, finished look, while keeping edges stable and durable. Adjust your topstitch tension for smooth results—it’s worth it! Match your thread choice to your fabric for a pro touch.
Topstitching adds polish to your gloves, securing edges while delivering a clean, professional finish that’s built to last.
- Use a size 11 needle for thin fabrics.
- Test decorative stitching on scraps.
- Keep stitches straight for clean lines.
- Go slow at finger curves.
- Follow glove tutorials for extra tips.
To ensure the best results, consider the overall process of making your gloves, from choosing the right materials to following tutorials for specific techniques.
Adding Decorative Elements
How can you make your gloves pop? Try embroidery designs for a chic touch or delicate beadwork application for sparkle.
Use applique techniques to add bold patterns, or experiment with fabric painting for custom glove artistry.
Insert lace for elegance.
These gloves embellishment ideas are easy ways to start glove refashioning. Remember, glove customization transforms ordinary into extraordinary with a chic touch!
Final Fitting and Adjustments
Testing fit is where gloves truly come to life! A perfect glove fitting involves these steps:
- Fit Mockups: Slip them on and check for snugness.
- Seam Adjustments: Fix tight or loose spots.
- Comfort Testing: Wiggle fingers; assess glove comfort.
- Mobility Checks: Verify freedom of movement.
- Hemming Options: Finish openings neatly for glove ease.
Adjust as needed! Accurate measurements, including understanding your natural waistline and hip, are vital for a great fit.
Frequently Asked Questions (FAQs)
How do you make a glove pattern?
Picture your hand as a stencil—trace it onto paper, fingers spread wide like you’re waving.
Add 1/2 inch for seams.
Cut carefully, and voilà, you’ve got a custom-fit glove pattern template!
How do I make my own handmade gloves?
Start by tracing your hand on paper, adding extra space for seams.
Cut the pattern, transfer it to stretchy fabric, and sew carefully.
Turn it right-side out, fine-tune, and voilà—your custom gloves await!
How do you sew gloves?
Sew gloves by tracing your pattern onto stretchy fabric, pinning layers together, and using a straight stitch along the lines.
Leave openings for fingers and thumb.
Trim excess, turn inside out, and adjust to ensure a proper fit, which is a complete process for making the gloves.
How to make winter gloves?
To make winter gloves, trace your hand on stretchy, warm fabric like fleece.
Add seam allowance, cut, and sew edges with a straight stitch.
Turn them inside out, hem openings, and adjust for a snug fit.
How to sew gloves well?
Rome wasn’t built in a day, and perfect gloves take patience.
Cut precisely, pin carefully, and sew slowly with a straight stitch.
Backtack seams, trim neatly, and always try them on for adjustments.
How do you make a baseball glove?
Crafting a baseball glove involves cutting leather into precise patterns, stitching them together tightly, and shaping the glove with oil and consistent use.
It’s all about blending craftsmanship, patience, and a little elbow grease!
Are gloves easy to make?
Did you know over 80% of beginners find glove-making simple with the right fabric?
Using stretchy material and a basic pattern, you’ll manage fine.
Patience and practice? That’s your ticket to DIY mastery!
What fabric is good for making gloves?
Stretchy fabrics like spandex blends or lightweight knits are fantastic for gloves.
Satin adds elegance, while fleece offers warmth.
Avoid thick materials; trust me, your fingers will appreciate the extra mobility and comfort!
How to make gloves out of sleeves?
Grab an old sweater sleeve, cut it to your desired glove length, and outline your hand.
Stitch along the tracing, leaving open ends for fingers.
Add flair with lace or buttons for extra charm!
How are gloves made step by step?
Start by tracing your hand on paper, adding seam allowance.
Cut fabric using the pattern, sew fourchettes for finger flexibility, and attach the thumb.
Finish seams, turn right-side out, and adjust for fit.
Conclusion
Don’t worry if your first try isn’t perfect—practice makes progress! Making gloves at home is a hands-on project that blends creativity and practicality.
With each step of this tutorial, from tracing your hand to sewing seams, you’re mastering the art of tailoring a perfect fit.
Experiment with fabrics, add personal touches, and make it uniquely yours. Tutorials on how to make gloves let you create something stylish, functional, and entirely handmade.
Ready to put your craft to work?


