This site is supported by our readers. We may earn a commission, at no cost to you, if you purchase through links.
 Designing your own dress pattern gives you the freedom to create something truly one-of-a-kind. Start by taking detailed body measurements with a soft tape measure for accuracy—this step’s like laying the foundation for a house.
Choose a method that suits you: tracing an old favorite garment, adjusting a commercial pattern, or draping fabric directly on a dress form. Use tools like rulers, fabric scissors, and pattern paper to refine your design.
Modern software can even help you draft patterns digitally. Make adjustments for style and fit before sewing begins.
With a little patience, your vision can become wearable art.
Table Of Contents
Key Takeaways
- Take accurate body measurements to ensure a perfect fit and avoid sewing issues.
- Choose a pattern-making method that matches your skill level, like tracing garments, draping, or using pattern drafting software.
- Use online tools or software for precise, customizable designs that save time and effort.
- Experiment with personalizing details like necklines, sleeves, and closures to create unique, one-of-a-kind garments.
Design Own Dress Pattern
Creating your own dress pattern lets you design clothes that fit perfectly and reflect your style.
Designing your own dress pattern lets you create a one-of-a-kind outfit that fits perfectly and showcases your unique style.
Start with accurate measurements, and choose a reliable method or tool to turn your vision into a custom pattern.
Importance of Accurate Body Measurements
Accurate body measurements are the foundation of a custom dress pattern. They guarantee fit perfection, design precision, and pattern accuracy.
Use reliable measurement tools to capture your unique body shape and avoid sewing pattern fit issues. Accurate measurements require using specialized measuring devices. Remember, measure twice, cut once for flawless results!
- Key areas to measure: bust, waist, hips, and length
- Essential tools: measuring tape, flat surface
- Crucial tip: Update measurements regularly as your body evolves
Choosing Right Pattern Making Method
Choosing the right pattern making method sets the tone for your dress pattern design journey.
Match your skill level, time investment, and project goals to the approach.
Here’s a comparison to help you decide:
| Method | Complexity | Best For |
|---|---|---|
| Manual Drafting | High | Precision Creators |
| Draping | Medium | Visual Learners |
| Tracing Garments | Low | Quick Starters |
| Pattern Drafting Service | Low-Medium | Professionals |
| Pattern Making Software | Medium-High | Tech-Savvy Sewists |
Choose what excites you! Your next masterpiece awaits.
Using Online Tools and Software
Online dress pattern makers have redefined dress pattern design, making it fast, fun, and efficient.
With tools like virtual draping, AI assistance, and seamless digital alterations, you can create unique designs effortlessly.
Explore these top picks:
- Tailornova: This dress design software uses pattern digitization and 3D previews to craft perfect-fit patterns in minutes.
- Seamly: A free, versatile pattern-making software offering customizable, professional-grade options.
- Sewist CAD: Enables cloud collaboration and produces unlimited digital dress patterns based on measurements.
Consider exploring Tailornova dress products for design options.
Immerse yourself in these tools and bring your dream dress to life!
Mastering Pattern Making Techniques
You can master pattern-making techniques by learning methods like tracing garments, deconstructing clothes, or draping fabric. Each approach helps you create precise templates, ensuring a perfect fit for custom designs.
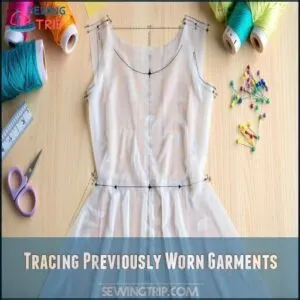
Tracing Previously Worn Garments
Ready to create your own pattern? Tracing a favorite garment is a fun start! Begin with the right paper selection—lightweight and semi-transparent, like baking paper.
Lay your dress flat on a hard surface. Secure it with pins or your hands for stability.
Trace seams using a chalk transfer method to capture shape precisely. Add a generous seam allowance for easier sewing.
This method of pattern tracing allows for accurate tracing and endless experimentation, making garment copying simple and rewarding. It’s a straightforward way to craft personalized styles from clothes you already love!
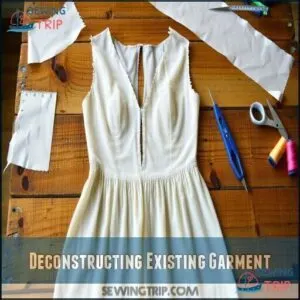
Deconstructing Existing Garment
Deconstructing an old garment isn’t just helpful—it’s genius! Carefully unpick seams using a seam ripper, preserving each piece for pattern recreation. This method’s incredible for fit analysis and spotting smart construction details.
- Seam identification: Observe how seams shape the garment.
- Fabric salvage: Flatten each piece onto paper for pattern tracing.
- Alteration inspiration: Enhance with pattern modification ideas.
It’s perfect for replicating styles while making pattern adjustments.
Altering Commercial Pattern
Transform commercial patterns into your ideal fit with simple pattern alterations. Start by blending sizes, like using size 10 for the bust and 12 for the hips, to fix fit issues. Adjust darts or seam lines for perfect shaping.
Add style modifications like pockets or trims to make it yours. Want variety? Try combining patterns for unique looks.
Many resources are available to help with pattern alteration products. Here’s a quick pattern adjustment guide:
| Goal | Action | Result |
|---|---|---|
| Size Adjustments | Blend multiple sizes | Custom fit |
| Pattern Blending | Merge pattern elements | Unique designs |
| Fit Issues | Redefine darts/seam lines | Better shaping |
| Style Modifications | Add details | Personalized finish |
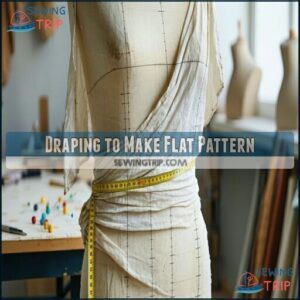
Draping to Make Flat Pattern
Shaping a dress pattern through draping blends creativity and precision. Start by pinning fabric to a dress form and experimenting with textures and silhouettes—this lets you see how the material responds in real time.
Use muslin for easy manipulation and mark grainlines and fit adjustments directly onto the fabric. Understanding fashion draping basics is essential for experimenting with fit and structure.
Capture progress photos during muslin fitting to refine your design later. Once satisfied, trace your work onto paper for pattern drafting techniques like adding seam allowances.
Draping creates a bridge between fabric manipulation and professional-level pattern making techniques, ensuring your design truly reflects your vision and fit requirements.
Creating Custom Dress Pattern
Creating your own custom dress pattern starts with selecting a style that matches your vision.
Taking accurate body measurements for the perfect fit is crucial. By adjusting details like length, neckline, and sleeve shape, you can design a pattern that’s uniquely yours and ready for sewing, making it a perfect fit.
Selecting Style and Adjusting Measurements
Bringing your custom dress pattern to life starts with selecting a style that complements your body shape and ensuring measurement accuracy. A well-chosen silhouette paired with precise adjustments creates a garment that feels as great as it looks!
Here’s how to design your own dress step-by-step:
- Choose a dress silhouette that highlights your features and fits your vision.
- Use a body measurement guide to take accurate measurements for the perfect fit.
- Adjust design elements, like necklines and sleeves, for personalized style considerations.
- Apply ease adjustments for comfort and added flexibility.
With smart tools updating measurements automatically, creating dress pattern adjustments is simple and smooth—no calculator required!
Choosing Format for Printing PDF Pattern
Printing your PDF dress pattern is simple with the right setup. For Paper Size, choose A4 or Letter for home printers, and A0 for copy shops.
Check Scale Accuracy by printing the test square first. Adjust Printer Settings to “Actual Size” (100%). Use Tiling Options for multi-page layouts.
To keep everything organized, consider dedicated folder creation for your digital patterns. Tools like a dress pattern generator combine automation and precision, ensuring sewing pattern digitalization makes assembling and cutting layouts seamless.
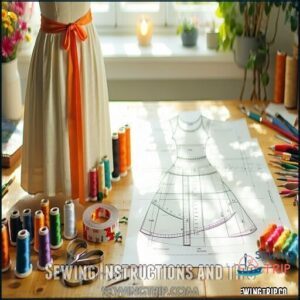
Sewing Instructions and Tips
Once your PDF pattern is ready, it’s time to sew it into reality! Following clear sewing instructions makes the process a breeze, even if you’re just starting out. Take your time, and focus on precision—you’ll thank yourself later.
Begin by prepping your fabric. Align it with the fabric grain to maintain the garment’s structure. Don’t skip marking seam allowances; they’re key for accurate assembly. Always keep your sewing tools organized—there’s nothing worse than losing your scissors mid-project!
Here are a few sewing tips to guide you:
- Press seams after every step using proper pressing techniques for a polished look.
- Use fitting stitches, like straight or zig-zag, based on fabric needs.
- Test your pattern on inexpensive fabric first to confirm fit.
- Refer to detailed sewing tutorials for tricky parts like hand stitches or zipper insertion.
Enjoy sewing confidently!
Customizing Pattern for Unique Design
Make your personalized dress pattern stand out by tweaking design elements! Try bold necklines, varied sleeve styles, and unique closures for fresh flair.
Don’t forget precise fit adjustments—small changes shape custom clothing beautifully.
Sewing pattern customization software makes alterations easy for custom dress patterns. Pair smart fabric choices with personal style to craft showstopping custom dress patterns ready to impress.
Customizing Dress Patterns
Customizing dress patterns lets you transform a basic design into something truly your own by tweaking details like necklines, sleeves, and closures.
With careful adjustments and a focus on fit, you can create clothing that’s both unique and crafted perfectly to your body.
Mastering Necklines, Sleeves, and Closures
Mastering custom necklines, sleeves, and closures makes your design truly yours.
Experiment with neckline variations to create elegance or drama, and refine your sleeve styles for a standout look.
Use intuitive tools to enhance closure types, ensuring seamless garment finishes.
Here’s how to elevate your dress pattern:
- Upgrade a classic round neckline to a V-neckline.
- Add cuff details for custom sleeve patterns.
- Replace bulky seams with sleek invisible zippers.
- Add advanced collars for statement-making designs.
Transform pattern pieces into timeless beauty!
Incorporating Design Details and Embellishments
Now that your neckline and sleeves are sorted, it’s time to elevate your design with unique details.
Add trims or explore surface embellishments like fabric manipulation or decorative stitching for a standout look. Beading techniques can bring elegance, while functional pockets and layered textures add charm.
Use fashion design software to experiment with trims and patterns seamlessly. For accurate results, consider using pattern making software.
Here’s a quick idea table:
| Detail | Purpose | Tips |
|---|---|---|
| Adding trims | Style enhancement | Match with fabric color palette |
| Surface embellishments | Texture creation | Use lightweight fabrics |
| Decorative stitching | Subtle accents | Contrast thread colors |
| Beading techniques | Fine detailing | Apply sparingly for balance |
Let your design ideas flow freely—each choice shapes your signature style!
Adjusting Fit for Different Body Types
Making a customized dress pattern fit like a glove starts with mastering sewing pattern adjustments. Focus on inclusive sizing and adaptive design to guarantee comfort and style for any body shape.
Use made-to-measure patterns and muslin fitting to refine the fit before cutting final fabrics.
- Add width to plus-size sewing patterns for hips or busts.
- Shorten bodices for petite frames or lengthen for taller individuals.
- Adjust shoulder width for athletic builds or create ease for fuller arms.
- Modify waistlines to flatter apple shapes or enhance hourglass figures.
Achieving Professional-Looking Finish
Transform your garment into a masterpiece with expert sewing pattern techniques! Use precise pressing techniques to achieve a flawless drape.
Emphasize sewing pattern quality by aligning grainlines and confirming clean closures.
Seam finishes like French or serged seams add polish, while crisp hems create a professional edge.
Understitching guarantees linings stay neat. Regular sewing pattern adjustments refine the fit, and attention to details like seam allowance precision elevates your dress from home-sewn to boutique-worthy perfection.
Bringing Design to Life
To bring your design to life, start by choosing the right fabric and materials that match your pattern and vision.
Follow clear sewing instructions, troubleshoot challenges, and focus on details to guarantee a polished final look.
Choosing Right Fabric and Materials
How do you bring your sewing pattern to life? It all starts with thoughtful fabric selection. The right fabric makes all the difference between an elegant design and a frustrating sewing experience.
- Match fabric weight to your pattern. Lightweight cotton works for flowing styles, while structured denim suits fitted or bespoke looks.
- Understand fiber content and how it reacts during sewing or washing.
- Evaluate drape quality—will the fabric flow beautifully or feel too stiff?
- Check print scale to confirm patterns align well with your design.
Don’t forget to test fabric swatches! It helps you avoid issues like poor colorfastness or mismatched texture. Considering the garment’s purpose will help when choosing right fabric. Choose with care, and your dress will reflect your skill and vision.
Following Sewing Instructions and Tips
Following sewing pattern instructions is key to success. Carefully check seam allowances and fabric grain for flawless results.
Use pressing techniques to give your garment a sharp, polished finish. When sewing curves, notching and clipping make all the difference.
A solid sewing guide simplifies steps, while fitting adjustments guarantee the perfect look. Take it slow—precision matters!
Troubleshooting Common Pattern Making Mistakes
Troubleshooting pattern-making mistakes doesn’t have to be overwhelming if you know what to look for. Double-check Grainline Issues, adjust Dart Placement, and always account for Seam Allowances.
Start with a Muslin Fitting to identify flaws before using your final fabric.
- Verify grainline alignment to avoid warped edges.
- Gradually tweak dart placement for better garment fitting.
- Use consistent seam allowances for accurate pattern matching.
- Test pattern adjustments with muslin to perfect fit.
Patience perfects your craft!
Showcasing Finished Design
Show off your creation with a runway presentation or a stylish photo shoot.
Capture clear shots highlighting details and fit for portfolio building or online sales.
Share sewing pattern stories, recommendations, and testimonials to inspire others.
Collect client feedback to refine future designs.
Post photos on Instagram or Pinterest to boost engagement and spark sewing pattern reviews.
Your completed masterpiece deserves the spotlight. Let it shine through every stitch!
Frequently Asked Questions (FAQs)
What is pattern making for dresses?
Pattern making for dresses involves creating a detailed blueprint that shapes fabric into a finished garment.
You’ll use measurements and design ideas to draft, adjust, and personalize patterns for a precise, custom fit.
Can You Make your own dress patterns?
Picture a blank canvas transforming into your dream dress.
Yes, you can make your own patterns!
With accurate measurements, paper, and creativity, you’ll craft unique designs that fit perfectly—no sewing experience required!
How do I make a dress pattern?
Start by taking precise measurements of your bust, waist, hips, and height.
Sketch the dress design, draft basic blocks for bodice and skirt, add details like darts and seam allowances.
Then cut and test.
What is online sewing pattern designer?
Think of an online sewing pattern designer as your secret weapon for custom clothing.
It tailors patterns to your exact measurements, offers endless design options, and simplifies creating perfectly fitted garments with professional-grade precision.
This combination allows for professional-grade precision in creating custom clothing.
How can I create a dress online?
Use an online sewing pattern designer to input your measurements, customize styles, and adjust design elements like necklines or sleeves.
It’s intuitive, saves time, and delivers a custom fit without extra adjustments.
How do you design a wedding dress?
Over 2 million weddings happen yearly, so designing your wedding dress starts by sketching ideas.
Choose fabric, set necklines, and add lace or beading.
Get custom measurements for a made-to-fit, dream-come-true gown.
How to design your own dress online for free?
Use free online sewing pattern tools to customize designs with your measurements.
Platforms let you tweak styles, add elements, and export personalized patterns.
It’s fun, accessible, and perfect for creating unique, well-fitting clothes online.
How to make your own sewing patterns?
Crafting your own sewing patterns is like sketching your dreams into fabric.
Trace existing garments, take precise measurements, draft on paper, add seam allowances, and refine the fit with test pieces for a perfect result.
How do you make a fashion pattern?
To make a fashion pattern, start by taking accurate body measurements, sketching your design, and creating a basic block.
Add design details, include seam allowances, and draft individual pieces for a precise, custom-fit result.
How can I make my own pattern for free?
Start by tracing a favorite garment onto paper, marking seams and edges carefully.
Add seam allowances, adjust fit using measurements, and label pieces.
This hands-on approach lets you create patterns customized to your style.
Conclusion
Why settle for store-bought when you can design your own dress pattern and create something truly unique?
Start by taking accurate measurements and choosing a pattern-making method that fits your skill level.
Explore tools or software for added precision, and don’t forget to adjust for style and fit.
With the right fabric and careful sewing, you’ll turn your vision into reality.
Mastering each step will leave you with a custom dress that’s uniquely yours.

