This site is supported by our readers. We may earn a commission, at no cost to you, if you purchase through links.
 You’ll typically get 20-40 hours of cutting time from your rotary blade, but how long rotary cutter blades last really depends on your projects and cutting habits.
Heavy quilters working with thick fabrics might need new blades weekly, while occasional crafters can stretch theirs for months.
Your blade’s telling you it’s done when cuts start skipping, fabric frays instead of slicing cleanly, or you’re pushing harder to get through materials.
Don’t ignore these warning signs—dull blades damage your cutting mat and create messy edges that’ll haunt your finished projects.
Smart storage and proper technique can double your blade’s lifespan.
Table Of Contents
- Key Takeaways
- Rotary Cutter Basics
- How Long Do Rotary Blades Last?
- Signs Your Blade Needs Replacing
- Extending Blade Life
- Sharpening and Replacing Blades
- Rotary Cutter Safety
- Choosing The Right Rotary Cutter
- Using a Cutting Mat
- Storing Rotary Cutters
- Disposing of Used Blades
- Frequently Asked Questions (FAQs)
- Conclusion
Key Takeaways
- You’ll get 20-40 hours of cutting time from your rotary blade, but heavy quilters working with thick fabrics might need weekly replacements while occasional crafters can stretch theirs for months.
- Replace your blade immediately when cuts start skipping, fabric frays instead of slicing cleanly, or you’re pushing harder to get through materials—don’t ignore these warning signs.
- You can double your blade’s lifespan through smart storage, proper cutting technique, and using quality cutting mats that prevent premature dulling.
- Always engage the safety lock after each cut, store blades in protective cases, and wrap used blades in paper towels before disposal to prevent injuries to yourself and sanitation workers.
Rotary Cutter Basics
Before diving into blade longevity, you’ll want to understand what makes these tools tick.
Rotary cutters come in different blade sizes – 18mm for detailed work, 45mm for standard quilting, and 60mm for heavy-duty cutting.
Each size serves specific purposes in your crafting arsenal.
Cutter types vary from basic models to ergonomic designs that reduce hand strain during long cutting sessions.
Safety features like blade guards and locking mechanisms protect both you and the blade when not in use.
Blade materials range from standard steel to endurance options that promise extended rotary cutter blade life.
Understanding these fundamentals helps you make smart choices about blade care and replacement timing.
The right combination of cutter ergonomics and proper blade maintenance directly impacts blade sharpness and overall blade lifespan.
When you know your tool’s basics, replacing blades becomes a strategic decision rather than guesswork.
How Long Do Rotary Blades Last?
Your rotary blade’s lifespan depends on what you cut and how often you use it.
The harder you cut, the faster your blade dulls—simple as that.
Some blades last through several quilts while others need replacing after cutting through tough materials like denim or batik fabrics.
Depends on Usage
Your rotary cutter blade life depends entirely on how you use it.
Cutting frequency plays the biggest role – daily quilters will replace blades monthly, while weekend crafters might stretch one for several months.
Fabric type impact matters too, as Batiks and heavyweight materials dull blades faster than standard cottons.
Layer count affects blade longevity since cutting through multiple layers creates more wear, and material thickness and blade pressure also influence lifespan.
Light, controlled cuts preserve sharpness longer than heavy-handed slicing through thick fabrics, which is why using the right technique is crucial for extending the life of your rotary cutter blade.
Change When Dulled
Don’t wait for your rotary cutter blades to completely fail. Replace them as soon as you notice cutting difficulty or blade dullness affecting your work.
Recognizing dullness early prevents frustration and guarantees clean cuts every time.
Here are three clear signs your blade needs replacement:
- Uneven cuts that leave fabric edges ragged or incomplete
- Extra pressure required to push through normal fabric layers
- Skipped threads that remain uncut after passing the blade
Regular blade inspection helps maintain peak blade longevity and cutting performance.
Signs Your Blade Needs Replacing
Recognizing when your rotary cutter blades need replacing saves you frustration and fabric.
Watch for uneven cuts that leave jagged edges instead of smooth lines.
If you’re applying increased pressure to push through fabric, that’s blade dullness talking.
Snagging fabric during cuts means the blade has lost its sharpness and needs immediate replacement.
Check for visible damage like nicks or chips along the blade edge.
When threads remain uncut after slicing, your blade wear has reached its limit.
Test blade sharpness loss by cutting through your usual fabric layers – struggling through materials that once cut easily signals replacement time.
Don’t ignore these warning signs.
Fresh rotary cutter blades make quilting safer and more enjoyable.
Replace dull blades promptly to maintain clean, precise cuts.
This simple maintenance ensures your quilting experience remains positive and enjoyable.
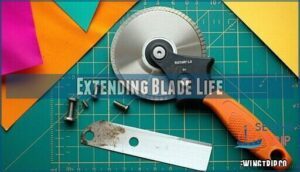
Extending Blade Life
You can stretch your rotary blade’s life by using it properly and keeping it clean.
Simple care habits like cutting on good mats and storing your cutter safely will save you money and keep your blade sharp longer.
Proper Use
Proper blade care tips start with your cutting technique. Position your rotary cutter at a 45-degree blade angle against the ruler, maintaining steady fabric tension throughout each cut.
Respect layer limits by cutting no more than six fabric layers at once. Check your mat condition regularly – rough surfaces dull blades faster.
Apply gentle, consistent pressure while rolling the blade away from your body. These rotary cutter usage habits and cutting techniques protect your cutting tool longevity substantially.
Maintenance
Good cutting habits set the foundation, but regular rotary cutter maintenance keeps your blade performing like new.
Clean your blade after each project to remove fabric fibers and lint buildup. Mat cleaning prevents debris from dulling your edge prematurely.
Oiling blades at the pivot point guarantees smooth operation and prevents rust. Practice safe handling when inspecting for damage or stuck threads.
These simple blade care tips substantially boost performance. To avoid corrosion, consider proper storage techniques.
Master these sharpening techniques and blade storage methods to maximize your investment and keep your blade in good condition.
Sharpening and Replacing Blades
Even well-maintained blades eventually need sharpening or replacement. Rotary blade sharpeners exist, but they rarely restore original sharpness—replacement is usually better.
New blades actually need sharpening since manufacturing leaves them slightly dull. After three years of use, sharpening becomes more cost-effective than constant replacement.
Monitor your blade replacement frequency based on usage patterns and fabric types to maximize blade lifespan. A rotary blade sharpener may extend blade life.
- Keep replacement blades stocked for quick swaps
- Use sharpening tools for extending blade life
- Replace blades after major quilting projects
- Store sharp and dull blades separately
- Follow proper blade disposal methods for safety
Rotary Cutter Safety
Keeping yourself safe while using rotary cutters requires constant awareness of blade exposure.
Never leave that razor-sharp blade uncovered when you set your cutter down, even for a second.
Always engage the safety lock immediately after each cut to prevent accidental contact.
Protective gear like cut-resistant gloves can save your fingers from serious injury.
Many quilters swear by them, especially when working on detailed projects.
Always cut away from your body, maintaining proper cutting direction to avoid slips that could cause harm.
Secure storage means keeping cutters in protective cases or sheaths when not in use.
This prevents children and pets from accessing the blade while protecting the cutting edge.
**Consider a cutter with enhanced safety features for added protection.
**These blade safety precautions become second nature with practice, ensuring injury prevention remains your top priority during every quilting session.
Choosing The Right Rotary Cutter
The right rotary cutter can make the difference between smooth sailing and frustrating struggles in your quilting projects.
With so many rotary cutter brands and blade material options available, choosing wisely matters for both performance and your wallet.
Here are five key factors to keep in mind when selecting your rotary cutter:
- Cutter Size Selection – 45mm works best for most quilting tasks, while 28mm handles detailed curves and 60mm tackles thick layers
- Ergonomic Design – Look for comfortable grips that reduce hand fatigue during long cutting sessions
- Blade Type Differences – Standard blades suit cotton fabrics, endurance blades last longer, and pinking blades prevent fraying
- Brand Comparison – Fiskars and Olfa lead the market with reliable performance and wide blade availability
- User Reviews – Check feedback on blade quality and how different blade materials perform with your preferred fabrics
Considering various cutter dimensions is important for different project needs.
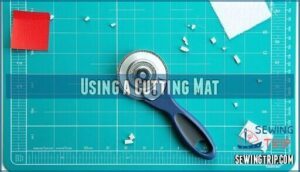
Using a Cutting Mat
Your rotary cutter blade’s best friend is a quality self-healing mat. These cutting mats create the perfect cutting surfaces that prevent blade dulling factors like rough textures or hard countertops.
Mat materials matter – look for self-healing varieties that close up after cuts, maintaining smooth surfaces longer. Place your cutting mat on a firm, level surface to prevent slipping during cuts.
This mat protection approach keeps both your blade sharp and your cuts accurate. The cutting mat impact on blade life is significant – blades last months longer with proper mats versus cutting on cardboard or wood.
Many options for purchasing a cutting mat are available online. For mat cleaning, wipe gently with soap and water after heavy use. Fabric lint buildup affects performance.
Mat longevity depends on care – store flat and avoid excessive heat. Mat alternatives like cardboard work temporarily but dull blades faster. Quality cutting mats pay for themselves through extended blade life.
Storing Rotary Cutters
Smart blade storage keeps your rotary cutter blades sharp and prevents accidents.
Keep your blades sharp and your fingers safe with proper storage habits.
Follow these storage tips for blade protection and safe placement:
- Lock the safety guard on your cutter before putting it away
- Use storage cases with felt lining to prevent blade damage
- Store loose blades in labeled pill bottles or blade containers
- Keep cutters upright in tool holders or magnetic strips
- Maintain child safety by storing all cutters in locked drawers
Proper blade storage extends blade life and prevents costly replacements while ensuring safety.
Disposing of Used Blades
When your rotary cutter blades lose their edge, proper disposal protects everyone from injury.
Never throw dull blades loose in the trash—they’re sharp enough to cut through garbage bags and harm sanitation workers.
Safe disposal starts with wrapping each blade in paper towels or taping them securely to cardboard.
This creates a protective barrier that prevents accidental cuts.
Store wrapped blades in dedicated blade containers like empty mint tins, pill bottles, or the original blade packaging until you’re ready to dispose of them.
For recycling options, contact your local scrap metal facility or recycling center.
Many accept rotary cutter blades as scrap metal, reducing environmental impact.
Some quilt shops also collect used blades for proper disposal.
Consider repurposing old blades as thread cutters before disposal—products like BladeSaver convert them into useful tools.
This extends their life and reduces waste.
Following proper blade disposal methods and sharps safety practices keeps your family, waste handlers, and environment protected while maintaining responsible blade changing habits.
Frequently Asked Questions (FAQs)
How long do rotary cutter blades last?
Sharp blades slice like butter, dull ones fight you every cut.
Your rotary cutter blades typically last several months with regular quilting, though batiks and thick fabrics will wear them out faster than cotton.
How long does a blade last?
Your blade’s lifespan depends on what you’re cutting and how often.
Most quilters get several months from one blade, though batiks and thick fabrics will dull it faster than regular cotton.
Where can I buy a 45mm rotary cutter?
Like finding the perfect coffee shop on every corner, 45mm rotary cutters are everywhere.
You’ll find them at craft stores like Jo-Ann’s, Michaels, or Hobby Lobby, plus online retailers like Amazon for convenient shopping.
Do you need a new rotary cutter blade?
You’ll know it’s time when cutting becomes difficult, threads stay uncut, or you’re pressing harder than usual.
Replace blades when they snag fabric or leave ragged edges instead of clean cuts.
How many layers can a rotary cutter cut?
You’ll slice through fabric, you’ll cut with precision, you’ll tackle multiple layers.
A sharp rotary cutter blade handles 6-8 layers of cotton fabric easily, thicker materials reduce capacity, but you’re still cutting efficiently through several layers, with a sharp rotary cutter blade being key to this process.
Why are my rotary cutter cuts not accurate?
Your cuts aren’t accurate because you’re likely using a dull blade, cutting too many layers at once, or not maintaining steady pressure against your ruler. Check your blade sharpness first.
How often should you replace rotary blades?
Sarah noticed her quilting cuts became ragged after completing three large projects.
You should replace rotary blades when they start pulling threads or require extra pressure.
Most quilters change blades every 2-4 quilts.
How long do rotary shaver blades last?
Rotary shaver blades typically last 12-18 months with regular use.
You’ll notice decreased performance when they start tugging or leaving stubble.
Replace them when shaving becomes uncomfortable or requires multiple passes for smoothness.
How long do sawmill blades last?
Sawmill blade lifespan depends on wood type, cutting volume, and maintenance.
You’ll typically get 8-12 hours of cutting time before resharpening.
Hardwoods dull blades faster than softwoods, while proper tensioning extends their life substantially.
Do titanium rotary cutter blades last longer?
Titanium blades are practically indestructible compared to standard steel ones.
They’re especially great for heavy-duty quilting projects, and you’ll get substantially more cuts before they dull, making them worth the higher upfront cost.
Conclusion
Sharp blades create clean cuts while dull ones destroy fabric—the difference is dramatic.
Understanding how long rotary cutter blades last helps you maintain quality results in every project.
Replace your blade at the first sign of skipping or fraying, typically after 20-40 hours of use.
Store cutters properly, use cutting mats consistently, and handle blades safely to achieve professional-looking cuts.
With these simple practices, you’ll keep your workspace organized and efficient.
- https://boardgamegeek.com/thread/623447/rotary-cutter-blade-life-span
- https://suzyquilts.com/quilting-rotary-cutters-a-complete-guide/?srsltid=AfmBOoqVW0WCw4n4M4ppv4QHJKYjrF4ibm-ZcKZDRlfPScLAnhOHo2zb
- https://www.quora.com/How-long-should-a-rotary-cutter-blade-last-Mine-keeps-going-dull-after-a-few-days-cutting-fabric
- https://olfa.com/pages/faq?srsltid=AfmBOooyTl7Hln0LsMKBEsuHdgTQ1toOKzQPVVwEg-pbhuRvpNMkuOct
- https://www.slingshotforum.com/threads/rotary-cutter-blades-how-many-cuts.28406/


