This site is supported by our readers. We may earn a commission, at no cost to you, if you purchase through links.

Cut pieces along the grain with sharp scissors, avoiding pulling or tugging the fabric. Pin sparingly since fleece doesn’t fray much, and consider using clips instead.
Keep your cutting mat clean to prevent snags, and always test your stitch settings on scraps first. Stay-stitch curved edges immediately after cutting to prevent distortion.
Press seams gently with steam rather than dragging your iron across the fabric. These fundamental techniques form just the foundation—mastering fleece requires understanding its unique behavior patterns and using the right tools, like a ballpoint needle, to achieve professional results with sharp scissors and by stay-stitch curved edges to prevent distortion.
Table Of Contents
Key Takeaways
- Use the right needle and settings – You’ll need a ballpoint needle (size 10-12) and should reduce your machine’s tension and presser foot pressure to prevent the fabric from getting pulled and distorted while sewing.
- Cut and handle fleece properly – You should cut pieces along the grain with sharp scissors without pulling the fabric, pin sparingly since fleece doesn’t fray, and consider using clips instead of pins.
- Stay-stitch curved areas immediately – You’ll want to sew a straight line about 1/2 inch from the raw edges right after cutting, especially on curves like necklines and armholes, to lock fibers in place and prevent stretching.
- Press gently and avoid dragging – You should use light steam with upward motions rather than dragging your iron across the fleece surface, and let each section cool completely before moving it to prevent unwanted stretching.
Buy Quality Fleece
Buying quality fleece sets the foundation for stretch-free sewing success. You’ll want to hunt for fleece fabric with high fiber density – that tight, compact weave that won’t budge under pressure.
Quality fleece with tight fiber density is your first line of defense against stretching disasters.
Run your fingers along the cut edge and feel for that solid, substantial texture. Look for anti-pill properties on the label. This feature keeps your fleece looking fresh after multiple washes and prevents those annoying little fuzz balls that scream "cheap fabric."
Check the blend composition too – 100% polyester polar fleece typically offers the best stability, though cotton blends can work if they’re well-constructed. To find what you need, you can explore fleece options.
Weight options matter more than you’d think. Medium-weight fleece strikes the perfect balance between warmth and manageability. Skip the ultra-lightweight stuff that stretches like taffy. Before committing to yards of fabric, do a quick colorfast testing by rubbing a damp cloth on an inconspicuous corner.
Quality fleece won’t bleed or fade, ensuring your finished project maintains its vibrant appearance while preventing stretching headaches during construction.
Layout and Cutting Tips
Smart layout and cutting choices set the foundation for stretch-free fleece projects, much like how a good recipe starts with proper prep work.
You’ll need to pay attention to the fabric’s nap direction and keep your workspace clean to avoid those pesky lint balls that can throw off your cuts, ensuring complete concepts are considered for a successful project.
Use With Nap Layout
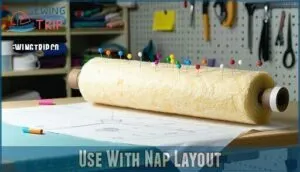
Think of fleece fabric like a pet’s fur – it all flows in one direction, and fighting against that nap direction while sewing fleece will cause your project to stretch and pucker. Following the nap line maintains visual consistency and prevents stretching during construction.
Like a well-behaved pet, fleece has a natural flow—work with it, not against it.
When placing your pattern pieces, you’ll need to pay attention to fabric grain and achieve proper pattern placement for cutting efficiency. The key to successful placement is to ensure that all pieces are aligned correctly with the fabric’s natural direction.
- Pin pattern pieces with all tops pointing the same direction on the nap line
- Use sharp pins placed perpendicular to cut edges for maximum stability
- Weight down patterns to prevent shifting while cutting through thick fleece fabric
- Mark the nap direction with chalk arrows before removing pattern pieces
This systematic approach to layout prevents fleece stretching and guarantees your finished garment maintains its intended shape and professional appearance. Understanding the importance of fleece nap is vital for a successful project.
Clean Lint Before Sewing
Fleece fabric sheds like a golden retriever in summer, creating lint buildup effects that’ll jam your machine faster than you can say "bobbin trouble."
Before sewing fleece, grab the best lint brushes and tackle those feed dogs, bobbin area, and needle plate. For superior results, consider using specialized sewing lint tools.
Machine cleaning frequency should increase when working with fleece – clean after every project to prevent stretching issues. Pre-wash fleece helps reduce shedding, while a dryer sheet minimizes static cling reduction.
Keep tissues nearby for lint removal during sewing. A clean machine prevents fabric stretching and guarantees smooth stitching throughout your project.
Mark and Baste First
Accurate markings serve as your roadmap when working with stretchy fleece fabric. Before you even thread your machine, grab fabric chalk or a washable marker to outline darts, pleats, and tucks on the wrong side of your fleece pieces.
This simple step prevents fabric stretching and keeps everything aligned. Smart sewers know that basting benefits extend beyond just marking.
Here’s your game plan:
- Mark construction details like darts and pleats clearly on the fabric’s wrong side using removable markers
- Baste critical areas with loose hand stitches to test fitting before committing to permanent seams
- Secure layers by hand-basting seam allowances together, especially on curves where fleece loves to shift
Test fitting through basting stitch work saves you from heartbreak later. Those temporary stitches prevent distortion while you check the fit.
Think of basting as your safety net – it’s easier to adjust loose hand stitches than rip out machine work on fuzzy fleece fabric.
Use Ballpoint Needles
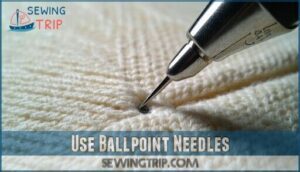
Right off the bat, you’ll want to swap out that regular needle for a ballpoint one when sewing fleece.
These specialized ballpoint needles are your secret weapon against fabric stretching and damage. Their rounded tips slip between fleece fibers instead of piercing them, preventing runs and snags that cause distortion.
Choose needle size 10 or 12 for most fleece fabric projects – they’re small enough to minimize holes while strong enough to handle the material. Major needle brands like Schmetz and Singer offer quality ballpoint needles designed specifically for knit fabrics.
Fresh needles work best since fleece dulls them quickly. When your needle starts skipping stitches or pulling threads, it’s time for a replacement. This simple switch prevents fabric damage and keeps your sewing tips arsenal sharp for successful fleece projects.
Reduce Tension and Pressure
After selecting the right ballpoint needles, your machine settings need fine-tuning to handle fleece fabric without causing fabric stretching or distortion. Think of your sewing machine like a gentle massage therapist – too much pressure creates tension, but the right touch works wonders.
Reducing thread tension and presser foot pressure prevents your fleece from getting yanked around like taffy. When these settings are too tight, you’ll fight fabric distortion with every stitch.
Here’s how to dial in perfect settings:
- Lower your thread tension to 2-3 on most machines for smooth, even feeding
- Reduce presser foot pressure by half to let fleece glide naturally underneath
- Increase stitch length to 3.0mm or longer to minimize fabric manipulation
A walking foot attachment provides extra support, acting like training wheels for tricky fleece projects. Your needle choice matters too – those ballpoint tips work best with relaxed tension settings.
This gentler approach keeps fleece behaving beautifully, preventing those frustrating puckers and waves that make projects look homemade rather than professional. Maintaining proper tension prevents thread breakage and puckering.
Reinforce Zippers and Buttons
After adjusting your machine settings, you’ll need to tackle those tricky closure areas.
Zipper interfacing becomes your best friend here – apply lightweight fusible interfacing strips behind zipper placement to prevent waviness and maintain stability.
Hand baste through this reinforcement before machine stitching for professional results.
Button stability requires extra attention too.
Use strong polyester thread and create firm anchor knots in the fleece fabric.
These reinforcement techniques keep your fastenings secure without distorting the surrounding material.
Always test your securing fastenings approach on fabric scraps first.
This simple step prevents disappointment and guarantees your zipper reinforcement and button reinforcement methods work perfectly for stretching prevention.
Finish Seam Allowances
Don’t let your fleece project unravel on you – finishing seam allowances is where the magic happens. Without proper seam finishing, fleece edges will shed fibers and create a messy appearance that screams "homemade disaster."
Serging Techniques work best with a 3-thread or 4-thread overlock stitch to contain those pesky fibers. If you don’t own a serger, Zigzag Stitching with a wide, dense setting does the trick. Pinking Shears offer a quick solution for lighter fleece, while Binding Edges with bias tape creates a professional finish.
Your seam finishing arsenal should include:
- Serging for the cleanest, most durable results
- Overcasting with zigzag stitches for everyday projects
- Pinking Shears for quick, no-fuss edge treatment
- Bias tape binding for decorative finishes
- Fray Prevention sprays for extra security.
Test different techniques on scraps first – your fleece will thank you later.
Press Lightly With Steam
Steam pressing fleece requires a gentle touch and the right iron settings to prevent stretching.
Set your iron to a low steam temperature – high heat will cause fabric melting and ruin your project faster than you can say "oops."
Test a scrap piece first to find the sweet spot between effective wrinkle removal and fabric damage.
When steam pressing fleece, use light upward motions rather than dragging the iron across the surface.
This technique helps with seam setting without flattening the soft pile that makes fleece so cozy.
Let each pressed section cool completely before moving it – rushing this step invites unwanted stretching.
Focus on stabilizing fleece seams and hems with brief steam bursts rather than prolonged pressing.
A fabric stabilizer or lightweight interfacing can help maintain shape during this process.
Remember, you’re coaxing the fibers into place, not wrestling them into submission.
Stay Stitch Crosswise
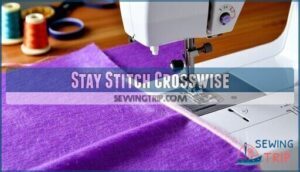
Right after you’ve pressed your fleece, it’s time to lock those fibers in place with stay stitching. This simple technique is your secret weapon for preventing distortion before it starts.
Sew a straight line about 1/2 inch from raw edges, working perpendicular to the grain direction. Focus especially on curved areas like necklines and armholes where fleece garment shaping matters most.
Stay stitching provides essential bias seam stability and curve control that’ll save you frustration later. Think of it as insurance for your project—a few minutes now prevents hours of fixing stretched-out seams.
For reinforcement stitching on tricky curves, add lightweight interfacing too. This crosswise stitching technique transforms wobbly fleece into manageable fabric that behaves beautifully.
Care Instructions
Your fleece fabric deserves the same TLC you gave it during sewing.
Turn garments inside out before washing—this simple trick prevents pilling and protects the soft surface.
Use a gentle cycle with cold water and mild detergent for best fabric care.
For drying methods, tumble dry on low heat and remove promptly to avoid wrinkles.
Between washes, tackle stain removal by dabbing spots with a damp cloth.
Store fleece items flat as your storage solution.
These laundry instructions will keep your cozy creations looking fresh for years, and following them will ensure you give your fleece the best care.
Frequently Asked Questions (FAQs)
Does Fleece stretch while sewing?
Yes, fleece stretches substantially while you’re sewing due to its knit structure.
You’ll notice it pulling and distorting easily, especially along curved seams.
This stretching can ruin your project’s shape and create uneven, wavy seams, which is why understanding fleece and its behavior is crucial to avoid uneven results.
What should I consider when sewing with fleece?
Choose quality anti-pill fleece with tight knit structure.
Use ballpoint needles, polyester thread, and longer stitch lengths.
Reduce presser foot pressure, sew slowly without pulling fabric, and add lightweight interfacing for stability.
How do you stretch a fleece?
Gently pull the fabric while it’s damp from washing, then stretch it in the direction you need.
You can also use steam from an iron to soften fibers before stretching by hand.
How do you sew Fleece?
Use ballpoint needles and reduce machine tension to prevent snagging.
Cut with sharp scissors, sew slowly with longer stitches, and don’t pull the fabric.
A walking foot helps feed layers evenly for professional results.
Is Fleece a good fabric for sewing?
Fleece’s a fantastic beginner-friendly fabric that won’t fray or ravel, making mistakes forgiving.
You’ll love its warmth, softness, and stretch.
Just manage the stretching with proper techniques, and you’ll create cozy, professional-looking projects easily, utilizing the fabric’s stretch.
How do you keep Fleece in place when sewing?
Stabilizing fleece requires strategic pinning and proper machine settings.
Pin perpendicular to edges, reduce presser foot pressure, and sew slowly without pulling.
A walking foot feeds fabric evenly, preventing unwanted stretching during stitching, which is crucial for stabilizing fleece.
How do you stabilize fleece for sewing?
Think fleece is as cooperative as a toddler at bedtime?
You’ll need lightweight fusible interfacing, cotton stabilizer underneath, or bias tape binding.
Lower your presser foot pressure and use stay-stitching within seam allowances.
What is the best sewing machine setting for fleece?
Set your machine to a longer stitch length, reduce presser foot pressure, and lower thread tension.
You’ll want a universal or ballpoint needle, plus consider using a walking foot to feed the fabric evenly.
How to keep fleece from shifting when sewing?
Use a walking foot to feed both fabric layers evenly.
Pin perpendicular to cut edges, not parallel.
Lower your presser foot pressure and sew slowly.
Keep fabric flat—don’t pull or guide it through the machine, and sew slowly.
How to stop stretch fabric from stretching while sewing?
Lower your machine’s tension and presser foot pressure, then use a walking foot with longer stitches. Don’t pull the fabric—let the machine feed it naturally while you guide gently.
Conclusion
Mastering fleece is like taming a gentle giant—it requires patience and the right approach.
You’ve now learned how to keep fleece from stretching while sewing through proper needle selection, tension adjustments, and careful handling techniques.
Remember to test your settings on scraps first, and don’t rush the process.
With these ten professional tips in your toolkit, you’ll create beautiful fleece projects that maintain their shape wash after wash, and happy sewing!


