This site is supported by our readers. We may earn a commission, at no cost to you, if you purchase through links.

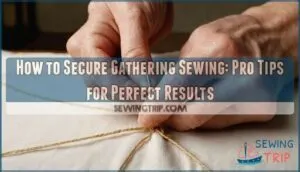
After creating your gathers by pulling the bobbin threads, pin the fabric to your pattern piece and match any notches. Here’s the key trick: place a pin at each end and wind the thread tails around it in a figure-eight pattern.
This creates a rock-solid anchor that won’t budge during construction. You can also tie off the threads with small knots or use temporary basting stitches to hold everything in place.
The secret lies in choosing the right securing method for your specific fabric weight and project requirements.
Table Of Contents
- Key Takeaways
- Gathering Techniques for Sewing
- Step 1: Prepare for Gathering
- Step 2: Sewing The Gathering Stitches
- Step 3: Creating The Gathers
- Step 4: Securing The Gathers
- Step 5: Finishing The Gathered Seam
- Tips and Techniques for Even Gathers
- Considerations for Different Fabrics and Projects
- Frequently Asked Questions (FAQs)
- Conclusion
Key Takeaways
- Anchor your gathering threads with pins – Wind thread tails around pins in a figure-eight pattern at each end to prevent slipping during construction
- Choose the right securing method for your fabric – Use temporary basting stitches for delicate materials, knots for standard fabrics, and pins for quick adjustments
- Test your gathers before final stitching – Gently tug the fabric to ensure threads won’t break and gathers stay evenly distributed throughout construction
- Remove gathering stitches after securing the seam – Once you’ve sewn the final seam with regular stitch length, carefully remove all temporary gathering threads for a clean, professional finish
Gathering Techniques for Sewing
You’ll find that gathering fabric for sewing requires a bit of patience, the right technique, and steady hands.
Perfect gathers come down to patience, proper technique, and knowing when your fabric’s ready to cooperate.
Mastering two-thread, three-thread, or zig zag over a cord methods guarantees your fabric gathers evenly, so you won’t have to wrestle with puckers acting up like stubborn socks in the laundry.
Two-Thread Gathering
Working with two-thread gathering gives you control over fabric fullness, whether you’re preparing a ruffled pillow or adjusting a skirt hem.
To get started, place two parallel gathering stitches within the seam allowance width, spacing each line about 1/8 inch from the fabric edge. Leave long thread tails for easy pulling, then gently adjust the gathers by sliding fabric along the threads.
Many sewers find success using a specific gathering stitch thread designed for this purpose.
Remember:
- Basting stitch placement shapes gathers
- Thread tail length makes adjustments easy
- Seam allowance width matters for neatness
- Keep your rows parallel for even secure results
Three-Thread Basting
While two-thread gathering works well for basic projects, three-thread basting gives you the ultimate control when working with tricky fabrics or precise seams.
You’ll sew three parallel gathering stitches spaced 1/8 inch apart within your seam allowance, creating more anchor points for even distribution. For supplies related to this specific technique, various online retailers offer specialized tools.
| Row Position | Thread Spacing | Tension Control |
|---|---|---|
| First row | 1/8" from edge | Low tension |
| Second row | 1/4" from edge | Low tension |
| Third row | 3/8" from edge | Low tension |
| Pull point | Bobbin threads | Gentle pressure |
| Securing stitches | All three rows | Even distribution |
This three-thread basting technique works like having extra hands holding your fabric. The additional basting stitches prevent puckering and give you backup threads if one breaks during manipulation.
When you’re ready for basting removal, simply snip and pull each gathering stitch carefully after securing your final seam.
Zig Zag Over a Cord
When thick fabrics fight back, zigzag over cord becomes your secret weapon.
Select perle cotton or light cording that matches your fabric weight—too thin and it’ll snap, too thick and your machine will protest.
Thread the cord through your clear embroidery foot, keeping it taut as you zigzag. Set your stitch width to 2.5mm for ideal cord coverage.
Pull the cord gently to create even gathers, then knot the ends. This robust gathering technique prevents those pesky holes that plague heavyweight materials while giving you precision control over fullness.
Step 1: Prepare for Gathering
Before you start gathering, you’ll need the right supplies and clearly marked fabric pieces to guarantee smooth, even results.
Think of this prep work like setting up your workspace before cooking – having everything ready makes the actual gathering process much easier and prevents frustrating mistakes later. Complete concepts and right supplies are key.
Gather Supplies and Tools
Before you start gathering fabric, you’ll need the right sewing supplies and tools to guarantee smooth results.
Fabric considerations and thread selection matter greatly, while marking tools help position your gathering stitch accurately. Machine settings should accommodate your chosen fabric weight.
Essential sewing tools for gathering success:
- Strong, high-quality thread – prevents frustrating breakage mid-project
- Sharp pins – secure gathers without damaging delicate fabrics
- Gathering foot attachment – transforms tedious hand-work into effortless machine gathering
- Fabric scissors – clean cuts mean professional-looking finished seams
For light to medium fabrics, machine gathering works particularly well.
Mark Gathering Areas on Pattern Pieces
Before marking your pattern pieces, lay them flat and identify gathering areas using triangles or notches printed on the pattern.
Transfer these pattern markings to your fabric using chalk, fabric pens, or washable markers for accurate placement, and mark both the start and stop points for your gathering stitch.
These marking tools guarantee proper notch alignment during fabric preparation, and dividing wide sections into quarters using additional marks prevents thread breakage and creates more even gathers using various sewing techniques and gathering methods.
Divide wide sections into quarters using additional marks – this prevents thread breakage and creates more even gathers using various sewing techniques.
Step 2: Sewing The Gathering Stitches
Now you’re ready to create the actual gathering stitches that’ll make your fabric cooperate.
Setting the right stitch length and positioning these stitches correctly will determine whether your gathers turn out smooth and professional or frustratingly uneven.
Choose The Right Stitch Length
Set your machine’s stitch length between 3-4mm for ideal gathering results.
This longer setting creates loose stitches that won’t break when you pull the threads.
Shorter stitches make gathering nearly impossible, while longer ones lack control.
The right stitch length depends on your fabric type and project needs, ensuring your gathering stitch works smoothly without frustrating snags.
Position The Stitches Within or Outside Seam Allowance
Positioning gathering stitches strategically determines your project’s final appearance and durability.
You’ll place these stitches based on your fabric’s weight and seam allowance options.
Consider these stitch placement guidelines:
- Within seam allowance – keeps visible stitch lines hidden after joining pieces
- Outside seam allowance – provides better fabric edge distance control for thick materials
- Project-specific placement – waistbands need different positioning than armholes
This stitch placement impact affects how your gathering techniques perform and whether your secure gathering stays intact through wear.
Step 3: Creating The Gathers
Now it’s time to pull those gathering threads and create your fabric’s new shape.
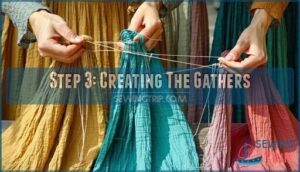
You’ll pull the bobbins thread tails from the wrong side of your fabric, working slowly to avoid breaking the threads as you scrunch the material into even gathers.
Pulling Bobbin Thread Tails for Even Gathers
Gently pull the bobbin thread tails from the wrong side, watching the fabric gather like magic under your fingers.
Pull gently and watch your fabric transform – gathering magic happens with patient fingers.
Keep an eye on Bobbin Thread Tension to Prevent Thread Breakage and make sure you’re Distributing Fabric Evenly. Verify proper bobbin case alignment for smooth sewing.
For best results, remember:
- Use strong thread for gathering fabric
- Secure gather ends before adjusting
- Choose Best Fabric Types for even gathers
Practice makes perfect in sewing gathering!
Adjusting The Gathers as Needed
Once you’ve pulled the bobbin threads and created initial gathers, you’ll need to fine-tune them for professional results.
Even distribution requires patience—move gathers along the stitching line with your fingers, checking that fabric folds appear uniform.
For wide pieces, consider sectioning fabric to prevent thread breakage during adjustment.
| Adjustment Technique | Method | Result |
|---|---|---|
| Finger Smoothing | Gently push gathers along stitch line | Creates even spacing |
| Sectioning Fabric | Divide wide pieces in half | Prevents thread breaks |
| Tacking Evenness | Use temporary basting stitches | Checks gather uniformity |
| Reinforce Seams | Add extra stitching row | Strengthens heavy fabric joins |
This securing gathers process transforms bunched fabric into controlled, attractive folds.
Your gathering advice should emphasize working slowly—rushing creates uneven gathers that’ll haunt your finished garment.
Remember, creating gathers is like kneading bread; gentle, consistent pressure yields the best results.
Step 4: Securing The Gathers
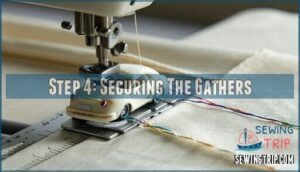
Once you’ve created your gathers, you’ll need to secure them properly to prevent all your hard work from unraveling.
Think of this step as putting the brakes on your fabric—without proper securing, those beautiful gathers can shift and become uneven during construction, which is why securing them is akin to applying the brakes.
Use Pins, Basting Stitches, or Knots
Once you’ve created your gathers, it’s time to lock them in place.
Pin placement at 1-2 inch intervals prevents shifting during sewing—place pins perpendicular to your seam line for easy removal.
Basting options include hand or machine stitches using contrasting thread for visibility.
Consider purchasing specialized pins for this task.
Knot tying at thread ends creates secure temporary holds, especially helpful with slippery fabrics that need extra grip, using contrasting thread for better visibility.
Ensuring The Gathers Are Secure
After pinning and knotting threads, test your gathering’s stability by gently tugging the fabric.
Strong reinforcement stitching prevents gathers from shifting during wear.
Check pin placement along seam lines, ensuring basting security holds everything in place.
Quality gathering techniques require double-checking knots won’t slip.
For tricky fabrics, consider using a specialty gathering foot.
This final inspection guarantees your gathering stitches will survive washing and daily use, creating professional seam finishes that last, with strong reinforcement and ensuring the gathers do not shift, which is a key aspect of quality gathering techniques.
Step 5: Finishing The Gathered Seam
Now that your gathers are secure, it’s time to sew along the seam line and remove any gathering stitches or cord.
This step locks everything in place, so your fabric stays gathered—no surprises at the next family dinner when your skirt suddenly un-gathers itself, which is why this step is crucial for a secure finish.
Sewing Along The Seam Line
Now you’ll carefully guide the fabric through your machine, sewing along the seam line with your regular stitch length.
Keep your seam allowance width consistent—typically 5/8 inch—while maintaining stitch placement accuracy.
Watch for fabric edge alignment as you sew, gently smoothing gathers with your fingers to prevent puckering.
This consistent stitching locks your gathering securely in place permanently, ensuring a professional finish with accurate seam allowance.
Removing Gathering Stitches and Cord (if Used)
Once your final seam is stitched, it’s time for thread removal and cord extraction—a little sewing clean-up that makes a big difference.
For a clean finish and to preserve fabric integrity, try these steps:
- Use a seam ripper or small scissors for easy gathering stitch removal.
- Snip and gently pull out threads, taking care with stitch visibility.
- If you used a cord, extract it smoothly to avoid seam allowance distortion.
- Double-check for puckers before calling your gathered seam finished.
This process is crucial for maintaining the quality of your work, ensuring that the final product looks professional and preserves fabric integrity.
Tips and Techniques for Even Gathers
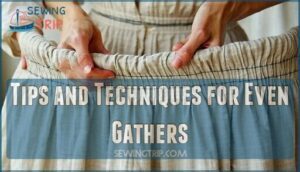
You’ll get the most even gathers by using three rows of basting stitches.
Adjusting them carefully with your fingers is crucial to achieve smooth and consistent fabric ripples.
It’s not magic, just a little patience and a steady hand to keep those fabric ripples smooth and consistent.
Using Three Rows of Basting Stitches
Three rows of basting stitches transform chaotic fabric into perfectly controlled gathers.
Set your stitch length to 4mm and space rows 1/8 inch apart within the seam allowance.
This triple-threat approach prevents thread breakage while giving you enhanced control over fabric manipulation.
| Row Position | Stitch Placement | Purpose |
|---|---|---|
| First Row | Edge of seam allowance | Primary gathering control |
| Second Row | 1/8" from first row | Even distribution backup |
| Third Row | 1/8" from second row | Preventing breakage insurance |
This gathering method creates a safety net—if one thread snaps, you’ve got two more keeping your gathers secure.
The parallel lines work together like a well-rehearsed dance team, ensuring even distribution across your fabric.
Pull gently from the bobbin threads, and watch your gathering techniques come alive with professional precision.
Easing With Three Rows of Basting Stitches
Most professional sewers swear by this triple-row technique for seamless sleeve installations and curved seams.
Position your basting stitches at ⅛", ¼", and ⅜" from the raw edge, maintaining proper basting stitch tension to prevent thread breakage.
This gathering method provides superior fabric distribution control, preventing skipped stitches during final construction.
When sectioning wide fabric, divide areas to avoid overwhelming single threads.
The three-row system offers backup security—if one line breaks, others maintain your gathers.
Always pull bobbin threads gently for even distribution, then secure with pins before reinforcing seams with your final stitching.
Considerations for Different Fabrics and Projects
Different fabrics require specific gathering approaches to prevent damage and achieve professional results.
When working with delicate or loose-weave fabrics, you’ll want to avoid traditional gathering methods that can cause tears or distortion.
Thick fabrics benefit from silk cording and zigzag stitching techniques that won’t create unsightly holes.
Avoiding Delicate or Loose Weave Fabrics
When gathering delicate fabrics, fabric choice becomes your best friend or worst enemy.
These fragile materials can’t handle traditional gathering methods without sustaining damage:
- Sheers and chiffons
- Delicate laces
- Open-weave knits
- Loose crochet work
- Lightweight silks
Instead of risking permanent holes, consider interfacing options or alternative methods like stay-stitching for stabilizing weaves before gathering.
Beginners often find success with easy to handle cotton fabrics, which are a more forgiving material for those new to gathering delicate fabrics.
Using Silk Cording and Zig Zag Stitch for Thick Fabrics
While standard gathering works for most materials, thick fabrics demand a different approach.
Silk cording paired with a zigzag stitch creates smooth, controlled gathers without the bulk of multiple thread rows.
For stretchy fabrics, the zigzag stitch is ideal because it accommodates stretching without breaking the thread.
| Setting | Recommended Value | Purpose |
|---|---|---|
| Cord Material Choice | Silk or cotton | Prevents fabric damage |
| Stitch Width Settings | 2.5-3mm wide | Covers cord completely |
| Tension Adjustment Tips | Slightly looser | Easier fabric manipulation |
| Fabric Hole Prevention | Single cord pass | Minimizes needle marks |
| Cord Removal Methods | Pull gently after seam | Clean finish |
Position your silk cording along the gather line, then zigzag over it using a wide stitch.
The cord acts like a drawstring—pull it to create even gathers across thick fabrics.
This method prevents the fabric holes that multiple basting rows can create.
Once you’ve sewn your seam, simply remove the cord for gathering securely without permanent marks.
Frequently Asked Questions (FAQs)
What is gathering in sewing?
Because sewing fabric flat is just too easy, you’ll use gathering to bunch up fabric, creating soft, controlled folds.
You’ll reduce fabric width, usually for skirts or sleeves, adding fullness and a touch of drama.
How do you sew a gather?
Set your machine to the longest stitch length, sew two parallel lines within the seam allowance, then pull the bobbin threads to create even gathers.
What are sewing fabric gathering techniques?
You’ll master three core techniques: two-thread gathering uses parallel basting stitches within seam allowances, three-thread adds extra control, and zigzag-over-cord works best for thick fabrics.
How do you sew a gathered fabric?
You’ll gather fabric by sewing two parallel basting stitches, then pull the bobbin threads to create even folds.
Pin the gathered piece to your flat fabric, matching notches, and stitch permanently with regular length stitches, ensuring a secure and even gathered piece.
What can you do with a gathered fabric?
You can transform gathered fabric into stunning skirt tiers, flowing sleeves, decorative ruffles, elastic waistbands, curved seams, feminine necklines, and dramatic costume elements that add volume and movement.
Why should you learn sewing fabric gathering techniques?
Ever tried fitting a mountain into a suitcase?
Learning fabric gathering lets you control fullness, shape, and fit in your sewing.
You’ll discover new designs, make clothes look professional, and avoid fabric bunching disasters.
How to secure a gathering stitch?
Pin your gathered fabric to the flat piece, matching notches. Wind thread tails around a pin in figure-eight pattern. Stitch with regular length, then remove gathering threads.
What is the best way to sew gathers?
Start by sewing two or three long, parallel basting stitches inside the seam allowance, using a loose tension.
Gently pull the bobbin threads to bunch the fabric, then spread the gathers evenly, like ruffling a pie crust.
How do you fix uneven gathers after securing?
Like untangling Christmas lights, you’ll need patience and gentle hands. Remove securing stitches, redistribute gathers by sliding fabric along basting threads, then re-secure with pins before stitching again.
What tension settings work best for gathering stitches?
Set your machine’s tension low, around 2–3, so threads glide easily when you pull to gather.
This helps prevent thread breakage.
If you crank tension too high, you’ll wrestle with stubborn, uneven gathers—no fun!
Conclusion
Ever wonder why your gathers slip out just when you need them most?
Mastering how to secure gathering sewing means your hard work stays put, whether you’re tackling delicate voile or sturdy denim.
Use pins, knots, or basting stitches, and always match your method to your fabric.
Remember, patience pays off—adjust gathers evenly and anchor those threads well.
With these pro tips, you’ll never have to chase runaway gathers again.
Your projects will look neat, polished, and professional.


