This site is supported by our readers. We may earn a commission, at no cost to you, if you purchase through links.
Grab a regular needle and canvas will snap it in half before you finish a single seam. That’s not bad luck, that’s physics. Canvas fights back, thick fibers, tight weave, and stubborn layers that chew through standard machine setups.
Bags, awnings, slipcovers, anything built from canvas needs to survive years of stress, sun, and rough handling. Get the setup wrong and you’ll fight skipped stitches, puckered seams, or a machine that jams every few inches.
Learning how to sew canvas the right way means matching your tools, tension, and technique to the fabric from the very first stitch. Grab your needle and let’s get your machine ready to punch through canvas like it’s nothing.
Table Of Contents
Key Takeaways
- Use a heavy-duty needle (size 90/14 to 100/16) with polyester thread and a walking foot, since regular needles and thin thread will bend or snap under canvas’s thick, tight-woven fibers.
- Prep your canvas first by prewashing to prevent shrinkage, pressing wrinkles flat, rolling instead of folding, and cutting clean edges with the grain to keep seams strong.
- Dial in your machine settings before sewing: a 3.0-3.5mm stitch length, tension set around 5, reduced presser foot pressure, and a slow sewing speed to avoid puckering, skipped stitches, or needle heat buildup.
- Finish seams with techniques like flat-felled or double-stitching, topstitching, and edge treatments (pinking shears, bias binding, edge sealing liquid) to lock in strength and prevent fraying over years of use.
Choose Canvas Sewing Supplies
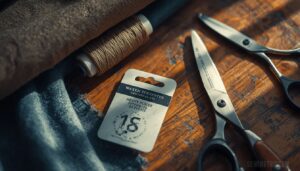
Canvas doesn’t forgive the wrong tools, so grab gear built for the job. Regular needles bend, thin thread snaps, and dull scissors just fight you the whole way. Here’s exactly what to reach for before you sit down at the machine.
Heavy-Duty Needles
Grab a Jeans or Universal needle in size 90/14 to 100/16 before you sew canvas—regular needles bend fast. Thicker shafts (0.9–1.2mm) resist flex under pressure. Look for chrome or titanium coatings to cut friction and keep points sharp longer. High carbon steel gives you durability, and a sharp point (like a denim needle) punches through heavyweight fabrics clean, no snagging.
If you’re still fighting skipped stitches or broken needles, this guide on common issues when sewing canvas walks through fixes beyond just picking the right needle.
For even more challenging materials, you can use heavy duty sewing needles to help with better fabric penetration.
Strong Polyester Thread
Pair that needle with heavy-duty polyester thread, size 40 or a 30/2 to 54/3 count. Polyester beats cotton for tensile strength and abrasion resistance, so seams hold under years of stress.
Core-spun construction boosts knot security, and colorfastness stays strong in direct sunlight, no fading, no bleeding onto your canvas dyes. It’s tough stuff, built for the long haul.
Presser Foot Options
Now, about that presser foot. A walking foot feeds thick canvas layers evenly, no shifting, no bunching. For zippers or piping, switch to a zipper foot for tight, precise stitching along the teeth.
Sewing vinyl or waterproof canvas? A Teflon or roller foot glides right over sticky spots without snagging. Match the foot to the job, and your seams stay clean.
Cutting Tools
Once your foot’s set, it’s time to cut. Use a rotary cutter for straight, clean lines through sturdy material—shear action mechanics matter here, so keep blades sharp.
Dull edges snag threads and fray canvas fast. Mark lines with fabric chalk, then use an awl to poke clean guide holes. Tool material durability counts too: carbide blades hold their edge longer than standard steel.
Clips Instead of Pins
Ditch the pins on this stuff—canvas fights back with every poke. Clips avoid pinholes that weaken heavy duty thread seams, and they grip slippery fabric without shifting.
They handle:
- Thick layer clamping
- Curved seams
- Bias edges
- Coated fabric protection
- Fast setup for sewing supplies
Reusable, color-coded, one-handed—clips speed your workflow while you sew canvas with confidence.
Prepare Canvas Before Sewing
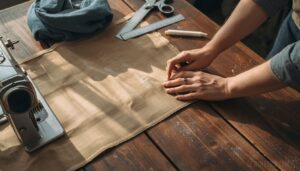
Grab your canvas before you touch that machine. A little prep now saves you big headaches later, trust me. Here’s exactly what you need to do first.
Before firing up your sewing machine, brush up on the basics with this step-by-step guide to mastering the blanket stitch, so your edges look clean from the start.
Prewash Cotton Canvas
Skip this step and your seams will fight you later. Toss canvas in cold water first—shrinkage prevention matters more than patience.
| Skip Prewash | Prewash First |
|---|---|
| Shrinks after sewing | Shrinks before cutting |
| Bleeds color | Sets color |
| Stiff drape | Relaxed fiber drape |
Cold water temperature limits fiber distortion. Air dry flat, then you’re ready to sew canvas with sturdy material that behaves.
Press Wrinkles Flat
Grab your iron and clamp that canvas to a sturdy board—flat pressure is what tames the wrinkles here. Six seconds of steady heat cuts edge curl by 40%. Use a damp pressing cloth for even heat transfer and no scorching.
- Preheat iron to canvas setting
- Steam lightly, close but not soaking
- Press firm, hold steady
- Cool fully before moving
Roll, Don’t Fold
Once your canvas is pressed, don’t crease it right back with folds. Roll it instead—fold lengthwise into a narrow strip first, keep edges aligned, then roll edge to edge with even tension. This keeps wrinkles out and preps your fabric for clean, accurate cuts before you touch sail needles, heavy duty thread, or start any seam construction.
Cut Clean Edges
A ragged edge tells on you later, right through the seam. Use sharp shears or a rotary cutter, cutting with the grain to stop fibers from feathering.
Score a light guide line first, then finish with firm, steady pressure—no sawing. Blade geometry matters here: a clean edge now means less fraying once heavy duty thread and needle start their work.
Test on Scraps
Never trust a full seam to guesswork. Before cutting into your main piece, sew a few test seams on scraps to check stitch length, tension balance, and needle compatibility.
Watch how the canvas responds, feel for thread resistance, then adjust your machine. This quick trial run saves fabric, builds confidence, and confirms your setup delivers strong, durable seams.
Set Up Your Machine
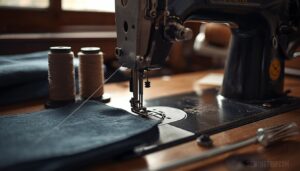
Your canvas is prepped and ready, but your machine needs a little attention too. Thick fabric like this pushes a regular setup past its limits fast. Here’s what to adjust before you sew a single stitch.
Needle Size 90/14–100/16
Two numbers matter more than any other setting here: 90/14 and 100/16. That’s Metric vs US sizing on the same needle, and shaft thickness runs 0.90mm to 1.00mm. Thicker shafts resist bending and prevent fabric pitting.
Pick a Universal or Sharp point, and let the larger eye handle heavy duty thread without shredding.
Stitch Length 3.0–3.5mm
Got your needle sorted? Good, now dial in stitch length.
Set your machine to 3.0 to 3.5mm. This range hits the sweet spot between seam strength and fabric flexibility, no puckering, no perforating canvas like a cheese grater.
- Boosts thread lock on canvas sails
- Balances stitch density with drape
- Improves abrasion resistance at stress points
- Reduces fabric puckering
- Strengthens durability without stiffness
Adjust Thread Tension
Stitch length set, now check tension. Set your dial to 5 for heavy canvas, then test on scraps first.
Threading matters most: thread with the presser foot up so discs grip properly. Peek underneath your stitches. Loops showing on top? Tighten slightly. Bobbin thread showing? Loosen. Upper bobbin balance keeps stitches even and stitch density consistent, protecting long-term material durability.
Reduce Presser Foot Pressure
Tension’s dialed in, so ease up on the foot now. Find your pressure dial or lever, and back it off slightly from your normal setting.
Lower pressure means less fabric drag, fewer crushed fibers, and no seam puckering.
- Locate the pressure adjustment
- Loosen it a notch
- Test on scraps
- Watch for smoother feed
Got a bulky overlock foot or walking foot? Pair it here for better layer compression control.
Sew Slowly
Ease off the gas pedal on this one. Canvas punishes speed—rushing builds up needle heat fast and leads to skipped stitches or puckered seams.
Sew in short, steady runs. Pause between passes, let the fabric settle, then continue. This deliberate pace protects stitch accuracy and keeps stitch length consistent from start to finish, no worries about wonky seams later.
Sew Canvas Step by Step
Your machine’s set up and your canvas is ready to go. Now it’s time to put needle to fabric and build seams that actually hold. Here’s the process, step by step.
Mark Seam Lines
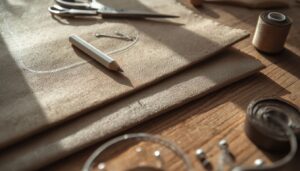
Grab a chalk pencil or water-soluble marker and pick one with high contrast against your canvas color, so the line stays visible the whole time you’re sewing.
Draw straight seam lines to match your pattern, and use a French curve for any curved edges.
Mark both fabric layers so they line up, then baste or pin to double-check accuracy before stitching.
Start With Test Seams
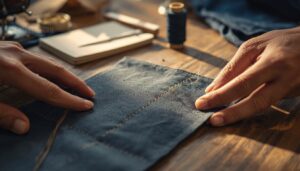
Before you touch your real project, run a quick test seam on scrap canvas cut to the same weight and finish. Try your thread tension and needle size together, watching for puckering. Simulate stress by tugging the seam hard.
Record your settings and results so you can reproduce that perfect stitch later, no worries!
Guide Fabric Gently
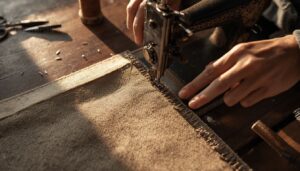
Canvas doesn’t like to be rushed. Poke it, and it fights back with puckers and skipped stitches.
A walking foot feeds top and bottom layers evenly, so nothing shifts mid-seam. Keep both hands steady, guiding fabric along your marked line without pulling. Lift the needle between direction changes to avoid snagging. Spray adhesive or scrap stabilizer underneath keeps slippery layers locked together while you stitch slow and sure.
Press Each Seam
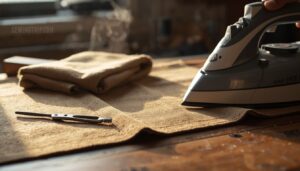
Your seam won’t lay flat on its own, so give it a hot press right after stitching, before moving to the next row.
Steam softens canvas fibers and knocks down puckering fast. Press open for lighter goods, or to one side for max strength on heavy panels. A tailor’s ham helps curved seams. Use a pressing cloth to avoid shine or scorch marks.
Topstitch for Strength
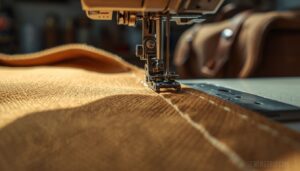
Two rows beat one every time. Set stitch length to 3.0-3.5mm and space your lines 1/4 to 3/8 inch apart for real parallel stitching benefits.
- Distributes stress evenly
- Adds bar tack reinforcement at corners
- Boosts tension balance
- Locks in edge integrity
Sew slow, watch stitch density, and keep that heavy duty thread flowing smooth through your machine.
Finish Strong Canvas Seams
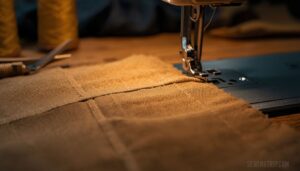
Your seams are sewn, but the job’s not done yet. A raw edge on canvas will fray fast without the right finish. Here’s how to lock every seam down for the long haul.
Flat-Felled Seams
Fold your raw edge under, tuck it inside the seam, and stitch it flat — that’s the whole trick behind a flat-felled seam. No exposed threads, no fraying, just a clean, professional workwear finish.
Fold the raw edge under and stitch it flat—a flat-felled seam means no fraying, just a clean, lasting finish
The two stitch lines spread stress across the fabric, giving you serious tear resistance right where canvas gear takes a beating: straps, bags, seat edges.
Sturdy, simple, and built to last.
Double-Stitched Seams
Not every seam needs folding under. Sometimes two straight lines of stitching, running 1/8 to 1/4 inch apart, do the job just fine.
Stitch your first line, then add a second parallel row. Backstitch both ends to lock threads.
This boosts tensile strength and guards against seam blowout on load-bearing spots like straps or bag bottoms — simple, durable, and clean enough for workwear.
Hemming Thick Edges
Once your seams are locked in, thick edges need their own game plan. Grab a walking foot so multiple canvas layers feed evenly, no bunching.
Fold once, sew a triple stitch for extra hold, and keep tension moderate to stop rippling.
A specialized hem foot or edge binding strip finishes raw edges clean, giving that hem real staying power against wear.
Prevent Fraying
Raw canvas edges love to fray, so seal them fast. Pinking shears slice a zigzag that slows fraying instantly, or run an overcast stitch along the edge for extra grip.
Bias binding wraps edges completely, while edge sealing liquid locks stray threads with a flexible coat. Add interfacing near vulnerable spots, and your heavy duty thread stays put, seam allowance intact.
Troubleshoot Skipped Stitches
Why does canvas skip stitches when everything looked fine on cotton? Usually it’s needle timing or a bent needle throwing off bobbin hook alignment.
Swap in a fresh needle, rethread completely, clear lint from the plate, then test on scraps.
Balance thread tension, add stabilizer if puckering hides the problem, and repeat until your sewing machine runs clean, consistent stitches with heavyduty thread.
Frequently Asked Questions (FAQs)
Can I sew canvas with a regular sewing machine?
Yes, for light to medium jobs. Grab a heavy duty needle and heavy duty thread, and don’t rush it. Frequent thick canvas work? An industrial machine or walking foot saves your motor from strain.
How hard is it to sew canvas?
Tough as canvas, but not a tall order once you get the hang of it. Fabric density and machine capability matter most — heavier weaves demand stronger needles and steady hands, but with practice, this sewing skill becomes second nature.
What kind of sewing machine do I need to sew canvas?
Grab a machine with a heavy-duty motor and metal frame rigidity for stability. A walking foot prevents slipping, while industrial or servo motor control options handle multiple canvas layers without skipping stitches or bogging down mid-seam.
What do I need to sew canvas?
A 100/16 needle can pierce six canvas layers without snapping, surprising most beginners. You’ll need needle durability, heavy thread weight polyester, a machine with real machine capacity, a walking foot, and fabric clips instead of pins for accurate, distortion-free stitching.
Can you sew canvas with a sewing machine?
Your home machine copes medium canvas just fine with a sturdy 90/14 needle and polyester thread. Heavier canvas strains regular machines though, so an industrial machine prevents motor burnout, skipped stitches, and needle damage on thick, multi-layer stitching patterns.
How to cut the canvas for a sew-on patch?
Back your canvas with matching-weight stabilizer first, then trace with chalk. Use a rotary cutter for clean lines, round corners at 1/4 inch, and deburr edges with a seam roller before stitching your patch.
How do you sew canvas?
Taming canvas is like breaking a wild horse: fight it and it fights back. Work with its grain instead.
Match heavy-duty needle and thread, use a walking foot, sew slow, strengthen stress points, and press seams flat for lasting strength.
Should you learn to sew canvas?
Yes, absolutely worth it. You’ll gain durable upholstery and repair skills, save on tailoring costs, and try out creative projects like tote bags or boat cushions. Modest equipment investment, big payoff in confidence and control over heavy-duty textile work.
Is canvas difficult to sew?
Think of canvas like a stubborn old rope: tough, but not unbeatable once you know its knots. Fabric density and thickness challenge your machine, causing seam bulk, but the right needle, thread, and patience make it totally manageable.
Do you need a special needle to sew canvas?
Grab a denim needle for its reinforced shaft, or a microtex for precision on tight weaves. Leather needles work too. Sailmaker hand needles help with thick layers. Match thread and needle to avoid bending, skipped stitches, or breakage.
Conclusion
A flat-felled seam is a small flag planted in tough fabric, proof you tamed something that fights back. That’s the real reward when you learn how to sew canvas: not just a bag or awning, but a seam built to shrug off wind, sun, rough handling, and years of hard daily use. Your needle broke a sweat, your thread held the line, and now that stubborn old canvas won’t quit on you. Stitch on, friend.
- https://www.heidiproffetty.com/post/nohasslesewingcanvas-needlepunchfabricusingsewingmachine-diyflatwarepockettutorial
- https://www.selvane.co/blogs/knowledge/canvas-bag-construction-reinforcement-and-finishing
- https://www.canvasetc.com/diy-heavy-duty-canvas-log-carrier
- https://www.craftsy.com/post/sewing-with-canvas
- https://weallsew.com/tips-for-sewing-heavy-fabrics