This site is supported by our readers. We may earn a commission, at no cost to you, if you purchase through links.
You’ll need a heavy-duty needle, longer stitches, and slower sewing speed to prevent thread melting from needle friction.
Use a walking foot for even feeding and choose polyester thread for strength.
The key lies in adjusting your stitch length based on neoprene thickness – thicker material needs longer stitches to maintain stretch.
Start with test scraps to find your machine’s sweet spot, as tension and timing matter more than with cotton or polyester fabrics.
Master these fundamentals and you’ll discover specialized seaming methods that create professional waterproof results.
Table Of Contents
Key Takeaways
- You’ll need a heavy-duty needle (16/100 or 18/110), walking foot attachment, and polyester thread to handle neoprene’s thick, stretchy properties without breaking or skipping stitches.
- Use longer stitch lengths (3-3.5mm) and slower sewing speeds to prevent thread melting from needle friction while maintaining flexibility in your finished seams.
- Test your machine settings on fabric scraps first since neoprene’s thickness requires adjusted tension and timing that differs significantly from regular cotton or polyester fabrics.
- Apply neoprene contact cement to seams before stitching, then add seam tape for waterproof bonds that won’t fail under stress or water exposure.
Sewing Neoprene Basics
Working with neoprene requires specific tools and techniques to handle its thick, stretchy nature successfully.
You’ll need heavy-duty needles, strong thread, and the right machine attachments to create professional-looking seams that won’t fail under stress.
Choosing The Right Thread
When sewing neoprene, thread material selection determines seam strength and durability.
Choose 100% polyester or bonded nylon thread for superior UV resistance and mold prevention. Heavy thread weight like 69 bonded nylon handles neoprene’s thickness best.
Match thread color to your neoprene fabric for professional results. These synthetic threads resist saltwater and chemicals better than cotton options.
For outdoor applications, polyester offers better UV resistance.
Selecting Heavy-Duty Needles
Needle selection makes or breaks your neoprene sewing success.
Use universal needles sized 16/100 or 18/110 for standard 3mm neoprene fabric.
For thicker material over 4mm, step up to 120/19 or 130/21 sizes.
Denim needles work great too, providing extra piercing power for your sewing machine.
Test different needle point types on scraps first – this prevents damage and guarantees proper neoprene stitching throughout your project.
Selecting the correct needle also depends on your sewing machine’s system for a successful sewing machine setup.
Using Walking Foot or Knit Foot Attachments
Your sewing machine needs help handling neoprene’s thick, sticky surface.
A walking foot grips both fabric layers, ensuring even feeding and preventing slippage that causes puckering.
If you don’t have one, try a knit foot attachment.
Both improve fabric handling and stitch quality by maintaining consistent pressure, making your neoprene sewing projects smoother and more professional-looking.
Many sewists rely on specific neoprene options for these projects, utilizing a walking foot to ensure the best results.
How to Sew Neoprene
Successfully sewing neoprene requires mastering specific techniques that accommodate this stretchy, waterproof material.
Neoprene sewing success depends on understanding this unique material’s stretchy, waterproof properties and adjusting your technique accordingly.
Your sewing machine becomes your best friend when you understand neoprene’s unique properties and adjust your approach accordingly. Neoprene projects demand patience and precision, but the results showcase exceptional neoprene durability.
Key steps for successful neoprene sewing:
- Prepare your workspace – Use a clean, flat surface and keep neoprene glue nearby for reinforcing seams
- Test settings first – Always practice on scraps to determine ideal stitch tension and seam finishes
- Consider material thickness – Thicker neoprene requires different sewing techniques than thinner versions
Neoprene Sewing Techniques
Once you’ve mastered the basics of sewing neoprene, you’ll need specific techniques to handle this unique material’s stretchy, thick properties.
These advanced methods will help you create professional-looking seams, add functional zippers, and work with commercial patterns designed for wetsuit-style construction, utilizing advanced techniques to achieve the desired outcome.
Working With Commercial Patterns
Most commercial sewing patterns aren’t designed for neoprene’s unique stretch and thickness.
You’ll need significant Pattern Adjustments to accommodate the fabric’s behavior. Reduce Seam Allowances by half since neoprene doesn’t fray.
Pay attention to Grainlines – neoprene stretches differently across directions. Test Pattern Matching on scraps first.
These neoprene sewing techniques guarantee your sewing patterns work perfectly with stretchy materials.
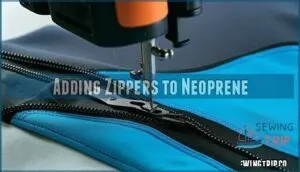
Adding Zippers to Neoprene
Zipper placement on neoprene requires precision since this material doesn’t fray when cut.
Use fabric adhesive to secure waterproof zippers before stitching, preventing movement during sewing. Consider zipper length carefully – it should exceed the opening slightly for easier installation.
Heavy-duty needles and polyester thread handle neoprene thickness effectively. These neoprene sewing techniques guarantee durable seams that withstand water exposure and stretching.
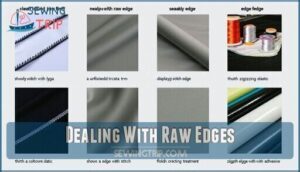
Dealing With Raw Edges
Raw edges on neoprene don’t fray, making them surprisingly low-maintenance. Unlike cotton fabrics that unravel, neoprene’s synthetic structure stays intact when cut.
This natural characteristic means you can often skip traditional edge finishing techniques. However, neat cutting becomes critical since exposed edges remain visible throughout your project’s lifetime.
Here are key approaches for handling neoprene’s raw edges:
- Leave edges unfinished – Perfect for sport accessories and tech pouches where flexibility matters most
- Add Lycra binding – Reduces chafing on close-to-skin items while providing professional appearance
- Apply neoprene adhesive – Creates waterproof seal that prevents edge breakdown from heavy use
- Use zigzag stitch along edges – Adds strength without compromising the fabric’s natural stretch
- Try fold-over elastic – Offers comfortable edge finishing that moves with neoprene’s flexibility
Your sewing machine handles these edge finishing options well with proper needle selection. Consider neoprene thickness when choosing your approach – thicker materials benefit from binding or sealing for edge durability.
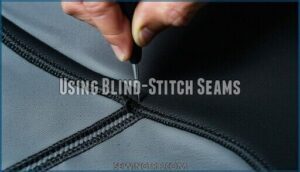
Using Blind-Stitch Seams
When you’re tackling thick neoprene projects, blind-stitch seams offer unmatched waterproofing strength and seam concealment.
This stitching technique involves gluing panels first, then using curved needles that penetrate only partway through the material.
Unlike zigzag stitch methods, blind-stitching creates invisible, waterproof connections perfect for wetsuit applications and thick items, making your sewing machines work like professional manufacturing equipment.
For ideal results, remember to use precise color matching to maintain invisibility, ensuring a professional finish with waterproof connections.
Neoprene Stitch Options
Selecting the right stitch type makes the difference between professional-looking neoprene projects and frustrating failures.
You’ll need to match your stitch choice to the specific demands of your project, whether it’s comfort, durability, or waterproofing.
Flatlock and Zigzag Stitches
Flatlock advantages shine when you need durable neoprene seams that won’t bulk up under your wetsuit.
These stitches create flat, comfortable connections by overlapping fabric edges directly.
Zigzag variations offer excellent stretch compatibility with your sewing machines, preventing thread breakage during movement.
Both stitch applications work well for different comfort considerations – flatlock for professional-grade seam durability, zigzag for flexible stretch fabric projects requiring basic sewing tips when sewing with neoprene.
Overlock Stitches
Overlock stitches provide excellent durability for neoprene seams but create noticeable seam ridges that can feel uncomfortable against skin.
You’ll need binding options or comfort binding techniques to smooth these raised areas.
While overlock alternatives like flatlock stitches offer better comfort, overlock remains ideal for heavy-duty applications.
To achieve a professional finish, remember to trim excess fabric after sewing.
Consider your project’s comfort requirements when choosing between overlock durability and user comfort for stretch fabric projects.
Increasing Stitch Tension
Proper tension troubleshooting prevents frustrating thread breaks and skipped stitches when working with thick neoprene fabric.
You’ll need to adjust your sewing machine tension settings to accommodate neoprene’s unique properties. Here’s what to watch for:
- Seam puckering indicates excessive tension pulling fabric layers
- Fabric feeding issues show insufficient pressure on material
- Thread breaks signal overly tight upper tension settings
Test adjustments on scraps before sewing neoprene clothing or neoprene accessories to avoid costly mistakes.
Tips for Neoprene Projects
You’ll find several advanced techniques can transform your neoprene projects from amateur attempts into professional-quality results. These finishing methods guarantee your creations stay watertight, durable, and comfortable to wear.
Gluing Seams for Waterproofing
Beyond stitch selection, neoprene adhesives boost seam lifespan through proper gluing technique. Apply neoprene contact cement to both surfaces, wait 5-10 minutes, then press together firmly.
This adhesive application creates waterproof bonds that complement your stitching. For best results, consider using quality cement.
Triple-glued seams offer maximum durability for wetsuit repair projects. Quality neoprene accessories and neoprene clothing benefit from these waterproofing methods alongside your sewing supplies.
Taping or Sealing Seams
After gluing your seams, you’ll want to add seam tape for maximum waterproofing methods and durability enhancement.
Professional wetsuit repair relies on neoprene tape applied with heat or contact cement to create watertight bonds.
Choose your sealing application based on project needs:
- Melco tape – Industry standard for DIY neoprene projects and sewing machine repairs
- GearAid Tenacious Tape – Flexible option for neoprene bags and cases requiring stretch
- Iron-on tapes – Quick aesthetic considerations solution for less flexible areas.
Different seam tape types offer varying waterproofing performance up to 5,000mm hydrostatic pressure.
Embroidering on Neoprene
Embroidering on neoprene requires proper preparation to achieve professional results.
Use cutaway stabilizer types to support the stretchy fabric during stitching.
Select ballpoint or stretch needles for sewing machine needles to prevent fabric damage.
Choose polyester thread for durability and flexibility.
Hoop techniques should apply gentle tension to avoid distorting the material.
Design considerations include simpler patterns that won’t stress seams in neoprene bags and neoprene crafts, enhancing your sewing skills through focused sewing tutorials.
Working With Neoprene and Other Materials
Combining neoprene with other fabrics requires careful fabric compatibility assessment and adhesive selection.
Match material thickness between layers to prevent bunching, and consider texture considerations for smooth sewing machine operation.
Choose compatible fabrics like fleece or cotton for neoprene cases and neoprene crafts.
Test adhesive bonds on scraps before final project application to confirm proper bonding with your sewing machine supplies.
Proper fabric grain alignment helps prevent distortion.
Frequently Asked Questions (FAQs)
How hard is it to sew neoprene?
Sewing neoprene isn’t extremely difficult, but it requires specific techniques and equipment. You’ll need heavy-duty needles, walking foot attachment, longer stitches, and strong thread for best results.
What is the hardest material to sew?
Like wrestling with iron-clad armor, tackling leather stands as sewing’s ultimate challenge. You’ll face tough, thick hides that demand heavy-duty needles, specialized feet, and serious machine power to conquer.
Can you wash neoprene in washing machines?
Yes, you can wash neoprene in washing machines, but use cold water and gentle cycle settings. Skip fabric softener and bleach. Air-dry completely since heat damages neoprene’s flexibility and structure.
How do you prevent neoprene from stretching?
Don’t put the cart before the horse when handling neoprene. Use longer stitch lengths around 3-5mm, increase stitch tension, and employ a walking foot to prevent stretching during sewing.
What adhesives work best with neoprene fabric?
Aquaseal neoprene adhesive delivers professional-grade bonding for seams and patches.
You’ll also find success with contact cement or specialized wetsuit glues.
These adhesives create flexible, waterproof bonds that won’t crack under stress.
How thick should neoprene be for projects?
Most neoprene projects work best with 2-5mm thickness – thinner materials suit clothing while thicker versions handle gear like laptop sleeves perfectly.
Can you iron or heat press neoprene?
Heat pressing neoprene is possible with caution. Use 275 degrees with Teflon sheet protection and press for 15-20 seconds maximum. Always test first—neoprene can melt or warp with excessive heat.
Conclusion
Ironically, you’ve just mastered one of sewing’s most challenging materials while many struggle with basic cotton.
When you know how to sew neoprene properly, you’ll handle wetsuit repairs, create custom gear, and tackle projects others avoid.
Your heavy-duty needle, walking foot, and adjusted stitch length transform this stretchy rubber into professional results.
Remember to test your settings first, work slowly, and seal those seams for waterproof finishes that last.
- https://www.reddit.com/r/sewhelp/comments/1jg3j7c/my_machine_wont_sew_this_fabric_neoprene_can/
- https://rockywoods.com/pages/tips-sewing-neoprene-fabrics
- https://www.nrs.com/learn/how-neoprene-is-stitched
- https://www.westcoastpaddler.com/community/threads/sewing-neoprene.10263/
- https://www.jbneoprene.com/news/mastering-the-art-of-sewing-neoprene/


