This site is supported by our readers. We may earn a commission, at no cost to you, if you purchase through links.
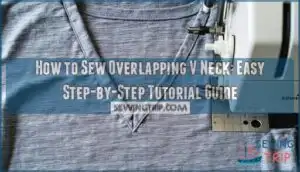
Start by drafting your pattern with the overlap built in, then cut your fabric pieces with seam allowances.
Pin the overlapping sections in place and stitch the shoulder seams first.
Next, you’ll attach a fitted neckband that wraps around the entire V opening, securing both layers while maintaining the crossover effect.
The key is getting your measurements right and keeping that overlap consistent as you sew, which makes perfect pressing crucial in achieving that crisp, professional look that’ll have people wondering where you bought such a polished piece.
Table Of Contents
Key Takeaways
- Cut two separate front bodice pieces that cross over each other at the center, adding 1-2 inches of overlap depth and proper seam allowances for the crossover effect.
- Choose lightweight to medium-weight fabrics like cotton blends or knits with 30-50% stretch that drape well and won’t create bulk at the overlap point.
- Attach a fitted neckband around the entire V opening after pinning the overlapping sections and stitching the shoulder seams first to secure both layers properly.
- Press seams carefully using appropriate heat settings and seam pressing tools, like a pressing ham, to prevent stretching and achieve that crisp, professional finish.
Sewing V Neck Basics
You’ll master the overlapping V neck technique by understanding three key basics that make all the difference.
These fundamentals will set you up for success before you even pick up your scissors.
Understanding V Neck Patterns
Before diving into your overlapping V neck project, you’ll need to understand how Vneck patterns work.
Pattern variations include surplice, plunging, and moderate styles that determine neckline depth. When grading patterns or adjusting fit, consider how fabric choice affects drape.
Your Vneck pattern pieces include notches and center markings for accurate assembly. This Vneck sewing guide helps you recognize essential elements before cutting fabric.
For a flawless finish, it’s helpful to review V-neck sewing tips.
Choosing Right Fabric
Your fabric choice makes or breaks an overlapping V neck project. The right material guarantees clean lines and lasting comfort.
The fabric you choose determines whether your V-neck drapes beautifully or disappoints completely.
Consider these five key factors when selecting fabric:
- Fabric Weight – Choose lightweight to medium-weight materials that won’t create bulk at the overlap
- Drape Consideration – Pick fabrics like rayon or bamboo that flow smoothly around the neckline
- Stretch Factor – Knit fabrics with 30-50% horizontal stretch work best for overlapping neckline flexibility
- Texture Choice – Avoid slippery materials like silk that shift during sewing overlapping fabric
- Color Fastness – Select stable dyes that won’t bleed when following your Vneck sewing guide
Cotton blends offer beginner-friendly handling, while knit fabric Vneck projects benefit from spandex blends. Remember, the overlap point needs fabric that holds its shape without gaping after wear; for sheer fabrics, consider practicing the neckline seam finish on a scrap piece first.
Essential Sewing Tools
Before starting your overlapping V neck project, gather these essential tools for smooth construction.
You’ll need sharp fabric scissors for clean cuts, fabric marking tools like chalk or disappearing ink pens, and measuring tools including a flexible tape measure.
Don’t forget seam rippers for corrections, various thread types matching your fabric, and specialized presser feet for precise neckline work.
You can find exceptionally sharp models for cleaner cuts.
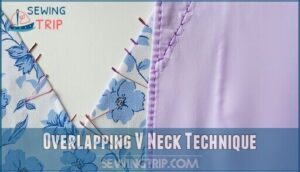
Overlapping V Neck Technique
Overlapping V neck technique creates a polished look that’s harder to mess up than traditional V necks.
The overlapping V-neck method eliminates guesswork and guarantees professional-looking results every time.
You’ll work with two fabric pieces that cross over each other at the neckline.
This method gives you better control over the final shape and hides any wobbly cutting mistakes.
The overlapping Vneck tutorial starts with understanding your Overlap Depth – typically 1-2 inches works best.
Here’s what makes this technique shine:
- Securing Overlap with precise pinning prevents shifting during construction
- Facing Application reinforces the neckline and creates clean edges
- Decorative Stitching adds professional finishing touches
- Neckline Stability improves with the double-layer construction
- Pattern adjustments accommodate different body shapes easily
When sewing Vneck using this method, you’re basically creating a controlled crossover.
The overlapping pieces provide natural Neckline Stability without complex engineering.
This method can also help address common causes of gaping.
This Vneck construction approach works great for beginners because the overlap masks small imperfections.
Plus, you can adjust the crossing point during fitting – something impossible with traditional V necks.
Cutting V Neck Pieces
Now you’ll cut the pattern pieces to create your overlapping V neck design.
Start by measuring your neckline carefully and marking the exact V shape on your fabric before making any cuts.
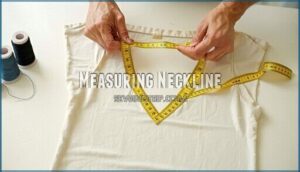
Measuring Neckline
Measure your neckline carefully for perfect fit. Start by determining neckline depth using your pattern’s front center line.
Check shoulder slope angles to verify proper drape. Take accurate measurements around your natural neckline, then add seam allowances.
A neckline measuring tool can improve accuracy. Consider a muslin fitting first for complex V-neck construction patterns.
These sewing V-neck measurements prevent costly pattern adjustments later in your sewing neckline project, ensuring a perfect fit and proper drape.
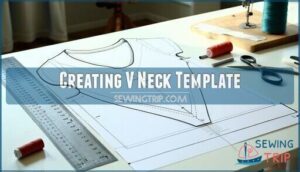
Creating V Neck Template
Before you cut fabric, you’ll need a solid template that acts as your roadmap. Template Accuracy starts with precise measurements and clear markings for professional results.
Here’s your template creation process:
- Mark neckline depth from center front using your measurements
- Draw V-shape connecting shoulder point to center front point
- Add seam allowances of ¼ to ⅜ inch around all edges
- Label template with grainline and front/back indicators
Use a ruler for straight lines and French curve for smoother shapes. This template guarantees consistent Overlap Amount and proper Curve Shaping across all your pieces.
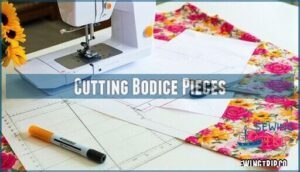
Cutting Bodice Pieces
Place your pattern pieces on fabric with proper Bodice Grain alignment.
Pin securely for Cutting Accuracy and mark all Marking Darts clearly.
These Pattern Adjustments guarantee your Vneck sewing tips work perfectly.
Smart Fabric Layout saves material while maintaining professional results. Consider using a fabric marker for accurate markings.
Double-check measurements before cutting – there’s no going back once you make that first snip!
Attaching V Neck Band
Now you’ll attach the v neckband to complete your garment’s neckline. This step requires careful pinning and steady stitching to create a smooth, professional finish.
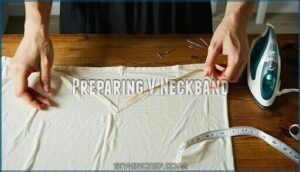
Preparing V Neckband
Your neckband’s success depends on proper preparation before attachment. Fold the band lengthwise with wrong sides together, then press to create a sharp crease. This step prevents stretching and guarantees clean edges for professional results.
- Fold and press the neckband in half lengthwise for stability
- Mark matching points at quarters to align with bodice neckline measurement
- Add band interfacing if working with delicate or stretchy fabrics
- Check bias grain direction to prevent distortion during Vneck sewing
For added support, consider using V neck interfacing.
Sewing Band to Bodice
Now you’ll align the neckband with your bodice pieces using precise Band Placement techniques.
Pin the band’s raw edges to the bodice neckline, matching your marked points carefully. Keep gentle Tension Control as you ease the band around the curve.
For stretchy necklines, remember to pin at quarter points for even distribution.
The key to clean finish Vneck sewing lies in securing your band evenly without puckering – these Vneck sewing tips make perfect Vneck sewing achievable for your blouse project.
Pressing Seams
After securing your band with pins, proper pressing makes all the difference.
Heat your iron to match your fabric type – cotton handles high heat while synthetics need gentler temperatures.
Press curved seams carefully using seam pressing tools like a pressing ham. This prevents stretching and creates that clean finish Vneck you’re after.
These Vneck sewing tips guarantee professional results every time.
Finishing V Neck Seam
After attaching your V neck band, you’ll need to finish the seam for a clean, professional look.
This final step involves trimming excess fabric, topstitching the neckline, and checking your work for quality.
You should ensure that all steps are followed carefully to achieve the desired outcome.
Trimming Excess Fabric
Sharp scissors cut away extra fabric from your overlapping V-neck seam allowance with surgical precision.
Trim seam allowance to about 1/4 inch, then grade seams by cutting one layer shorter than the other.
This prevents bulk under your clean finish V-neck.
Clip curves carefully without cutting into your stitching line for professional sewing techniques.
Topstitching Neckline
Perfect timing beats perfect stitching every time.
Set your topstitch tension slightly looser than normal seams to prevent puckering.
Choose a universal needle size 90/14 for most fabrics.
Select matching thread for invisible results or contrasting for decorative appeal.
Use 3-4mm stitch length for crisp lines.
Maintain consistent edge stability by keeping your fabric taut but not stretched while guiding it through.
Inspecting Seam Quality
After topstitching your neckline, examine your work carefully.
Check seam strength by gently tugging the V-neck area. Look for stitch consistency along the entire neckline – no loose or tight spots.
Watch for fabric pucker around curves. Adjust thread tension if needed. Spot visual defects like skipped stitches.
This final inspection guarantees your sewing V-neck dress or blouse meets professional standards for beginner sewing V-neck projects, ensuring a quality finish with proper thread tension.
Frequently Asked Questions (FAQs)
How to cut V-neck overlapping?
I notice this question appears to be about sewing techniques rather than SEW-EURODRIVE drive technology.
Let me provide a helpful response about cutting V-neck overlapping fabric.
Don’t put the cart before the horse – measure twice, cut once.
Mark your V-neck angle carefully using chalk.
Cut along your marked lines with sharp fabric scissors.
Leave extra seam allowance for adjustments and overlapping edges, following the principle of cut once.
What is an overlapping V-neck called?
An overlapping V-neck is called a "wrap neckline" or "crossover V-neck."
You’ll create this style by overlapping fabric pieces at the neckline, forming a flattering V-shape that wraps across your chest for elegant coverage.
How to fix a gaping V neckline without sewing?
Try fashion tape or double-sided clothing tape between fabric layers.
Use safety pins strategically on the inside. Add a camisole underneath for coverage.
Consider garment clips or snap fasteners for temporary fixes.
How do you prevent v neck from stretching out?
Like a security guard protecting your favorite shirt, you’ll want to wash V-necks in cold water and lay them flat to dry.
Store them folded rather than hung to prevent gravity from stretching the neckline over time.
What interfacing works best for overlapping v necks?
Fusible interfacing works best for overlapping v-necks.
Choose lightweight to medium-weight interfacing that matches your fabric’s weight.
Apply it to both neckline pieces before sewing to prevent stretching and create clean, professional-looking edges.
How to fix uneven overlapping v neck points?
Threading a needle through fabric mishaps can feel like untangling Christmas lights.
First, you’ll measure both neckline points from the center front seam.
Mark where they should align.
Pin one point slightly higher, then gradually trim and adjust until both points match perfectly for a balanced finish, achieving a perfectly aligned neckline.
Can you add sleeves to overlapping v neck?
You can easily add sleeves to your overlapping v-neck design. Simply attach sleeves at the armhole seam before or after completing the neckline overlap, depending on your preferred construction method.
How to adjust overlapping v neck for different sizes?
Different sizes need different measurements – grade each pattern piece by adding or subtracting quarter-inch increments at side seams, shoulders, and neckline curves while maintaining the overlapping proportion.
Conclusion
Ready to master how to sew overlapping v neck designs with confidence?
You’ve learned the essential steps from measuring and cutting to attaching the neckband and finishing seams.
The overlapping technique creates a sophisticated look that’s surprisingly manageable once you understand the process.
Remember to take your time with measurements and pressing—these details make the difference between homemade and professional results.
With practice, you’ll create beautiful v-neck garments that showcase your growing sewing skills perfectly.

