This site is supported by our readers. We may earn a commission, at no cost to you, if you purchase through links.
Hem the top edges, then sew the straps with reinforced stitching to keep them sturdy. Attach a pocket, if you like, for extra charm (and a spot for your keys).
Sew the sides and bottom with a 1/2-inch seam allowance, then box the corners so your tote can actually hold stuff! Want to personalize it? Add fabric paint, or iron-on designs for flair!
Table Of Contents
- Key Takeaways
- How to Make a Tote Bag – Beginner Tutorial
- Step-by-Step Instructions for Sewing a Tote Bag
- Best Fabric for Tote Bags?
- Large Tote Bag Measurements
- Decorating Your Tote Bag
- Tips for Sewing Canvas and Drop Cloth
- Finishing Edges With Zig-Zag Stitch or Fray Check
- Choosing The Right Sewing Machine for Tote Bag Making
- Using The Right Tools for Tote Bag Making
- Pin It for Later!
- Frequently Asked Questions (FAQs)
- Conclusion
Key Takeaways
- Choose sturdy materials like canvas or heavyweight cotton and cut precise fabric pieces, including 14"x14" rectangles for the bag and 4"x22" strips for the handles.
- Use reinforced stitching for durability, sew the sides and bottom with a 1/2-inch seam allowance, and box the corners to maximize storage capacity.
- Add personalized touches with fabric paint, embroidery, or iron-on designs to make your tote bag uniquely yours.
- Equip yourself with the right tools like heavy-duty needles, a walking foot, and sharp fabric scissors for clean cuts and professional-looking results.
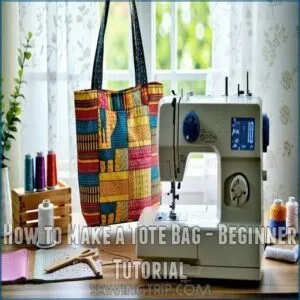
How to Make a Tote Bag – Beginner Tutorial
Ready to create a stylish and functional tote bag that’ll turn heads and carry your essentials?
You’ll master the art of sewing a perfect bag in just a few simple steps, even if you’re a complete beginner with zero sewing experience.
Supplies Needed
Your sewing adventure kicks off with a treasure trove of crafting essentials.
Grab sharp fabric scissors, sturdy pins, and a reliable sewing machine that’ll be your trusty sidekick.
Choose heavyweight cotton or canvas fabric that’ll stand up to daily wear.
Don’t skimp on quality threads and needles – they’re the unsung heroes of your tote bag masterpiece.
Interfacing adds backbone, while cotton webbing creates killer handles that won’t quit.
Get ready to transform simple materials into a custom carry-all that screams your style.
Cutting The Pattern
Now that your supplies are ready, grab those trusty fabric scissors for your tote bag pattern adventure.
Carefully measure and mark your fabric, ensuring precision for a professional finish. The quality of your tote bag fabric will greatly impact the overall appearance of your bag.
Cut two 14" x 14" rectangles for the bag body, and two 4" x 22" pieces for handles. Pro tip: Always cut on the fabric’s wrong side to keep your edges clean and crisp.
Step-by-Step Instructions for Sewing a Tote Bag
Ready to transform a piece of fabric into a stylish and functional tote bag that’ll turn heads?
You’ll be surprised how easy it’s to create a custom bag that’s both practical and personalized, with just a few simple sewing techniques and some creative flair.
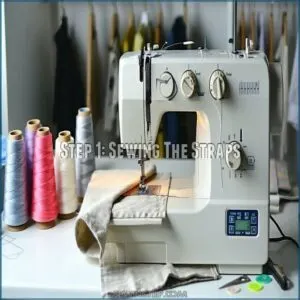
Step 1: Sewing The Straps
With a crisp canvas cut, tote bag straps become the backbone of your handmade masterpiece.
Master these sewing techniques to craft sturdy handles that’ll carry your world:
- Choose durable thread matching your fabric’s weight and color
- Fold and press handles precisely, creating sharp, clean edges
- Reinforce stitching at stress points for maximum handle strength
Your bag’s personality starts here – let’s nail those tote bag straps!
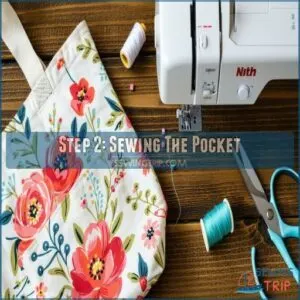
Step 2: Sewing The Pocket
After nailing your straps, it’s time to jazz up your tote bag with a perfect pocket.
Choose a fabric that complements your bag’s main material.
Measure carefully and cut a pocket piece that’ll slide seamlessly into your design.
Remember, pocket placement is key in tote bag sewing – aim for functionality and style that’ll make your creation pop.
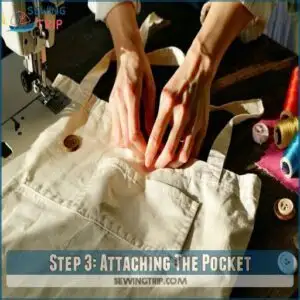
Step 3: Attaching The Pocket
Ready to give your tote bag some serious storage power? Attaching the pocket is where your sewing skills truly shine. To master this step, understanding pocket sewing techniques is vital for a professional-looking tote bag.
- Position the pocket precisely for maximum functionality
- Choose reinforced stitching for long-lasting durability
- Align carefully to guarantee a professional finish
Slide the pocket onto your fabric, pin it securely, and stitch along the edges with confidence. Your careful placement transforms a simple bag into a practical masterpiece.
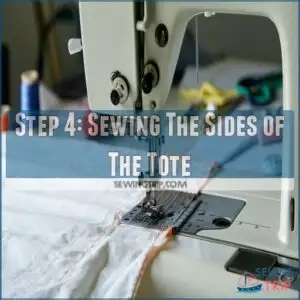
Step 4: Sewing The Sides of The Tote
Now that your pocket’s in place, it’s time to bring those tote bag sides together.
Line up your exterior fabric pieces with right sides facing each other.
Set your machine’s stitch length to about 3mm, ensuring a strong seam.
Use a 1/2-inch side seam allowance, maintaining consistent fabric tension as you sew.
Backstitch at the beginning and end for extra durability.
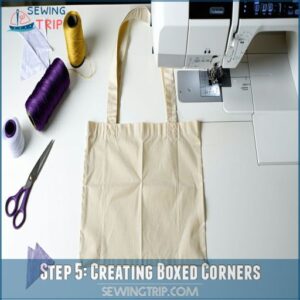
Step 5: Creating Boxed Corners
Let’s transform those flat bag corners into professional-looking boxed edges! With a few strategic moves, you’ll elevate your tote bag’s structure like a sewing maestro.
Here’s how to nail those crisp, structured corners:
- Position side seams perpendicular to your work surface
- Create precise bottom corner creases
- Align inner corner creases along sewn side seams
- Trim excess fabric triangles with confidence
Using Tote Bag patterns can help you achieve a polished look.
Zigzag or fray check raw edges, then sew across triangle box corners using a precise 1⁄4" seam allowance and strategic moves to ensure a professional finish.
Best Fabric for Tote Bags?
You’ll want to choose a fabric that’s both sturdy and stylish for your DIY tote bag adventure.
Canvas, cotton, and linen are your top picks, each offering unique strengths that’ll help you create a bag that’s as tough as it’s trendy.
Canvas Fabric
After mastering your tote bag’s basic structure, canvas fabric emerges as a powerhouse material for crafting durable bags.
Duck canvas – a heavyweight textile – delivers unmatched strength for your handmade carrier. Its tightly woven cotton threads create a robust canvas tote that’ll survive daily wear and tear.
Pro tip: Choose medium to heavyweight canvas types between 7-12 oz for maximum durability. Different fabric weights determine your bag’s performance, so select wisely.
When sewing, expect slightly more resistance compared to lighter materials, and use heavy-duty needles for clean, professional results.
Cotton Fabric
If canvas feels too tough, cotton swoops in as your tote bag’s superhero fabric.
Medium-weight cotton types like duck cloth bring durability without drama.
Prewash your fabric to dodge shrinkage surprises, and choose a thread count that matches your weave patterns.
Press those seams like a pro – open or to the side works magic.
Zigzag stitching keeps fraying at bay, transforming your cotton canvas into a personalized tote that’ll carry your world with style.
Pick your favorite fiber blend and watch your bag come to life.
Linen Fabric
Weaving elegance into your canvas tote bag, linen brings a touch of rustic charm with its natural fibers.
This textile heavyweight offers durability and style:
- Lightweight yet strong fabric that holds its shape
- Breathable material perfect for summer cotton tote bag projects
- Versatile weave patterns that elevate your textile creation
Embrace linen’s raw edges or dress it up with delicate embellishments.
Spot clean gently and line dry to preserve its unique texture and character.
Large Tote Bag Measurements
Imagine your dream tote bag: spacious, sturdy, and perfectly sized for your adventures.
When designing large tote bags, measurements are your roadmap to success. Aim for fabric pieces around 18-20 inches wide and 16-18 inches tall to create a roomy 16 x 14 x 5-inch bag. These dimensions aren’t just numbers—they’re your ticket to a versatile carrier that can handle everything from beach gear to grocery hauls.
Pro tip: measure across your body from shoulder to hip to nail the perfect strap length.
Canvas, denim, and cotton prints are your best friends here. A magnetic snap or buckle closure keeps your treasures secure, while giving you the freedom to design a bag that’s both functional and uniquely yours.
Understanding tote bag making techniques is important for a professional finish, allowing you to create a bag that meets your needs and exceeds your expectations.
Decorating Your Tote Bag
You’ve just sewn a fantastic tote bag, and now it’s time to make it uniquely yours with some creative decorations.
From playful appliques to vibrant fabric paint, you’ll transform your handmade bag into a personalized masterpiece that shows off your creative style.
Appliques and Embroidery
After perfecting your tote bag’s shape, it’s time to make it pop with personality! Applique and embroidery turn a simple bag into a canvas of creativity.
Try these game-changing decoration techniques:
- Cut fabric shapes that tell your story
- Choose embroidery designs that speak to your soul
- Mix textures and colors for maximum impact
- Play with thread choices that create visual drama
- Experiment boldly without fear of failure
Your handmade tote becomes a walking piece of art, reflecting your unique style and creativity.
Fabric Paint and Markers
Want to turn your handmade tote bag into a canvas of personal expression? Fabric paint and markers are your secret weapons for creating a DIY masterpiece that screams "you"! Whether you’re a bold color enthusiast or a subtle design lover, these tools let you transform a plain tote into a wearable work of art.
| Fabric Paint | Fabric Markers |
|---|---|
| Dimensional acrylic paint | Oil-based markers |
| Textile medium paint | Double-tipped markers |
| All-purpose textile pens | Water-based options |
From vibrant stripes to whimsical nature motifs, your creativity knows no bounds. Splash on abstract shapes, write meaningful words, or sketch playful designs. Your tote bag becomes more than just a carry-all—it’s a statement piece that reflects your unique style.
Iron-on Transfers
If fabric paint left you craving more pizzazz, iron-on transfers are your creative sidekick for tote bag personalization.
- Select designs that showcase your personality
- Prep images using design software for crisp results
- Choose smooth fabrics that welcome transfer magic
Master heat press settings to transform plain bags into walking art statements. Your handmade tote becomes a canvas, telling your story with every stylish step.
Tips for Sewing Canvas and Drop Cloth
When sewing canvas or drop cloth for your tote bag, you’ll want to use techniques that make your project look professional and last longer.
Grab a heavy-duty needle, reinforce those seams, and consider using a walking foot to tackle these sturdy fabrics like a pro.
Using a Heavy-Duty Needle
Fire up your sewing machine and gear up for canvas conquest with a heavy-duty needle that means business.
Choose a size 18 for lightweight canvas or a size 16 for those thick drop cloths – these specialized needles slice through multiple fabric layers like a hot knife through butter.
Keep your arsenal stocked with fresh needles, swapping them out before they dull and derail your sewing momentum, with a sharp needle as your secret weapon for flawless stitch quality and smooth fabric glide.
Reinforcing Seams
Want your handmade tote to survive daily adventures? Seam reinforcement is your secret weapon for fabric stability and stitch security.
Strengthen your bag’s backbone with these pro-level techniques:
- Thick topstitching thread acts like armor
- Zigzag stitches create fortified fabric edges
- Fray check seals potential weak points
- Interfacing transforms lightweight fabrics
- Strategic stitching prevents unexpected wardrobe malfunctions
Craft a tote that’ll outlast your wildest expectations – one reinforced seam at a time, with pro-level techniques to ensure fabric stability.
Using a Walking Foot
After reinforcing those seams, your next secret weapon is the walking foot – a game-changer for handling thick fabrics.
This magical sewing machine attachment helps you glide smoothly over canvas and denim layers, preventing fabric slipping and uneven stitches.
| Fabric Type | Walking Foot Magic | Sewing Mood | Difficulty Level | Pro Tip |
|---|---|---|---|---|
| Canvas | Smooth Sailing | Confident | Medium | Slow & Steady |
| Denim | Total Control | Focused | Challenging | Test First |
| Cotton | Gentle Guidance | Relaxed | Easy | Adjust Pressure |
| Linen | Precise Movement | Calm | Medium | Watch Tension |
| Silk | Delicate Touch | Careful | Tricky | Go Slow |
Adjust the pressure, test on scraps, and watch your tote bag transform from homemade to professional.
Finishing Edges With Zig-Zag Stitch or Fray Check
Every fabric whispers its own story of wear and tear, but smart sewists know how to silence those fraying threads. When creating your dream tote bag, edge finishing becomes your secret weapon of fabric preservation.
Here’s how to keep those seams rock-solid:
- Grab Fray Check for instant seam security
- Apply liquid sealant on raw fabric edges
- Use zig-zag stitches for machine-reinforced protection
- Choose transparent solutions that dry invisible
Fray Check works like a superhero, stopping fabric breakdown before it starts. Unlike complicated hemming techniques, this no-fuss liquid creates smooth, professional edges in seconds.
Whether you’re a newbie or seasoned sewist, these seam-saving tricks will transform your tote bag from amateur to absolutely amazing. Protect your hard work and watch your creation stand the test of time.
Choosing The Right Sewing Machine for Tote Bag Making
Your sewing machine can make or break your tote bag project, so choosing the right one is essential.
Whether you’re a beginner or a seasoned crafter, finding a machine that matches your skill level and budget will help you create stunning tote bags with ease and confidence.
Key Features to Consider When Choosing a Sewing Machine
When your zigzag finish leaves you craving more precision, it’s time to upgrade your sewing machine game.
Picking the right machine can make or break your tote bag adventure. To find the perfect machine, consider reading Sewing Machine reviews from experts and users.
Check out this quick guide to sewing machine features that’ll transform your crafting:
| Feature | Beginner | Intermediate | Pro |
|---|---|---|---|
| Machine Speed | Slow | Medium | Fast |
| Thread Capacity | Basic | Multiple | Advanced |
| Motor Power | Low | Medium | High |
| Stitch Quality | Standard | Improved | Professional |
Understanding Different Types of Stitches
With a stitch in time saving nine, you’ll want to master key sewing stitches for your tote bag project.
From the classic Running Stitch to the secure Backstitch, each technique adds strength and style to your creation.
Beginners can quickly learn Whipstitch and Slipstitch, turning basic sewing terminology into professional-looking seams that’ll make your handmade bag shine.
Budget-friendly Options for Beginners
- Singer Start 1304 ($100-150 range)
- Brother XM2701 lightweight model
- Janome 2212 entry-level machine
- Computerized Brother CS6000i with multiple features
For beginners, investing in portable sewing machines can be highly beneficial for learning and creating tote bags.
Grab a wallet-friendly machine and start creating those killer tote bags without emptying your piggy bank!
Using The Right Tools for Tote Bag Making
You’ll need the right tools to transform your fabric into a stunning tote bag that’ll make heads turn.
Grab your Clover Fine Quilting Pins, Olfa Rotary Fabric Cutter, and Fiskars Scissors, and you’ll be crafting like a pro in no time!
Clover Fine Quilting Pins

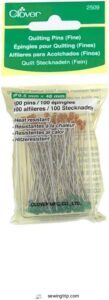
After mastering your sewing machine’s nuances, you’ll want Clover’s fine quilting pins in your arsenal. These 0.6mm diameter pins glide through lightweight fabrics like a hot knife through butter, keeping layers perfectly aligned.
Iron-proof glass heads mean you can press without worry. Just remember: while they’re champions for cotton and linen, heavy canvas might make these delicate pins throw in the towel.
Understanding the types of sewing pins is essential for selecting the right tools for your project. Choose wisely, and pin with precision using the right sewing machine.
Olfa Rotary Fabric Cutter With Cover and Replacement Blade
Looking for a reliable way to get super clean cuts? Meet the Olfa Rotary Fabric Cutter, a must-have for tote bag making.
This lightweight tool cuts fabric layers smoothly—perfect for crafting straight lines or curves. Its tungsten steel blade glides like a dream through cotton, saving you time and patience compared to scissors.
The finger groove handle gives you total control, making precise patterns effortless. Need a fresh blade? The quick-change cover makes swapping it out simple and safe.
Want sharper cuts? Regular blade sharpening or keeping replacement blades handy guarantees your cutter’s always ready for your next sewing tutorial!
Fiskars Original Orange Handled Scissors Ergonomic Fabric Paper Crafts

When you’re crafting your DIY tote bag, the Fiskars Original Orange Handled Scissors are a game-changer.
Their ergonomic grip keeps your hands comfy while tackling fabric cutting.
The sharp, stainless steel blades glide through layers with precision, so every trim is on point.
Plus, those bent handles keep fabric flat—no annoying shifting.
From sewing tote bags to paper trimming, this craft tool is a must.
Keep scissor maintenance in mind to guarantee lasting sharpness!
Pin It for Later!
Pinning is your secret weapon for a flawless DIY tote bag. It might feel tedious, but it keeps your sewing game on point.
Imagine snapping a Social Media-worthy “work in progress” shot—straight seams make all the difference. Use quilting pins to "bookmark" your fabric edges, holding everything in place before you start sewing.
For curved seams or tricky corners, add more pins to fight fabric shifts. Mastering the pinning techniques is essential for achieving professional-looking results.
Clover’s fine glass head pins work wonders, especially on thicker materials like canvas. Always pin perpendicular to the edges for easy removal, saving your fabric and fingers.
A well-pinned project guarantees neat lines, giving you a tote bag tutorial success story that’s ready for content sharing or digital organization ideas!
Frequently Asked Questions (FAQs)
What is the best pattern for a tote bag?
The "golden ticket" pattern for a tote bag uses two sturdy 14”x14” rectangles for the exterior, matching lining pieces, and 4”x22” handle strips.
It’s simple, functional, and beginner-friendly, perfect for everyday use.
Can a beginner make a tote bag?
Making a tote bag is perfect for beginners.
It’s straightforward, requires minimal materials, and teaches basic sewing skills.
Start with simple fabrics like cotton, follow a step-by-step guide, and you’ll nail it!
How to make a tote bag?
Start by cutting rectangles from sturdy fabric, sew the sides and bottom, and miter the corners for depth.
Add lining, attach folded handles, and topstitch the edges.
Personalize with decorations for a creative touch!
How do you sew a tote bag?
You won’t believe how simple it is—just hem the top, stitch the sides and bottom, pleat the corners, and add handles.
Turn it inside out, press, and voilà, you’ve got a handmade tote!
Can you make a custom fabric tote bag?
Custom fabric tote bags are easy and fun to make.
Pick your favorite fabric, add lining for durability, and personalize it with prints, embroidery, or patches.
It’s a creative way to showcase your style.
How do you decorate a tote bag?
Ever wonder if tiny touches can transform something ordinary?
Add personality to your tote bag with fabric paint, embroidery, iron-on patches, or stencils.
Think bold colors, patterns, or favorite quotes for a standout look!
How do you make a tote bag at home?
Cut sturdy fabric into rectangles, sew the sides and bottom, and hem the top.
Add handles, stitch securely, and press seams.
Personalize with linings or decorations to create a practical, stylish tote bag.
How much fabric do I need to make a tote bag?
To make a standard tote bag, you’ll need about half a yard of fabric for the body and an extra quarter yard for handles.
Oversized bags? Grab a yard—better to have too much!
Is a tote bag business profitable?
Yes, it can be!
Tote bags are trendy, affordable to produce, and eco-friendly, which appeals to many.
With unique designs and smart marketing, you can turn a simple idea into a profitable small business.
Is a tote bag easy to sew?
Around 42% of beginners start sewing with tote bags because they’re simple and practical.
You just measure, cut, and sew a few straight lines—it’s like sewing’s version of training wheels, but more useful!
Conclusion
Crafting a tote bag is as simple as dialing a rotary phone once you’ve got the steps down.
With the right fabric, sturdy stitches, and a bit of creativity, you’ll have a functional, stylish tote in no time.
Whether you’re using bold fabric paint, personalized appliques, or leaving it classic, this project is endlessly customizable.
Now you know how to make a tote bag that’s perfect for errands, gifting, or just showing off your sewing skills!

