This site is supported by our readers. We may earn a commission, at no cost to you, if you purchase through links.
 To copy clothes sewing, start by grabbing tracing paper, a cutting mat, blue painter’s tape, and a fine-point marker.
Carefully lay your favorite garment on a flat surface, smoothing out wrinkles. Trace its key features, like darts, seams, and pockets, onto the paper, and don’t forget to add seam allowances for sewing.
Analyze the fabric’s stretch and weight to choose the right material for your clone.
Once your pattern’s ready, snip, sew, and tweak to perfection. It’s like making your wardrobe’s greatest hits album—but with stitches.
Trust the process, and soon, you’ll master turning loved pieces into wearable templates.
Table Of Contents
Key Takeaways
- Lay your garment flat, smooth out wrinkles, and carefully trace its sections onto paper, marking seam lines, darts, and pockets while adding seam allowances for a precise pattern.
- Use the right tools like tracing paper, fine-point markers, and blue painter’s tape to capture every detail and ensure accuracy in your pattern-making process.
- Analyze the original garment’s fabric type, stretch, and weight to choose a suitable material for your replica and ensure a proper fit.
- Test and refine your pattern by sewing a draft, checking the seams and fit, and making adjustments for a polished final piece.
Copying Clothes Basics
Want to recreate your favorite outfit without breaking the bank? Learn the art of copying clothes through clever pattern making that’ll transform your sewing skills and wardrobe in no time.
Necessary Items for Copying
Get ready to develop your DIY fashion superpower with the right gear.
Grab your tracing paper, pattern weights, and blue painter’s tape like a pro. Collect a tracing wheel, sharp scissors, and precise measuring tools.
Measuring tape and a cutting mat are your new best friends. Your sewing toolkit is about to transform those tracing patterns from dream to reality.
Preparation and Planning
With your favorite garment spread out, start gathering supplies for your sewing pattern adventure. Grab tracing paper, a fine-point marker, and 3M blue painter’s tape – your toolkit for copy clothes pattern magic.
Understanding basic sewing techniques is essential before you begin tracing and copying your clothes.
Prepare a clean, flat workspace and take a deep breath. You’re about to discover the secrets of garment copying, transforming that perfect piece into a replicable blueprint.
Examining The Original Garment
Dive deep into your garment’s DNA through thorough garment inspection. Spread out the fabric, tracing its seam lines and studying every curve. Analyze fabric type, noting stretch and weight.
Using garment copying techniques can help you create a precise replica of your favorite clothes. Capture pattern accuracy by marking key details—darts, pockets, and unique construction elements.
These garment copying tips will transform your store-bought piece into a perfect pattern blueprint, giving you the power to replicate your favorite clothes.
Copy Clothes Sewing Process
Now that you’ve prepped your workspace, it’s time to bring your garment copying skills to life.
Grab your chosen sewing techniques and start laying out your fabric with precision.
Analyze the original garment like a detective, noting every curve and seam.
To improve your skills, understanding basic sewing patterns is essential for successful garment replication.
Copying clothes sewing is an art of patience and observation.
Your hands become the architects of a new wardrobe masterpiece, transforming a single piece into a template for endless fashion possibilities.
Creating a Sewing Pattern
Ready to transform your favorite garment into a custom pattern that fits like a glove?
You’ll learn the art of tracing, measuring, and recreating your go-to clothes with precision and creativity, turning your sewing skills into a wardrobe-expanding superpower.
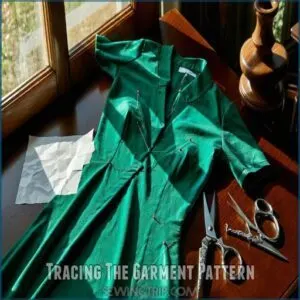
Tracing The Garment Pattern
Ready to transform your favorite garment into a perfect pattern? Let’s develop your drafting skills with these pro tips:
- Spread out your chosen garment on a large paper surface
- Pin down edges carefully to prevent shifting
- Use fine-point markers for precise tracing
Tracing a pattern isn’t rocket science—it’s about patience and attention. Grab your tools, flatten that fabric, and start marking seam lines with confidence. Your sewing adventure begins right here!
Adding Seam Allowances and Details
After tracing your pattern, it’s time to master seam allowances and details. These extra fabric margins are your secret weapon for a perfect fit.
Understanding seam allowance is essential for efficient stitching. Check out this seam allowance cheat sheet:
| Fabric Weight | Seam Allowance | Pro Tip |
|---|---|---|
| Lightweight | 1/4" |
Mark every curve, dart, and pocket with laser-like focus to nail your garment copying game.
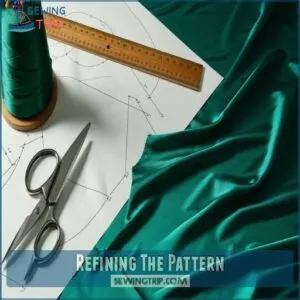
Refining The Pattern
At the heart of pattern refinement lies your keen eye for detail and precision. Perfecting your sewing pattern demands careful scrutiny and strategic adjustments.
Consider these critical refinement steps:
- Measure twice, cut once – precision is your sewing superpower
- Analyze seam lines for microscopic imperfections
- Test-fit pattern pieces against original garment
- Mark potential adjustment points with confidence
- Embrace small tweaks that transform good to great
Your draft becomes a blueprint of sartorial possibility.
Constructing The New Garment
You’re now at the most exciting part of copying clothes: transforming your carefully traced pattern into a brand-new garment that’s an exact replica of your favorite original.
With your pattern in hand and fabric ready, you’ll follow each marking and seam line to recreate a piece that looks like it came straight from a designer’s workshop.
Observing The Original Garment
Now that you’ve traced your pattern, it’s showtime for garment inspection.
Spread out your original piece and play detective, examining every nook and cranny – seams, stitches, fabric drape.
How do those details make this piece unique, and what does your fabric analysis entail – it’s understanding the blueprint of your beloved garment.
Assess fit, note construction quirks, and prep for your DIY clothing clone mission.
Applying The Pattern
With your garment laid out, start applying the copy clothes pattern like a fashion detective unraveling a sewing mystery.
Breathe life into your fabric selection by following these critical steps: Understanding sewing pattern basics is essential for accurate garment construction.
- Align pattern pieces precisely on fabric
- Use weights or pins for secure positioning
- Trace pattern markings with chalk or washable marker
- Double-check grain line and symmetry
- Cut fabric with sharp, dedicated scissors
Precision transforms your DIY garment copying adventure.
Sewing The New Garment
After carefully mapping out your copy clothes sewing pattern, thread your machine with a matching color and select a stitch that mimics the original garment’s construction.
Pin your fabric pieces together, double-checking alignment. Understanding garment construction techniques is essential for a successful duplicate.
Start sewing with steady, even strokes – your garment fitting depends on precision. Test different stitch lengths to match the original’s quality, ensuring your duplicate clothing looks professional and polished.
Finalizing The Copied Garment
You’re almost there—just a few finishing touches to bring your project to life.
It’s time to compare your work to the original, make adjustments, and verify everything looks and fits just right.
Reviewing The Original Garment
A quick garment inspection is critical to spot differences between your copy and the original. Test fit assessment by placing your copy over the original.
Confirm pattern accuracy by comparing measurements. Check seam evaluation details—are they neat and aligned? Perform fabric analysis to match texture and feel.
To guarantee your copied garment lasts, consider garment care tips that help maintain its quality over time. These garment copying tips help refine results, guaranteeing your copy clothes pattern replicates store-quality craftsmanship with confidence.
Making Adjustments
Now’s the time to tweak your sewing patterns for that perfect fit. To achieve professional results, consider using sewing guide techniques for precise garment construction.
Here’s how to master garment fitting:
- Seam adjustments: Add 1” seam allowances for flexibility during fit adjustments.
- Sleeves refined: Check the sleeve cap; trace evenly for smooth sewing adaptations.
- Darts traced perfectly: Match both dart legs for precise pattern alterations.
Small design modifications here create big results later!
Completing The Copied Garment
The final garment fitting is your big reveal! Test the fit, check seams, and adjust where needed.
Mastering sewing techniques is essential for a professional finish. Use sewing finishing techniques like trimming stray threads or reinforcing stress points.
Here’s a quick reference table for finishing touches:
| Step | Technique | Tools Needed |
|---|---|---|
| Assess overall fit | Pinch and tweak seams | Pins, mirror |
| Finish raw edges | Use zigzag or serging | Serger, scissors |
| Press and perfect | Smooth seams with heat | Iron, press cloth |
Done right, your garment sewing victory awaits!
Frequently Asked Questions (FAQs)
What do I need to copy a garment?
You’ll need a well-fitting garment, 3M blue painter’s tape, tracing paper, pins, markers, a ruler, and a padded surface.
Toss in patience and a sharp eye for details—you’re reverse-engineering fabric, not rocket science!
How to copy a dress?
Lay your dress flat and analyze seams, darts, and details.
Use tracing paper or painter’s tape to copy each section.
Add notes for seam allowances, then refine your pattern for a perfect fit.
How do you make a sewing pattern from existing clothing?
Lay your garment flat and trace each section onto paper along the seamlines, adding seam allowances.
Carefully mark darts, pleats, and pockets.
Use measuring tools for accuracy, and tweak details during test sewing for precise results.
Can you make a pattern from an old garment?
Think of it like reverse engineering your favorite recipe.
Yes, you can make a pattern from an old garment by carefully tracing its pieces, adding seam allowances, and noting all details for an accurate duplication.
Can you copy a pattern?
You can absolutely copy a pattern!
Use tools like tracing paper, tape, or pins to recreate pieces from an existing garment.
Focus on seam lines, details, and fit to guarantee accuracy and success.
How do you take a garment apart?
Let’s say you’re taking apart a favorite jacket.
Start by gently removing stitches with a seam ripper, working seam by seam.
Be patient—preserve each piece intact to trace and replicate accurately later.
How to duplicate a piece of clothing?
Duplicate clothing by tracing sections of the original onto paper, marking seamlines and details. Use tape for tricky areas like curves.
Add seam allowances, cut fabric, and sew it together.
Voilà, your clone’s ready!
How to copy existing clothes?
Start by examining your garment’s seams and structure.
Use painter’s tape to mark seam lines.
Then trace each section onto paper. Add seam allowances and refine details.
This simple method creates an accurate, reusable pattern.
How to copy a dressmaking pattern?
Pattern-making perfection pairs patience with precision.
Lay your dress flat and trace each section onto paper. Mark seam lines and add allowances.
Carefully capture darts or pleats for an accurate replica.
Voilà, your custom pattern’s ready!
How to make a pattern from a garment without taking it apart?
Lay your garment flat and trace its sections onto paper.
Mark seam lines with a fine-point marker.
Use pins or 3M blue painter’s tape to capture tricky details like curves, darts, or pockets.
Conclusion
Imagine the satisfaction of recreating your favorite outfit with your own hands—it’s easier than you think.
By breaking down the process step by step, you’ll master how to copy clothes sewing like a pro. From tracing patterns to sewing and tweaking, you’re just a few tools and some patience away from duplicating wardrobe pieces you love.
So grab your supplies, trust the process, and create clothing that fits both your body and your style perfectly!
- https://www.instructables.com/How-to-Copy-a-Garment-that-Fits-Perfectly-Without-/
- https://sewingtrip.com/how-to-copy-clothes-sewing/
- https://www.allfreesewing.com/Basics-and-Tutorials/How-to-Make-a-Pattern-From-a-Garment-You-Love
- https://sewguide.com/make-sewing-pattern-old-dress/
- https://www.doinaalexei.com/beginnersewingtutorialblog/understanding-seam-allowance-in-sewing-beginners-guide-to-fabric-allowance

