This site is supported by our readers. We may earn a commission, at no cost to you, if you purchase through links.
That snag on your sleeve doesn’t mean the shirt’s done for. A knee ripped on the playground, a seam popped at the shoulder, a moth hole in your favorite sweater—none of it has to end in the trash pile.
Most tears look worse than they are. With the right needle, thread, and a little patience, you can make that damage disappear or strengthen it so it never comes back.
Knowing how to sew a tear properly means matching your method to the fabric and the type of damage you’re facing. Grab your sewing kit, and let’s get that garment back in shape, stitch by stitch.
Table Of Contents
Key Takeaways
- Assess whether the damage is a clean rip, a hole, or fraying, and match your fabric weight and stretch to the right repair method before you start sewing.
- Prep work like trimming loose threads, pressing the fabric flat, aligning torn edges, and adding interfacing sets you up for a stronger, smoother repair.
- Choose your stitch based on the tear and fabric: backstitch for strength, ladder stitch for invisible mends, zigzag for stretchy knits, and hand or machine sewing depending on fabric weight.
- For larger or ragged tears, cut a patch with an extra inch of fabric on all sides, pin it in place, stitch around the edges, then press and trim for a durable finish.
Assess The Tear and Fabric Type
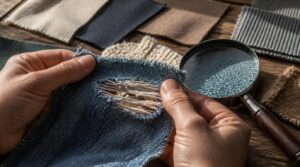
Before you thread a single needle, take a good look at what you’re working with. Every tear tells you something, and your fabric has its own rules for how it wants to be fixed. Here’s what to check before you start stitching.
If you’re mending a stretchy sweater or knit top, picking the right needle for knit fabrics will save you from snagged threads and puckered seams.
Clean Rip or Hole
Before you thread a single needle, figure out what you’re actually dealing with. Pull the fabric edges together gently: if they meet cleanly with no gaps, that’s a clean rip, and you can stitch the tear closed with matching thread. If fabric’s missing, you’re looking at a hole, and you’ll need a patch instead. Check for fraying, too, since that affects repair feasibility.
Understanding the different types of rips helps determine the best repair method, such as distinguishing between clean rips and open rips requiring patches.
Fabric Weight and Stretch
Once the rip’s identified, feel the fabric itself. Delicate silks and lightweight knits need gentler handling than heavier materials like denim or canvas, which hold stitches better but stretch less.
Check for give: knits and stretchy fabrics pull in multiple directions, so match thread tension and stitch type to that stretch recovery rate, or your repair will pucker or snap along the grain.
Fraying and Weak Spots
Now look close at the edges. Fraying starts where individual fibers break away from the fabric’s center, and worn spots always show shorter fibers than the surrounding area.
Watch for abrasion hotspots like cuffs and hems, plus slippage where yarns shift loose. If edges look weak, trim loose threads before you strengthen the rip, or your stitch tension control won’t hold.
Seam Vs. Surface Tear
Once fraying’s trimmed, check where the damage sits. Seam tears run along the stitch line, edges anchored and straight. Surface tears appear as ragged holes anywhere else.
- Heartbreak over a tear in your favorite piece of clothing
- Relief once you assess the damage correctly
- Confidence from choosing the right repair approach
- Frustration when surface tears keep spreading
- Satisfaction pressing the repair flat afterward
Seams need reinforced backstitching; surfaces need patching before you stitch the tear closed.
Prepare The Torn Area for Sewing
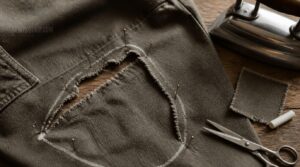
Before you thread a single needle, the torn area needs some prep work. A little groundwork now means smoother stitching and a stronger repair later. Here’s what to do first.
Trim Loose Threads
Before you sew a stitch, clear away the mess. Grab sharp scissors and trim stray threads flush with the fabric, angling your cuts away from the seam.
For a full rundown on tidying up threads at every stage, this guide to closing seams cleanly walks you through the finishing touches.
For knits, snip gently to avoid laddering. Wovens tolerate closer trims. Silk needs micro scissors for a clean edge.
This loose thread removal step preps your fabric properly and prevents fraying before you press or pin anything.
Press Fabric Flat
A hot iron works wonders here, but heat needs a plan, not a guess. Set your iron to match the fabric, low for synthetics, higher for cotton or denim, and always use a pressing cloth on delicate weaves.
Lay the tear flat, add a quick steam burst, then press with steady motion. Let it cool fully before moving on.
Align Torn Edges
Once you press the fabric, it’s time for edge alignment. Fold along the tear so both sides lie flat on the original grain line, matching pattern direction to avoid a jog.
Ease waviness with gentle finger pressure. Check fabric alignment across the whole tear, raw edges meeting with no gap, before pinning for seam straightening.
Add Interfacing Support
Think of interfacing as a cast for a healing bone: it holds everything steady while the stitches do their work. Choose based on fabric compatibility—lightweight fusible for silk, knit interfacing for stretch.
Interfacing acts like a cast for a healing bone, holding torn fabric steady while the stitches do their work
- Cut interfacing larger than the tear
- Fuse interfacing to the wrong side
- Press to bond without scorching
- Let cool before handling
This edge stabilization step keeps fraying at bay.
Pin Delicate Fabrics
Silk and chiffon forgive nothing, so your pin choice matters as much as your stitch.
| Fabric | Best Pin |
|---|---|
| Silk/chiffon | Fine silk pins |
| Sheer/organza | Extra short pins |
| Knits | Ballpoint pins |
Pin at a 45-degree angle within seam allowances, spaced 3-4 inches apart. Remove pins as you sew, never iron over them, to avoid snags and marks.
Choose The Best Stitching Method
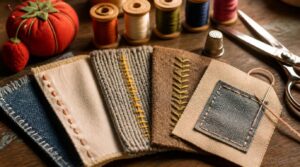
Now that your fabric is prepped and ready, it’s time to pick the right stitch for the job. Not every tear needs the same fix, and the method you choose depends on the fabric and the damage. Here are five stitching techniques to match to your repair.
Hand Sewing Small Tears
Small tears deserve a gentle hand, literally. For clean rips under two inches, hand sewing gives you control machines can’t match.
Thread your needle, then knot the end with a quilter’s knot—coil thread around your finger before pulling through. Match thread color to fabric for a nearly invisible stitch. Use a ladder stitch along the seam crease, working small, even stitches to close the tear seamlessly.
Machine Sewing Sturdy Fabrics
Denim, canvas, and other heavy fabrics call for muscle, not fuss. Fire up your sewing machine, load a sturdy needle (size 90/14 or up), and set a straight stitch.
- Use matching thread with real strength
- Add stabilizer for stretch control
- Adjust foot pressure for bulky layers
Iron the area first, then strengthen the rip with steady, even passes. Keep up machine maintenance for clean results.
Backstitch for Strength
Once the machine work’s done, grab your needle for spots that need extra grip.
Backstitch is your go-to for knees, elbows, and seams under stress—sew forward, then back through the same hole. Keep stitches 2-3mm long, use matching thread for durability, and lock each end with a small knot. This reinforces the rip so it holds through wash after wash.
Ladder Stitch for Invisibility
Backstitch holds things together, but sometimes you want a repair nobody can even spot.
That’s where ladder stitch (or invisible stitch) comes in. Fold edges neatly, match thread color to fabric, and hand stitch small rungs across the gap.
- Keep thread pulled snug, not tight
- Use a fine needle for clean piercing
- Secure the thread inside the fold
Press gently once you stitch the tear closed.
Zigzag Stitch for Stretch
Ladder stitch hides a tear, but knits and Lycra need a repair that moves. Enter the zigzag stitch, sewn on a machine with a 1.5–3mm width and 2.5–4mm length. Use a ballpoint needle to dodge skipped stitches, polyester thread for stretch, and test settings on scrap fabric first. Balance thread tension so seams don’t pucker.
Sew The Tear Step by Step
Now that you’ve picked your stitch, it’s time to put needle to fabric. This part rewards patience more than speed, so slow down and follow each move in order. Here’s exactly how to go from threaded needle to finished repair.
Thread and Knot Needle
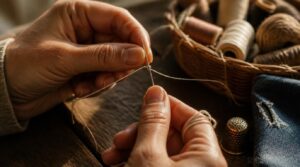
Cut your thread double the length of the tear, since it folds over twice when threading. Match thread weight and color to your fabric for a smooth repair.
Thread the needle, then tie a quilter’s knot: coil the thread around your finger, roll it off, and pull tight. Simple, secure, ready to sew.
Start From The Center
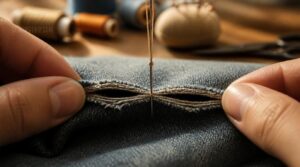
Once threaded and knotted, find the exact middle of the tear and set your needle there first. This center-first alignment keeps both sides balanced as you stitch outward.
- Less puckering
- Straighter lines
- Even tension
- No gaping edges
- Steady confidence
Working from the middle out gives you a symmetrical repair, so strengthen the rip evenly before you stitch the tear closed completely.
Keep Stitches Even
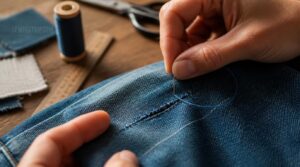
Even stitches make the difference between a repair that blends in and one that shouts for attention. Aim for 1-2mm spacing between each stitch, using a ruler or chalk marks as your guide.
Test your rhythm on scrap fabric first. Match your needle to the fabric weight, keep your pace slow, and let consistent stitch length carry you toward stitching the tear closed with confidence.
Control Thread Tension
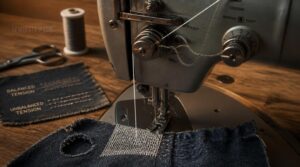
Loose loops or puckered lines usually mean your stitch tension is off, not your technique. If you’re hand sewing, keep pressure even; on a machine, check upper thread balance against lower thread calibration, clean the thread path, and nudge the tension regulator in small steps. Test on scrap first, matching thread to fabric weight, so your tear closes smooth and flat.
Secure The Final Knot
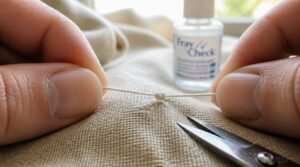
A weak knot undoes every stitch you just made. Pull the last stitch snug, then tie off the end with a double knot for a locking hold. Trim the thread tail to about a quarter inch, close but not too short. For slippery thread, dab on fray check. Tug gently to confirm the knot holds.
Patch and Finish Larger Tears
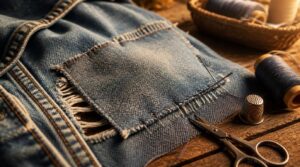
Some tears are too big or too ragged for stitches alone to fix. That’s when a patch steps in to back up the fabric and hold everything together. Here’s how to cut, place, and stitch one in five simple steps.
Cut Patch to Size
Grab your patch fabric and measure the hole’s height and width, then add 1 inch on all sides for cutting accuracy. Use the average of height and width for size calculation, and round up to the nearest half inch.
Keep shape alignment with the garment’s grain, mark seam allowance with chalk, and cut clean edges with sharp scissors.
Place Patch Under Tear
With your patch cut and trimmed, slide it behind the tear so it acts as a patch backing, sitting flat against the wrong side of the fabric.
Check edge coverage—the patch should reach at least a quarter inch past the tear on all sides.
Line up the grain alignment with your garment’s weave, keeping drape natural and stitches secure once you sew.
Baste or Pin Patch
Now that your patch sits flat and aligned, it’s time to lock it down before stitching.
Pin perpendicular to the tear edges, working from center outward, spacing pins 2 to 4 inches apart. For slippery or delicate fabrics, curved safety pins baste better than straight ones.
Tug gently to confirm the patch stays put—no shifting, no puckering—before you sew.
Stitch Around Patch Edges
With your patch pinned and steady, sew a small running stitch about ⅛ inch from the edge, working corners with extra reinforcement.
- Match thread color to the patch or garment
- Keep tension slightly tighter than usual
- Pivot carefully at each corner
- Use zigzag stitching for stretch fabrics
- Finish with a satin edge for durability
Press and Trim Excess
Once the stitching’s done, it’s time for pressing techniques to set your work. Use a hot iron on the appropriate heat setting and press the repair flat from the wrong side first.
Flip it over and press edges flat on top, too. Then trim seam allowance close to the stitching, remove loose threads, and finish stitch lines to prevent fabric fraying for good.
Frequently Asked Questions (FAQs)
What is the best stitch to repair a tear?
A stitch in time saves nine: for most tears, backstitch wins. It locks fibers with overlapping stitches, resists unravelling, and suits woven fabrics under light stress—stronger than a plain straight stitch, though a fabric stretch test helps you confirm before committing.
How to sew a rip step by step?
Thread your needle with matching thread, secure the knot, and sew a rip from the center outward with even hand stitching. Control stitch tension, check thread color matching, and finish by pressing the repair flat.
How do you mend a tear in fabric?
You don’t need special skills, just patience. Assess the tear, prep the fabric, then stitch the tear with matching thread. Control tension, secure the knot, and press flat—simple steps, sturdy results, every time.
How to make fabric look torn?
Grab tweezers to pull warp threads, snip fringe points, then tease with a fabric brush for soft fraying. Vary tear shapes and placement near seams for authentic tear shaping, layering small frays with holes.
What is the best stitch for mending a rip?
Picture that ragged split gaping at your knee like a tiny mouth. For woven fabric, the backstitch wins on strength. Want it invisible? Use ladder stitch for clean tears, or zigzag for stretchy knits that need give.
How do you sew a tear rip?
Snip stray threads first, press the tear flat, and line up the edges evenly. Match your thread to the fabric, then backstitch or run a stitch along the tear, keeping stitches small and tension even throughout.
How to repair small tears on fabric?
Trim loose threads first, then align edges tightly. Choose a running stitch for light fabric or backstitch for durability, spacing stitches 1-2mm apart. Secure your knot tightly, press flat, and your fabric stabilization will hold beautifully.
How do you resew a tear in a sewing machine?
Slow and steady wins the seam. Raise the needle, align edges under the presser foot, and stitch the tear using short, even stitches, keeping consistent tension and stitch length settings for a durable, professional-looking machine repair.
How do you stitch a tear in fabric?
Clean the tear, press it flat, and align the fabric grain. Choose hand stitching for delicate spots or machine stitching for sturdy ones—backstitch to strengthen the rip, or patch larger holes with careful edge finishing.
How do you fix a rip or tear in fabric?
Think of a rip as a wound: assess before you act. Check size and edges, prevent fraying, then match fabric type and thread color before you stitch the tear or strengthen the rip with hand or machine sewing.
Conclusion
A tear is just fabric asking for attention, not a death sentence. Once you know how to sew a tear, that snagged sleeve or busted seam stops feeling like a crisis.
Thread your needle, match your stitch to the fabric, and work with patience. Your careful stitches nearly disappear, and the garment often comes back stronger than before. That shirt still has plenty of life left in it.
Keep your kit close, and mend on.
- https://nightdress.net/how-to-fix-a-torn-slip-dress-easy-diy-sewing-tips
- https://mellysews.com/invisible-mending-step-by-step
- https://craftanddesign.net/tear-in-fabric
- https://thefloramodiste.com/blogs/tfm/the-step-by-step-guide-on-how-to-repair-your-own-clothes
- https://www.motherearthnews.com/diy/sewing-patches-zmaz83mjzraw