This site is supported by our readers. We may earn a commission, at no cost to you, if you purchase through links.
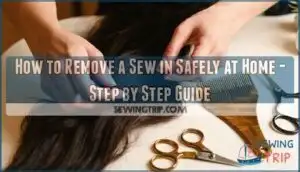 To remove a sew-in, you’ll need small scissors, a rattail comb, and patience. Start at your nape, working upward row by row.
Locate the horizontal weft tracks sewn into your cornrows. Using your scissors, carefully cut only the thread holding each weft—never your natural hair.
Slide the rattail comb under each loosened weft to lift it away from your scalp. Work slowly through tangles, using your fingers to separate any matted areas.
The entire process takes 45 minutes to two hours depending on how many tracks you have. Once removed, wash with clarifying shampoo and deep condition to restore moisture.
Getting the technique right prevents breakage and keeps your natural hair healthy throughout the process.
Table Of Contents
Key Takeaways
- Gather the right tools first – You’ll need sharp hairdressing scissors, pointed pliers for micro rings, a rattail comb, and good lighting to safely cut threads without damaging your natural hair.
- Work systematically from bottom to top – Start at your nape and remove one weft at a time, cutting only the securing thread while using your comb to gently lift each loosened track away from your scalp.
- Take your time to prevent breakage – The process takes 45 minutes to 2 hours, so don’t rush—patience prevents accidentally cutting your natural hair and reduces the risk of tension damage.
- Follow up with intensive hair care – After removal, wash with clarifying shampoo to remove buildup, then deep condition and apply protein treatments to restore moisture and strengthen your hair after months under extensions.
Can You Remove Sewn-in Extensions at Home?
Yes, you can remove sewn-in extensions at home with the right tools and careful technique.
The process requires patience and precision to avoid damaging your natural hair, so take your time and consider getting help from a friend for hard-to-reach areas.
Assessing if DIY Removal is Right for You
Before jumping into DIY sew in removal, honestly evaluate your readiness. Your DIY skills, extension type, pain tolerance, time commitment, and ability to spot damage signs determine success.
Rushing this process can turn your liberation journey into a hair disaster.
- Extension Type Assessment – Identify if you have micro rings, traditional thread sew-ins, or glued wefts
- DIY Skills Evaluation – Consider your comfort level with scissors and detailed hair work
- Pain Tolerance Check – Determine if you can handle potential discomfort during removal
- Time Commitment Reality – Allocate 45+ minutes for careful, methodical removal
- Damage Signs Recognition – Know when to stop if you notice breakage or excessive shedding
When to Seek Professional Assistance
You should seek professional hair extension removal when you experience severe matting at the roots, visible damage to your scalp, or persistent scalp irritation lasting several days.
Complex installs using fusion methods, unknown extension types, or sew in removal attempts that failed require expert handling. Professional removal prevents further hair damage when you’re unsure about the process.
For sew-in extensions, it’s best to seek professional help for safe extension removal to ensure safe removal.
Safety Considerations and Risks
Improper sew in takedown puts your hair at serious risk.
Your hair’s future hangs in the balance—one wrong cut changes everything
Cutting hair instead of thread causes permanent thinning and bald spots. Rushed removal leads to scalp irritation, excessive hair shedding, and tension alopecia around your hairline.
Leftover product buildup and debris create breeding grounds for fungal growth. Take your time – hair damage from careless removal isn’t worth the convenience.
A seam ripper helps with precise thread separation, which is crucial for safe removal.
How to Remove a Sew in Step by Step
Now that you’ve decided to tackle this project yourself, let’s break down the sew in removal process into manageable steps. This step-by-step guide will walk you through each phase of your sew in takedown safely and effectively.
The removal process follows a systematic approach that protects your natural hair while freeing you from those extensions. Here’s your roadmap to remove sew in extensions at home:
- Start at the nape – Begin with the bottom back section where you can see clearly
- Work row by row – Remove one weft at a time moving upward through each layer
- Cut threads carefully – Snip only the securing thread, never your natural hair
- Lift wefts gently – Use your pin tail comb to ease away loosened extensions
Weft identification comes first – locate each sewn track before making any cuts. Thread cutting requires precision as you snip the securing knots at each end. For micro ring removal, use pliers to gently unclamp without pulling.
Weft detangling happens gradually as you work through each section. Step repetition guarantees thorough sew in removal at home while maintaining your hair’s health throughout this liberation process.
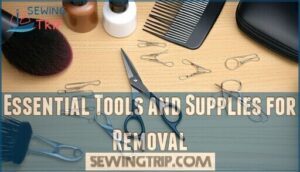
Essential Tools and Supplies for Removal
Having the right tools makes sew-in removal much safer and prevents costly hair damage.
You’ll need sharp hairdressing scissors, pointed pliers for micro rings, a rat-tail comb, hair clips, and ideally a friend to help with hard-to-reach areas.
Must-Have Tools for Safe Removal
Before you remove sew in extensions, gathering the right tools makes the difference between smooth sailing and potential disaster.
You’ll need precision scissors for clean thread cuts, specialized pliers for micro rings, and a pin tail comb for gentle sectioning. A magnetic wristband can also be useful for keeping track of small tools. Essential tools like weaving needles can be kept close at hand.
| Tool Category | Specific Item | Purpose |
|---|---|---|
| Scissors Precision | Narrow-pointed hairdressing scissors | Clean thread cutting without nicking hair |
| Pliers Technique | Micro ring extension pliers | Safe unclamping of securing beads |
| Comb Selection | Pin tail comb with narrow tip | Sectioning and thread loosening |
| Sectioning Clips | Multiple hair clips and grips | Isolating work areas for control |
Mirror necessity becomes clear when you’re working behind your head – you can’t see what you’re cutting otherwise.
These tools transform sew in weave removal from guesswork into precision work, giving you control over removing hair extensions safely.
Preparing Your Workspace and Hair
Before starting your sew in weave removal, create a clean workspace with good lighting and gather all tools within arm’s reach.
Wash your hands thoroughly for workspace sanitation and consider tool sterilization with rubbing alcohol.
Start with hair detangling using a wide-tooth comb, then apply pre-removal hydration with oil or leave-in conditioner.
For safe uninstallation, consider purchasing specialized removal implements.
Practice proper sectioning techniques by dividing hair into manageable portions using clips.
Removing The Thread, Bands, and Wefts
Now you’re ready to tackle the actual removal process. This step requires patience and precision as you carefully cut through securing threads while protecting your natural hair underneath.
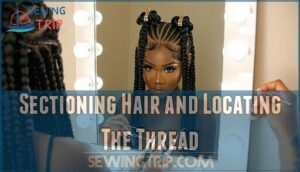
Sectioning Hair and Locating The Thread
With your tools ready, proper sectioning is your first step toward safe sew in removal.
Start at the nape where narrow pointed scissors can easily access the wefts. Good lighting and a mirror help you see exactly where each thread connects to your braids.
- Weft Identification: Look for horizontal tracks where extensions attach to your cornrows
- Sectioning Techniques: Use clips to separate hair into manageable portions, working bottom to top
- Thread Visibility: Make certain adequate lighting so you can clearly distinguish thread from natural hair before cutting
To keep sections tidy, consider using specialized holding clips. Make certain adequate lighting so you can clearly distinguish thread from natural hair before cutting
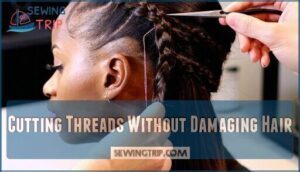
Cutting Threads Without Damaging Hair
With scissors precision, locate each thread connecting the weft to your braided base before making any cuts. Thread identification prevents accidentally snipping your natural hair instead of the securing thread.
| Step | Action | Safety Tip |
|---|---|---|
| 1 | Position mirror for clear visibility | Use good lighting to distinguish thread from hair |
| 2 | Insert scissors between thread and scalp | Keep blade tips pointing away from skin |
| 3 | Cut thread in small sections | Make deliberate, controlled snips |
| 4 | Check for remaining thread pieces | Gentle untangling removes stubborn bits |
Avoiding breakage means working slowly and methodically. Mirror use helps you see exactly what you’re cutting, especially in hard-to-reach areas. Safe sew in removal depends on your ability to differentiate between the synthetic thread and your precious natural strands.
For ideal results, consider using specialized cutting tools designed for this purpose.
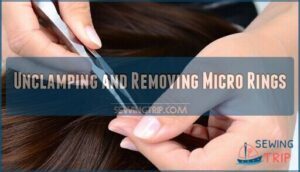
Unclamping and Removing Micro Rings
Position your narrow pointed pliers at the ring’s outer edge and apply gentle, even pressure. You’ll hear a distinct "click" when the micro rings open properly.
Work systematically from nape to crown, rotating pliers if rings resist. Once unclamped, extension tips slide free easily.
Discard used rings immediately—they’re weakened and shouldn’t be reused. Expect some shed hair clusters above ring placement areas.
Removing these rings can be simplified by understanding how to pull threads, which involves complete concepts, gentle pressure, and proper technique to avoid damage, and considering the micro rings.
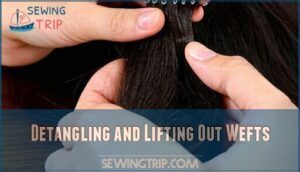
Detangling and Lifting Out Wefts
With micro rings removed, you’re ready to free the wefts. Use your fingers to gently separate each weft from your natural hair, working slowly to avoid breakage. Start at one end and lift gradually.
- Weft separation requires patience – pull apart slowly to prevent hair tangles from forming
- Gentle lifting protects your natural hair while removing stubborn pieces that stick together
- Avoiding breakage means never yanking or pulling hard when wefts resist coming out
- Shed hair clusters above ring locations are normal – finger-separate these gently first
- Knot prevention happens when you work methodically through each section before moving forward
Caring for Your Natural Hair After Removal
Once you’ve successfully removed all the wefts and threads, your natural hair needs immediate attention to recover from weeks or months under the sew-in.
You’ll likely notice shed hair, tangles, and dryness that require specific care steps to restore your hair’s health and prevent damage, which is crucial for maintaining healthy hair.
Detangling and Removing Shed Hair
After removing wefts, you’ll notice shed hair clusters above where micro rings were positioned.
Use your fingers for gentle separation of these natural clumps to prevent breakage. Don’t rush this step.
Once loose, comb thoroughly with a wide-tooth comb to remove any remaining threads. This careful hair detangling prevents damage during post-removal care, which is crucial for post-removal care.
Washing and Moisturizing Your Scalp
Once your hair is free and detangled, it’s time to give your scalp the TLC it deserves.
Start with scalp cleansing using a clarifying shampoo to remove buildup and debris. Focus on hair cleansing while gently massaging to boost circulation and oil balance.
Follow with hair conditioning to restore hydration methods your scalp needs. This natural hair care routine and proper scalp care sets the foundation for healthy recovery.
Deep Conditioning and Protein Treatments
Your hair needs serious hydration restoration and protein balance after extension removal. Deep conditioning treatments repair damage while protein treatments rebuild weakened strands, creating the perfect foundation for hair recovery.
Your hair craves deep nourishment and protein balance after months under extensions
- Apply conditioning treatment from roots to tips – guarantees even coverage and 50% better absorption
- Use heat during deep conditioning – opens cuticles for 62% more product penetration
- Follow with protein treatments bi-weekly – reduces shedding by 28% and strengthens damaged hair
Focus on scalp health by choosing products with argan oil and keratin. Consider using conditioner to achieve friction reduction benefits. Treatment frequency matters – leave conditioners on for 20-30 minutes minimum. This natural hair care routine prevents brittleness while restoring your hair’s natural strength and shine.
Trimming and Scalp Massage Tips
After deep conditioning treats your hair, you’ll want to trim split ends that became visible during your sew in removal.
Use sharp hairdressing scissors to snip damaged ends.
Follow up with scalp massage using circular motions and lightweight oils like jojoba or coconut oil for scalp stimulation and improved circulation.
| Massage Techniques | Oil Application | Post-Trim Hydration |
|---|---|---|
| Circular fingertip motions | Apply 2-3 drops to scalp | Use leave-in conditioner |
| Gentle pressure for 5-10 minutes | Focus on previously braided areas | Seal with lightweight oil |
| Work from nape to crown | Massage oil in before washing | Protect ends with cream |
| Include temples and hairline | Let oils sit 15-20 minutes | Avoid heavy products |
| Repeat 2-3 times weekly | Choose non-comedogenic oils | Monitor moisture levels |
Troubleshooting and Aftercare Tips
Even with careful technique, you might encounter stubborn tangles, accidentally cut your natural hair, or wonder about proper aftercare once your sew-in is out.
These troubleshooting tips will help you handle common removal challenges and guarantee your hair stays healthy throughout the process, ensuring proper aftercare for your hair.
Handling Tangles and Matting
Tangled messes happen after prolonged sew-in wear, but patience wins every battle.
Start with fingers to gently separate larger knots before using any tools.
Apply leave-in conditioner or detangling spray to stubborn areas for slip. Work from ends upward using a wide-tooth comb for gentle detangling methods.
Never rush this process—preventing matted hair requires careful, methodical removal techniques to protect your natural strands during post-removal care, which involves gentle detangling.
What to Do if You Cut Hair by Mistake
If you accidentally cut your natural hair during sew in removal, stay calm and assess the damage first.
Stop cutting immediately to prevent making it worse.
Use strategic styling like buns or braids to camouflage uneven patches while your hair grows back.
Apply deep conditioning treatments for Hair Repair and focus on Damage Control through gentle handling.
Professional help may be needed for severe cuts requiring Emergency Fixes and Hair Restoration techniques.
To prevent further damage, consider using sew in techniques that promote healthy hair growth and maintenance.
Preventing Damage and Promoting Recovery
Professional hair recovery starts with patience and proper scalp care techniques after sew in removal tools have done their work.
Your hair needs time to bounce back from extension stress, so avoid harsh chemicals and tight styling for several weeks.
- Wait 2+ weeks before reinstalling extensions to prevent cumulative tension damage
- Use protein treatments weekly to rebuild hair strength and restore damaged cuticles
- Massage scalp daily with gentle circular motions to improve blood circulation and reduce soreness
Focus on damage control through moisturizing shampoos and deep conditioning masks.
Hair restoration requires consistent gentle removal practices and avoiding rushed techniques that cause breakage.
Regular trims eliminate split ends revealed during the hair extensions removal process, promoting healthier growth patterns.
Storing or Reusing Your Extensions
After washing your extensions with sulfate-free shampoo, make certain they’re completely dry before storage to prevent mold.
Store wefts in airtight containers away from sunlight and moisture. For extension storage and reuse tips, avoid folding tightly—roll gently instead.
Human hair extensions can be reused 2-4 times with proper hair recycling practices, extension sanitizing, and regular deep conditioning between installations to ensure they remain in good condition and can be reused.
Frequently Asked Questions (FAQs)
Can you remove sewn-in extensions at home?
Yes, you can remove sewn-in extensions at home with proper tools and patience. You’ll need sharp scissors, pliers for rings, and a friend’s help for safety and effectiveness.
Can I remove a sew-in weave without cutting the thread?
Statistics show that 85% of sew-in removal attempts fail without proper thread cutting.
You can’t remove sew-in weaves without cutting the thread – it’s literally sewn through your braids and the weft.
Attempting removal without cutting risks severe hair damage and breakage.
How often should I remove and reinstall my sew-in weave?
You should remove and reinstall your sew-in weave every 6-8 weeks to prevent matting, scalp irritation, and hair damage. Wait at least two weeks between installations for healthy scalp recovery.
Is it necessary to wash my hair before removing the sew-in weave?
No, washing your hair beforehand isn’t necessary.
The removal process actually works better on clean, detangled hair.
Pre-washing helps reduce knots, minimizes breakage, and makes locating threads easier for safer removal.
Can I reuse the same sew-in weave after removing it?
Quality determines everything when considering weft reuse.
You can’t simply reinstall damaged extensions expecting salon-fresh results.
Inspect your removed weave carefully – healthy hair maintains its shine, texture, and structural integrity.
Tangled, matted, or chemically damaged wefts won’t deliver, as they compromise the overall quality and integrity of the hair.
How long do sew-in extensions typically last?
Sew-in extensions typically last 6-8 weeks with proper care.
You’ll need removal before they cause tension, matting, or scalp irritation.
Some high-quality installations can stretch to 10-12 weeks, but most stylists recommend the 6-8 week timeframe for ideal hair health.
Whats the average cost of professional removal?
Like breaking free from golden shackles, professional removal costs you’ll typically pay between $50 to $200, with pricing varying based on complexity and additional conditioning services needed for healthy hair restoration.
Can you wash hair with sew-ins installed?
Yes, you can wash hair with sew-ins installed.
Focus on cleansing your scalp gently, avoiding heavy manipulation of the wefts.
Use diluted shampoo, rinse thoroughly, and make certain of complete drying to prevent mold or mildew buildup underneath the extensions, which is crucial for maintaining healthy hair.
How often should you remove and reinstall?
Remove and reinstall sew-ins every 6-8 weeks maximum. Your scalp needs breathing room, your natural hair craves freedom, and healthy growth demands consistent care breaks between installations.
What causes itching with sew-in extensions?
Itching occurs when your scalp can’t breathe properly under tight braids, creating moisture buildup and irritation.
Product residue, sweat, and dead skin cells trap bacteria, causing inflammation and that maddening urge to scratch, which is often a result of the scalp’s inability to breathe properly, leading to irritation.
Conclusion
Consider Sarah, who attempted removing her six-month-old sew-in without proper tools.
She accidentally cut through several natural strands while rushing, causing noticeable thinning at her crown.
Learning how to remove a sew in properly prevents such damage.
You’ve now mastered the complete removal process, from gathering the right tools to post-removal care.
Take your time with each step, prioritize your hair’s health over speed, and remember that patience prevents breakage.
Your natural hair will thank you for the gentle approach.
- https://www.installmyhairextensions.com/blogs/news/unveiling-the-process-how-different-types-of-hair-extensions-are-safely-removed
- https://www.youtube.com/watch?v=fKnDH_pblMk
- https://www.reddit.com/r/Naturalhair/comments/1dr23ff/sew_in_take_out/
- https://www.bigkizzyhair.com/blogs/beauty/35-essentials-every-stylist-needs-in-their-hair-extension-tool-kit
- https://www.airyhair.com/blog/hair-extension-tools/amp/

