This site is supported by our readers. We may earn a commission, at no cost to you, if you purchase through links.
Grab a ceramic flat iron, go small section by small section, and keep a steady hand—don’t accidentally tap those sew-in tracks! Use a fine-tooth comb as you pass the iron for that silk press feel.
Protect your handiwork with satin at night, and remember: a pro touch and regular trims work wonders. Next up, smart ways to keep it sleek.
Table Of Contents
Key Takeaways
- Always prep both your natural hair and extensions by cleansing, detangling, and applying a heat protectant before straightening.
- Work in small, manageable sections with a ceramic flat iron set to safe temperatures, and keep the iron away from sew-in tracks.
- Protect your style at night with silk or satin accessories and use sulfate-free shampoos to maintain smoothness and prevent frizz.
- Give your scalp breaks between installs, avoid excessive heat, and schedule trims every 6-8 weeks to keep both your sew-in and natural hair healthy.
Preparing Your Hair and Extensions
You’ll get the best results when you start with clean, detangled hair and extensions, so take your time prepping each section before styling.
Think of this step like stretching before a workout — it keeps your hair healthy and helps prevent breakage down the line.
Cleansing and Detangling Natural Hair
Clarity counts—start by choosing a sulfate-free shampoo for gentle detangling and buildup removal. Massage your scalp in circles, then work conditioner from ends to roots to keep moisture balance in check. Use a wide-tooth comb to detangle section by section.
Traction alopecia can be avoided with proper care. This routine improves scalp health, making sewins smoother whether you plan to straighten your hair or rock your curly hair.
Stretching Curly Hair Without Heat
After cleansing and detangling comes the magic—stretch your curly hair for sewins, no heat needed. Try these tried-and-true methods for damage-free hair care:
- Roller Setting
- Banding Method
- African Threading
- Air Drying in sections
- Using Natural Elongation techniques
These simple steps help you prep hair extensions, keep your curls healthy, and steer clear of breakage.
Sectioning Hair for Easier Straightening
Ready to make the most of your flat iron? Start with sectioning for pro results. Working in small, manageable parts—using clips for precise Clip Placement—lets you stretch your hair evenly, avoid tangling, and protects against damage.
Use the table below for Sectioning Benefits:
| Section Size | Layered Straightening |
|---|---|
| Small | Better control |
| Medium | Fast, even heat |
| Large | More tangles |
| Tiny | Slow, precise |
| Oversized | Missed spots |
Prepping Extensions Before Styling
Before styling, don’t skip prepping: Extension Quality Matters, so check if you’ve got synthetic or human hair—each reacts differently to a flat iron. Gently detangle with a wide-tooth comb, and always pre-wash for extra softness and less buildup.
Let your extensions fully dry before moving on; damp hair plus heat protectant means your hair straightening will actually work wonders!
Essential Tools and Products for Straightening
You’ll need the right tools—like a ceramic flat iron, wide-tooth comb, and a good heat protectant—to get your sew-in sleek and healthy without unwanted damage.
Don’t worry, investing in the proper products saves your hair from frizz, split ends, and future “Why did I do that?” moments.
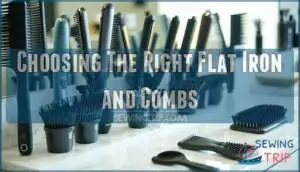
Choosing The Right Flat Iron and Combs
Now that your hair’s prepped and tangle-free, set yourself up for straightening success. Choose a flat iron with ceramic, titanium, or tourmaline plates for even heat, and check for temperature control to keep things safe.
Selecting a flat iron with tourmaline plates can boost shine and reduce frizz. Grab a wide-tooth or fine-tooth comb—bristle quality and ergonomic design matter for smooth hair styling. Your sewin will thank you.
Applying Heat Protectant Sprays or Serums
When you’re gearing up to flat iron your sewin, don’t skip the heat protectant. Spritz or smooth it on evenly—think “no patchy spots.” Watch for these:
- Even Application cuts down on damage.
- Dodging Product Buildup keeps hair light.
- Reapplication Frequency matters for big sessions.
Consider exploring options for heat protectant sewin to maintain hair health. Pick serums with ingredient benefits—skip anything with drying alcohol!
Recommended Temperatures for Extensions and Leave-out
Thermometers aren’t just for kitchens—Temperature Monitoring Tools keep Extension Heat Limits in check. Aim for 320–350°F for extensions; natural Leave-out Heat Tolerance varies, so start low, especially near braids. High temperatures can cause hair to become brittle, leading to damage and breakage.
Stay sharp for Heat Damage Signs like steam or odd smells. Always cool with gentle air, trim regularly, and don’t forget that deep conditioner for healthy curly hair styles.
| Area | Max Temp |
|---|---|
| Extensions | 350°F |
| Leave-out | 360°F |
| Synthetic | 300°F |
| Trim, Condition | As needed |
Styling Aids Like Clips, Brushes, and Edge Control
Once temperatures are under control, it’s time for the right tools. Reach for sturdy clips (think butterfly clips for thick hair) to section with ease. Pick a boar bristle brush—these keep tangles at bay without breakage. A great option is this boar bristle brush for styling.
Use edge control for a clean hairline and smooth baby hairs. Keep tools clean; product buildup can crash your curly hair styles.
Step-by-Step Guide to Straightening a Sew-In
You’re about to master straightening your sew-in with simple, clear steps that protect both your natural hair and extensions from heat damage.
Stick with this easy process—you’ll be surprised how quickly smooth, sleek results become your new normal.
Dividing Sew-in and Natural Hair Into Small Sections
With patience and a good tail comb, sectioning techniques like hair partitioning and strand separation keep you organized and stress-free. Working in small sections cuts down on tangles and breakage. This way, you can see where to trim without any guesswork.
Use clips to hold each braid segmentation out of the way, making weave division a breeze.
Using a Flat Iron Safely on Extensions
Once you’ve split your sections, it’s showtime. Start with a small section size—about two inches—apply a heat protectant thoroughly, and set your flat iron to the right temperature control for extensions. Sweep the iron smoothly, avoiding attachment points. Use a steady hand and focus on technique. No rush.
To prevent damage, remember to use heat protectant spray before applying heat. **Aftercare routines, like trims, keep those lengths looking fresh.
Straightening The Leave-out for a Seamless Blend
Start with parting finesse by neatly sectioning your leave-out from the braids. Use a fine-tooth comb for matching density and smooth blending of textures.
Glide your flat iron gently, avoiding breakage with light, steady passes. Try not to rush—lasting sleekness is all about careful technique.
If ends look rough, give them a quick trim for polish.
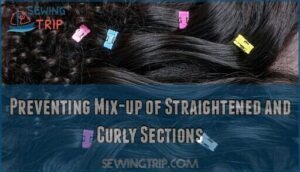
Preventing Mix-up of Straightened and Curly Sections
Taming a sew-in maze means tracking which sections you’ve straightened—trust me, it’s easy to lose your place. Try these pro-tips:
- Section Identification: Use clips or Temporary Markers to keep new and old straight sections apart.
- Consistent Direction: Always work from back to front.
- Braiding Unstraightened: Braid or tuck away curly bits for Separate Storage, avoiding accidental heat passes.
Tips for Maintaining Straight Sew-Ins
You’ll keep your sew-in looking smooth and healthy by using the right products, gentle techniques, and targeted routines each day.
Follow these practical tips so your straightened style stays sleek—no one wants their hair getting frizzy before the weekend!
Nighttime Routines With Silk or Satin Accessories
A nighttime hair-care routine pays off—think of silk benefits and satin bonnets as your secret sidekicks.
These smooth materials are all about friction reduction and moisture retention, shielding braids or straight styles while you sleep.
Tuck hair under a bonnet, scarf, or on a silk pillowcase to wake up with style preservation and less drama in the morning.
Washing and Conditioning Without Causing Frizz
Switching from silk pillowcases, let’s talk wash day. Always reach for sulfate-free shampoos—they keep your sew-in sleek and frizz-free.
Lather gently, rinse with cold water to help your hair shine, and remember: gentle drying beats a towel scrub session.
Tuck your braids under a shower cap when you deep condition, so straight strands don’t get ruffled.
Daily Brushing and Moisturizing Practices
After washing your sew-in, grab a boar bristle brush for gentle detangling. Go slow, working from ends to roots; a little patience avoids pulling and breakage.
Spritz a light leave-in—don’t drown your hair—then smooth on a serum for moisture balance.
Check in nightly with a silk bonnet for added frizz control and better results every morning.
Deep Conditioning to Keep Hair Healthy
Now that you’re keeping up with daily brushing and moisture, don’t skip deep conditioning—it’s your hair’s secret weapon! Try it regularly to boost moisture retention, balance protein, and support scalp health. To avoid damage, air dry completely.
Here’s how to keep those strands smiling:
- Choose quality product ingredients
- Focus on moisture retention
- Maintain protein balance
- Prioritize scalp health
- Track treatment frequency
Preventing Damage and Maximizing Longevity
You want your sew-in to last and your hair to stay healthy, so it’s all about using smart techniques and not rushing the process.
By making careful choices, like giving your hair breaks and saying no to extra heat, you’ll keep your style looking fresh without sacrificing your strands.
Minimizing Heat Exposure and Avoiding Tight Installs
By all means, treat your hair like you’d treat a silk scarf—minimize heat exposure and go easy during installs. Choose Heatless Alternatives whenever possible, saving your strands for the long haul.
Gentle braiding keeps Scalp Tension low while Install Breaks let your roots breathe.
Watch for Product Buildup, as it sneaks up and causes dullness.
Using Heatless Straightening Alternatives
Roller Sets, Banding Method, and Hair Wrapping all let you straighten sew-ins—no sizzling flat iron required. A good tension blowout (using low-speed, high-tension air) or picking the right alternative products can stretch curls smoothly.
Give these heatless tricks a shot, and you’ll help your hair stay healthy and strong, minus the stress and frazzle. Using closures or frontals can eliminate leave-out entirely, further reducing heat damage risks.
Taking Breaks Between Sew-ins
Everybody’s roots need a breather—sometimes your hair just wants a “vacation.” Press pause between sew-ins for scalp recovery, hair regrowth, and breakage prevention. Here’s what works:
- Hydrate your scalp—think of it as a spa day for your head.
- Switch to protective styling.
- Let your natural hair rest to encourage healthy growth and strength.
Professional Maintenance and Regular Trims
Relying on regular Professional Consultation, you’ll keep both your sew-in and natural hair in top shape. Pro stylists spot trouble early, offer Product Recommendations, and make sure those ends don’t split faster than you can say, “Salon day!”
Schedule trims every 6-8 weeks for Split End Removal, boosting Extension Lifespan and preserving Texture Matching.
Frequently Asked Questions (FAQs)
How long does it typically take to straighten a sew-in hairstyle?
Taming a sew-in doesn’t take all afternoon—usually, you’ll spend 30 to 60 minutes from prepping, sectioning, to straightening.
Go slowly, use heat protectant, and keep passes minimal for hair that won’t protest later.
Can I use a different type of needle for sewing in the extensions?
You can use a straight or curved needle for sew-in extensions, but the curved type makes getting around tricky spots easier.
Just keep each stitch gentle—no one wants scalp tension ruining their good hair day!
How often should I replace my straight sew-in?
You’ll want to replace your straight sew-in every 6 to 8 weeks. Letting it ride too long’s like overstaying at a party—your scalp gets grumpy, and your hair health takes a nosedive.
Can I use dry shampoo on a sew-in?
Like a quick dusting for your hair, dry shampoo helps soak up oil at the roots. **Spray lightly onto your sew-in, wait a few minutes, then gently brush through.
**
Aim for scalp health, skip heavy buildup.
What hairstyles are safe after straightening a sew-in?
After straightening, rock a sleek ponytail, low bun, soft waves, or even a half-up style.
Handle your roots with care, avoid tight rubber bands, and spritz a little serum for a polished finish.
How do I manage scalp itching with a sew-in?
An ounce of prevention is worth a pound of cure—keep your scalp fresh by cleansing gently with witch hazel on cotton pads, moisturizing with light oils, and never scratching with sharp objects.
Pat, dab, massage. **Comfort wins.
Are there specific products for colored sew-ins?
Use sulfate-free shampoos and color-safe conditioners to protect your colored sew-in. Try purple shampoo for blondes, deep conditioners with UV protection, and lightweight leave-ins for vibrancy.
Don’t skip weekly moisture treatments—color loves hydration.
Conclusion
Over 60% of sew-in wearers say their style lasts longer with proper care. When you learn how to straighten a sew in, you’ll discover lasting shine, less breakage, and more confidence.
Gentle prep protects your hair and extensions, and heat protection is non-negotiable. Night routines with silk or satin matter, so don’t skip them.
Follow each precise step, keep tools clean, and trims regular, and your sew-in will stay sleek and healthy.
- https://www.youtube.com/watch?v=8PDJfuHG95w
- https://hotheads.com/blogs/sew-in-weft/sew-in-weft-maintenance-guide
- https://www.airyhair.com/blog/straightening-hair-extensions/amp/
- https://usahair.com/blog/common-mistakes-to-avoid-with-sew-in-hair-extensions-essential-tips-for-success.html
- https://www.privatelabelextensions.com/blogs/bundles/products-for-straight-hair

