This site is supported by our readers. We may earn a commission, at no cost to you, if you purchase through links.
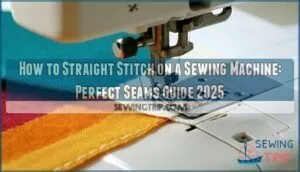
This fundamental technique works on all fabrics and forms the backbone of nearly every sewing project. Once you’ve got the basics down, there are clever tricks for achieving professional-looking results every time.
Table Of Contents
- Key Takeaways
- Mastering The Straight Stitch
- Techniques for Straight Stitching
- Enhancing Straight Stitching With Accessories
- Patience and Practice for Straight Stitching
- What Does a Straight Stitch Look Like?
- Step-by-Step Guide for Sewing a Straight Stitch
- Tips for Achieving a Perfect Straight Stitch
- Troubleshooting Common Issues With Straight Stitching
- Exploring Creative Possibilities With Straight Stitching
- Frequently Asked Questions (FAQs)
- Conclusion
Key Takeaways
- Watch your seam guide, not the needle – You’ll get straighter lines by focusing on the fabric edge along reference points rather than staring at the moving needle.
- Let the feed dogs do the work – Don’t pull or push fabric through; guide it gently while your machine’s feed dogs control the movement for consistent stitching.
- Support your fabric properly – Use an extension table and keep fabric flat to prevent shifting and ensure smooth feeding through the machine.
- Start slow and practice regularly – Build muscle memory with consistent practice at a comfortable pace rather than rushing through projects.
Mastering The Straight Stitch
You’re ready to master the straight stitch, the foundation of almost every sewing project. By focusing on straight lines and even spacing, you’ll see how practice leads to strong, neat seams every time.
Benefits of Straight Stitching
With the straight stitch, you get simplicity and versatility wrapped into one neat package. This foundation stitch is perfect for beginners and seasoned sewers alike.
It creates clean seams, boosts seam strength, and works on all sorts of fabrics. Using your sewing machine’s basic settings, you’ll find straight stitch sewing is reliable, beginner friendly, and ideal for almost any project.
Seam Allowance Options
Now that you’ve seen how straight stitching holds a project together, let’s talk seam allowance. Your seam width choice matters—a narrow seam works for light fabrics, a wider one builds solid structure.
Use a seam guide, edge guide foot, or magnetic seam guide for accuracy. For curved seams, grading seams, clipped seams, or corner mitering, adjust and check often for neat results.
Quilting With a Straight Stitch Machine
Quilting success starts with choosing a Walking Foot for your straight stitch machine. This attachment keeps layers of fabric and batting from shifting.
Before you get started, select sturdy fabric and try basting methods that suit your project. Adjust stitch length, needle position, and thread tension for clean quilting patterns.
Don’t forget, regular machine maintenance helps with stitch regulation, so your finished quilt looks neat and polished every time.
Techniques for Straight Stitching
When you’re learning to straight stitch on a sewing machine, you’ll want to practice using seam guides and keeping fabric aligned for consistent, even results.
Follow each step closely, and soon you’ll feel confident managing your fabric and machine for neat seams every time.
Avoid Watching The Needle
Once you’re ready to master the straight stitch, it helps to trust your sewing machine. Instead of zeroing in on the needle, let your Peripheral Vision and Fabric Guidance do the work.
Watch the fabric’s edge glide along a reference line. Maintaining a Consistent Speed turns sewing straight lines into a smooth, Rhythmic Sewing flow, building muscle memory every time.
Proper Utilization of Feed Dogs
Shifting your focus from the needle, pay attention to your sewing machine’s feed dogs—they’re the unsung heroes guiding your fabric smoothly.
To keep your straight stitch on track, make sure feed dog height is set properly, balance the pressure foot, and check for fabric feeding issues.
Regularly clean your feed dogs and consider specialty feed dogs for tricky projects.
Providing Fabric Support
To keep your fabric steady while you sew, put an extension table to use alongside your machine. It fights gravity and gives your fabric handling real support.
For better results, try these tips:
- Use Interfacing Usage for tricky fabrics
- Choose the right Stabilizer Types for extra hold
- Experiment with Fusible Backings
- Explore Woven or Knit Support
Aligning Fabric With Reference Points
After you’ve supported the fabric, focus on aligning it with reference points for a straight stitch. Use the seam allowance guide, edge guide foot, or even a magnetic seam guide for reliable fabric edge alignment.
Laser alignment tools and presser foot edges help keep seams consistent.
Proper placement ensures a consistent seam width, giving your project that professional finish every time**.
Utilizing Seam Guide Attachments
Ever wonder how professionals get their stitches so straight? Seam guide attachments are your secret weapon for accurate placement. They come in many attachment types: edge guide foot, adjustable guide foot, and magnetic seam guide, each ensuring a neat seam allowance. Keep them clean for best results and try creative applications as your skills grow.
- Aligns fabric for precision
- Reduces wobbly seams
- Helps maintain seam allowance
Enhancing Straight Stitching With Accessories
You can improve your straight stitching results by using the right accessories and adjusting your machine settings. Specialty presser feet and needle position adjustments will help you create more accurate seams with better control.
Specialty Presser Feet
Beyond mastering basic techniques, specialty presser feet can transform your straight stitch results. These essential presser feet solve specific sewing challenges while improving precision and speed.
The straight stitch presser foot creates clean, accurate seams on most fabrics. For tricky materials, try a Teflon Foot or Roller Foot—they glide smoothly over sticky surfaces like vinyl and leather without marking. An Open-Toe Foot gives you clear visibility for precise topstitching, while an edge guide foot maintains consistent seam allowances.
Here are must-have specialty feet for straight stitching:
- Blind Hem foot – Creates professional invisible hems on garments
- Adjustable Guide foot – Maintains perfect seam allowances with movable guides
- Quarter-inch foot – Essential for quilting with precise ¼" seams
- Walking foot – Feeds multiple fabric layers evenly without shifting
With over 20 specialty foot options available, you’ll find the right tool for every project. These accessories aren’t just fancy add-ons—they’re practical solutions that make straight stitching easier and more professional.
Adjusting Needle Position
While specialty presser feet help with specific tasks, adjusting needle position settings gives you even more control. Most sewing machines let you move the needle left, right, or center. This affects fabric edge alignment and topstitching precision.
For zipper foot usage, position your sewing machine needle closer to the zipper teeth. When setting up straight stitch for decorative stitching, try different needle placement uses.
Center position works best for standard seams, but left or right placements help when you need precise seam allowances. Practice adjusting needle placement on scrap fabric first.
Patience and Practice for Straight Stitching
You won’t master straight stitching overnight, but each practice session brings you closer to perfect seams.
Start with scrap fabric and take your time—rushing leads to crooked lines and frustration, while steady practice builds the muscle memory you need for consistent results.
Taking Your Time
Consistent speed is your bedrock when sewing straight stitch on any machine. Rushing mistakes happen when you push too fast through fabric layers. Slowing down creates better quality control and prevents common issues and solutions from becoming necessary.
Consistent speed serves as your foundation when sewing straight stitches—rushing creates mistakes while patience builds quality control
Your foot pedal deserves gentle pressure, not aggressive stomping. Practice consistently at a comfortable pace until muscle memory develops. Controlling sewing speed means finding that sweet spot where your machine hums smoothly.
Adjust your sewing machine settings to match your natural rhythm. Avoiding fatigue keeps your lines straighter and your seams neater. Remember, tortoise beats hare every time.
The Importance of Practice
Practice consistently to develop muscle memory in your sewing skills. Your hands learn to guide fabric smoothly through repeated motion. Consistent repetition transforms clumsy attempts into confident straight lines.
Skill development requires patience building through daily sessions. Don’t let initial frustration derail your progress. Each wobbly seam teaches valuable lessons about tension and speed. Overcoming frustration becomes easier with each successful stitch.
Sewing practice builds the foundation for sophisticated techniques. Eventually, sewing straight lines becomes second nature through dedicated muscle memory training.
What Does a Straight Stitch Look Like?
A straight stitch looks like a neat row of tiny dashes running in perfect alignment. When you examine your seam appearance, you’ll spot the telltale signs of quality work.
Here’s what makes a straight stitch pattern shine:
- Stitch evenness – Each stitch matches the next in size and spacing
- Thread tension – No loops or puckering mars the fabric impression
- Consistent lines – Your stitches per inch stay uniform throughout
- Smooth stitch length – Around 2.5-3.5mm creates the ideal look
Quality straight stitches won’t have gaps between individual stitches. They’ll create one continuous line that looks professional and holds strong.
Step-by-Step Guide for Sewing a Straight Stitch
Follow these five essential steps for sewing straight stitch success. First, complete your machine setup by selecting the correct needle and adjusting thread tension for your fabric weight.
Next, focus on proper fabric placement under the presser foot, aligning edges with your sewing machine’s guide marks.
Begin with backstitching to secure your seam, then maintain consistent stitch length around 2.5mm as you sew forward. Let your machine’s feed dogs guide the fabric naturally while keeping steady pressure on the pedal.
Tips for Achieving a Perfect Straight Stitch
You’ll find that perfecting your straight stitch requires the right tools and steady practice to create strong, professional seams. The key steps include using seam guides, aligning fabric with reference points on your machine, and maintaining a consistent pace as you sew.
Seam Guide Attachments
Seam guide attachments transform your straight stitch accuracy from guesswork to precision. Magnetic guides clamp onto your machine’s throat plate, creating reliable seam markings for consistent results.
Adjustable guides let you customize seam allowances, while aftermarket options offer specialized features. These attachment types turn your sewing machine into a professional-grade tool for accurate seams every time.
Using Reference Points
Reference points on your sewing machine work like invisible guardrails for perfect straight stitches. Your fabric edge alignment becomes simple when you follow these five key reference markers:
- Seam allowance guide markings on the throat plate
- Laser guidance systems that project a straight line
- Fabric edge positioned against the presser foot
- Parallel line sewing using drawn guidelines
- Consistent seam width marks on your machine
These reference points eliminate guesswork and help you maintain steady control. You’ll find that watching your fabric edge rather than the needle creates smoother, more accurate seams every time.
Taking Your Time and Practicing
Mastering straight stitches requires consistent practice and gradual improvement through mindful sewing at slow speed. Start with practice projects for beginners using sewing practice sheets to build muscle memory along straight lines.
Patience rewards you with better control as your hands learn proper movements. Take breaks when frustrated—rushing leads to wobbly seams that need ripping out later.
Troubleshooting Common Issues With Straight Stitching
Even experienced sewers encounter problems when straight stitching, but you can fix these issues quickly with simple adjustments.
You’ll learn to identify and solve common problems like uneven stitches, fabric puckering, and skipped stitches using basic machine settings and proper techniques.
Uneven Stitch Length
Uneven stitches often stem from tension imbalance or feed dog issues affecting your straight stitch quality. Check these common culprits:
- Thread tension settings – Adjust upper and lower tension for consistent stitch length
- Needle size mismatch – Wrong needle for fabric density creates irregular stitches
- Feed dog problems – Clean lint buildup that prevents smooth fabric feeding
- Machine maintenance needs – Oil and service regularly for ideal performance
Testing tension settings on fabric scraps saves frustration later.
Fabric Puckering
Fabric puckering can turn your sewing machine into your worst enemy. When your straight stitch creates unwanted wrinkles, start with tension adjustment—lower both upper and bobbin thread tension.
Consider these solutions:
- Use fabric stabilizers beneath delicate materials for extra support
- Choose the right needle choice for your fabric weight and type
- Adjust feed dog pressure to prevent fabric distortion during stitching
- Experiment with shorter stitch length settings to reduce stress on seams
Remember, every fabric behaves differently with your sewing machine.
Skipped Stitches
When skipped stitches plague your sewing machine, the culprit usually lies in four key areas. This common straight stitch problem frustrates sewers, but solutions exist.
- Needle Quality: Replace dull or bent needles every 8 hours of sewing
- Thread Compatibility: Match thread weight to your fabric type and needle size
- Tension Balance: Adjust both upper thread tension and bobbin tension settings
- Machine Timing: Clean feed dogs and needle plate area regularly
A fabric stabilizer helps prevent skipping on tricky materials.
Exploring Creative Possibilities With Straight Stitching
You can turn your basic straight stitch skills into creative projects using decorative threads and twin needles for unique effects.
Changing your stitch length creates texture and visual interest, transforming simple seams into design elements.
Decorative Threads and Twin Needles
You can transform basic straight stitching into stunning decorative work using specialty thread types and twin needle techniques. Metallic threads create shimmering effects on your sewing machine, while polyester embroidery threads offer vibrant colors and high sheen. Twin needles produce two parallel straight lines that mimic professional embroidery without special equipment.
Start by adjusting your thread tension settings lower than normal to prevent puckering. Test different needle sizes—larger ones work better with heavier decorative threads. When working with stretch fabrics, reduce presser foot pressure for smoother stitching.
Always test your decorative effects on scrap fabric first to make certain of proper fabric compatibility. These simple adjustments to your sewing machine settings reveal creative possibilities that’ll make your projects shine.
Stitch Length Variation
Beyond decorative threads, adjusting stitch length opens up new creative possibilities for your straight stitch projects. Different stitch length settings on your sewing machine create unique effects depending on fabric type, thread weight, and stitch purpose. Shorter stitches provide precise control for detailed work, while longer stitches create flowing decorative effects. Making tension adjustments alongside length changes ensures professional results.
- Precision work: Use 1.5-2.0mm lengths for topstitching collars and buttonholes
- Standard seaming: Set 2.5-3.0mm for most fabric types and everyday projects
- Decorative effects: Try 4.0-5.0mm lengths for visible stitching and artistic details
- Gathering: Use maximum length with loose tension for easy fabric manipulation
- Reinforcement: Switch to shorter lengths when sewing stress points and corners
Frequently Asked Questions (FAQs)
What is a straight stitch sewing machine?
Like a trusty companion in your sewing journey, a straight stitch sewing machine creates simple, evenly-spaced stitches in a straight line.
It’s the basic stitch pattern that forms the foundation for all your sewing projects and seams.
How do you sew a straight stitch?
Start by threading your machine and selecting straight stitch. Place fabric under the presser foot, align with seam guides, then gently press the pedal while guiding fabric steadily forward.
Why should you buy a straight stitch sewing machine?
Don’t put all your eggs in one basket—straight stitch machines excel at precision seaming.
You’ll get dedicated functionality, high-quality stitch quality, and reliable performance for basic sewing projects without unnecessary complexity.
How do I adjust the needle position for a straight stitch?
Most sewing machines have a needle position dial or button. Turn it to center for standard seams, or left/right for topstitching and edge work.
Check your manual for specific controls.
What thread weight works best for straight stitching?
Think of thread weight as your sewing foundation’s backbone. Use medium-weight all-purpose thread (40-50 weight) for most straight stitching projects. It’s strong enough to hold seams securely while feeding smoothly through your machine without causing tension issues.
How do you prevent fabric from shifting while sewing?
Pin your fabric pieces together before sewing to keep them aligned. Lower the presser foot firmly to grip the fabric.
Guide gently with your hands, but don’t pull or push the material through.
Can you straight stitch without a presser foot?
You can’t safely straight stitch without a presser foot. It holds fabric steady and controls thread tension.
Free-motion feet allow limited movement, but regular presser feet are essential for consistent, quality stitches.
Whats the ideal sewing speed for beginners?
Like a tortoise winning the race, slow and steady gets the better of the sewing machine. You’ll want to crawl along at your slowest speed setting initially.
This gives you control and prevents mistakes while you’re learning the ropes.
How do you choose between polyester and cotton thread?
Choose polyester thread for strength and durability on most fabrics. Cotton thread works best with natural fabrics like cotton and linen.
Match your thread type to your fabric for best results.
Conclusion
Sarah’s first quilt looked like a road map gone wrong until she mastered how to straight stitch on a sewing machine. Now you’ve learned the same essential skills.
Remember to watch your seam guide, let the feed dogs work, and support your fabric properly. Start slowly and practice regularly. These fundamentals will transform your sewing from wobbly attempts into professional-looking seams that’ll make you proud of every project you create.

