This site is supported by our readers. We may earn a commission, at no cost to you, if you purchase through links.
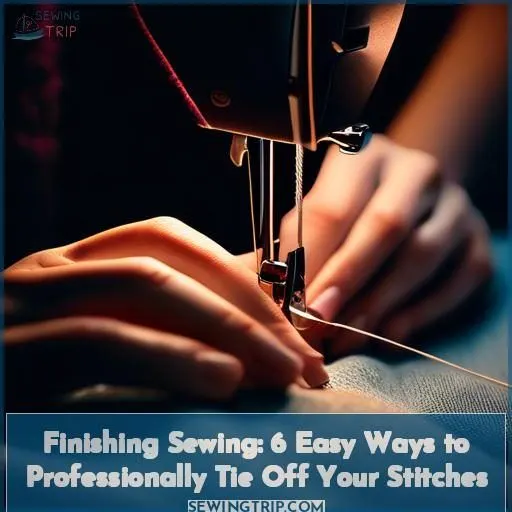
To professionally complete your sewing, you have several choices. For a sturdy double-threaded knot, cut the thread below the needle, tie the two halves together with three firm knots, and be careful not to pull the first knot too tightly.
Alternatively, you can tie off with a single thread by leaving enough length to loop and pull tight.
For a seamless finish, make a tiny stitch through both fabric layers, pass the needle back through the same stitch, and pull the thread to form a loop, then pass the needle through it.
These methods guarantee a polished, secure result. To explore further into the six best ways to professionally finish your sewing projects, continue reading.
Table Of Contents
Key Takeaways
- Use a sturdy double-threaded knot for a secure finish, or opt for a single thread for a seamless look.
- Ensure proper knot tension, thread length, and knot placement to maintain stitch quality.
- Tie off with a single thread by looping and pulling tight, or make a tiny stitch through both fabric layers for a knotless finish.
- Utilize adhesive to secure knots and enhance thread durability, especially on thicker materials like leather.
How to Finish Off Sewing?
To finish off sewing, you can use several techniques to secure your stitches. One popular method is backstitching, which involves sewing a few stitches in the same place at the beginning and end of the seam. This creates a lock stitch that helps to secure the seam and prevent it from coming undone over time.
Another option is to use a knot to tie off the thread. To do this, you can make a loop with the needle and thread, insert the needle under the stitch closest to the thread, and pull it to create a knot. For added security, you can make another loop and knot it again.
If you’re working with thick fabric or want extra security, you can also use Fray Check, a clear liquid that prevents threads from fraying or unraveling.
Tying Off With a Double Threaded Needle
When sewing with a double threaded needle, you’ll want to guarantee a lasting finish. Start by cutting the thread beneath the needle, then tie the two thread halves together with three firm knots, being cautious not to pull the first knot too tightly.
Cut Thread Below Needle
Snip your thread below the needle, considering needle size and fabric thickness to guarantee adequate length for a secure knot without causing puckering in your stitch.
Tie Two Halves Together
Joining two strands together is a critical step in completing your stitches. When working with a double-threaded needle, you’ll want to make sure the knot is secure and the thread is taut. Here’s how to do it:
- Cut the thread under the needle: This will provide you with two separate ends of thread to work with.
- Join the two strands together: Cross one end of the thread over the other, then pull the ends through the loop created by the crossing. This will form a basic knot.
- Confirm the knot is secure: Pull on the thread to confirm the knot is tight and won’t unravel.
- Maintain enough thread for easier tying: Reserve about 2-3 inches of thread on each end for easy handling.
Make Three Tight Knots
To make three tight knots when tying off with a double threaded needle, guarantee proper knot tension, thread length, and knot placement. Double knots provide consistency for back stitch and running stitch. Alter tension as needed for different fabrics and thread types.
Avoid Pulling First Knot Too Tightly
When finishing with a double threaded needle, it’s essential to prevent pulling the first knot excessively tightly. This can result in problems with thread tension, knot positioning, stitch tension, and knot size, which can impact the overall quality of your sewing. Here are some recommendations to help you tie off your stitches effectively:
- Thread tension: Make sure that the tension on your thread is suitable for the fabric you’re working with. If the tension is too tight, it can cause the thread to snap or become difficult to manage.
- Knot positioning: Position the knot at the appropriate point on the fabric. For example, if you’re sewing a seam, you may want to tie the knot on the back of the fabric to avoid visible knots on the right side.
- Stitch tension: Pay attention to the tension between the two threads. If the threads aren’t evenly tensioned, it can result in uneven stitching.
- Knot size: The size of the knot can also affect the stitch quality. Ensure the knot isn’t too large or too small for the fabric and stitch type.
- Fabric thickness: Consider the thickness of the fabric you’re working with. Thicker fabrics may require a different knotting technique or more thread to ensure a strong hold.
Leave 2-3 Inches of Thread for Easier Tying
Leaving 2-3 inches of thread for easier fastening is a vital step when tying off with a double threaded needle. This additional length allows you to tie the knots more securely without having to concern yourself about running short of thread.
It also provides you with the flexibility to modify the knot tension and confirm that the knots are evenly spaced.
Be mindful to avoid pulling the initial knot too tightly, as this can cause the thread to break or the knots to become uneven. Instead, aim for a balanced tension that holds the fabric layers together without excessive pressure on the thread.
Tying Off With a Single Threaded Needle by Knotting
When sewing with a single threaded needle, you’ll want to leave enough thread to create a knot. Loop the thread to form the knot, hold the loop down with your finger, then pull on the thread end to tighten it before trimming the excess.
Leave Enough Thread for Knotting
After mastering the double-threaded tie-off, guarantee your single-threaded finish has ample thread length for knot security, preventing excess thread while preserving stitch durability.
Loop Thread to Make Knot
To make a knot using a single threaded needle, you’ll need to loop your thread. Start by leaving enough thread for knotting.
Then, loop the thread around your finger or a surface to create a loop. Hold the loop down with your finger to keep it in place while you tighten the knot by pulling on the thread end.
Finally, trim the excess thread and secure the knot with adhesive if desired.
Hold Loop Down With Finger
When tying off with a single threaded needle by knotting, it’s crucial to hold the loop down with your finger to achieve the desired loop size. This step aids in maintaining finger pressure, ensuring proper thread tension and knot strength. It also alleviates hand fatigue during the process.
Pull on Thread End to Tighten Knot
To safeguard your knots, yank the thread strand sturdily. This guarantees knot firmness, resilience, and lastingness. Keep in mind, knot placement and safety are essential for seam durability.
Trim Excess Thread
Once you’ve tightened that knot, it’s time to trim the excess thread. Here’s how:
- Choose the right tool for a clean cut.
- Match the trim length to your fabric thickness.
- Consider the thread type and needle size.
- Feel the satisfaction of a job well done.
Tying Off Without a Knot
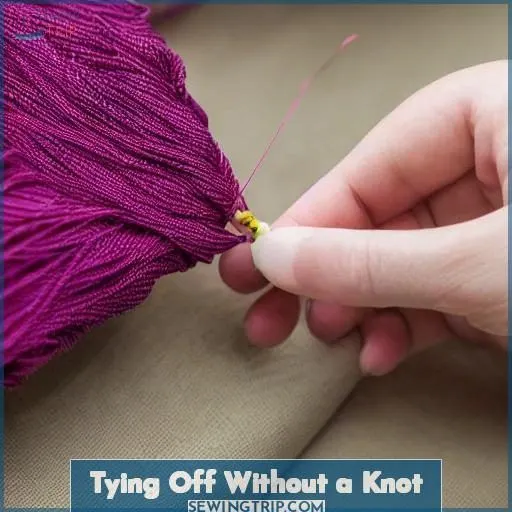
Stitched it all up, but now what? Don’t let your hard work unravel – tie off your stitches without a knot. Make a tiny stitch through both layers, reinsert the needle, pull to form a loop, pass the needle through, and snip the tail to lock it in place.
Make Tiny Stitch Through Both Fabric Layers
To tie off without a knot, make a tiny stitch through both fabric layers. The length of thread and thickness of fabric will determine the type of stitch and needle size needed. This method guarantees seam strength and is particularly useful for delicate fabrics or when a knot would weaken the seam.
Reinsert Needle Through Same Stitch
To securely tie off your stitching without a knot, reinsert the needle through the same stitch you made earlier. This helps maintain the stitch tightness and guarantees a clean finish. Double stitching can be used for added strength, while thread choice impacts the overall look of your work.
Pull on Thread to Form Loop
To form a loop when tying off without a knot, pull on the thread with enough force to create a loop that’s just the right size. The loop’s tightness depends on the thread’s thickness and the fabric’s thickness. Knot placement is key, so make sure to tie the knot in the right spot before forming the loop.
Pass Needle Through Loop and Pull
To pass the needle through the loop and pull, follow these steps:
- Hold the loop with one hand.
- Position the needle in the other hand.
- Pass the needle through the loop from the back to the front.
- Pull the needle and thread to tighten the knot.
Cut Off Tail End
Cut the thread tail to secure knot, guaranteeing durability. Trim excess for a seamless finish.
Tying Off on Felt
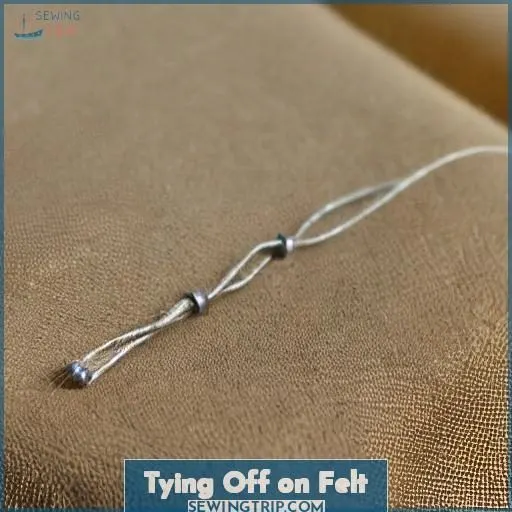
When sewing on felt, you’ll want to tie a knot and butt it right against the felt. Then, simply pull the thread tight and snip off the excess, letting the end hide away in the felt.
Tie Knot and Butt It Against Felt
Tying off on felt is a common technique used in sewing, especially when working with felt or other thick materials. Here are three ways to tie a knot and butt it against felt:
- Thread Hiding: When working on a project, it’s crucial that the back of your work is as neat as the front. To hide the knot, slide your needle in between the felt fibers from near the top edge, and coming out at the hole for your last stitch. Tie off the thread and cut it. Later, you can learn how to hide the knot so the back of your work is nice and neat.
- Felt Thickness: The thickness of the felt can affect the stitch tension and needle size. To tie a knot and butt it against felt, you need to take into account the thickness of the material. Make sure the knot is against the felt in the back before turning the felt over.
- Material Choice: The choice of material also plays a role in tying off on felt. For example, when sewing with leather, you might choose to tuck the thread end under the leather and secure it with adhesive to ensure a clean finish.
Pull Thread to Tighten and Snip
To guarantee knot longevity, pull the thread to tighten and snip. This step is essential for loop placement and knot visibility. Thread uniformity plays a significant role in upholding the strength of your stitches. Bear in mind, a securely tied knot can significantly impact the durability of your sewing projects.
Let Go of Thread End to Hide It
To conceal the thread end when manually stitching a garment, follow these steps:
- After tying the concluding knot, refrain from severing the thread at the junction.
- Insert the threaded needle adjacent to the knot and penetrate it between the fabric layers, directing it away from the knot while ensuring the thread evades contact with the fabric’s exterior.
- Ascend your needle approximately 2 inches distant from the knot, sever the thread near the fabric, and subsequently stretch the fabric slightly to retract it into the layers.
This technique achieves a more refined appearance and hinders the knot from unraveling.
Knotting Between Layers
When sewing, neatly knotting the thread between layers is a professional finishing touch. Simply insert the needle between the leather layers, tie a knot, and tuck the short thread tail into the leather, securing it with a dab of adhesive.
Insert Needle Between the Leather Layers
To insert the needle between the leather layers, follow these steps:
- Needle Placement: Position the needle at the desired location between the leather layers, making sure that the needle is properly aligned with the seam or the area where you want to sew.
- Thread Tension: Hold the needle with a firm grip, adjusting the tension to guarantee a smooth and consistent stitch.
- Knot Size: If you’re using a double threaded needle, make sure the knot size is suitable for the thickness of the leather. A larger knot may be necessary for thicker leather, while a smaller knot may be sufficient for thinner leather.
- Tail Length: Leave an adequate length of thread for tying off, typically 2-3 inches.
Tie a Knot and Cut the Thread
To tie a knot and cut the thread when sewing, follow these steps:
- Position the needle with the thread tails at the desired knot placement.
- Choose the appropriate needle size for your thread type and fabric.
- Make sure the thread tension is correct to prevent the knot from slipping or bunching.
- Tie the knot by looping the thread around the needle and pulling it through the loop to create a knot.
- Tighten the knot by pulling the thread ends to secure the stitch.
- Cut the excess thread close to the knot to maintain a clean finish.
Remember to be gentle when tightening the knot to avoid damaging the fabric or thread. This method is commonly used for securing the thread between layers of fabric or when tying off the end of a sewing project.
Leave a Short Thread Tail
When fastening your stitches, it’s crucial to retain a brief thread end. This aids in preserving knot clarity and guarantees sturdiness, while also improving the general appearance of your sewing creation.
Tuck the Tail Into the Leather
After stitching, gently tuck the thread’s tail into the leather’s embrace. It’s like hiding a secret between the layers, ensuring your masterpiece remains pristine.
Secure With Adhesive
Regarding the safeguarding of sewing endeavors with adhesive, multiple varieties and application techniques exist. Here’s an analysis of adhesive types, their application, durability, safety, and removal:
- Spray Adhesive: Found in aerosol cans, this adhesive is appropriate for bonding two fabric pieces. It’s commonly utilized for appliqué work and can be temporary or permanent. Always test the spray adhesive on a fabric remnant to guarantee it won’t leave a residue.
- Basting Tape: A narrow double-sided adhesive strip, available in various forms. It’s often used for hemming and can be heat-activated, requiring ironing. Hems are the most prevalent use of basting tape, but it can also be useful for folding any fabric piece.
- Seam Sealant: A liquid adhesive used to strengthen stitches, found in notions aisles. It can be applied to the reverse side of a button or used to waterproof seams. The optimal type of seam sealant for your specific project should be researched.
- Textile Adhesives: These come in various forms, including fabric adhesive sticks, temporary repositioning spray, fabric stiffener, and various types of fabric glue. They’re suitable for a wide range of sewing and craft projects.
- Hot Glue: Heated in a glue gun, this adhesive is ideal for attaching fabric to other surfaces like wood. However, it can melt synthetic fabrics quickly, so another glue option should be used for those.
When applying adhesive to your sewing projects, ensure that the adhesive is suitable for use on porous surfaces like fabric, washable, and non-toxic. Also, consider the drying time and whether the glue is repositionable before use.
Tying a Knot on the Back
To tie a knot on the back, first bring the thread to the back of the leather. Then, tie a knot with the excess thread, trim it close to the knot, and apply adhesive to secure it.
Bring the Thread to the Back of the Leather
To tie a knot on the back of the leather, bring the thread to the back of the material using a needle. The needle size and leather thickness should be considered for ideal thread placement. The stitch type and knot strength also play a role in this process. Here’s a step-by-step guide:
- Bring the thread to the back of the leather.
- Tie a knot with the excess thread.
- Trim the thread close to the knot.
- Apply adhesive to the knot for added security.
Tie a Knot With the Excess Thread
When securing your stitches, it’s essential to fasten the knot for both knot stability and thread longevity. Positioning of the knot is vital, with an adequate tail length guaranteeing a tight fit. Adhesive type is also a consideration, as certain types may be more appropriate for your project.
Trim the Thread Close to the Knot
After tying a knot with the excess thread, trim it close to the knot for knot security. Adhesive bonding can further enhance thread durability on thicker leather.
Apply Adhesive to the Knot
To guarantee the longevity of your sewing venture, it’s imperative to apply adhesive to the knot when tying off on leather. Here are four techniques to accomplish this:
- Employ a leather-specific glue: Opt for a glue explicitly crafted for leather, such as Aleene’s Leather & Suede glue or Tandy’s Eco-Flo Leather Weld adhesive. These adhesives offer a robust bond and align with leather materials.
- Utilize contact cement: Contact cement is a high-tenacity adhesive that establishes a durable bond between two objects. Apply it to both surfaces to be bonded for the best possible results.
- Use a potent adhesive or glue: Glue sticks or rubber cement can provide a strong bond for leather patches. Ensure that the adhesive is compatible with leather and that both surfaces are evenly coated.
Frequently Asked Questions (FAQs)
How to tie off a single threaded needle without knotting?
Simply insert the needle into the fabric, loop the thread, and pull it through to secure the stitch. No knot required – just a slick, seamless finish. Easy peasy!
What is the best adhesive for securing knots in leather sewing?
Hands down, the best adhesive for securing leather knots is a good old-fashioned superglue. It dries fast, holds tight, and won’t let those stitches come undone. A real game-changer for your leather projects!
Can I use a locking stitch for tying off in all materials?
No, you can’t use a locking stitch for tying off in all materials. It works well for some, like leather, but may not be suitable for delicate fabrics. Choose the finishing method that best suits your project’s needs.
How to tuck thread ends under the fabric without damaging it?
Tucking thread ends under fabric? Easy breezy! Simply insert your needle between the layers, pull the thread through, and tuck that tail snugly into its new cozy hideaway. No fuss, no muss – just seamless magic!
What is the recommended length for thread tails when tying off?
When tying off, leave 2-3 inches of thread – any less and it’ll be too tight; any more and it’ll be a pain in the neck. Just the right length makes it a breeze to work with.
Conclusion
Mastering the art of sewing isn’t just about creating intricate designs – it’s about the finishing touches that enhance your projects. From the sturdy double-threaded knot to the smooth, knotless finish, you now have a complete guide to professionally tying off your sewing.
Implement these techniques, and you’ll gain access to a world of refined, secure results that will make your sewing stand out. Ready to boost your how to finish off sewing skills? Let’s get stitching!

