This site is supported by our readers. We may earn a commission, at no cost to you, if you purchase through links.
You’ll need a foot that can handle the bulk—consider a walking foot for even feeding or a Teflon foot to glide over sticky layers.
With the correct needle size and type, adjusted machine settings, and savvy manual methods, you’ll master the art of sewing fleece.
This guide empowers you with the knowledge to tackle thick fleece projects with confidence and finesse.
Table Of Contents
- Key Takeaways
- What Foot to Use When Sewing Many Layers of Fleece
- Understanding Fleece Fabric
- Choosing the Right Sewing Machine Foot
- Preparing Fleece for Sewing
- Selecting the Correct Needle
- Adjusting Machine Settings
- Manual Sewing Techniques
- Utilizing Special Sewing Feet
- Finishing Touches
- Frequently Asked Questions (FAQs)
- Conclusion
Key Takeaways
- Consider using a roller foot for its ability to glide over multiple layers smoothly, making it an excellent choice for sewing many layers of fleece.
- Adjust machine settings, such as tension and presser foot pressure, to accommodate the thickness of fleece and ensure a seamless glide through the fabric.
- Choose the right needle size and type, with a sharp point for piercing through multiple layers and durable material for longevity, to prevent snags and achieve smooth stitches.
- Employ manual sewing techniques like using the hand wheel to navigate thick sections and a wedge to level the presser foot, ensuring even stitching over bulky seams.
What Foot to Use When Sewing Many Layers of Fleece
When sewing many layers of fleece, a walking foot is recommended as it helps feed the fabric evenly and prevents slipping. If you don’t have a walking foot, a roller foot can also be effective for managing the bulk of the seams.
Understanding Fleece Fabric
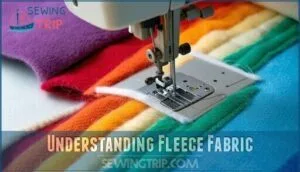
When tackling fleece, you’re juggling a fabric that’s as versatile as it’s tricky.
Fleece weight can range from featherlight to bear-hug thick, and its stretch can test your patience.
You’ll find a rainbow of fleece colors and a carnival of prints, each adding personality to your projects.
The textures? From velvety to rugged, they can transform the feel of your creation.
To master these layers, you’ll need the right tools: special feet to glide over the fabric, a needle that won’t balk at the challenge, and your sewing savvy.
Choosing the Right Sewing Machine Foot
When sewing multiple layers of fleece, choosing the right sewing machine foot is crucial.
A walking foot, Teflon foot, or roller foot can significantly improve your sewing experience by ensuring smooth fabric feed and preventing skipped stitches.
Walking Foot
After getting to grips with fleece’s cozy quirks, let’s march on to the walking foot. This trusty sidekick helps you tackle layered fleece like a pro, ensuring your machine chews through the pile without a hiccup.
- A walking foot keeps high-loft fleece in check.
- Ideal for stretch and polar fleece projects.
- Manages anti-pill fleece and flannel layers smoothly.
- Adjust machine settings for a seamless glide.
- A roller foot can be a solid backup plan.
Teflon Foot
Switching to a Teflon foot can feel like you’ve hit the sewing jackpot, especially with fleece’s tricky nature.
This slick buddy lets your fabric glide through without a hitch, making needle penetration a breeze.
It’s a game-changer for managing those bulky seam allowances in your rag quilt.
So, when fleece layers pile up, let the Teflon foot lead the charge.
Roller Foot
When tackling fleece, your secret weapon is the roller foot. This nifty tool glides over multiple layers like a dream, ensuring your sewing doesn’t hit a snag.
Keep it in tip-top shape with regular maintenance and proper storage.
Hunting for accessories or need a new one? Check out reputable suppliers.
Preparing Fleece for Sewing
Before sewing fleece, it’s crucial to press seams open and trim seam allowances. This step ensures your project’s layers align smoothly and reduces bulk.
Pressing Seams Open
When preparing fleece for sewing, pressing seams open is crucial. This step ensures a smooth finish and helps prevent seam puckering.
Selecting the right press cloth is essential to protect the fabric. Consider the heat setting carefully to avoid damaging the fleece.
When dealing with thick and fluffy fabrics like fleece, using quilting cottons for seam allowances can enhance the overall quality of your project.
Trimming Seam Allowances
After pressing seams open, it’s time to trim those seam allowances.
Think of it as giving your fleece a haircut before its big debut on a spooktacular eve.
Snip close but don’t snip your stitches! Use those rag quilt snips for precision.
This isn’t just about making it fit in the washing machine; it’s about crafting a bed quilt masterpiece.
Selecting the Correct Needle
Choosing the right needle size and type is crucial when sewing with fleece, especially through multiple layers. It ensures your machine can handle the fabric efficiently, preventing skipped stitches and needle breakage.
Needle Size
After pressing those seams as flat as a pancake, it’s time to talk needles.
You’re aiming for the Goldilocks zone with needle size and type—sharp enough to pierce through your fleece fortress, yet smooth as butter with the right lubrication.
Think of it as choosing the perfect arrow for your fleece-quilt target.
Whether it’s a throw or couch quilt, the right needle turns you into a sewing Robin Hood.
Needle Type
Choosing the right needle is like picking the perfect arrow for your quiver.
Aim for needle sharpness that pierces through layers like a hot knife through butter.
The needle point should glide smoothly, avoiding snags.
Opt for a needle material that promises durability and consider a dash of needle lubrication for seamless sewing.
Lastly, smart needle storage keeps your arsenal ready for action.
Adjusting Machine Settings
When sewing multiple layers of fleece, it’s crucial to adjust your machine’s tension and stitch length.
These settings ensure smooth stitching and prevent fabric puckering or skipped stitches.
Tension Adjustment
Adjusting your machine’s tension is like finding the perfect spice level for your chili—it’s crucial for the best outcome.
- Tweak tension adjustment based on fabric thickness.
- Adjust presser foot pressure for smooth fabric feed.
- Fine-tune machine settings for consistency.
- Match needle size to fabric weight.
- Shorten or lengthen stitch length for fabric type.
Get these right, and you’re golden!
Stitch Length
Adjusting stitch length is like finding the perfect rhythm for your dance with fleece.
Think of your needle size and tension adjustment as your dance partners, crucial for a smooth performance.
Don’t shy away from using the hand wheel for tricky moves or the wedge method to glide over bulky seams.
It’s your secret weapon for mastering those layers with finesse.
Manual Sewing Techniques
When sewing multiple layers of fleece, you’ll often need to switch to manual techniques.
Use the hand wheel to carefully navigate over thick sections.
Employ a wedge to level the presser foot for even stitching.
Using the Hand Wheel
Diving into manual sewing? The hand wheel is your secret weapon. It’s like having a fine-tuning knob for your stitches, giving you control that’s as precise as a surgeon’s scalpel.
- Hand wheel operation lets you tackle thick layers with grace.
- Tension adjustment becomes a breeze, ensuring smooth stitches.
- Manual sewing turns challenges into triumphs.
- Wedge method: your go-to for navigating tricky spots.
- Special sewing feet elevate your game, making every stitch count.
Master these, and you’ll sew like a pro, no sweat!
The Wedge Method
After mastering the handwheel, you’re ready to tackle thick fabrics with the wedge method.
This manual sewing trick is your secret weapon for fleece sewing. Slip a folded fabric wedge under the presser foot to level it over bulky seams.
It’s like giving your machine a little boost, ensuring smooth sailing over the fabric mountain.
Utilizing Special Sewing Feet
When tackling multiple layers of fleece, the right sewing foot can make all the difference.
An edge joining foot or a zigzag foot will help you manage the bulk and maintain a consistent stitch.
Edge Joining Foot
Dive into the world of fleece with an edge joining foot, your secret weapon for flawless seams.
This foot is perfect for stitch-in-a-ditch, zigzag, and overcasting stitches, making topstitching fleece a breeze.
It’s like having a GPS for your sewing machine; guiding you through layers with precision.
Say goodbye to wonky seams and hello to decorative stitching that pops!
Zigzag Foot
Dive into the world of fleece with your zigzag foot, your trusty sidekick for tackling those bulky layers.
This foot, combined with adjustable pressure, ensures your zigzag stitch sails smoothly over the fabric sea.
Finishing Touches
To elevate your fleece projects, consider adding decorative stitching for a unique touch.
Ensure durability and a polished look by mastering topstitching techniques.
Decorative Stitching
When tackling fleece, don’t shy away from decorative stitches. They’re your secret weapon for adding flair.
Think free motion embroidery or bold appliqué to make your project pop.
Embellishments can elevate the mundane to magnificent.
So, rev up your machine and let those stitches dance across the fabric, turning a simple piece into a statement.
Topstitching for Durability
Topstitching isn’t just about looks; it’s your fleece project’s armor.
With the right topstitching machines, you’ll zip through layers like a hot knife through butter.
Crank up the topstitching speed, but don’t skimp on using sturdy topstitching thread for that unbeatable finish.
Master a few topstitching techniques, and you’ll add both flair and durability.
Frequently Asked Questions (FAQs)
Can fleece fabric be dyed successfully at home?
Yes, you can dye fleece fabric at home, but you’ll need the right dye for the fleece’s material.
Dive in with synthetic fabric dye for polyester fleece or fiber reactive dye for natural fibers.
How to repair holes in fleece garments?
Oh, the irony of loving your fleece too much until it tears!
Fear not, grab a needle, some matching thread, and channel your inner seamstress.
A simple stitch or patch can bring it back to life.
Are there eco-friendly alternatives to synthetic fleece?
Sure, you can swap synthetic fleece for eco-friendly options like recycled polyester. Tencel blends or natural fibers like wool and bamboo are both renewable and biodegradable.
How to minimize static cling in fleece clothing?
To dodge static cling in fleece, toss a dryer sheet in with your laundry, or air dry your clothes.
Moisturizing your skin can also prevent that annoying electric hug from your favorite fleece garments.
Best storage methods for fleece fabric and garments?
Did you know 90% of crafters struggle with fabric clutter?
Roll up your fleece and stash it in clear bins or cubes.
It’s quick, lets you see your stash at a glance, and keeps things tidy.
Conclusion
Crossing the finish line with your fleece sewing project is within reach.
You’ve learned that using a walking, Teflon, or roller foot can make sewing multiple layers of fleece a breeze.
Remember to choose the right needle, adjust your machine settings, and apply manual techniques for precision.
With these tools and tips at your fingertips, you’re set to deliver high-quality, durable fleece creations.
Now, go forth and conquer those thick layers with confidence!

