This site is supported by our readers. We may earn a commission, at no cost to you, if you purchase through links.
Welcome to the world of sewing! Whether you’re a beginner or an experienced sewer, you might sometimes run into bobbin problems. Don’t worry – this guide will help you troubleshoot and fix any issues with your bobbins.
We’ll walk through common problems like thread not coming up, looping threads, and tension issues so that you can get back to stitching in no time! So let’s dive in and learn how to solve those pesky bobbin complications once and for all.
Table Of Contents
- Key Takeaways
- Change the Needle
- Use the Correct Size Bobbin
- Troubleshoot Bobbin Thread Issues
- Check the Bobbin Case for Burs
- Fixing a Stuck Bobbin Case
- Adjusting Bobbin Tension
- Loose Bobbin Case
- Weird Noise Coming From the Bobbin Area
- Cleaning the Machine
- When to Seek Professional Help
- Frequently Asked Questions (FAQs)
- Conclusion
Key Takeaways
- Proper maintenance and cleaning of the sewing machine can prevent most common bobbin problems.
- Using the correct needle size and high-quality thread can prevent stitch defects and tangles.
- Checking for burs on the bobbin case and ensuring correct tension adjustment can prevent looping thread and birdnesting.
- Seeking professional help for severe issues and taking breaks when troubleshooting complex tasks can prevent further damage to the machine.
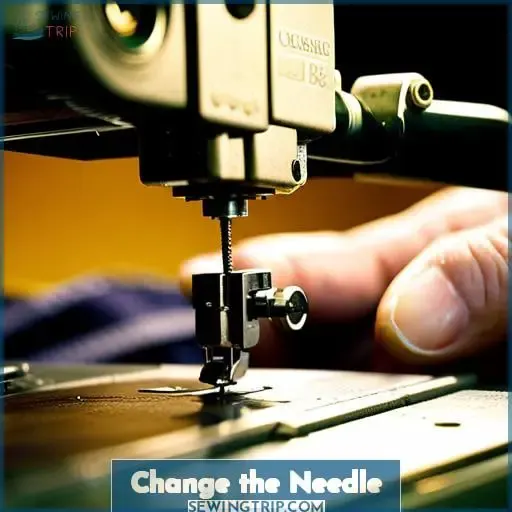
Change the Needle
You understand the importance of a sewing machine needle, so you take extra care to ensure it is set correctly. The needle size used must match the fabric type and thread weight; otherwise, problems can occur with bobbin tension and thread issues.
If in doubt about which size to use, refer to your sewing machine manual or consult a professional for help.
Furthermore, check that you are using the right letter (L) on your bobbin case when setting up for different fabrics as this will affect its tension too! The tension of both the upper-thread and lower-thread needs adjusting – too tight or loose can cause knots in threads.
But also make sure they match each other correctly; if not, then stitches won’t be formed properly either.
Using quality threads such as cotton wrapped polyester blend helps reduce tangles while reducing time spent reworking them due to snags from poor quality materials used by some cheaper brands on offer today! When changing needles, always pay attention – especially when switching between heavier/lighter materials like denim vs chiffon – because even though all machines have similar parts, their design may vary slightly depending on brand model purchased making adjustments necessary before continuing work at hand ensuring everything looks perfect once completed!
An online guide should provide more detailed information regarding correct settings & tensions specific per type/brand etc. Lastly, don’t forget there is no substitute for practice: try out different combinations & techniques until desired results achieved without compromising safety standards established worldwide.
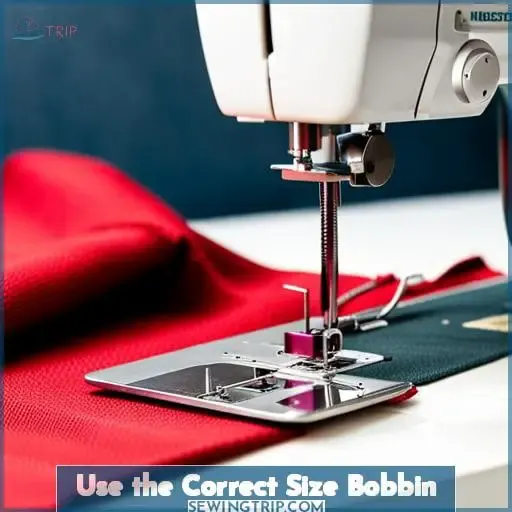
Use the Correct Size Bobbin
Check to make sure the bobbin you’re using is the right size for your project – not too big or small, but just right.
Using a front-load bobbin means that it should move freely in the machine, while top load bobbins are usually more rigid and require special inserts so they can fit properly in place. If you’re having trouble threading or if your needle keeps hitting the bobbin case when sewing, this could be because of an incorrect sized bobbin being used.
It’s important to adjust tension correctly as well; too little or too much will cause issues when stitching fabric together as well as damage to needles over time from excessive force applied when trying to sew through thick material such as denim jeans.
Plastic bobbins tend not only wear out faster than metal ones but also may need replacing sooner due to them becoming damaged after long periods of use which leads them becoming misshapen and no longer fitting into their respective cases properly leading again to uneven tensions when sewing fabrics together causing bunching up on one side of fabric rather than even stitches across both sides which are desired outcomes by most people doing regular dressmaking projects at home on domestic machines.
Finally, always check your needle before beginning any project; bent needles can lead directly onto broken tip situations where parts break off inside the machine itself, necessitating its removal either by yourself (always unplug power first) or preferably taken into an authorized repair shop who would be better able to advise how best to proceed further with repairs/replacements needed.
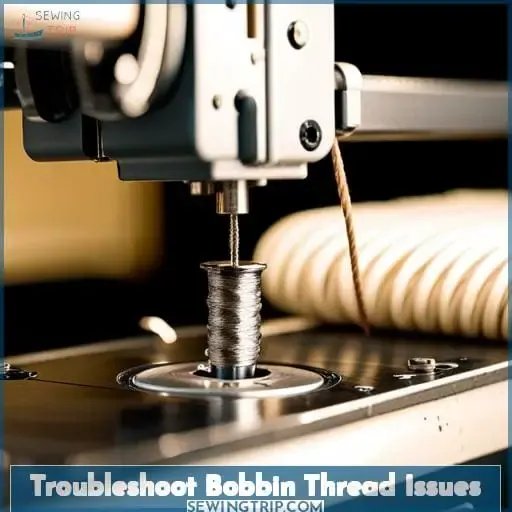
Troubleshoot Bobbin Thread Issues
If you are experiencing difficulties with your sewing machine, it may be due to issues with the bobbin thread. Common problems include the bobbin thread not coming up, thread looping on top of the fabric, or tension issues.
In this discussion, we will address these common bobbin thread issues and provide solutions to help you troubleshoot them quickly, allowing you to resume creating beautiful projects.
Bobbin Thread Won’t Come Up
If your thread won’t come up, you may need to adjust the tension or make sure that the bobbin and needle size are correct. Threading issues can be caused by incorrect bobbin size, wrong type of needle, improper tension on the bobbin thread, or timing issues between feed dogs and hook assembly.
To fix this problem:
- Check if the sewing machine is threaded correctly.
- Make sure you’re using a compatible type of needle for the fabric.
- Adjust upper thread tension as needed for even stitching.
- Re-time feed dogs with hook assembly if necessary.
- Tighten or loosen bobbin winder stopper as per instructions in the manual.
Even after solving these problems, there still might remain some minor ones, such as lint build-up around the bobbin area, which can cause bunching threads. Therefore, it’s important to regularly clean your machine using a brush and vacuum cleaner.
Additionally, use high-quality threads instead of cheap alternatives since they will not only last longer but also reduce the chances of having bobbin-related problems in the future.
Finally, all machines have their own unique requirements regarding bobbins, so always check according to the manufacturer’s instructions before starting any project!
Bobbin Thread Keeps Looping
Often, thread looping is caused by either an incorrect upper thread tension or using low-quality thread. To prevent this from happening, it’s important to select the appropriate bobbin size for the machine and needle type being used, as well as adjust the needle tension accordingly.
Choosing a higher quality of sewing thread with the correct weight can help reduce birdnesting, resulting in smoother stitching lines. Regularly cleaning and maintaining your sewing machine will also ensure proper functioning of its components, such as the bobbin-winding spindle and disks, which maintain proper tension when winding bobbins, thus preventing any further issues like looping threads.
Furthermore, if you find that your bobbin keeps looping despite all these steps, then check for burrs on metal cases or damages on plastic cases – both can be fixed easily – before replacing them with new ones if necessary.
Bobbin Thread Tension Problems
Adjusting the bobbin thread tension can help with any looping issues, so make sure to adjust it using the screw on its side. It’s important to use a high-quality thread and match the needle size to your fabric to ensure proper tension of your upper threads.
Always choose a compatible bobbin for your sewing machine model. Avoid lint buildup in and around the bobbin case as it can cause uneven tension or even breakage of threads due to excessive friction between parts while sewing.
When making different types of stitches, it’s crucial to use not only the correct type of bobbins but also different types of threads depending on the weight of the fabric. Light, medium, and heavy weight fabrics require different tensions respectively.
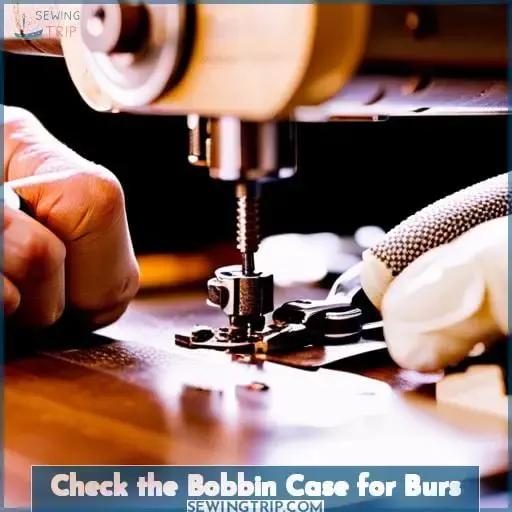
Check the Bobbin Case for Burs
If you are experiencing bobbin issues with your sewing machine, it is crucial to inspect the bobbin case for any burs. For front-loading machines (vertical), this involves examining the area where the needle passes through and ensuring that there are no sharp edges or other obstructions.
Top-loading machines (horizontal) require attention to any irregularities on both sides of the opening, as well as in between the teeth of the metal plate inside. It is important to ensure that all of these areas are smooth and clear before proceeding with more advanced troubleshooting steps.
Front-Loading Machines (Vertical)
For front-loading machines, it’s important to ensure that the bobbin case is free of burrs to achieve smooth stitching and flawless results. Additionally, selecting the right needle is essential, as a bent or incorrectly sized needle can interfere with the timing of the machine.
To avoid looping in the bobbin thread below, check that the upper thread hasn’t been overly tightened.
To check for any burrs on metal bobbin cases, use a magnifying glass. If caught early enough, these burrs can be fixed, but plastic cases often need to be replaced if damaged. Proper tension adjustment is also crucial, as too much or too little tension can affect stitch quality.
Use an adjustable screwdriver on either side of the Bobbin Winder Needle Shaft to achieve the desired tension, but be careful not to overtighten.
Lastly, always ensure that the timing between needles and bobbins is correct to achieve cleanly crafted stitches every time.
Top-Loading Machines (Horizontal)
Checking your top-loading machine’s bobbin case can help you avoid stitch defects and ensure smooth sewing. Make sure to use the correct needle size, as incorrect sizing can cause timing issues with the bobbin winder.
If there is a broken needle inside, it can also interfere with stitching. Low-quality thread may be more prone to looping around the bobbin case, so opt for high-quality threads instead when possible.
Before starting any project on your sewing machine, give it a good look over. Check for common issues such as sewing machine interlocks or birdnesting of thread in top-loaded bobbins. For best results, add just a little bit of oil every now and then after cleaning.
This helps improve speed while reducing noise from friction caused by moving parts in your device.
Overall, taking care of these small details ensures that you get optimal performance from both old and new machines alike!
Fixing a Stuck Bobbin Case
If your bobbin is stuck, don’t panic – you can easily fix it with a few simple steps!
First and foremost, make sure that the needle is the correct size for your machine. It should also be straight and not bent in any way. If it needs to be replaced, remove the bottom plate of the machine to access it.
Next, check that you have selected a bobbin of appropriate size as well as good quality thread for sewing. To adjust tension on stuck bobbin cases with screws, use an adjustable screwdriver or small wrench while holding onto both sides of the case firmly so they do not move during the adjustment process.
Turn clockwise to loosen tension or counter-clockwise if more pressure is needed against the thread spool when winding bobbins from free-standing winder machines.
Lastly, clean around the area where threads enter through the bottom plate using a powerful handheld vacuum cleaner before lubricating lightly with a little bit of oil if necessary (check manual).
It’s important to remember all these basics when troubleshooting sewing machine bobbin problems and solutions: replacing needles correctly according to the instructions in the user manual; selecting the proper sized bobbin compatible with the model being used along with the right weight/type of fabric being stitched; ensuring upper/lower tensions are set up accurately by adjusting knobs located on either side of the presser foot arm; setting up the correct timing between the needle and feed dog mechanisms will help create beautiful stitches every time the project is completed successfully.
Finally, never forget regular cleaning, including removing lint buildups inside the mechanism itself, which may cause even more complications down the line!
Adjusting Bobbin Tension
Adjusting the bobbin tension is key to avoiding looping thread and birdnesting. To make any adjustments, it’s important to ensure that the correct needle and bobbin size are used in order for the sewing machine to work properly.
If you’re having issues with your bobbin tension, check if there are burs on your metal or plastic bobbin case by using a magnifying glass. These can be fixed if present. It’s also necessary to verify that the winding tension disks of both top spool and small spool have been set correctly, as well as ensuring proper maintenance of all parts involved in operation such as cleaning out lint build-up regularly.
If needed, adjust upper thread tensions accordingly by turning clockwise for loose threads or counterclockwise when too tight. However, take caution not to over adjust either way, which may lead to further problems down the line like broken needles from excess pressure applied.
Additionally, inspect carefully how your insert is placed into its corresponding slot before closing up the lid so it follows the same direction of motion with respect towards other components inside.
Lastly, professional help might be needed depending on the severity of the issue at hand. Thus, keep contact details of a local repair shop handy just in case more assistance is required later on.
Loose Bobbin Case
You could be in for a world of hurt if your bobbin case is loose, so take action quickly before it causes chaos! A loose bobbin case can lead to timing issues, needle size problems, and more. It’s important to understand the potential causes and make sure you know how to fix them.
The most common mistake when dealing with a loose bobbin case is not having the small spool of thread in the correct position. Often, invisible threads will form between two bobbins rather than one single strand.
This can cause tension problems that will affect any project you work on afterward.
Adjusting tension correctly is key here too. Check that plastic bobbins are securely placed into their slots, as well as checking they have been threaded properly according to manual instructions or video tutorials available online.
When adjusting tensions, do this slowly using either an internal screwdriver or tweezers.
If all else fails, then rethreading your machine should help clear out any unwanted debris from previous projects that may be causing interference with current ones. Remember though that different brands require different sizes of bobbins, so make sure these are compatible first before beginning again.
Take some time away after troubleshooting each issue one by one. Sometimes taking a break helps us think clearly about what we need next when tackling complex tasks like fixing sewing machines without rushing ourselves unnecessarily into making mistakes along the way due to incorrect positioning, etc.
Which can cost valuable minutes later down the line if left unchecked initially.
Weird Noise Coming From the Bobbin Area
Listen closely – is something strange coming from your sewing area? It could be a weird noise caused by the bobbin area. This is a common problem and it’s important to diagnose it as soon as possible, before any further damage can occur.
The first thing you should do is check that the needle and bobbin are set up correctly in their initial position, with the thread going in the right direction. Next, inspect for bent needles or low-quality threads, which may cause issues with tensioning or timing of needle and bobbin movement, respectively.
If all else fails, then take your machine to an expert who will be able to solve the following issues: verifying correct thread weight; making sure upper thread tension isn’t too tight; cleaning out lint build-up around this area; ensuring metal parts on front-loading machines aren’t burred (which may require replacement); adjusting the screw on the side of the case for correct tensioning of bobbin threads, etcetera.
Regular maintenance, such as vacuuming gently around this part of the machine, will help minimize any potential future problems arising here again.
Cleaning the Machine
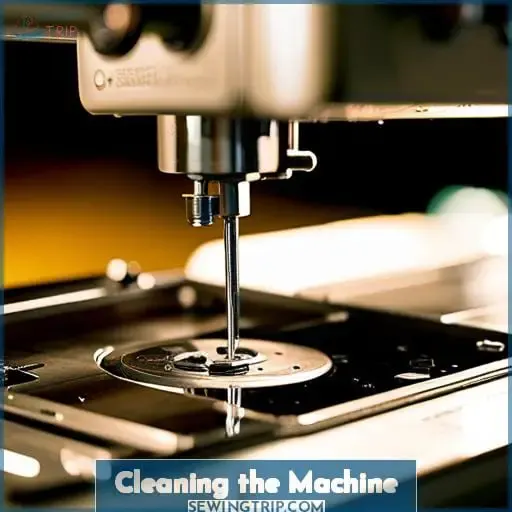
If you’re experiencing bobbin problems with your sewing machine, the first step is to clean it. Removing lint and dirt from around the bobbin area can help ensure smooth operation. Instead of using canned air, use a brush to more effectively dislodge debris without damaging any fragile parts inside.
Additionally, oil and vacuum your machine on a regular basis to maintain optimal performance of its components.
Removing Lint and Dirt
Forget about the threading and timing – it’s time to get serious about cleaning up! The key to avoiding bobbin problems is frequent cleaning.
Dust, dirt, lint, and hair can easily accumulate in many of the moving parts of sewing machines. It’s important to clean out these areas regularly as they can cause a variety of issues, including incorrect needle size or burr removal from metal bobbin cases on older models.
When performing this process, make sure you use appropriate tools such as a brush for dusting off any excess build-up on your machine’s interior components or a small but powerful vacuum cleaner for more thorough cleanings.
Additionally, pay attention when selecting the type and size of needles which are compatible with specific types of fabrics, as well as adjusting tension levels correctly when installing bobbins into your machine.
This helps avoid further complications down the road caused by improper tension adjustment during installation.
With consistent maintenance via cleaning processes like these, you’ll be able to troubleshoot most common bobbin problems people encounter with their home sewing machines quickly and efficiently!
Using a Brush Instead of Canned Air
When cleaning your sewing machine, use a brush instead of canned air to remove lint and dust. A soft-bristled brush is ideal for repurposing old brushes or buying new ones specifically designed for bobbin tensioning and winding.
When selecting the correct needle size, refer to the threading techniques described in your manual before proceeding with bobbin selection. For older vacuum models, it’s important to choose either a top-loaded or front-loaded version depending on the type of bobbin system installed in your machine.
New sewists should also pay attention to the tension of their upper thread. Incorrect settings can cause issues when using newer bobbins due to their more delicate construction than traditional metal units found in older machines.
With these tips at hand, all users are well-equipped to keep their machines clean while avoiding any unnecessary repairs down the line!
Oil and Vacuuming
After brushing off the dust, finish cleaning your workstation with a few drops of oil to keep it running smoothly – like an engine that’s been properly lubed. For modern machines, use only high-quality sewing machine oil and apply a drop or two on all moving parts.
Vacuuming is also important in removing lint buildup around the bobbin area and preventing thread tension issues. Remember to always match needle types and bobbin size for good solutions. Quick note: adjust the tension of the upper thread before changing bobbins or switching to thicker threads as this affects stitch quality.
| Vacuuming Tips | Using Oil |
|---|---|
| 1) Use a small handheld vacuum cleaner with brush attachment. | 1) Apply drops of high-quality sewing machine oil on moving parts regularly after cleaning. |
| 2) Avoid using canned air which may push debris further into crevices. | 2) Only use designated sewing machine oils as other oils can damage plastic components. |
| 3) Gently run vacuum over areas near bobbin case without touching any metal surfaces directly. | 3) |
When to Seek Professional Help
If you’re uncertain about any issue that may be occurring with your sewing project, it’s time to seek professional help. People experience problems such as the bobbin keeps popping out or thread bunching due to incorrect needle selection, bobbin size, or tension of the upper thread.
If you hear weird sounds coming from your machine, make sure it is not because of a bent kind of needle and fasten it enough so that it will not shatter inside the machine.
Furthermore, check for burrs in metal bobbin cases on front-loading machines and plastic ones on top-loading machines.
Here are some things you should consider when deciding whether to seek professional help:
- Have a good understanding of correct needle selection according to fabric type and weight;
- Check for accurate sizing when selecting bobbins;
- Adjust Bobbin Thread Tension correctly using the screw provided at the side without damaging the case too much;
- Make sure timing between Needle & Bobbins is properly synced up before starting work again;
- Use high-quality threads that won’t cause looping/thread bunching issues throughout the design process;
- Clean the machine regularly, removing lint, dirt, etc. from underneath the stitch plate area affecting performance.
- Test tension before adjusting pressure foot accordingly depending upon the material used.
- Double-check all parts, including presser feet, needles, and bobbin cases, keeping an eye open for damage-related signs also while disassembling during the cleaning process.
Ultimately, if these tips don’t solve the problem, then it’s best to seek expert advice/opinion rather than making matters worse through a trial & error approach resulting in more serious problems that might even require expensive repair costs down the line later!
Frequently Asked Questions (FAQs)
How often should I change my needle?
You should change your needle as soon as you notice signs of wear, such as unraveling thread, skipped stitches, or burrs on the tip of the needle. To ensure smooth stitching every time, replace it with a needle that matches the fabric and thread weight.
What is the difference between a plastic and metal bobbin case?
Plastic and metal bobbin cases are commonly used in sewing machines. Metal is more durable, but plastic can be lighter and more precise. The type of case affects tension control, as well as the overall look and feel of stitches made with the machine.
What type of thread should I use for my bobbin?
When selecting thread for your bobbin, opt for a high-quality thread that corresponds to the weight of your fabric. Avoid using low-quality threads that may knot or tangle easily. It is important to match the needle size with the type of fabric you are sewing and to always use a spool cap to prevent looping.
How can I tell if my bobbin tension is correct?
To check your bobbin tension, turn the screw on the side of the bobbin case. If it’s too tight, turn clockwise to loosen; if it’s too loose, turn counterclockwise to tighten.
What should I do if my bobbin keeps getting stuck?
Ensure that the bobbin is compatible with your machine, correctly inserted and tensioned, and that the needle settings are correct. Regularly clean and maintain your sewing machine to prevent lint build-up or birdnesting.
Conclusion
In conclusion, most potential problems that can arise from a sewing machine bobbin can be solved with a little bit of troubleshooting. It’s important to ensure you’re using the right size bobbin, the correct needle, and checking for burrs in the bobbin case.
Regular cleaning and maintenance can also help maintain the health of your sewing machine, just like brushing your teeth helps keep your mouth healthy. If the problem persists after checking all these things, it might be time to seek help from a professional.
Fixing sewing machine bobbin problems is like solving a puzzle – with the right pieces, you can find the solution.

