This site is supported by our readers. We may earn a commission, at no cost to you, if you purchase through links.
 To test a sewing machine foot pedal, first set your multimeter to the continuity setting and touch the probes to the pedal terminals.
You should get a reading, indicating the circuit is complete.
Next, inspect the pedal port for debris and make sure the electrical contacts are clean.
If there are no visible issues, move on to maintenance.
Lubricate the mechanism, check the spring for wear, and adjust the tension if needed.
Still having trouble?
Consult the manufacturer’s troubleshooting guide and be prepared to replace the pedal if all else fails.
Want to dive deeper into keeping your sewing machine running smoothly?
Table Of Contents
Key Takeaways
- Test the foot pedal for continuity using a multimeter set to the continuity setting
- Inspect the foot pedal port for debris and ensure the electrical contacts are clean
- Lubricate the foot pedal mechanism and check the spring for wear to maintain smooth operation
- Consult the manufacturer’s troubleshooting guide if issues persist, and consider professional repair if needed
How to Test a Sewing Machine Foot Pedal?
To test a sewing machine foot pedal, you can check the pedal’s continuity and the foot pedal port. If the pedal isn’t functioning properly, you may need to clean and maintain it, or potentially replace it with a new one.
Testing Foot Pedal Continuity
To test your sewing machine’s foot pedal for continuity, start by grabbing a multimeter.
Simply set it to the continuity setting and touch the probes to the foot pedal terminals.
You should see the multimeter register a reading, indicating the pedal is functioning properly.
Next, inspect the foot pedal and its base for any visible damage or obstructions.
Make sure the pedal is securely connected to the sewing machine.
If you’re still having issues, consult the manufacturer’s wiring diagram to check for any electronic faults.
Checking the Foot Pedal Port
Next, inspect the foot pedal’s connector port on your sewing machine.
Loose connections here can cause issues with the pedal’s responsiveness.
Confirm that the port is clear of debris and that the electrical contacts are clean.
If the port appears worn or damaged, you may need to replace the foot pedal holder or tray.
Carefully examine the compatibility between your foot pedal and the machine’s port – a mismatch could prevent proper function.
With the port in good condition, you’re one step closer to resolving that pesky foot pedal problem.
Cleaning and Maintaining the Foot Pedal
To maintain smooth foot pedal operation, lubricate the mechanism periodically using a light machine oil or silicone lubricant. Also, inspect the spring to make sure it’s not damaged or worn out, as this could affect pedal responsiveness and control.
Lubricate the Foot Pedal Mechanism to Ensure Smooth Operation
To keep your foot pedal operating smoothly, you’ll want to lubricate the mechanism periodically.
Start by removing any lint or debris that may have accumulated around the pedal.
Use a soft brush or compressed air to clean the area thoroughly.
Next, apply a small amount of sewing machine oil to the moving parts, being careful not to over-lubricate.
This will help reduce friction and make sure the pedal glides effortlessly.
Check the resistance by testing the rheostat – it should gradually decrease to zero as you depress the pedal.
If the resistance is uneven, consider upgrading to an advanced foot pedal with improved motor and wiring for better control.
Ensure the Foot Pedal’s Spring is Working Properly
Ensuring your foot pedal’s spring is functioning optimally is paramount for seamless operation.
Begin by assessing the spring tension – gently press down on the pedal and release, noting the speed with which it returns to its resting position.
If it feels sluggish or fails to fully rebound, you may need to adjust the spring tension.
Identify the adjustment screw or mechanism and cautiously adjust it until the pedal attains the desired spring resistance.
In the event of a damaged or worn-out spring, a complete replacement is necessary.
During the cleaning of the foot pedal, meticulously inspect the spring area, removing any lint or debris that could potentially obstruct its movement.
With a properly functioning spring, you’ll experience enhanced control and responsiveness from your sewing machine.
Troubleshooting the Sewing Machine
If your troubleshooting attempts haven’t resolved the issue with your sewing machine’s foot pedal, it’s essential to refer to the manufacturer’s troubleshooting guide for additional assistance. However, if the problem persists despite following the guide, it may be necessary to seek professional repair services to accurately diagnose and repair any underlying issues.
Consult the Manufacturer’s Troubleshooting Guide for Further Assistance
If the foot pedal troubleshooting steps don’t resolve the issue, consult your sewing machine’s manufacturer troubleshooting guide.
It may provide insights into common foot pedal faults, pedal cord issues, faulty wiring, or other electrical problems.
The guide can also help identify mechanical malfunctions like issues with the hand wheel, shuttle race, or foot controls.
Follow the manufacturer’s step-by-step instructions carefully, as they know your specific sewing machine model best.
Attempting complex repairs without guidance could worsen the problem, so rely on the expertise in the troubleshooting guide before considering professional service.
Consider Seeking Professional Repair if the Issue Persists
If the issue persists after your initial troubleshooting efforts, it may be time to consult a professional repair service.
While DIY repairs can be tempting, the complexity of sewing machine electronics and mechanisms often requires specialized expertise.
Compare the potential repair cost to the value of your machine – if it’s an older model, a professional fix may not be worth it.
However, if your machine is under warranty, the manufacturer-approved repair shop can provide coverage.
For the best outcome, seek an expert who can properly diagnose and resolve the problem, whether it’s a faulty foot pedal, electronic fault, or something more complex.
Their experience and tools can get you sewing again in no time.
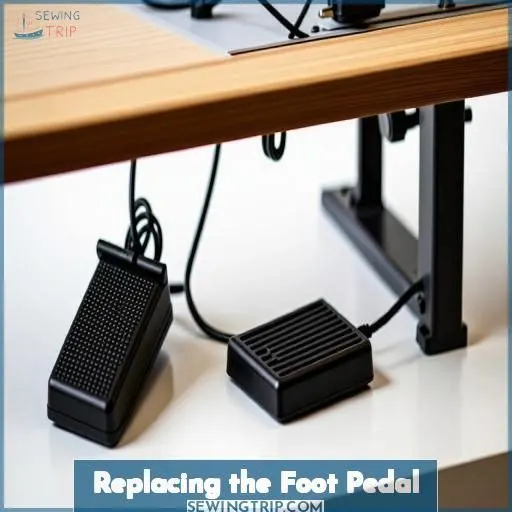
Replacing the Foot Pedal
Regarding the replacement of your sewing machine’s foot pedal, adhere meticulously to the manufacturer’s installation guidelines to guarantee optimal performance. If you regularly undertake intricate sewing endeavors, contemplate an upgrade to a specialized, high-caliber foot pedal designed specifically for your requirements.
Follow the Installation Instructions Carefully
When replacing your sewing machine’s foot pedal, be sure to follow the installation instructions carefully. Identify a compatible replacement part from the manufacturer or a reputable retailer. Carefully disconnect the old pedal and connect the new one, ensuring a proper connection. Test the new pedal’s functionality using the methods you learned earlier, such as checking for continuity with a multimeter. Pay close attention to the rheostat or carbon pile resistor, as these components are vital for controlling the machine’s speed. With a little diligence, you can get your sewing machine back up and running smoothly.
- Identify compatible replacement
- Carefully disconnect and connect
- Test new pedal’s functionality
- Inspect rheostat or resistor
Consider Upgrading to an Advanced Foot Pedal if Desired
If your existing foot pedal is causing issues, contemplate upgrading to a more advanced model. Modern foot pedals provide enhanced features such as variable speed control, programmable buttons, and wireless connectivity. When choosing a replacement, verify compatibility with your sewing machine model. Advanced foot pedals may come at a higher price, but the added functionality and convenience can justify the investment.
| Foot Pedal Upgrade Options | Advanced Features | Compatibility | Cost Considerations |
|---|---|---|---|
| Computerized Foot Pedal | Variable Speed, Programmable Buttons | Check Fit for Your Machine | Premium Price, Long-Term Value |
| Wireless Foot Pedal | Cordless Operation, Customizable Settings | Refer to Manufacturer Recommendations | Convenience vs. Initial Expense |
| Ergonomic Foot Pedal | Improved Comfort, Reduced Fatigue | Confirm Proper Connection | Balanced with Desired Functionality |
Upgrading your foot pedal can transform your sewing experience, so consider the options that best align with your needs and financial situation.
Frequently Asked Questions (FAQs)
How do you troubleshoot a foot pedal?
Test foot pedal continuity with a multimeter. Check for damage, obstructions, and proper connections. Consult wiring diagram; inspect foot pedal port. You’ve got this, master troubleshooter!
Can I use my sewing machine without a foot pedal?
You can technically operate it without a pedal, but you’ll lose speed control. Use your hand to turn the flywheel slowly – mastering that level of precision takes practice.
How does a sewing machine foot pedal work?
As the maestro controls the music, the foot pedal rheostat orchestrates the machine’s tempo – pressing deeper awakens its rhythmic dance.
How to clean a sewing machine pedal?
Gently brush debris off pedal contacts. Apply a few drops of sewing machine oil where pedal pivots. Wipe excess oil. Your pedal will work smoothly again without sticking.
How do I properly store a sewing machine foot pedal?
Wrap it snugly in a clean cloth, securing the cord to prevent tangling. Store it in a dry, dust-free container, shielded from extreme temperatures and sunlight. This preserves the pedal’s integrity for seamless operation.
What are the common causes of foot pedal failure?
Foot pedals frequently malfunction as a result of worn contacts, damaged cables, or internal friction. Inspect the wiring, test continuity, and routinely clean/lubricate moving parts for peak performance.
Can I use a generic foot pedal with my sewing machine?
Nope, you can’t just use any generic pedal. It has to be compatible with your specific machine, or you risk damaging the electronics or motor. Stick with manufacturer-approved replacements for safe, reliable operation.
How often should I replace the foot pedal on my machine?
Like a car’s tires, your foot pedal wears down with use. Generally, replace it every 3-5 years (or 200-300 hours) to guarantee smooth, consistent pedal response.
What safety precautions should I take when testing a foot pedal?
Unplug your machine before testing foot pedals. Never operate them when hands are near moving parts. Follow proper lockout procedures.
Conclusion
At the end of the day, if you’ve tried all the tricks in the book to test a sewing machine foot pedal and still can’t get it to work properly, it might be time to replace it.
But don’t let that discourage you.
With a little elbow grease and the right guidance, you can keep your machine running smoothly for years to come.


