This site is supported by our readers. We may earn a commission, at no cost to you, if you purchase through links.

The FBA technique involves cutting and spreading your pattern pieces to add volume where you need it most, then repositioning darts to maintain the garment’s shape. This prevents common fitting issues like horizontal drag lines below the bust, gaping armholes, and that unflattering tent effect that makes beautiful fabrics look frumpy.
The math behind FBA calculations reveals surprising truths about pattern grading.
Table Of Contents
- Key Takeaways
- Determining Your Sewing Cup Size
- Choosing The Correct Pattern Size
- Signs You Need a Full Bust Adjustment
- Essential Tools for Full Bust Adjustments
- Calculating and Planning Your FBA
- Step-by-Step Full Bust Adjustment Guide
- Refining Fit and Troubleshooting Issues
- Frequently Asked Questions (FAQs)
- Conclusion
Key Takeaways
- You’ll need a Full Bust Adjustment (FBA) when your bust differential—the difference between your upper bust and full bust measurements—exceeds 2 inches, and you should choose your pattern size based on your high bust measurement rather than your full bust to ensure proper shoulder and armhole fit.
- You can identify when you need an FBA by watching for telltale signs like horizontal drag lines below the bust, gaping armholes, tight shoulders with fabric pulling across your chest, and button bands that gap open despite following pattern instructions precisely.
- The FBA process involves cutting strategic adjustment lines through your pattern, spreading the pieces to add the calculated amount of fullness (typically half your bust differential minus the pattern’s 2-inch baseline), and repositioning darts to maintain the garment’s shape while keeping grainlines parallel.
- You’ll achieve professional results by fine-tuning dart placement within one inch of your bust point, easing excess fullness into side seams for knit fabrics, and reshaping armhole curves after adjustments to eliminate sharp corners and maintain smooth underarm width.
Determining Your Sewing Cup Size
Before you start sewing, you’ll need to determine your sewing cup size by measuring both your upper bust and full bust measurements. The difference between these two measurements determines how much extra room you’ll need to add through a Full Bust Adjustment to achieve a properly fitted bodice.
How to Measure Upper and Full Bust
Start by positioning a flexible measuring tape around your torso, just beneath your arms and above your bust. This Upper Bust Measurement captures your ribcage circumference without breast tissue interference.
For Full Bust Measurement, wrap the tape around the fullest part of your chest, usually at nipple level. Keep the tape parallel to the floor and snug but not tight for accurate Bust Circumference readings.
To guarantee accurate measurements, using a reliable bust measuring tool is vital.
Calculating Bust Differential
Once you’ve taken both bust measurements, subtract your upper bust measurement from your full bust measurement to calculate your bust differential.
This bust differential measurement determines how much fullness you’ll need to add during pattern alteration. For example, if your full bust measures 38 inches and your upper bust measures 36 inches, your differential equals 2 inches—indicating you’ll need a full bust adjustment for proper fit analysis.
Understanding Pattern Cup Vs Bra Cup
Pattern cup sizing differs substantially from bra cup measurements you’re familiar with. While your D-cup bra reflects breast volume and band size variations, pattern cup represents the bust differential—the difference between your upper bust and full bust measurements.
Pattern cups measure bust differential, not bra volume—your D-cup bra doesn’t equal a D-cup pattern adjustment
Commercial patterns usually draft for a 2-inch differential (B-cup equivalent), regardless of your actual bra size, making cup size conversion essential for proper pattern sizing and successful bust adjustments.
Choosing The Correct Pattern Size
Selecting the right pattern size prevents hours of frustration and guarantees your finished garment fits beautifully across the shoulders and neckline. You’ll achieve professional results by choosing based on your high bust measurement rather than your full bust, then adjusting the pattern to accommodate your cup size through strategic modifications.
Why High Bust Measurement Matters
Your high bust measurement acts as the foundation for accurate Pattern Sizing and Bodice Fitting because it reflects your actual frame size, independent of Cup Size Impact. Unlike full bust measurements that include breast tissue, Upper Bust Measurement aligns with your skeletal structure, ensuring proper shoulder and armhole fit.
This Measurement Accuracy prevents common Bust Fit Issues like gaping necklines and baggy shoulders, making subsequent Bust Adjustment modifications more precise and effective.
Understanding the importance of upper bust measurements is essential for achieving a well-fitting bodice.
Selecting Patterns With Cup Options
When shopping for bodice patterns, look for multi cup patterns that offer Cup Size Variations from C through DD or beyond. These Multi Cup Patterns reduce alterations by 80% compared to standard B-cup drafts.
Pattern Selection Tips include checking if designers specify their Bust Cup Size baseline—some indie patterns draft for C-cups rather than B-cups, affecting your Upper Bust Measurement calculations and overall Bust Fit Considerations.
Understanding proper pattern grading techniques is essential for achieving a well-fitted garment.
Commercial Vs Indie Pattern Sizing
Understanding the differences between commercial and indie pattern sizing becomes your key to selecting the right starting point for your Full Bust Adjustment. Commercial patterns from major companies generally follow standardized Bust Measurement Standards, drafting their bodices for B-cup figures with consistent sizing across their lines. However, Commercial Fit Problems arise when these patterns don’t account for fuller busts, creating widespread fitting issues.
Indie designers often draft for slightly larger busts—usually C-cups—but Indie Sizing Issues include inconsistent standards between designers and limited size ranges, making Pattern Size Comparison challenging across different brands.
Signs You Need a Full Bust Adjustment
Professional patterns are usually drafted for B-cup measurements, so larger-busted sewists often experience predictable fitting issues that signal the need for adjustments.
You’ll recognize these symptoms when your carefully chosen pattern creates horizontal drag lines below the bust, pulls tight across the chest, or causes button bands to gap open despite following the pattern instructions precisely.
Fitting Issues in Ready-to-Sew Patterns
Beyond standard measurements, ready-to-sew patterns create unique Sewing Challenges for curvy figures. Most commercial designs assume a B-cup silhouette, causing immediate Bodice Fitting problems when you’re fuller-busted.
You’ll notice tight chest areas, pulling across the bust line, and distorted Garment Balance that throws off the entire fit. These Pattern Adjustments become essential for Curvy Silhouettes requiring Full Bust Adjustment modifications.
Common Symptoms of Poor Fit
Poor bust fit shows up in telltale ways that scream for a full bust adjustment. When your bodice doesn’t accommodate your curves properly, you’ll notice these clear warning signs:
- Gaping armholes that create unflattering gaps under your arms
- Tight shoulders with fabric pulling across your chest and bust area
- Bust wrinkles forming diagonal drag lines from bust to side seams
- Poor drape with fabric riding up in front, creating uneven hemlines
- Floppy fabrics that pucker and fold instead of lying smooth against your torso
These fitting issues signal your pattern needs more room for bust fullness through strategic bodice fitting adjustments. Understanding bodice fitting basics is essential to making effective adjustments and achieving a well-fitted garment.
When to Add or Move Darts
Smart sewists recognize when their patterns need dart modifications to achieve proper bust shaping. You’ll need dart redistribution when existing darts don’t align with your bust peak, or when pattern modification requires additional fullness distribution for better fit.
| Dart Issue | Solution |
|---|---|
| Side bust dart ends 1+ inch from bust point | Move dart tip closer to natural bust point |
| No bust darts on D+ cup patterns | Add bust darts or convert to princess seams |
| Existing darts create pulling/puckering | Redistribute dart intake across multiple seams |
| Horizontal drag lines below bust | Increase dart placement and bust adjustment amount |
Dart tips: Convert excess fullness into princess seams for smoother lines, or ease bust darts into side seams on knit fabrics for flawless shaping.
Essential Tools for Full Bust Adjustments
Having the right tools makes your full bust adjustment accurate and efficient, preventing costly mistakes on your final fabric. You’ll need durable tracing paper, precise measuring tools, and quality marking supplies to create a professional pattern modification that fits your curves perfectly.
Recommended Tracing Papers
When selecting tracing paper types for full bust adjustment, prioritize durability over convenience. Swedish tracing paper offers outstanding paper quality for pattern piece modifications, allowing you to sew test fittings directly. Alternatively, medical examination paper provides adequate strength for bodice block adjustments.
Pattern weights secure your drafting tools during bust measurement transfers, preventing shifting that compromises accuracy in your sewing notions workflow.
Measuring and Marking Tools
A clear ruler remains your measuring backbone for Full Bust Adjustments, helping you draw precise adjustment lines from bust point to centre front line and underarm curve. **Pattern weights keep everything steady while you mark.
**
Your measuring tapes capture accurate bust measurement and upper bust measurement data. **Sewing gauges offer quick checks for dart positioning and seam allowances throughout the adjustment process.
Using Sewing Transfer Paper Roll White
White Swedish tracing paper transforms your pattern modifications into precise, professional results. This 29-inch wide, see-through material lets you trace patterns with complete accuracy while preserving your originals. Unlike tissue paper, it won’t tear during bust adjustments and can be sewn directly for quick fitting tests.
The paper’s durability makes it perfect for marking bust peak points and adjustment lines during full bust adjustment procedures, ensuring your pattern adjustments remain accurate throughout multiple fittings.
For intricate designs, using freezer paper techniques can improve the overall quality of your sewing projects.
Calculating and Planning Your FBA
Before cutting into your pattern, you’ll need to calculate exactly how much extra room your bust requires and map out the adjustment lines precisely. This planning phase guarantees your FBA creates the right amount of fullness in the correct locations while maintaining proper grainlines and pattern balance.
Measuring The FBA Amount Needed
Calculate your FBA Amount by taking half the Bust Differential that exceeds the pattern’s B-cup baseline. For example, if your Upper Bust Measurement is 36 inches and Full Bust Adjustment needs are 40 inches, your Bust Differential equals 4 inches. Since standard patterns accommodate 2 inches, you’ll need a 1-inch Pattern Alteration per side. This Cup Size Calculation ensures proper Bust Measurement accuracy for your Full Bust Adjustment.
Understanding fiber content analysis is vital for selecting the right fabric for your garment, ensuring it will withstand the necessary alterations and wear.
Marking Bust Apex and Adjustment Lines
Accurately locate your bust point first—this essential reference point determines where all adjustment lines intersect for proper dart placement and bodice fitting. Mark the bust point on your pattern tracing, then draw four strategic adjustment lines: through the waist dart center to shoulder, from bust point to armscye one-third down, through side bust dart to point, and horizontally above the waist dart from center front.
Understanding a good Full Bust Adjustment is essential for achieving a well-fitted bodice.
Keeping Grainlines Parallel
Proper grainline alignment guarantees your bodice hangs correctly after bust adjustment. When you spread your pattern piece during FBA, maintaining parallel grainlines prevents twisted seams and uneven fabric drape.
Here’s how to maintain grainline alignment:
- Mark original grainlines before cutting your bodice pattern – draw arrows on both front and back pieces
- Check parallel seams after spreading – use a ruler to verify grainlines remain equidistant throughout the pattern piece
- Redraw grainlines if needed – princess seam adjustments often require new grainline placement for proper fabric hang
Step-by-Step Full Bust Adjustment Guide
Now you’ll execute the pattern cutting and spreading techniques to transform your traced bodice into a properly fitted garment for your bust size. The following steps guide you through precise cuts, dart positioning, and adjustments that guarantee your finished garment maintains proper grainlines while accommodating your measurements accurately.
Cutting and Spreading The Pattern
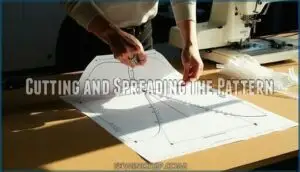
Your pattern’s transformation begins with strategic cuts along your marked adjustment lines. Using sharp scissors, cut completely through Line 1 from waist dart to shoulder, then along Line 2 to the armscye, leaving a small paper hinge. Cut Line 3 from side dart to bust peak. These cutting techniques create moveable pattern pieces for spreading methods.
When spreading the bodice pattern, maintain grainline management by keeping vertical lines parallel during bodice modification. To achieve professional results, utilizing proper bodice cutting tools is essential for accurate pattern making.
Adding and Positioning Darts
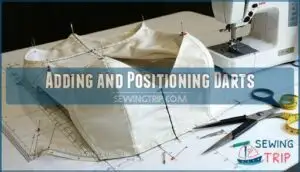
After cutting and spreading your pattern pieces, you’ll create new darts to accommodate the added bust fullness. Position your bust dart peak approximately one inch away from your actual bust point for the most flattering dart placement.
When determining dart width, remember that wider darts provide more bust shaping but require careful grainline management. The side bust dart should angle naturally toward your bust point, while maintaining proper dart tips that taper smoothly into the fabric.
Adjusting for Pleats and Gathers
When integrating a Full Bust Adjustment into pleated bodices, you’ll distribute additional width equally among existing pleats to maintain Pleat Depth Control and balanced proportions. Draw lines from the armhole through your Bust Point and each pleat, then spread incrementally to achieve your calculated Bust Adjustment amount.
This technique preserves the garment’s intended silhouette while providing essential Bust Ease Management through controlled Gather Distribution and flawless Fabric Drape Analysis integration.
Easing Darts Into Side Seams
Sometimes the simplest solution creates the most elegant fit. When you want to eliminate a side bust dart entirely, dart manipulation allows you to ease that fullness directly into the side seam instead. This technique works beautifully for knit fabrics where the stretch accommodates the extra volume without creating unwanted bulk.
- Transform harsh dart lines into smooth, curved seams that follow your body’s natural contours
- Eliminate the fussiness of matching dart points while maintaining professional bust shaping
- Create flowing silhouettes that move with you instead of against you
- Reduce bulk at the side seam for a cleaner finish under fitted jackets
- Achieve that custom-made look that whispers sophistication rather than shouting "homemade"
Start by measuring the dart width at its base, then gradually distribute this measurement along a 3-4 inch section of the side seam. Mark your side seam adjustment points, creating a gentle curve that mirrors your bust line. The dart point becomes your guide for seam easing placement. This bust adjustment technique requires careful pressing and stay-stitching to maintain the shape without puckering. Your side bust dart disappears while the bust dart functionality remains intact through strategic seam easing and dart rotation principles.
Understanding full bust adjustments is essential for a perfect fit, as it allows for accurate modifications to the pattern.
Refining Fit and Troubleshooting Issues
After completing your initial Full Bust Adjustment, you’ll likely need to fine-tune the fit through targeted adjustments to dart placement and armhole shaping.
This refinement process tackles common issues like gaping armholes, dart positioning errors, and waist measurement discrepancies that can occur even after a successful FBA.
Adjusting Dart Width and Position
After completing your initial full bust adjustment, you’ll likely need fine-tuning. When your bust dart positioning feels off, measure from the dart point to your actual bust peak – it should land within one inch.
For dart width adjustment, examine how the fabric lies across your chest. Too narrow creates pulling; too wide causes excess fabric bunching.
Adjust dart angle modification by pivoting the dart legs until the fullness distribution feels natural and the pattern realignment maintains proper fit.
Correcting Armhole and Waist Fit
Precision in armhole reshaping transforms your bust adjustment from adequate to outstanding. After spreading your pattern, you’ll need to redraw the armhole curve to eliminate sharp corners and maintain smooth underarm width.
Check your shoulder slope alignment—full bust adjustments often shift the armhole forward, requiring careful blending where the princess seam meets the armpit.
Frequently Asked Questions (FAQs)
Can you adjust patterns for asymmetrical breasts?
You can definitely adjust patterns for asymmetrical breasts. Create separate FBAs for each side, adjusting the larger breast first, then modifying the smaller side accordingly for balanced fit.
How to modify princess seam patterns?
Ninety percent of sewists abandon princess seam adjustments mid-project due to complexity.
You’ll modify princess seams by adding width at the bust curve, redistributing ease between front and side panels, then blending seam lines smoothly for professional results.
What adjustments work for nursing accessibility?
Consider front-opening designs like wrap tops, button-up shirts with hidden plackets, or strategically placed zippers.
Add overlap panels or crossover styles that provide easy access while maintaining coverage and support for your bust.
Can you combine FBA with shoulder adjustments?
Two birds with one stone – you can absolutely combine FBA with shoulder adjustments. Complete your full bust adjustment first, then address shoulder slope, width, or length issues.
The key is maintaining proper armscye curves throughout both modifications.
How to adjust wrap-style bodice patterns?
You’ll modify wrap-style patterns by creating pivot points at the bust peak and wrap line intersection. Trace your pattern, add fullness through the bust dart, then redistribute excess fabric along the wrap edge while maintaining the original drape and closure alignment.
Conclusion
Studies show that 80% of sewers struggle with poorly fitted bodices, yet adjusting bodice for large bust doesn’t have to be intimidating. You’ve learned to calculate bust differential, select appropriate pattern sizes using high bust measurements, and execute precise Full Bust Adjustments.
These techniques prevent common fitting disasters like gaping armholes and unflattering drag lines. With proper dart placement and grainline maintenance, you’ll achieve professional results that showcase both your skills and beautiful fabrics perfectly every time.
- https://www.youtube.com/c/sussexseamstress
- https://closetcorepatterns.com/pages/size-chart
- https://blog.closetcorepatterns.com/bodice-fitting-6-how-to-do-full-bust-adjustments-for-any-bodice/
- https://dresspatternmaking.com/blog/why-upper-bust
- https://www.inhousepatternsstudio.com/blog/three-tips-for-choosing-your-pattern-size

