This site is supported by our readers. We may earn a commission, at no cost to you, if you purchase through links.
 If your pants fit everywhere but look baggy or saggy in the seat, adjusting the pants pattern for a flat bum is key.
Start by shortening the back crotch curve slightly—this removes excess fabric without sacrificing comfort. You might also need to lengthen the back darts to give a bit of shape where fullness is missing.
If the pants still don’t sit right, try trimming fabric from the seat area, blending the seam lines smoothly. Don’t go overboard, though—stiff tailoring leads to awkward fits!
For the perfect adjustment, balance precision with patience, and always test changes on a muslin first.
Table Of Contents
Key Takeaways
- Shorten the back crotch curve to remove extra fabric and enhance fit around the seat area.
- Lengthen back darts for added shaping where fullness is missing and improve waistline alignment.
- Use muslin fitting to test adjustments before finalizing pattern changes for precise results.
- Avoid over-adjusting, as it can distort the fit, and always balance comfort with a polished look.
Identifying Flat Butt Issues
When your pants have extra fabric pooling under the seat or look saggy in the back, it’s a clear sign of a flat bum fit issue.
Extra fabric pooling under the seat? It’s a telltale sign of a flat bum fit issue begging for adjustment.
This happens because the pattern allows too much room where there isn’t the fullness to fill it, creating a less flattering silhouette.
Excess Fabric Indicators
Excess fabric hints at pants fitting issues.
Back sagging and fabric pooling below the seat signal a flat bum adjustment is needed.
If the rear looks deflated, with an unflattering fit or extra fabric above the bum, consider a flat seat adjustment.
These tweaks solve common pants pattern adjustment problems, ensuring a smoother, polished look.
Deflated or Saggy Appearance
A saggy look at the back of your pants often signals a flat bum issue.
A saggy back on your pants reveals a common flat bum issue—time to embrace adjustments for a polished, tailored fit!
Here’s how to spot it:
- Back fabric pools unattractively below the seat.
- Pants look deflated, lacking proper shaping.
- The fit feels loose despite the right size.
- Fabric drapes poorly, emphasizing an unflattering fit.
Fixing it? Proper back shaping and flat bum adjustments are key!
Addressing body shape factors can also improve the overall fit.
Lack of Fullness Causes
Sometimes, a lack of fullness comes down to anatomical variations or posture impact, leaving your pants looking a bit sad.
The wrong fabric drape or poor garment design can amplify this issue.
Style choices, like high-waisted cuts, might also work against you.
A flat bum adjustment through pants pattern alteration fixes these quirks, making fitting pants or adjusting patterns a breeze!
Professional Fitting Techniques
In the context of adjusting pants for a flat bum, professional fitting techniques guarantee a polished, precise result without creating new issues elsewhere.
By using tried-and-true methods like shaping the crotch curve or fine-tuning seam lines, you’ll achieve a fit that’s snug and flattering.
Industrial Sewing Methods
In the context of fitting pants for a flat seat adjustment, industrial sewing methods shine.
Seam construction and automated sewing improve production efficiency while maintaining quality control.
Specialized equipment guarantees accurate pattern alteration, eliminating excess fabric.
Adjusting patterns this way provides a polished look without compromising comfort.
It’s a reliable path to mastering pants pattern alteration with professional precision.
Pattern Alteration Tips
When tackling flat seat adjustments, precise pattern changes solve fitting problems.
Use a slash and pivot method to remove fabric and maintain smooth lines. Understanding pattern ease guarantees comfort in the final garment.
Follow these tips:
- Retrace your pattern after changes for a clean template.
- Redirect the grainline to align with leg shape.
- Smooth hips and adjust the waistline to avoid baggy butt issues.
Common Adjustment Mistakes
Over-adjusting is a common pitfall in pants pattern making, often causing fitting problems like saggy pants or an uncomfortable fit.
Avoid seam wedges; they distort the design. Muslin fitting is essential—don’t guess. Ignoring fabric behavior worsens adjustments like a flat seat adjustment or baggy butt adjustment.
Use this quick guide:
| Mistake | Effect | Solution |
|---|---|---|
| Ignoring fabric | Saggy pants result | Consider fabric stretch |
| Over-adjusting | Fit issues grow | Adjust gradually |
| Seam wedges | Disrupts proportions | Use proper adjustments instead |
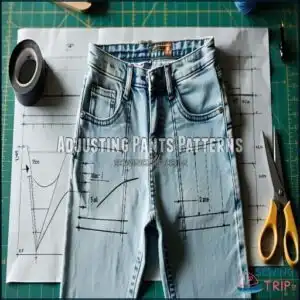
Adjusting Pants Patterns
When adjusting pants patterns for a flat bum, focus on reshaping the back crotch curve, removing excess fabric, and lengthening darts for better alignment.
These changes guarantee a snug, flattering fit without the sagging or pooling that comes from too much room in the seat, ensuring a better overall alignment.
Shortening Crotch Curve
A flat seat adjustment starts by shortening the back crotch curve—key in correcting that baggy butt issue.
Precision matters: measure carefully, refine the shape, and square the crotch point for balance.
Use a muslin fitting to test changes, ensuring smooth progressions.
Mastering this pants pattern making tweak takes practice but delivers a proper fit every time.
Removing Excess Fabric
To fix fit issues caused by excess fabric, you’ll focus on Fabric Wedge Removal. Begin by analyzing Seam Adjustment Points during muslin fitting.
Trim carefully along the back crotch seam, guaranteeing Muslin Fitting Accuracy. Use Pattern Redraw Precision to smooth out adjustments.
Following this pants alteration guide guarantees a cleaner final fit, making your pattern alteration tutorial truly effective.
Lengthening Darts Technique
Lengthening darts can work wonders for waistline alignment and bum curve enhancement.
To get it right:
- Mark a new dart endpoint for better placement.
- Fine-tune dart legs to reach this point, ensuring symmetry.
- Extend darts by 2.5cm during pattern alteration for improved fabric drape effect.
- Always recheck with a muslin.
A precise pants alteration guide makes all the difference!
Step-by-Step Adjustment Process
You’ll need a precise plan to adjust your pattern and fix that pesky excess fabric. Follow these straightforward steps to measure, redraw, and trim for a polished, flattering fit.
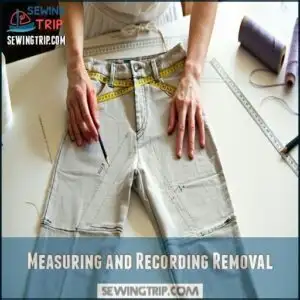
Measuring and Recording Removal
Start by measuring the removal amount needed to improve the bum curve. Use your muslin translation to determine how much fabric you should adjust.
Mark the distance accurately on the pattern at the back crotch seam. This guarantees precise pattern adjustment.
For best results, consider using specialized pattern making tools for accuracy. Accurate distance marking and pattern trimming eliminate guesswork, keeping your fitting advice straightforward and effective for a great fit!
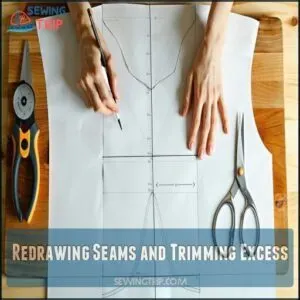
Redrawing Seams and Trimming Excess
After recording your adjustments, grab a ruler and smooth out the seam lines. Verify the stitch line alignment flows naturally into the waist.
Trim the excess paper carefully, keeping the back crotch seam neat. To achieve the best results, consider investing in quality pattern trimming tools.
Don’t forget to square the crotch point for a clean finish! Precise pattern modification is key—no hip area alteration gets overlooked, ensuring a well-made garment with proper pattern trimming tools.
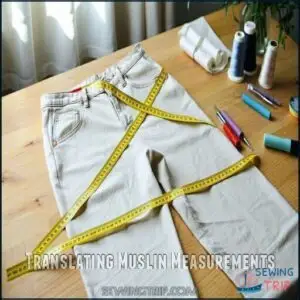
Translating Muslin Measurements
Once you’ve finalized your muslin fitting adjustments, it’s time to transfer those changes to the pattern.
Measure carefully—Muslin Accuracy guarantees Measurement Precision.
For Pattern Scaling, record adjustments like shortening the crotch curve or altering seams. Accurate measuring tools are essential for this process.
Fit Refinement thrives on Iterative Adjustments, so mark and modify precisely.
This pattern modification locks in a custom garment fitting for flawless pants fitting!
Pattern Alteration Tools
To adjust pants patterns effectively, you’ll need reliable tools like rulers, markers, and scissors to make precise changes.
Using techniques like slash lines, pivot points, and retracing guarantees clean adjustments and a better final fit, which involves making precise changes to achieve a good outcome with reliable tools.
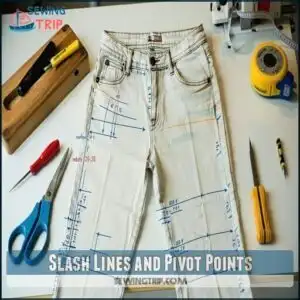
Slash Lines and Pivot Points
When adjusting for a flat bum, pattern slashing and pivot techniques are lifesavers. They let you tweak the fit without throwing off balance.
- Slash the pattern at key points to adjust curvature.
- Use pivot methods to reduce or add fabric cleanly.
- Redirect the grainline afterward to keep everything aligned.
Consider using specialized pattern manipulation tools for best results. Precision guarantees garment fitting with smooth waistlines and hip shaping!
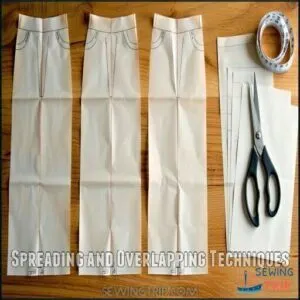
Spreading and Overlapping Techniques
To refine pants fitting and remove excess fabric, overlapping pattern pieces works wonders, utilizing complete concepts to achieve the desired fit.
Cut along line B, align it with line A, then secure with tape, ensuring that pattern manipulation guarantees precise fabric reduction while preserving the grainline impact.
| Step | Action | Outcome |
|---|---|---|
| 1: Mark Lines | Draw A and B equally apart | Guides adjustments |
| 2: Overlap Pieces | Align and tape securely | Eliminates excess |
| 3: Recheck Fit | Ensure smooth alignment | Perfect fit achieved, resulting in a perfect fit with smooth alignment. |
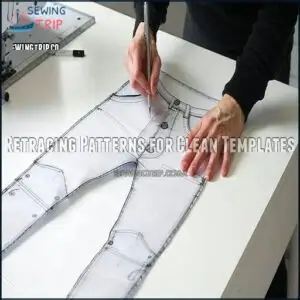
Retracing Patterns for Clean Templates
After shaping adjustments using spreading and overlapping, making clean template benefits your workflow.
Retrace your pattern pieces carefully to create accurate pattern copies. Use transparent paper for clarity, ensuring you avoid distortion and maintain grainlines.
**Ensuring adequate wearing ease is important for comfort.
Follow these tips:
- Trace with fine-point tools for precision.
- Redraw seams smoothly—skip sharp edges.
- Review pattern cutting alignment for consistency.
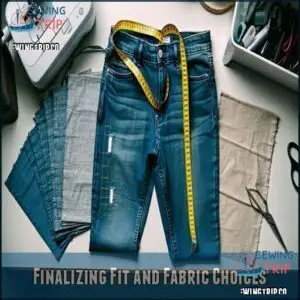
Finalizing Fit and Fabric Choices
Choosing the right fabric and fine-tuning your final fit guarantees your pants look polished and feel comfortable.
Consider stretch, recovery, and structure to balance a snug fit with enough give for easy movement.
Compensating for Removed Fabric
When adjusting for a flat bum, removing fabric can throw off your fit elsewhere—no one wants awkward waist gaps or twisted seams.
Compensate by refining waist adjustment and leg measurements, ensuring proper grain alignment. A little hip reshaping and fine-tuning dart adjustments create balance.
Sewing pants is like sculpting—remove strategically to maintain harmony. Pattern alteration done right feels seamless!
Considering Fabric Stretch and Recovery
When perfecting your pants fitting, consider the fabric’s Stretch Percentage and Recovery Rate.
Fabric Drape and Fiber Content matter too—denim stretch works differently than twill or linen, so test it first.
A Bias Cut can shift how the fabric moves, affecting results. Sewing adjustments shine with fabrics that spring back, ensuring your sewing pattern adjustments look polished every time.
Choosing Suitable Fabrics for Flat Bum Adjustment
When choosing fabric for pants design, consider fabric drape, stretch percentage, and recovery properties to guarantee a great fit, as these factors impact sewing pattern and pants fitting.
Especially for sewing fabric with varying weave density and fabric weight.
Frequently Asked Questions (FAQs)
How can I tell if I need a pants fit adjustment?
Did you know 68% of poorly fitting pants sag awkwardly?
If the back looks deflated or fabric pools under your bottom, it’s a sure sign you need an adjustment to improve the fit.
What does a pants fit adjustment fix?
A pants fit adjustment fixes fit issues like sagging, excess fabric, or discomfort.
It guarantees your pants hug your body properly, aligning with your shape for a polished look, while avoiding that awkward “baggy butt” situation, ensuring a proper fit.
How do you adjust a Pant if you have a FLAT STOMACH?
To adjust pants for a flat stomach, reduce excess fabric at the front waistband.
Lower the front rise slightly, taper darts if needed, and make certain smooth lines for a snug, polished, yet comfortable fit.
How do I fix a low seat adjustment in my pants?
Ever feel like your pants are sagging in all the wrong places?
Fixing a low seat means shortening the back crotch curve, removing excess fabric, and adjusting the pattern for a smoother, snugger fit.
Do you need to adjust the flat butt area?
You’ll likely need to adjust the flat butt area if the fabric sags or pools under your bum.
By refining the back crotch curve and adjusting dart length, you’ll achieve a smoother, snugger fit.
How do you adjust pants that are too baggy under the seat?
Imagine smoothing a rumpled sheet—pinch out that extra fabric underneath by shortening the back crotch curve on your pattern.
Tweak darts or slash and overlap to reshape, achieving a snugger, custom fit.
How to adjust store-bought pants for flat bum?
To fix store-bought pants with a flat bum fit, take in the back seam slightly, extend darts by about an inch, and taper the back crotch curve.
These tweaks reduce sagging and improve fit!
What tools simplify flat seat adjustments at home?
You’ll need tools like a flexible ruler, tailor’s chalk, sharp fabric scissors, and pattern weights.
A tracing wheel, muslin fabric, and a seam ripper also simplify adjustments, ensuring clean lines and precise alterations at home, which helps in making precise alterations.
Can flat bum alterations change seam durability?
Did you know poorly adjusted seams can reduce durability by 30%?
Flat bum alterations, if done correctly, don’t weaken seams.
Use strong thread and precise stitching to balance fabric tension and maintain long-lasting strength.
When to consider adding more darts for fit?
Add more darts if excess fabric persists below the waistband or around the bum.
Darts help shape the fabric to your curves, offering a snug fit while eliminating unwanted sagging or bagginess.
Conclusion
Achieving a great fit for a flat bum isn’t magic—it’s all about precision and technique.
By adjusting the pants pattern correctly, like shortening the back crotch curve or refining dart placement, you’ll say goodbye to saggy fabric and hello to sleek lines.
Test alterations on muslin first, ensuring each tweak enhances comfort and shape, with practice and patience, and proper tools, adjusting pants patterns for a flat bum will become second nature, leaving you with custom perfection every time.
- https://www.coletterie.com/tutorials-tips-tricks/the-colette-patterns-pants-fitting-cheatsheet
- http://www.flickr.com/groups/colettepatterns/
- https://www.maison-fauve.com/
- https://www.instagram.com/stories/highlights/17916801256743109/
- http://sewing.patternreview.com/cgi-bin/sewingclasses/board.pl?t=29657


