This site is supported by our readers. We may earn a commission, at no cost to you, if you purchase through links.
 You’ll master advanced pattern making adjustments by starting with precise body measurements and understanding how fabric behaves with your body’s unique contours.
Focus on key adjustment points: bust, waist, hip, and shoulder alignment. Learn to read pattern ease allowances and grainline positioning—these determine how your garment drapes and moves.
Master techniques like full bust adjustments, shoulder slope corrections, and length modifications before cutting fabric. Use muslin test garments to verify adjustments work correctly.
Professional pattern makers rely on mathematical formulas for grading between sizes, but you can achieve excellent results using systematic measurement comparisons and targeted alterations that address your specific fit challenges, including understanding pattern ease allowances and making shoulder slope corrections to ensure a perfect fit.
Table Of Contents
Key Takeaways
- You’ll eliminate frustrating fit issues by mastering systematic measurement techniques and understanding how pattern ease allowances work with your unique body proportions.
- You can transform store-bought patterns into custom-fitted garments using professional dart manipulation, shoulder corrections, and bust adjustments that address your specific fitting challenges.
- You’ll save fabric and prevent costly mistakes by creating muslin test garments before cutting expensive materials, allowing you to perfect adjustments through systematic trial and refinement.
- You’ll develop industry-standard skills through mathematical grading formulas and pattern adjustment techniques that deliver professional results comparable to custom tailoring.
Pattern Adjustment Basics
You’ll discover that mastering pattern adjustments transforms your sewing from frustrating to fulfilling, turning ill-fitting disasters into garments that feel custom-made for your body.
These foundational skills—from accurate measuring to understanding pattern language—form the building blocks every sewist needs before tackling complex alterations.
Measuring Body Canvas
Foundation measurements are your sewing success roadmap. Measure bust, waist, and hips at fullest points using flexible tape. Body Landmarks like shoulder points and waist level require Digital Measurement apps for precision tracking. Posture Impact affects accuracy, so stand naturally while helpers handle tricky back measurements.
Accurate sewing guarantees garments fit well, enhancing the overall sewing experience.
- Record body measurements in Personal Charts updated with Measurement Frequency every six months
- Use measurement techniques with narrow elastic markers on skin for consistent body proportions
- Wear everyday undergarments, avoiding bulky layers that distort sewing measurements
- Apply sewing pattern measurements against your recorded data for accurate body proportions analysis
Understanding Pattern Terminology
Once you’ve captured accurate body measurements, you’ll need to decode the symbols and markings that guide your pattern making journey. These Pattern Symbols aren’t random marks—they’re your construction blueprint.
Key Pattern Symbols to Master:
- Notches Meaning – Triangle marks that align pattern pieces perfectly during assembly
- Grainline Direction – Arrow showing fabric’s lengthwise grain for proper drape and stability
- Cutting Layout – Placement guide maximizing fabric efficiency while respecting grain
Understanding seamline versus cutting line prevents costly mistakes. The seamline shows where you’ll stitch, while cutting lines include seam allowances. To guarantee accurate fabric alignment, pay close attention to the pattern’s grainline.
Pattern pieces communicate through these symbols, creating a visual language that transforms flat paper into three-dimensional garments.
Ease Definition varies by garment style—fitted bodices need minimal ease while loose tops require more room for movement and comfort.
Grainline and Seam Allowance
Starting with proper grainline placement sets the foundation for professional-looking garments. Grainline Importance determines how your fabric behaves—ignore it, and you’ll get twisted seams and poor drape.
Altering Grainlines during pattern making adjustments requires careful attention to those directional arrows on your pattern pieces. Seam Allowance Width gives you wiggle room for fitting adjustments. Most patterns include 5/8-inch allowances, but you can customize based on your pattern alteration needs.
Curved Grainlines and Bias Grainlines need special handling—they stretch differently than straight grain. The following table summarizes key characteristics of different grain types:
| Grain Type | Stretch Direction | Best Application | Handling Tip |
|---|---|---|---|
| Lengthwise | Minimal | Structured pieces | Pin parallel to selvage |
| Crosswise | Moderate | Fitted areas | Test stretch first |
| Bias | Maximum | Flowing garments | Handle gently |
| True bias | Equal both ways | Binding, draping | Cut with sharp rotary |
Remember: your seamline follows the grainline—get this relationship right, and your garments will hang beautifully.
Choosing Correct Pattern Size
Beyond your usual retail size, pattern sizing demands precision with your body measurements.
Your largest measurement—whether bust measurement, waist, or hips—determines your starting point.
Cross-reference these personal measurements with size charts, remembering that standard sizing limitations vary between brands.
Body proportions matter more than vanity sizing.
Factor in ease allowance for comfort and movement.
Document your sewing measurements for future projects.
This pattern sizing foundation prevents frustration and guarantees size chart accuracy guides your adjustments.
Advanced Sewing Techniques
Once you’ve mastered basic pattern adjustments, you’re ready to tackle the advanced techniques that separate amateur sewists from professionals.
These refined skills will transform your garments from homemade to couture-quality, giving you complete control over fit, finish, and construction details, allowing for complete control over the final product.
Mastering French Seams
You’ll master French seams by creating enclosed seams that deliver a professional finish every time.
This sewing technique works perfectly with any fabric choice and eliminates raw edges completely.
Here’s your step-by-step process:
- Place fabric pieces wrong-sides together and sew at 1/4 inch seam allowances
- Trim close to the seamline for effective bulk reduction
- Flip pieces right-sides together for curve adaptation
- Sew final seam at 3/8 inch to encase raw edges
This technique transforms basic sewing pattern adjustments into couture-quality results, making your pattern alteration guide projects look professionally constructed.
Free-Motion Quilting Methods
After mastering French seams, you’ll discover free-motion quilting methods that transform ordinary fabric into textured artwork.
Quilting Foot Choice determines your control—darning feet work best for Thread Painting while open-toe feet suit Echo Quilting.
- Stitch Regulation systems maintain consistent loops during complex Texture Creation
- Practice figure-eights and spirals to build hand coordination before attempting intricate designs
- Lower thread tension slightly when switching between cotton and polyester threads
Your hands guide the fabric while the machine follows your lead.
Troubleshooting Common Issues
When gaping necklines and tight sleeves plague your project, you’re dealing with classic fitting issues solutions.
Drag lines reveal where fabric pulls under stress, while excess fabric creates unwanted pooling around curves.
Check your stress points first—tension settings, needle sharpness, and thread quality solve most problems.
Fit troubleshooting starts with identifying these visual cues before making pattern corrections.
Tailoring Tricks and Methods
Professional tailors rely on advanced pattern making techniques that transform ordinary garments into custom masterpieces.
Muslin mockups reveal fitting issues before you cut expensive fabric, while draping techniques create natural silhouettes that conform to your body’s curves.
Master these five essential pattern drafting techniques:
- Canvas Shaping – Steam-mold interfacing using grainline control for natural body curves
- Seam Manipulation – Grade seam allowances to eliminate bulk in curved areas
- Interfacing Strategy – Match weight to fabric for seamless custom pattern design
- Collar Construction – Roll collars naturally before final pressing for professional results
- Sleeve Setting – Use fit refinement through gentle finger pressure, not force
These pattern grading rules guarantee your pattern alteration guide delivers professional-quality results every time.
To achieve these results, it’s vital to regard appropriate needle selection for each fabric type.
Customizing Patterns
You’ve mastered the basics, but now it’s time to transform those store-bought patterns into garments that fit your unique body like they were designed just for you.
Pattern customization turns average-fitting clothes into perfectly fitted pieces that move with your body and flatter your specific proportions, making it a key step in creating clothes that are truly customized to you.
Altering Patterns for Fit
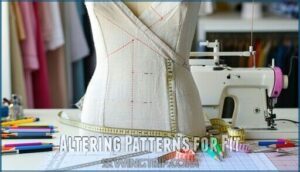
Perfect fit starts with understanding your unique body shape.
Begin with Bust Adjustment techniques, measuring your fullest point and modifying pattern pieces accordingly.
Move systematically through Length Changes and Width Adjustments before tackling Shoulder Mods.
Hip Contouring creates smooth shifts from waist to hips.
Each sewing pattern alteration builds upon the previous modification.
This pattern alteration guide transforms standard patterns into custom garment fitting solutions through precise pattern adjustments.
Using Pattern Grading Systems
Pattern grading transforms your perfectly-fitted base into a complete size range.
Grading Principles use mathematical Size Increments and Grade Rules to scale patterns proportionally across different sizes.
The slash and spread method manually adjusts patterns, while Digital Grading automates the process with precision.
Many designers now utilize advanced software options for increased efficiency.
Custom Grading lets you create unique size combinations that fit real bodies, not just industry standards.
Master these pattern grading techniques to expand your pattern making skills beyond basic pattern alteration and pattern adjustments.
Adding Decorative Elements
Once you’ve mastered grading systems, you can transform patterns with stunning decorative elements. Strategic embroidery designs and applique techniques elevate basic garments into showstoppers.
Surface ornamentation works best when planned during pattern design phase, not as an afterthought. Smart fabric manipulation creates visual interest without compromising fit.
You’ll find beading embellishments shine when placed along natural pattern lines. Consider how decorative elements interact with dart manipulation methods and slash and spread techniques during initial pattern making tutorials.
Your decorative arsenal includes:
- Delicate hand-embroidered motifs following seam curves
- Bold applique patches highlighting design focal points
- Strategic beading that enhances natural body contours
- Textured fabric overlays creating dimensional interest
- Painted details that complement your sewing pattern design
Incorporating Complex Designs
Beyond adding simple decorative touches, you’ll find that asymmetrical designs and intricate patterns separate amateur work from professional-level creations.
Draping techniques combined with modern pattern drafting software let you transform wild concepts into wearable masterpieces. Think of technology as your safety net – no more expensive fabric mistakes when testing complex ideas. Understanding the importance of grainline direction is also key to preventing twisted seams.
- Master dart manipulation methods for seamless asymmetrical designs
- Apply advanced collars with couture details for sophisticated looks
- Use intricate pleating techniques with princess seam adjustments
- Combine traditional draping techniques with digital pattern grading precision
Your pattern making tutorials become stepping stones to creating garments that rival high-end fashion houses.
Working With Fabrics
Once you’ve nailed the perfect pattern adjustments, your fabric choice becomes the make-or-break factor in achieving professional results.
Different textiles behave uniquely during construction, so understanding their properties will transform your sewing from amateur to expert level.
Understanding Fabric Properties
Fabric properties make or break your pattern adjustments. Fiber content determines how your garment behaves—cotton breathes but wrinkles, while polyester blends resist creases. Fabric weight affects structure substantially.
Fabric Weight
Fabric Drape
Fabric Stretch
Weave Structure
Best Use
Stretch recovery affects ease in sewing—knits need different allowances than wovens. Fabric drape changes how patterns hang. Understanding these properties prevents fitting disasters when making sewing pattern adjustments with different sewing fabric choices.
Mastering Advanced Techniques
Your fabric knowledge opens doors to advanced sewing techniques that separate pros from beginners. These methods require precision but deliver exceptional results.
- Dart Manipulation – Rotate, slash, and relocate darts to reshape garments without losing fit
- Volume Redistribution – Move fullness using pivot points while maintaining pattern integrity
- Pattern Walking – Test curved seamlines by rolling pattern pieces together before cutting
Master seam redrawing after adjustments to guarantee smooth construction. These sewing pattern alterations transform basic patterns into custom-fitted masterpieces.
Smart Fabric Selection
Your choice of sewing pattern fabric shapes the final outcome. Fabric drape determines how your garment moves and hangs on your body. Fiber content affects durability, while weave structure impacts stability during sewing pattern alterations.
Consider these factors when selecting sewing fabrics:
- Print scale should complement your body proportions and pattern design
- Colorfast testing prevents bleeding during washing and construction
- Weight compatibility with your sewing pattern instructions guarantees proper structure
- Stretch percentage affects how sewing pattern adjustments translate to the finished garment
Analyzing Textile Science
Master Fiber Properties through systematic analysis. Understanding tensile strength, elasticity, and absorbency guides sewing pattern fabric selection. Textile Testing reveals performance characteristics before cutting. Modern Performance Finishes enhance durability and functionality.
Knowing the fiber content impacts fabric performance and longevity.
| Test Method | Property Measured | Application |
|---|---|---|
| Tensile Test | Strength (3-9 g/den) | Sewing pattern testing |
| Elasticity Test | Stretch (3-700%) | Sewing pattern refining |
| Abrasion Test | Durability rating | Sewing pattern scaling |
| Moisture Test | Absorbency level | Sewing pattern grading |
Fabric Construction affects drape and stability. Dye Chemistry impacts colorfastness and care requirements.
Mastering Pattern Making
You’re ready to transform your sewing from guesswork into precision with professional pattern adjustment methods.
These industry techniques will teach you to create patterns that fit your unique body shape perfectly, eliminating the frustration of poorly fitting garments, and help you achieve a perfect fit.
Developing Industry-Standard Techniques
Professional pattern work demands mastering standardization metrics and tech integration that separate industry pros from home sewers.
These five industry benchmarks will transform your pattern adjustments:
- Standardization Metrics – Use consistent measurement protocols for sewing pattern fitting
- Tech Integration – Apply CAD software for precise pattern alteration calculations
- Automation Techniques – Implement digital cutting systems for accuracy
- Professional Training – Follow certified grading methods for industry standard patterns
- Quality Control – Establish checkpoints using pattern alteration supplies
These techniques guarantee your work meets commercial production standards.
Refining Skills for Professional Results
Perfecting your pattern alteration skills requires attention to detail and consistent practice.
Sharp cutting tools and quality rulers make precise seam allowance mastery possible. Test challenging fabric combinations to build instincts—muslin helps identify fit issues early.
Focus on grainline perfection and professional finishing techniques like French seams. Understanding balance points and design guarantees symmetrical and well-fitted garments.
Document your pattern adjustments to create a personal proportional patterning system for consistent results.
Utilizing Sewing Pattern Software
Digital pattern making software transforms your workflow from tedious manual drafting to precision-driven design.
Digital pattern grading automatically scales sizes while automated seam allowance eliminates calculation errors.
Pattern digitization converts hand-drawn pieces into editable files for pattern alteration software modifications.
Virtual fitting through 3D modeling reveals fit issues before cutting fabric.
A wide selection of software options exist for various needs.
Digital pattern software streamlines pattern adjustments and sewing pattern adjustments with click-and-drag simplicity.
Frequently Asked Questions (FAQs)
What are the 5 pattern making techniques?
Sarah’s favorite dress pattern never fit her shoulders properly until she learned these five core techniques.
You’ll master lengthening and shortening at adjustment lines, widening and narrowing through pivot points.
Full bust adjustments, small bust adjustments, and waistline modifications are also included for a perfect fit.
What makes a sewing pattern advanced?
Advanced patterns challenge you with complex construction techniques, multiple fitting adjustments, intricate details like bound buttonholes or welt pockets.
They require mastering skills like dart manipulation, grading between sizes, and reshaping curved seams.
What is the best pattern making software?
Finding the right pattern-making software is like choosing your creative compass.
I’d recommend Valentina for free open-source power, or CLO3D for professional 3D visualization.
Both handle complex grading and adjustments seamlessly.
How do I know if I need a full bust adjustment?
You’ll need a full bust adjustment if your bust measurement exceeds the pattern’s bust measurement by more than 2 inches.
Or if you notice gaping, pulling, or drag lines across the chest area.
How do I make a perfect pattern adjustment?
Like rotary phone users shifting to smartphones, you’ll master perfect pattern adjustments by measuring accurately, testing with muslin, making one change at a time, and documenting what works for your unique body shape.
How do you adjust a pattern to fit a different size?
You’ll first measure your body accurately, then compare those measurements to the pattern’s sizing chart.
Choose the size closest to your bust measurement as your starting point.
Use the "slash and spread" technique to widen sections or fold patterns to narrow them, maintaining proper grainlines throughout.
How do you adjust a sewing pattern?
Measure your body accurately and compare those measurements to the pattern’s sizing chart.
Make targeted adjustments using techniques like lengthening, shortening, widening, or narrowing at designated adjustment lines before cutting your fabric, which involves making adjustments to achieve a proper fit by using techniques such as lengthening.
Do I need a pattern adjustment before cutting a garment?
Yes, you should measure yourself and compare those measurements to the pattern before cutting.
Most patterns won’t fit your unique body shape perfectly straight from the envelope, so adjustments prevent wasted fabric and frustrating fitting issues later.
This step is crucial as it helps in preventing wasted fabric and ensuring a better fit.
What are the essential tools for modifying sewing patterns?
Without the right tools, you’ll fumble through pattern adjustments like trying to thread a needle in the dark.
You need a flexible measuring tape, gridded ruler, French curve, hip curve, and tracing paper for successful modifications.
How do I modify a pattern?
Start by taking accurate body measurements and comparing them to your pattern’s sizing chart.
Mark adjustment lines on your pattern, then use slash-and-spread techniques for width changes or fold methods for length modifications.
Conclusion
Absolutely revolutionary techniques transform your sewing forever when you master this advanced pattern making adjustments guide.
You’ve learned to read your body like a professional pattern maker, understanding how measurements translate into perfect-fitting garments.
Your newfound skills in bust adjustments, shoulder corrections, and ease calculations give you complete control over pattern modifications.
These systematic approaches eliminate guesswork from alterations, replacing trial-and-error with precise mathematical methods.
You’re now equipped with industry-standard techniques that guarantee every garment flatters your unique silhouette perfectly.


