This site is supported by our readers. We may earn a commission, at no cost to you, if you purchase through links.
Flip a store-bought blouse inside out and you’ll rarely find a raw edge in sight. Every seam sits tucked away, clean as a whistle, with no threads shedding into the wash. That’s the quiet trick behind garments that survive years of wear without fraying apart at the seams.
Learning how to sew a french seam hands you that same professional finish, right at your own machine. It’s not some guarded industry secret, either, just two straightforward stitches worked in the right order, on the right fabric, with the right tools on hand.
Grab a scrap of chiffon and your machine, and you’re already halfway to mastering the technique that separates hobby sewing from work you’d be proud to sell.
Table Of Contents
Key Takeaways
- A French seam encloses raw edges through two passes: sewing wrong sides together first, trimming to 1/8 inch, then folding right sides together and stitching again to hide the edge completely.
- This technique works best on lightweight, tight-weave fabrics like chiffon, organza, voile, and silk, but should be avoided on thick materials like denim and canvas, as well as stretch knits, since bulk and puckering ruin the finish.
- Success depends on the right setup: a 1.5–2.0mm stitch length, matching needle size to fabric weight, sharp scissors or a rotary cutter for clean trims, and careful pressing between passes to keep the seam flat.
- Common trouble spots like bulky fabric, curved seams, and wobbly stitch lines can be fixed with techniques like diagonal trimming, clipping curves, using a tailor’s ham, and letting the feed dogs guide the fabric.
What is a French Seam?
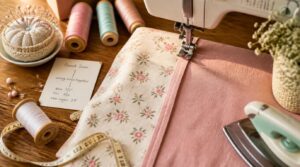
A French seam is a sewing technique that fully encloses raw edges inside a tidy fold, so nothing frays or unravels after washing. It works in two passes, first sewing the edges together, then folding and stitching again to hide them completely.
This step-by-step French seam sewing tutorial breaks down each pass with clear photos, making the technique easy to master even on delicate fabrics.
Before you pick up your machine, though, it helps to know why this method’s worth learning, which fabrics love it, and which ones you should skip.
Benefits of French Seams
Picture a seam that looks perfect whether you’re peeking inside or out, that’s the payoff here.
A French seam looks flawless from both sides, inside and out, with no compromise between the two
- Edge fraying prevention on delicate weaves
- Enhanced wash durability, even after 20+ cycles
- Clean interior aesthetics with no exposed raw edges
- Strength that holds garment shape over time
- A genuine professional sewing finish, inside and out
This method uses a double-stitched technique to create a completely enclosed seam.
That combination makes French seams a go-to for sheer garments demanding real seam durability.
Best Fabrics for French Seams
Not every fabric earns that clean, enclosed finish, so choose wisely.
Sheer fabrics like chiffon, organza, and voile benefit most, since French seams hide raw edges that would otherwise show through. Silk’s natural drape stays graceful when seams are enclosed, and lightweight linens or cotton batiste manage fraying risk beautifully. Tight-weave, lightweight materials reward you with minimal bulk, so your finished seam lies flat and hides inside the garment.
Fabrics to Avoid
Denim, canvas, and other thick fabrics create too much heavy fabric bulk once folded twice—your seam turns lumpy instead of flat.
Skip stretch and knit fabrics too, since stretchy material tension fights the two-pass stitching and puckers.
Fabrics to sidestep:
- Thick canvas or denim
- Stretch knits
- Heavily curved pattern pieces
- Synthetic blends with chemical finish concerns
Tools You’ll Need to Start
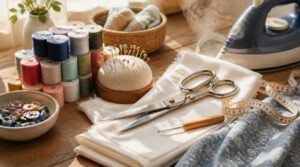
Before you sit down at the machine, gather a few basics so you’re not hunting for supplies mid-seam. Nothing fancy here, just the right thread, a sharp pair of scissors, and an iron you can trust. Here’s exactly what to have on hand before you start stitching.
Matching Thread and Machine Settings
Get your machine set right before you sew a stitch. Use all-purpose polyester thread, matching weight to your fabric, and set stitch length to 1.5–2.0mm.
Choose a size 60–70 needle for lightweight fabrics or 80/12 for cotton and linen. Keep top tension slightly loose, bobbin tension at factory settings, and always sew a straight stitch, never zigzag.
Ruler, Scissors, and Pins
Three tools make or break your accuracy: a clear acrylic ruler with 1/16 inch markings for parallax-free measuring, sharp scissors (gold stainless steel tailor scissors cut cleanest), and sharps pins for stable holds on woven fabric.
Once your pieces are cut and pinned, a leveling presser foot helps you glide over bulky seam allowances so techniques like what is topstitching turn out crisp and professional.
Keep a measuring tape and rotary cutter handy too. Clean your blades regularly, store pins in a cushion so they don’t bend, and organize notions so nothing goes missing mid-project.
Iron and Press Cloth Setup
Set up your iron and ironing board near your machine, so pressing between passes stays quick. Choose a lightweight cotton or muslin pressing cloth, at least 12×12 inches, to prevent fabric shine and scorching.
Test your temperature on a scrap swatch first. Use steam sparingly on delicate fibers, and wipe the soleplate clean regularly so residue never transfers onto your seams.
Practicing on Scrap Fabric
Rushing into your real project skips the one step that saves you the most frustration later.
Cut a few scraps by fiber and weight, then run a 6-inch practice seam, timing yourself for pace. Mark guidelines with chalk, backstitch at both ends, and test tension. Log needle size and results—consistent stitch tracking builds the confidence you’ll need for actual seam construction.
Top Sewing Supplies for French Seams
The right tools make french seams so much easier to nail on your first try. You don’t need a huge sewing kit, just a handful of reliable pieces that do their job well. Here are six supplies worth adding to your sewing table.
1. Gutermann Sew All Polyester Thread Set
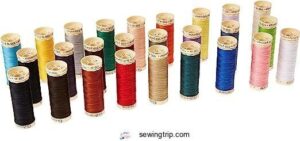
Gutermann Sew All Polyester Thread Set gives you 26 assorted colors in a clear storage box with spindles, so nothing tangles while you dig for the right shade. Each 100-meter spool is 100% polyester, built with Micro Center Technology for strong, clean seams under a straight stitch.
For French seams, matching thread strength to fabric matters as much as color. Beginners like this set since the see-through box makes color ID quick, though niche shades may still need separate hunting.
| Best For | This set is best for beginner and experienced sewists who want an organized, ready-to-use thread collection for everyday sewing projects. |
|---|---|
| Material | 100% Polyester |
| Weight | 0.01 oz |
| Primary Use | Sewing thread |
| Color Options | 26 assorted colors |
| Skill Level | Beginner to expert |
| Storage Included | Plastic storage box |
| Additional Features |
|
- 26 assorted colors cover most common sewing needs right out of the box
- Clear storage box with spindles keeps spools tangle-free and easy to identify
- Micro Core Technology delivers strong, clean seams with 100% polyester thread
- Assorted colors may not include specific or niche shades for specialized projects
- Extremely light total weight suggests smaller spool sizes than some sewists may expect
- As an imported product, availability or restocking may vary
2. Gold stainless steel tailor scissors
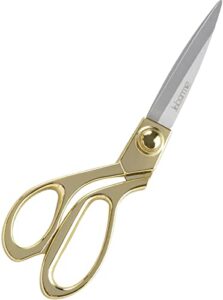
Precision cutting makes or breaks a French seam, and that’s where these 8-inch gold stainless steel tailor scissors earn their keep. The ultra-sharp blades hold layers flat while trimming that narrow 1/8 inch allowance, so you get clean edges without snagging delicate voile or chiffon.
The bent, ergonomic handle keeps fabric flat on your table and eases hand strain during long sessions. Just wipe blades dry after each use, since gold plating needs a little extra care to stay rust-free.
| Best For | Sewers and tailors who need precise, snag-free cuts through delicate fabrics like voile and chiffon, as well as heavier materials like leather and carpet. |
|---|---|
| Material | Stainless Steel |
| Weight | N/A |
| Primary Use | Fabric cutting |
| Color Options | Gold |
| Skill Level | All levels |
| Storage Included | None |
| Additional Features |
|
- Ultra-sharp blades give clean, precise cuts and hold fabric layers flat while trimming
- Ergonomic bent handle reduces hand strain during long cutting sessions
- Sturdy stainless steel build handles everything from ribbons to cardboard and leather
- Gold plating needs regular wiping and care to avoid tarnishing or rust
- Only one pair included per package
- Weighted design may feel heavy for those used to lighter scissors
3. Olfa Standard 60mm Rotary Cutter

Scissors work fine, but a rotary cutter turns trimming into one smooth glide instead of dozens of snips. The Olfa 60mm cuts through up to eight layers of cotton in a single pass, so trimming that narrow allowance stays fast and even.
Its self-retracting blade snaps back after each cut, and the ambidextrous handle fits either hand comfortably. Just remember: a rotary cutter needs a protective surface underneath, so don’t set it directly on your table.
| Best For | This rotary cutter is best for quilters, sewists, and crafters who need to cut through multiple layers of fabric or thick materials quickly and precisely. |
|---|---|
| Material | Metal |
| Weight | 3.17 oz |
| Primary Use | Rotary fabric cutting |
| Color Options | N/A |
| Skill Level | All levels |
| Storage Included | Blade safety cover |
| Additional Features |
|
- Cuts through 6 to 8 layers of fabric in one smooth pass, saving time on big projects
- Ambidextrous, ergonomic handle keeps hand fatigue low whether you’re right- or left-handed
- Integrated blade cover adds a layer of safety when the cutter isn’t in use
- Requires a separate cutting mat or protective surface to avoid damaging tables
- Needs 60mm replacement blades, which adds an ongoing cost
- Manual operation means precision depends on steady, consistent hand pressure
4. Breman Precision Self Healing Cutting Mat
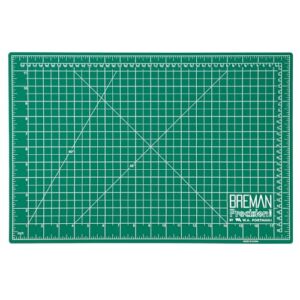
That rotary cutter needs somewhere safe to land, and that’s where the Breman Precision mat comes in. Its five-ply PVC construction self-heals after every pass, so your blade glides clean without carving grooves into the surface.
Flip it over for whatever you’re cutting: one side’s built for dark fabrics, the other for light ones, both marked with the same grid lines. The non-slip base keeps everything steady while you trim that narrow seam allowance down to size.
| Best For | sewists, quilters, and DIY crafters who need a durable, dual-sided surface for accurate everyday fabric cutting. |
|---|---|
| Material | PVC |
| Weight | 16 oz |
| Primary Use | Cutting surface protection |
| Color Options | Green/Black |
| Skill Level | All levels |
| Storage Included | None |
| Additional Features |
|
- Self-healing 5-ply PVC surface resists knife and rotary cutter marks
- Reversible green/black design suits both dark and light fabrics
- Built-in grid and angle guides make precise cuts and measurements easy
- Limited to 0.25-inch thickness, so it offers less cushioning than thicker mats
- Not designed to withstand heavy-duty industrial blades
- Meant for manual crafting tools only, not machine cutting setups
5. Rowenta Pro Master Steam Iron
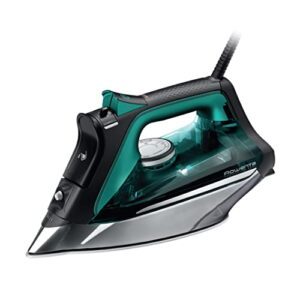
Once your seam allowance is trimmed and thread-free, you need heat that won’t let you down. The Rowenta Pro Master brings 1775 watts and a 210 g/min steam boost, with 430 microsteam holes spreading heat evenly across silk or organza alike.
Its anti-calc system keeps mineral buildup from staining delicate fabric, while the precision tip presses right into tight seam allowances. That’s exactly the crisp, flat press French seams demand before folding.
| Best For | Sewists and home users who want professional, French-seam-ready pressing results on delicate fabrics like silk, wool, and linen. |
|---|---|
| Material | Metal/Plastic |
| Weight | N/A |
| Primary Use | Garment pressing |
| Color Options | White |
| Skill Level | All levels |
| Storage Included | None |
| Additional Features |
|
- 430 microsteam holes and a 210 g/min steam boost deliver fast, even heat across delicate seams
- Precision spray tip targets tight seam allowances and stubborn wrinkles with ease
- Anti-calc system helps protect fabric from mineral staining over time
- Requires an ironing board for effective use
- Anti-calc system needs regular upkeep to keep performing well long-term
- At 1775 watts, it draws more power than lighter-duty irons
6. MumCraft Multi Color Sewing Clips
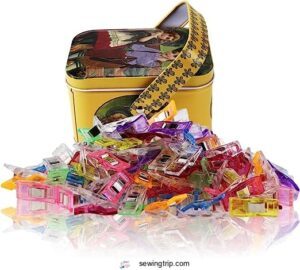
Once your seam’s pressed flat, you’ll want your fabric layers held steady without extra pinholes. That’s where MumCraft’s clips come in, offering 100 reusable plastic clips in a compact tin.
Their flat base slides right under the presser foot, and the wide opening grips multiple layers without distorting your seam. Bright, transparent colors let you see the fabric underneath while color-coding project stages. At 9.6 oz total, they’re light, portable, and perfect for holding French seam folds steady before that final stitch.
| Best For | quilters, sewists, and crafters who want to hold fabric layers, seams, and bindings in place without leaving pin holes. |
|---|---|
| Material | Plastic |
| Weight | 9.6 oz |
| Primary Use | Fabric fastening |
| Color Options | Assorted colors |
| Skill Level | Beginner to expert |
| Storage Included | Tin container |
| Additional Features |
|
- Reusable, transparent clips let you see and organize fabric layers as you sew
- Flat base and wide opening make it easy to feed work under the presser foot
- Compact tin case keeps 100 clips organized and portable
- Small size may not hold thick or heavy fabrics securely
- Clips can crack under too much pressure
- Tin storage is limited, so bulk use may need extra organizing
How to Sew a French Seam
Now that your fabric and tools are ready, it’s time to put that straight stitch to work. This process moves through five clear steps, each one building on the last to enclose your raw edges completely. Follow them in order, and you’ll end up with a seam that looks as good on the inside as it does on the outside.
Sew The First Seam
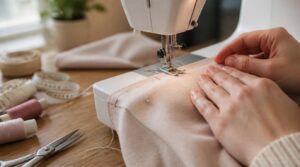
Here’s where the magic starts: with wrong sides together, not right sides like most seams you’ve sewn before.
Pin perpendicular to the raw edge so nothing shifts, then stitch a scant seam allowance using backstitching at both ends. Keep tension balanced and stitches short—this first pass is the foundation your whole French seam rests on, so take it slow.
Trim The Seam Allowance
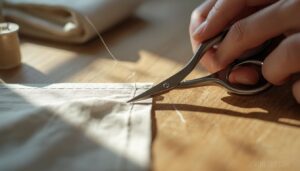
Grab your scissors and trim that seam allowance down to about 1/8 inch, cutting close to the stitching line without snipping threads. This reduces bulk and prevents fraying once you flip the fabric.
Keep blades sharp and fingers clear for safety. Trim the edges evenly so the enclosed raw edges sit flat, setting you up perfectly for pressing.
Press The Seam Flat
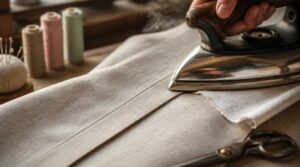
Now flatten that trimmed edge with a hot iron before moving on, so the seam lies smooth instead of ridged. Adjust heat settings to match your fabric, use steam for cotton or linen, and slip in a pressing cloth for anything delicate.
This fiber relaxation locks stitches in place and preps your fabric handling for the next fold in your French seam construction.
Fold Right Sides Together
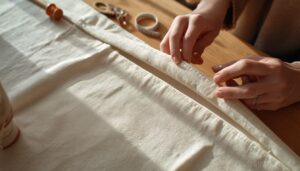
Time to flip things around. Fold your fabric so right sides face together, tucking that trimmed edge inside the fold, opposite of your first pass.
Line up notches and marks, check that fabric grain stays aligned, then pin perpendicular to the seam line so nothing shifts. This orientation sets up your second seam to fully enclose the raw edges—no fraying, no fuss.
Sew The Second Seam
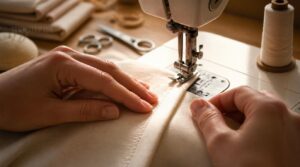
This is where the magic locks in. Stitch 1/4 inch from the folded edge, using straight stitches to fully enclose that raw edge inside.
Backstitch 3-4 stitches at both ends so threads won’t loosen with wear. Match thread color to your fabric, keep tension even, and press the seam flat toward one side—you’ve just built a seam that won’t fray or bulk up.
Fixing Common French Seam Problems
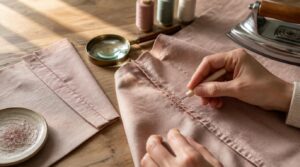
Even careful sewers run into snags with this technique, and that’s perfectly normal. Bulky fabric, curved edges, and wobbly stitch lines each call for their own fix. Here’s how to handle the most common problems so your seams stay clean every time.
Reducing Bulk in Thick Fabrics
Bulk is a French seam’s biggest enemy on thick fabrics. Wool, denim, or double-gauze pile up fast with four layers.
- Diagonal trimming at corners
- Grade seam allowances to 1/4" and 3/8"
- Try a Hong Kong finish on heavier goods
- Use serger overlock to reduce raw-edge thickness
- Plan strategic stitching to spread bulk evenly
These tricks keep your seam allowance flat, not lumpy.
Handling Curved or Stretchy Seams
Curves throw a wrench into French seams fast, so ease them in gently rather than forcing a straight stitch around a bend.
Clip concave curves up to the stitch line, easing puckers. For stretchy knits, stabilize with lightweight interfacing and shorten your stitch length slightly. Press over a tailor’s ham to shape the curve, then grade seam allowances so the enclosed edges lie flat without stiffness.
Keeping Stitch Lines Straight
Wobbly stitches ruin a French seam fast, so let the feed dogs guide the fabric instead of pushing it. Mark your line with tailor chalk, align a seam guide with the needle, and keep tension balanced. Sew slowly, eyes on the line.
- Check tension balance before starting
- Use a consistent guide
- Practice for muscle memory
Best Uses for French Seams
Once your stitch line runs true, put that skill to work where it counts most.
| Best For | Why It Works |
|---|---|
| Baby clothing, lingerie | Enclosed edges feel gentle on skin |
| Sheer curtains, silk blouses | Clean finish shows through chiffon and organza |
French seams also strengthen durable home textiles and couture pieces needing polished interior finishing on lightweight fabrics.
Frequently Asked Questions (FAQs)
How do you do a French seam step by step?
Sew wrong sides together first, trim close, then flip for right sides facing each other. Stitch again to fully enclose the seam allowance—no fraying, no visible raw edges, just a clean, professional French seam finish.
When should you not use a French seam?
Skip French seams on thick fabrics like denim, since bulk builds fast, and steer clear of curves, stretch fabric, or projects needing alterations. Repairability and easy re-fitting matter more there than fully enclosed seam finishing.
How to do a French seam stitch?
Grab wrong sides together first: stitch 1/4 inch from the edge, trim to 1/8 inch, then press flat. Fold right sides together, press again, and stitch the second seam to fully enclose that raw edge.
How big should a French seam be?
Most patterns default to a 5/8 inch seam allowance, but your finished French seam should land around 1/4 inch. Adjust the first pass based on fabric weight—sheer fabrics stay slim, sturdier ones can widen to 3/8 inch for durability.
What is the difference between a French and felled seam?
A French seam encloses edges narrowly for soft drape and a clean interior, while a flatfelled seam folds and topstitches for rugged strength. Choose French for delicate fabric drape; choose felled seams for durability and washable, sturdy garment construction.
What is the difference between a French seam and a regular seam?
Funny how a "regular" seam is anything but regular once fraying starts. The real difference: a French seam encloses raw edges for a clean interior finish, while a regular seam leaves them exposed, relying on serging for durability.
Can I sew a French seam?
Yes, you can, even as a beginner. This sewing technique has a gentle learning curve, so with basic straight-stitching skill and patience for two passes, you’ll master this seam type on your very first practice piece.
What is the difference between a French seam and an ordinary seam?
The real difference comes down to interior finish quality: an ordinary seam exposes raw edges needing separate finishing, while a French seam fully encloses them, preventing fraying, improving durability after washing, and adding slightly more bulk versus drape.
How do you stitch a French seam on a sewing machine?
Two straight stitches do the trick: pin perpendicular to the edge, sew wrong sides together at ¼ inch, trim close, then fold right sides in and stitch again at ¼ inch to lock every raw edge away.
How do you sew a French seam on a curve?
Pin curves carefully, then stitch at 3/8 inch, clipping seam allowances close to the line. Use a tailor’s ham for pressing, ease fabric gently to avoid curve puckering, and stabilize slippery layers with starch beforehand.
Conclusion
Ready to give your seams that boutique-quality finish? Once you’ve learned how to sew a french seam, you’ll never look at a raw edge the same way again. Two simple stitches, pressed and folded with care, turn fraying fabric into something built to last.
Practice on scraps until the rhythm feels natural, then move to your real project with confidence. Your garments will hold up, wash after wash, wear after wear. That’s the mark of true craftsmanship.
- https://www.sewdiy.com/blog/2020/video-how-to-sew-french-seams
- https://singerco.com.au/learn-create/sewing-101-how-to-sew-a-french-seam-
- https://grainlinestudio.com/blogs/blog/sewing-tutorial-french-all-your-seams
- https://inthefolds.com/q-a-series/2021/tips-for-sewing-french-seams
- https://www.seamwork.com/sewing-tutorials/sewing-french-seams