This site is supported by our readers. We may earn a commission, at no cost to you, if you purchase through links.
The pinning tools in sewing are essential for precise fabric manipulation and secure seam construction. You’ll want to select straight pins that glide easily into your fabric and match the pin gauge to the fabric weight. Keep your pins organized in a sturdy holder, and discard any damaged pins.
Use durable pins for heavy-duty tasks and lightweight, sharp pins for delicate fabrics. Perpendicular pin placement within the seam allowance provides the most flexibility and security.
Pinning is a fundamental technique that sets the stage for successful sewing.
Table Of Contents
Key Takeaways
- Pin selection is crucial for sewing, and straight pins are universally applicable for both hand and machine sewing.
- Pin management includes proper pin disposal, pin storage, and pin safety, such as discarding damaged pins and using heavy-duty pins for heavy-duty tasks.
- Pin placement is essential for precise stitching results, with techniques for pinning angles, curves, knits, slippery fabrics, and sheer fabrics.
- Perpendicular pin placement within the seam allowance provides the most flexibility and security, and pin selection should correspond to the fabric weight and pin head material.
Are the Pinning Tools in Sewing?
Yes, there are pinning tools in sewing. These tools include traditional pins, safety pins, and more recently, sewing clips.
Each type of pinning tool has its own advantages and disadvantages, and the choice between them depends on the specific sewing project and the sewist’s preference.
Traditional pins are the time-tested standard, while sewing clips are a more recent invention that many sewists now prefer for their ease of use and the fact that they don’t require sewing over or ironing over them.
Pin Selection
With regard to pin selection, you’ll want to opt for straight pins that effortlessly glide into your fabric without hindrance. Correspond the pin gauge to your fabric weight, and take into account the pin head material for your particular sewing requirements.
Pin Selection
In the realm of pin selection, a diverse range of types await your choice, each boasting distinct characteristics and uses. Essential pin types for your sewing toolkit include:
- Straight Pins: Universally applicable, they serve both hand and machine sewing endeavors.
- Ball-Point Pins: Designed for stretch knits and jerseys, their rounded tip wards off snags.
- Silk Pins: Delicate fabrics like silk find a gentle touch in these pins, minimizing fabric damage.
- Dressmaking Pins: Glass or flower-headed pins offer easy visibility and handling, making them sought after for lace or bias binding.
- Satin Pins: Curved seams find a pliable companion in these pins, their flat heads gliding smoothly without snagging.
Keep your pins organized within a sturdy pin holder or pin cushion, preventing any stray pins from vanishing into thin air.
Pin Management
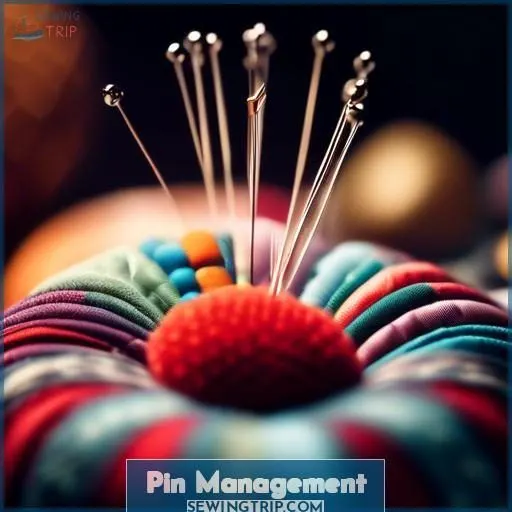
Pin management is essential for efficient pinning and sewing. It includes proper pin disposal, pin storage, and pin safety.
For pin disposal, discard damaged pins and separate pins from other items.
For pin storage, use durable pins for heavy-duty tasks and choose sharp, lightweight pins for delicate fabrics. Avoid pins with plastic heads due to possible melting.
For pin sharpening, consider using specialized tools. Always keep pins within seam margins to prevent fabric damage.
Pin Placement
Pin placement is essential for precise stitching results. Here are some fundamental techniques and approaches for pinning angles, curves, knits, slippery fabrics, and sheer fabrics:
- Pinning angles: Position pins perpendicular to the seamline when pinning lining to fashion fabric.
- Pinning curves: Employ glass-headed pins for comfort on fingers and visibility in lace.
- Pinning knits: Utilize ball point pins for elastic knits and jersey fabrics.
- Pinning slippery fabrics: Isolate pins from other objects to prevent snagging.
- Pinning sheer fabrics: Confine pins within seam allowances to avoid fabric damage.
- Pinning tools: Employ telescopic magnetic pick-up instruments to retrieve misplaced pins or needles.
Pin Management
Proper pin management is key to a successful sewing project. Discard any bent pins, keep pins separated from other objects, and use the right pin thickness for the job at hand to avoid damaging your fabric.
Discard Bent Pins
Bent pins can be a hazard in your sewing room. Discard them promptly to avoid injury or damage to your fabric. Replace them with new ones that glide easily into fabric with no resistance.
Bent pins can also cause damage to your machine. Store your pins properly to prevent them from getting bent.
Sharpening them may not be the best solution, as it can lead to further damage.
Separate Pins From Other Objects
In the world of sewing, pin organization is your hidden advantage. Picture your pins as miniature troops—each kind, size, and head, from glass to plastic ball heads, and nickel-plated steel to quilting pins with vibrant heads, has its purpose.
Keeping them apart makes sure you’re always prepared for action, preventing the dreaded pin chaos.
It’s not only about safety; it’s about sewing mastery.
Use Heavy-duty Pins for Heavy-duty Jobs
Use heavy-duty pins for demanding tasks. Heavy-duty pins are designed to handle the strain of working with thicker fabrics and more challenging projects. They’re usually made of stronger materials and have a larger head to provide better grip and control.
When selecting heavy-duty pins, look for those with a sharp point to make sure they pierce the fabric easily and a sturdy head that won’t bend or break under pressure. These pins are ideal for tasks such as sewing heavy fabrics like denim or upholstery, as well as for tasks that require extensive pinning, like quilting or garment construction.
Remember to remove pins before sewing with a machine to prevent damage to the needle or machine.
Opt for Sharp, Lightweight Pins for Delicate Fabrics
For delicate fabrics like leotards and elastic, opt for sharp, lightweight pins. Choose pins with a fine point and thin shank to minimize damage. Pin length and size should match the fabric’s thickness. Store pins perpendicularly in a pin cushion or caddy for easy access. When pinning, use perpendicular pins and keep them parallel to the needle’s path.
Avoid Plastic-headed Pins Due to Potential Melting
When you’re in the sewing dance, the last thing you want is a partner that melts under pressure. Plastic pins, notorious for pin melting, can become a sticky mess when ironing or machine sewing through layers of fabric, especially with upholstery fabrics. Opt for pin alternatives that can handle the heat.
- Pin Selection: Choose metal or glass-headed pins for heat resistance.
- Pin Safety: Avoid the meltdown drama on your sewing stage.
- Pin Alternatives: Explore magnetic clips for a no-melt, secure hold.
Pin Placement in Seam Allowances
When pinning your fabric, be sure to keep the pins within the seam allowances. This will prevent any unsightly pin holes from showing on the finished garment. Placing the pins perpendicular to the seam line also allows for more flexibility in the fabric as you sew.
Keep Pins Within Seam Allowances to Prevent Fabric Damage
Maintaining pins within seam allowances is essential to prevent fabric damage, reduce pin hole visibility, and minimize fabric distortion. To achieve this, mark seam allowances with a pen or chalk and pin within those perimeters. This helps preserve the integrity of the fabric and ensures a clean, polished finish.
Additionally, using a magnet on a telescopic pole can assist in retrieving lost pins from hard-to-reach areas, eliminating the need to search on the floor.
Perpendicular Pins Allow More Fabric Flexibility
Perpendicular pins offer greater fabric flexibility during sewing. By inserting pins perpendicular to the fabric’s cut edge, you create a less constricted hold on the fabric, improving sewing ease and precision.
This positioning also makes removing pins easier by sweeping them away with your fingers, minimizing the likelihood of fabric damage.
Additionally, perpendicular pins increase pin effectiveness by securely holding layers together without causing fabric movement or bunching.
Pin Placement for Hems and Linings
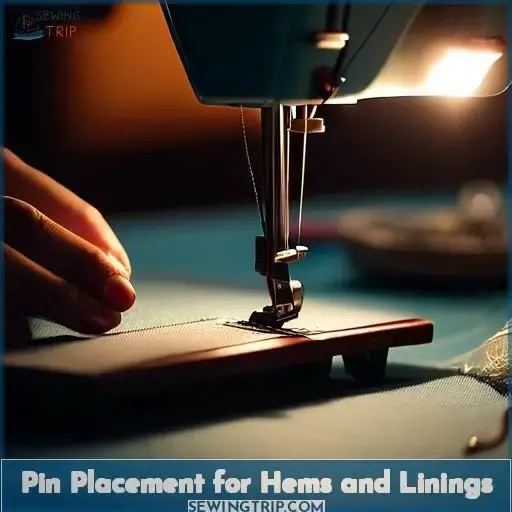
When pinning hems or linings, it’s essential to place pins perpendicularly. Using perpendicular pins will keep the fabric securely along zipper coils, ensuring accurate stitching lines, unlike parallel pins which can restrict fabric movement and diminish stitch accuracy.
Place Pins Perpendicularly When Pinning Hems or Linings
Pinning hems or linings is a critical step in sewing, guaranteeing that the layers are held together securely and precisely. To achieve optimal results, it’s imperative to employ perpendicular pins. Here are some tips and techniques to help you master this skill:
- Perpendicular Pins: When pinning hems or linings, use pins that are perpendicular to the fabric layers. This method allows for improved control and accuracy, as the pins will hold the fabric securely along the seamline.
- Pinning Technique: To pin perpendicularly, insert the pin at a 90-degree angle to the fabric layers. This will guarantee that the pins are evenly distributed and won’t cause any unwanted creases or distortions in the fabric.
- Bias Binding: Perpendicular pins are also beneficial when working with bias binding. They help to secure the binding in place, preventing it from shifting or coming loose during the sewing process.
- Zipper Coils: When pinning hems or linings along zipper coils, use perpendicular pins to hold the fabric securely. This will help to maintain the shape and integrity of the coils, ensuring a smooth and even sewing process.
- Stitching Lines: Perpendicular pins can also be used to define stitching lines precisely. By placing the pins perpendicular to the seamline, you can mark the exact points where you want to sew, ensuring accurate and consistent stitching results.
Perpendicular Pins Hold Fabric Securely Along Zipper Coils
Perpendicular pins hold fabric securely along zipper coils, ensuring precise stitching and fabric securement. This pin placement strategy is essential for maintaining sewing accuracy and preventing fabric shifting.
To further enhance your pinning skills, consider using a 3×5 table to compare perpendicular pin placement with parallel pin placement. This table will help you visualize the benefits of perpendicular pin placement and its impact on sewing accuracy.
Parallel Pins Limit Fabric Movement and Reduce Stitch Accuracy
When pinning hems and linings, parallel pins can restrict fabric movement and diminish stitch accuracy. Here are three methods to enhance pin placement:
- Perpendicular Pins: Position pins perpendicular to the seamline, which permits greater fabric flexibility and simpler removal.
- Pin Placement: Maintain pins within seam allowances to avert damage and uphold stitch accuracy.
- Pin Types: Select perpendicular pins, which secure fabric firmly along zipper coils and guarantee precise stitching lines.
Perpendicular Placement Ensures Precise Stitching Lines
Perpendicular placement guarantees precise stitching lines when securing hems and linings. It enables improved fabric management**, as pins firmly hold fabric along zipper spirals.
Maintain appropriate pin lengths for fabric thickness and employ pin varieties that smoothly penetrate fabric. Safely store pins to avert bending and guarantee pin integrity.
Precise pin placement is crucial for stitching outcomes, so consider parallel pins for looser hold and perpendicular pins for preventing fabric movement.
Pin Usage as a Stitch
Did you know you can use pins to precisely define your stitching lines? By strategically placing perpendicular pins, you can hold your fabric layers securely together, preventing fabric shifting for accurate results. Just be aware that parallel pins provide less secure hold compared to their perpendicular counterparts.
Pins Can Be Used to Define Stitching Lines Precisely
Just as you’d map out a journey before hitting the road, using pins to mark your stitching lines is like charting a precise course for your needle. Forget basting vs pinning debates; with the right pin angles, you’re the captain of your fabric ship, steering clear of snags.
Keep your pincushion organization tight, pin storage smart, and pin retrieval a breeze.
Perpendicular Pins Hold Layers Together Securely
Perpendicular pins firmly secure layers when utilized as a stitch. This is essential for precise stitching outcomes, particularly when handling delicate fabrics.
By positioning pins at a 90-degree angle to the fabric, you guarantee that the layers remain in place without displacement.
Recall to keep pins within seam margins to avert fabric damage and employ perpendicular pins for hems and linings to securely hold fabric layers.
Parallel Pins Provide Less Secure Hold
Parallel pins provide less secure hold compared to perpendicular pins. The pin strength is affected by the angle of placement. Perpendicular pins hold layers together more securely, especially when dealing with thicker fabrics.
Parallel pins can limit fabric movement and reduce stitch accuracy. Accurate pin placement is critical for maintaining fabric integrity and preventing damage.
Pin usage as a stitch is vital for accurate stitching results.
Perpendicular Pins Prevent Fabric Shifting
Perpendicular pins prevent fabric shifting when you’re pinning layers together. They hold the fabric securely in place, allowing for precise stitching. Here are three ways to use perpendicular pins effectively:
- Pin Direction: Place pins perpendicular to the seamline, especially when pinning underlining to fashion fabric.
- Pin Length: Choose pins with the appropriate length for your project. Longer pins are better for thicker fabrics, while shorter pins work for lighter ones.
- Pin Types: Opt for ball point pins for stretch knits and jersey fabrics, as they’ve a rounded point that prevents snagging.
Accurate Pin Placement is Critical for Accurate Stitching Results
Accurate pin placement is critical for achieving precise stitching results. Pinning techniques can vary, but using specialized pins and innovative pin tools can make a significant difference. Personal preferences and storage options also play a role in pin selection. By understanding the importance of accurate pin placement, you can master the art of sewing and create beautiful, well-constructed garments.
Pin Placement
When attaching fabric, it’s essential to insert the pins perpendicularly to the cut edge of the fabric. Keeping the pins parallel to the seam line will guarantee precise stitching and prevent fabric movement.
Insert Pins Perpendicular to the Cut Edge of Fabric
When securing fabric, it’s crucial to insert the pins perpendicular to the cut margin of the fabric to guarantee precise placement and effortless removal. This technique enables better pin visibility and arrangement, as well as minimizing the risk of injury from sharp pin ends. To insert pins perpendicularly, follow these steps:
- Hold the pin in your dominant hand, with the head facing you.
- Place the pin’s tip just below the fabric’s surface, ensuring it’s perpendicular to the cut margin.
- Press the pin gently into the fabric, ensuring it’s securely in place.
- Repeat this process for all the pins you need to secure.
Keep Pins Parallel to the Seam Line
To keep pins parallel to the seam line, place them along the stitching line or within the seam allowance. Pin spacing and density should be considered, as well as pin angling and length. The type of pin used can also impact pin placement; for example, ballpoint pins are ideal for stretch knits and jersey fabrics.
Pinning parallel to the seamline is known as pin basting and provides more control because it’s closer to an actual stitch.
Different Fabric Considerations
When working with various fabric types, it’s essential to adapt your pinning technique. Lightweight fabrics might need a less complex pinning method, while heavier or textured fabrics could require more specialized techniques to guarantee a smooth, wrinkle-free finish.
Pinning Tools
To master the art of pinning, you’ll need a variety of pinning tools. A pin cushion is essential for organizing your pins and keeping them safe. Pin storage boxes can help you keep your workspace tidy.
Different pin sizes and pinheads are available to suit various fabric types and sewing projects. Always make sure you’re using the right pin for the job to prevent fabric damage and ensure accurate stitching.
Fabric Considerations
When sewing with napped fabrics, it’s vital to think about the fabric’s nap direction. Napped fabrics, such as velvet, velour, velveteen, corduroy, terrycloth, faux fur, and suede, have raised fibers that lie in one direction. This direction is known as the nap. To make sure stitching is correct and prevent fabric damage, follow these guidelines:
- Pinning: All stitches should be made in the same direction along with the nap. This is because when pile meets pile, the layers will move independently, and the fabric may have a displacement of the fabric.
- Cutting: When cutting pattern pieces, make sure to place them so that the nap runs the same way on all pieces. This is especially important for fabrics like corduroy and velvet, where the nap is often more pronounced.
- Sewing: When sewing napped fabrics, use more pins than usual and sew slowly, manipulating the fabric with your fingers as you sew. This will help prevent the raised fibers from sliding around and causing issues with stitching.
- Pressing: When pressing napped fabrics, use a lower heat setting and a press cloth. Avoid bearing down or steaming your seams unless you’re sure your fabric can take it. A seam roller like the Clover Roll & Press can help you get flat seams without pressing too hard.
Pinning Techniques
Mastering pinning techniques is like discovering a secret avenue in your sewing journey. Arrange and store them as valuable treasures to prevent a pin-induced chaos.
Imagine pin varieties as your arsenal; each wields its distinct ability. When encountering a hindrance, utilizing the appropriate pin can transform a tangle into a work of art.
Pinning and Sewing
Once you’ve mastered pin selection and placement, it’s time to move on to pinning and sewing. Here are some essential techniques and strategies to help you navigate this process:
- Pin Cushion Placement: Place your pin cushion at a convenient distance from your work surface, making sure you can easily reach for pins without disrupting your sewing.
- Pin Cushion Storage: Keep your pin cushion in a clean, dry place to prevent mold growth and maintain its lifespan.
- Pin Holder: Invest in a pin holder to keep your pins organized and close at hand.
- Pin Sharpener: Regularly sharpen your pins to maintain their effectiveness and prevent fabric damage.
- Remove Pins Before Sewing: Always remove pins before sewing to prevent damage to the needle or machine.
- Smooth Out Fabric: After removing pins, smooth out the fabric to prevent bunching and ensure accurate stitching.
- Beginners vs. Experienced Sewers: Beginners should use pins for all sewing projects, while experienced sewers can determine when pinning is necessary based on fabric type and project size.
Frequently Asked Questions (FAQs)
What types of pins are suitable for holding bias binding?
Sewing clips, specifically quilters’ clips, are a great option for holding bias binding in place. They grip the fabric securely without leaving holes and allow for precise placement.
How can I prevent fabric damage when pinning?
To avoid fabric damage, pin within seam allowances and position pins perpendicularly to the fabric. Opt for lightweight, sharp pins suited to your fabric type. Discard bent pins to maintain a smooth sewing surface.
What are the benefits of using glass-headed pins?
Glass-headed pins offer clear visibility, making them a breeze to pick up. Their smooth texture is gentle on your fingers, too. Plus, they shine brightly against dark fabrics – no more frantic pin hunts!
Can I use pins for appliqué projects?
Pins are excellent for appliqué projects. Just secure the appliqué piece with perpendicular pins, then stitch around the edges. The pins will hold everything in place for precise stitching. Pins give you full control over appliqué placement.
How do I choose the right pins for my sewing project?
To choose the right pins, consider your fabric type – opt for sharp, lightweight pins for delicate fabrics and heavy-duty pins for sturdier materials. Match pin length and thickness to the job at hand for a smooth sewing experience.
Conclusion
Proper pinning techniques are the foundation for successful sewing projects. By carefully selecting and managing your pins, positioning them perpendicular within the seam allowance, you’ll achieve the flexibility and security needed for flawless stitching.
As a seasoned seamstress, you know that the right pinning tools can make all the difference. The pinning tools in sewing are truly essential.
Master these techniques, and you’ll enhance your sewing skills to new heights.

