This site is supported by our readers. We may earn a commission, at no cost to you, if you purchase through links.
Start with your machine’s fabric guide—it’s not just decoration, it’s your roadmap to success.
For lightweight fabrics like chiffon, use shorter stitch lengths (1.5-2mm) to prevent puckering.
Medium-weight cottons work best with standard settings (2.5-3mm), while denim demands longer stitches (3-4mm) and increased tension.
Your machine’s automatic mode reads fabric thickness, but don’t trust it blindly—test on scraps first.
Remember, the wrong stitch can turn silk into a crumpled mess faster than you can say "seam ripper."
The secret lies in understanding how stitch length, tension, and presser foot pressure work together.
Table Of Contents
Key Takeaways
- Match your fabric type to stitch settings – Use shorter lengths (1.5-2mm) for lightweight fabrics like chiffon, standard settings (2.5-3mm) for cottons, and longer stitches (3-4mm) for heavy materials like denim to prevent puckering and ensure proper seam formation.
- Test on scraps before committing – Do not trust your machine’s automatic mode blindly; always test stitch length, tension, and presser foot pressure combinations on fabric remnants first to avoid ruining your main project.
- Understand the fabric-stitch-thread relationship – Heavy fabrics need looser tension and lower thread weight, while lightweight materials require tighter settings and higher thread weight for professional results.
- Master your machine’s fundamentals – Learn proper threading techniques, maintain regular cleaning schedules, and know basic troubleshooting steps, such as changing needles and adjusting tension, to prevent common issues like thread breaks and skipped stitches.
Choosing Right Stitch
You’ll achieve professional results when you match your stitch type to your specific fabric and project needs.
Understanding how fabric weight, thread choice, and stitch characteristics work together prevents common mistakes and saves you time on every sewing project.
Perfect fabric-stitch harmony turns sewing struggles into professional success stories.
Fabric Type Considerations
When choosing fabric choices, your machine’s stitch selection directly impacts seam construction success.
Woven fabrics pair best with straight stitches due to their stable structure, while knit fabrics demand zigzag or stretch stitches to prevent breakage.
Heavy fabric weight requires lower stitch density, whereas lightweight materials need higher density.
Match fabric compatibility with appropriate stitch selection for professional results.
To achieve professional-looking upholstery, understanding the importance of precision stitching techniques is vital for superior results.
Thread Selection Factors
Your thread selection directly impacts stitch quality and project durability.
Match thread weight to fabric weight, consider fiber types for compatibility, and evaluate color choices for visibility or blending.
Twist direction affects thread strength and performance.
- Thread Weight: Use heavier threads (lower numbers) for thick fabrics, lighter threads (higher numbers) for delicate materials
- Fiber Types: Cotton threads work best with natural fabrics, polyester handles synthetic materials and stretchy fabrics
- Color Choices: Contrasting colors highlight decorative stitches, matching colors create invisible seams and professional finishes
- Twist Direction: Right-twist threads reduce thread breaks and tension issues, while left-twist creates different yarn texture effects
Stitch Selection Factors
Your fabric choice directly impacts which stitch will perform best on your project.
Match stitch types to fabric weight – lightweight fabrics need shorter stitch lengths while heavy materials require longer ones.
Consider seam strength requirements and tension control settings for ideal results.
Understanding the sewing stitch selection is essential for achieving professional-looking finishes.
| Factor | Light Fabrics | Heavy Fabrics |
|---|---|---|
| Stitch Length | 2.0-2.5mm | 3.0-4.0mm |
| Thread Weight | 50-60 weight | 30-40 weight |
| Stitch Density | Higher density | Lower density |
Automatic stitch selection simplifies this process by adjusting these parameters based on your fabric stitch settings input.
Fabric Weight Matters
Your fabric’s weight determines everything from stitch length to thread tension, and getting it wrong can turn your project into a frustrating mess.
Choosing the right stitch for your fabric’s weight is the secret to stress-free, professional sewing every time.
Understanding how to match your machine’s settings to your fabric’s characteristics will save you time, thread, and plenty of headaches, by ensuring that you use the correct thread tension.
Adjusting Stitch Length
When adjusting stitch length for different fabric weights, you’ll discover the secret to professional results.
Turn your machine’s stitch length dial to match fabric thickness—longer stitches for heavy materials, shorter for lightweight fabrics.
This stitch calibration prevents puckering and creates ideal stitch length settings.
Test length settings on scraps first for perfect stitch optimization.
Understanding the correct stitch length settings is essential for achieving the desired seam quality with the right stitch length settings.
Maintaining Tension
Perfect tension control makes the difference between professional-looking seams and amateur mistakes.
Start with your machine’s default tension settings, then make small adjustments based on your fabric’s behavior. Heavy fabrics need looser tension, while lightweight materials require tighter settings.
Watch for puckering or loose stitches—these signal tension imbalance. Clean your tension discs regularly and check bobbin adjustment for consistent stitch balance throughout your project.
Understanding proper thread tension basics is essential for achieving perfect stitches and avoiding common sewing issues, as explained in the thread tension basics guide.
Preventing Fray
Once you’ve got tension under control, fray prevention steps in to save the day.
Raw edges love to unravel, but you can stop them in their tracks.
Try these:
- Use an overlock stitch or zigzag for seam reinforcement.
- Apply fray check for stubborn fabrics.
- Adjust sewing machine settings for edge finishing and fabric stabilization.
Locking Stitch Essentials
You’ll secure professional results when you master locking stitches that prevent seams from unraveling mid-project. These essential techniques transform shaky beginnings into rock-solid construction that withstands washing, wearing, and time.
Secure Sewing Knots
Strong knots anchor your work while weak ones spell disaster.
Master these techniques to prevent unraveling disasters that waste time and materials.
| Knot Type | Best Use | Strength Rating |
|---|---|---|
| Square Knot | General sewing | Medium |
| Surgeon’s Knot | Heavy fabrics | High |
| Slip Knot | Temporary holds | Low |
| Double Knot | Thread locks | High |
| Weaver’s Knot | Thread joining | Medium |
Your sewing machine settings won’t matter if loose knots sabotage your project.
Practice knot tying with different thread weights to build muscle memory.
Stitch security depends on consistent tension adjustment tips and proper knot strength for each fabric type.
Ladder Stitch Importance
Ladder stitch creates invisible seams that vanish like magic tricks.
This technique produces professional edging by catching tiny fabric bits on alternating sides, forming seamless closures.
Your sewing machine stitch settings won’t replicate this hand-sewing method, but mastering ladder stitch elevates fabric finishing beyond basic stitch types guide recommendations.
Practice this sewing technique for beginners on scraps first.
Stitch Density Practice
Stitch density control becomes your secret weapon once you’ve mastered ladder stitches.
Adjust your sewing machine stitch settings by testing different combinations of stitch length and thread weight on fabric scraps.
Thicker fabrics need wider spacing, while delicate materials require tighter density control.
Practice stitch regulation by experimenting with stitch width control and fabric thickness variations.
Your stitch tension directly impacts final results.
Automatic Stitch Selection
Your sewing machine’s automatic stitch selection feature can transform your projects from amateur to professional-looking in seconds.
You’ll save time and avoid common mistakes by understanding how your machine’s dial and settings work together to choose the perfect stitch for each fabric and task, utilizing the automatic stitch selection feature.
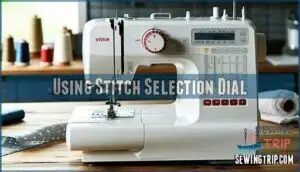
Using Stitch Selection Dial
Most sewing machines feature a stitch selection dial that’s your gateway to automatic modes.
Turn the dial to match your project’s needs – the stitch guide shows available options.
Modern machines offer stitch preview displays, letting you see settings before sewing.
Dial calibration guarantees accurate selection, while automatic stitch selection simplifies the process for beginners.
Understanding the sewing machine dial is vital for utilizing the full potential of a machine’s stitch selection capabilities.
Understanding Stitch Settings
Once you’ve mastered the dial, understanding your machine’s automatic stitch settings reveals professional results.
Default settings work for most projects, but adjustments transform ordinary seams into perfect ones.
- Stitch length controls fabric stretch – shorter lengths (2.0-2.5) prevent puckering on delicate fabrics
- Tension settings balance thread control – upper tension affects top thread flow, lower adjusts bobbin tension
- Stitch density impacts sewing speed – closer stitches create stronger seams but slow progress
- Width adjustments modify needle position – essential for zigzag and decorative stitches
- Testing on scraps prevents costly mistakes – always verify settings before stitching your main project
Common Stitch Mistakes
Why do experienced sewers still battle stitch defects?
Common stitch errors include tension issues causing puckered seams, thread breaks from dull needles, and fabric tears from incorrect stitch selection.
Seam problems often stem from mismatched thread weight or improper machine settings.
Quick sewing machine troubleshooting prevents stitch quality issues and thread breakage causes before they ruin your project, which can be achieved by addressing tension issues.
Stitch Appearance Factors
Your stitch appearance depends on three key factors that you can control with your machine’s settings.
Thread color creates contrast or blends seamlessly, stitch length affects texture and durability, and decorative elements add visual interest to your finished project.
Thread Color Impact
When selecting Thread Color, consider Color Matching with your fabric to achieve professional results.
Contrasting thread creates bold topstitching effects, while matching shades blend seamlessly into seams.
Thread Visibility depends on Fabric Contrast—darker threads on light fabrics highlight stitching lines.
Consider Dye Effects and Shade Selection carefully, as thread weight and thread tension affect how thread color appears on finished projects.
Stitch Length Effects
Ideal stitch length transforms your fabric type into professional results.
Shorter stitches create denser seams with superior stitch durability but increase thread consumption.
Longer stitches reduce fabric shrinkage and seam puckering on heavy materials.
Your sewing machine stitch selection determines appearance impact—tight stitches for quilting cotton, longer ones for canvas.
Testing stitch quality on scraps prevents costly mistakes, ensuring that you achieve the desired outcome with your chosen fabric and stitch length, which is crucial for professional results.
Decorative Elements
Decorative stitches transform ordinary projects into stunning masterpieces.
Your sewing machine’s decorative stitch options reveal creative possibilities through Thread Painting and intricate sewing machine stitch patterns.
Combine Embellishment Techniques like Decorative Appliqués with Beading Details for luxurious finishes.
Experiment with Ribbon Embroidery and stitch combinations to create unique textures that showcase your artistic vision perfectly.
For professional results, understanding stitch density matters is crucial to achieve the desired outcome with stitch density.
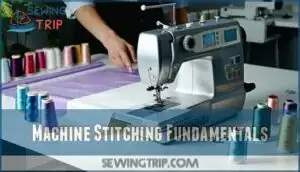
Machine Stitching Fundamentals
Perfect machine stitching starts with mastering your sewing machine’s fundamentals—threading, selecting the right stitch, and knowing how to troubleshoot when things go wrong.
You’ll save hours of frustration by learning proper setup techniques and maintaining your machine regularly, turning potential headaches into smooth, professional results.
Threading Techniques
Proper threading transforms your sewing machine from frustrating adversary into reliable partner.
Start with bobbins winding – wind thread evenly without overfilling. Thread path matters: follow your machine’s diagram precisely, missing even one guide creates tension nightmares.
Check needle insertion direction – flat side typically faces back. Adjust tension settings gradually, testing on fabric scraps first to prevent thread breakage and achieve perfect stitches.
Using the right sewing machine thread is vital for superior performance.
Troubleshooting Tips
When your machine acts up, systematic Error Fixing saves time and frustration.
Start with the big three: change your needle, clean lint buildup, and rethread completely. These steps resolve most Stitch Issues before they escalate into bigger headaches.
- Thread Breaks: Check needle size matches thread weight and fabric type
- Machine Jams: Remove tangled thread from bobbin area and tension discs
- Tension Problems: Test stitch on fabric scraps, adjusting dial incrementally
Common culprits include skipped stitches from dull needles and feed problems from clogged mechanisms. Address tension settings methodically—small adjustments prevent overcorrection disasters.
Regular Maintenance
After troubleshooting, don’t skip regular sewing machine maintenance. Clean lint, replace oil, and check filters—think of it as a spa day for your machine.
Bobbin care and tension disc maintenance keep stitches smooth. Schedule a sewing machine tuneup yearly.
Proper machine maintenance techniques are essential for extending the life of your sewing machine. Here’s a quick checklist:
| Task | Frequency |
|---|---|
| Machine Cleaning | Weekly |
| Oil Replacement | Monthly |
| Filter Checks | Quarterly |
Advanced Stitching Techniques
You can master advanced stitching techniques by learning hand methods, exploring specialized stitches, and experimenting with new patterns.
These skills let you handle complex projects and achieve professional results with precision and consistency.
Hand Stitching Methods
Beyond machine capabilities, hand sewing provides unmatched control for delicate work.
You’ll master precision techniques that machines can’t replicate, especially for repairs and intricate details.
- Backstitch creates the strongest hand-sewn seams by overlapping stitches backward
- Embroidery transforms plain fabric into artistic designs using decorative thread patterns
- Cross Stitch forms durable X-shaped stitches perfect for mending and decorative work
- Darning repairs holes invisibly by weaving thread through worn fabric areas
Specialized Stitches
Specialty feet enable advanced stitch variations and sewing techniques beyond basic straight stitches.
Your sewing machine stitch options expand dramatically with buttonhole feet for precise openings, blind hem feet for invisible finishes, and embroidery feet for decorative stitch options.
These attachments enhance fabric handling and thread management while enabling stitch customization.
Master embroidery stitch selection using specialty feet to achieve professional results with consistent stitch quality.
Experimenting With Stitches
Once you’ve explored specialized stitches, branching into new Stitch Variations becomes your creative playground.
Start with Fabric Testing on scraps to discover unexpected combinations. Your sewing machine stitch options hold countless possibilities waiting for discovery.
Here are five experimental approaches:
- Mix decorative stitch options with contrasting Thread Choices
- Layer different automatic stitch settings for unique textures
- Test Stitch Patterns on various fabric weights
- Combine hand and machine stitch types for hybrid effects
- Document successful Sewing Hacks for future projects
Smart stitch selection comes from fearless experimentation, not rigid rules.
Frequently Asked Questions (FAQs)
What is stitch selection on a sewing machine?
Imagine picking a song on a jukebox—stitch selection lets you choose the right stitch type for your fabric and project.
You’ll turn a dial or press a button, matching stitch to need for best results.
How do you choose a stitch on a sewing machine?
Look for stitch selection dials, buttons, or digital displays on your machine.
Check your manual for specific stitch symbols and numbers, then match them to your project’s fabric type and seam requirements, focusing on complete concepts to ensure the best results.
Why do you need a stitch selection guide?
You need a stitch selection guide because different fabrics, seam types, and project requirements demand specific stitches for superior results, preventing costly mistakes and ensuring professional-quality finished projects.
Do you need a sewing machine stitch selection guide?
Selecting stitches successfully starts with understanding your fabric’s fiber content and weight. You’ll need guidance choosing between straight, zigzag, or specialty stitches for ideal results and professional finishes.
How do I choose the right stitch type?
Consider your fabric’s weight and stretch, project purpose, and desired finish.
Match heavyweight fabrics with strong straight stitches, stretch materials with zigzag, and decorative elements with specialty stitches for superior results.
How many stitch settings does a sewing machine have?
Think of your sewing machine as a toolbox—basic models offer 8–20 stitch settings, while advanced ones boast hundreds.
Check your manual or display panel, as each machine’s stitch library is unique and always worth exploring.
How to select a stitch on a sewing machine?
Locate your machine’s stitch selector dial or digital display. Turn the dial to your desired stitch or press buttons to navigate options. Check your manual for specific symbols and settings.
What does SS stand for on a sewing machine?
SS on your sewing machine typically refers to "Straight Stitch" – the most basic and commonly used stitch type. It’s often marked as "SS" on stitch selection dials.
How do you use a stitch selection dial?
Turn the dial to match your desired stitch with the correct number or symbol.
Align the dial’s arrow with your choice, then test-stitch on scrap fabric to verify proper selection before starting your project.
How does bobbin thread affect automatic selections?
Bobbin thread affects automatic stitch selections by influencing tension balance.
Your machine’s sensor systems detect thread weight and adjust top thread tension accordingly, ensuring proper stitch formation and preventing puckering or loose stitches, which is crucial for maintaining the quality of the stitch, thus preventing puckering.
Conclusion
Mastering automatic stitch selection tips can feel like taming a wild beast, but you’ve got this.
Trust your machine’s guide, test settings on scraps, and always match stitch length and tension to your fabric.
Don’t let automatic modes fool you—your eye and hands are the final judges, and with practice, you’ll avoid puckered seams and frayed edges, because every perfect stitch starts with the right settings and a little attention to detail.
Keep experimenting, stay patient, and remember these principles to achieve professional results.
- https://maggieframestore.com/blogs/maggieframe-news/ultimate-guide-to-choosing-the-best-automatic-stitching-machine
- https://www.brother-usa.com/products/ce1150
- https://support.brother.com/g/b/faqend.aspx?c=us&lang=en&prod=hf_bb370eus&faqid=faqh00000589_000
- https://www.ageberry.com/advanced-features-of-modern-sewing-machines
- https://www.facebook.com/theruffledpurse/

