This site is supported by our readers. We may earn a commission, at no cost to you, if you purchase through links.
 If your sewing machine leaves tension loops on the bottom, it’s likely an upper thread issue. This sounds backward, right?
Common causes include incorrect threading, loose upper tension, or a poorly inserted bobbin.
First, rethread your machine, ensuring the thread slides smoothly through the tension disks. Next, check the bobbin’s placement and confirm it’s wound evenly.
Adjust the upper tension dial gradually tighter, testing on scrap fabric as you go. Don’t forget to use the right needle and matching thread for your fabric. A quick clean of lint or debris could be the cherry on top.
Still stuck? It might be time to peek under the bobbin case.
Table Of Contents
- Key Takeaways
- Common Causes of Bottom Thread Looping
- Identifying Tension Problems in Sewing Machines
- Adjusting Upper Thread Tension for Bottom Loops
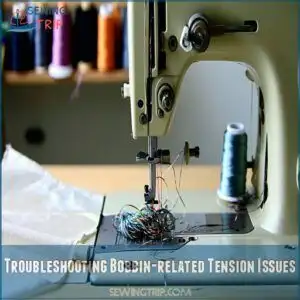
- Troubleshooting Bobbin-related Tension Issues
- Proper Threading Techniques to Prevent Looping
- Needle Selection and Maintenance for Optimal Stitching
- Importance of Regular Machine Cleaning and Maintenance
- Fabric and Thread Compatibility Considerations
- Advanced Tension Troubleshooting Techniques
- When to Seek Professional Sewing Machine Repair
- Frequently Asked Questions (FAQs)
- Conclusion
Key Takeaways
- Double-check your threading paths and tighten the upper tension dial to fix most bottom loop issues.
- Ensure the bobbin is properly wound, seated securely, and free from lint or debris.
- Replace dull or bent needles and select the correct needle for your fabric type to improve stitch quality.
- Regularly clean your machine, including feed dogs and tension discs, to prevent tension loops and ensure smooth stitching.
Common Causes of Bottom Thread Looping
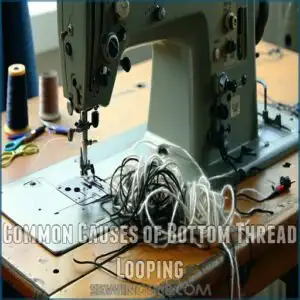
When your sewing machine’s bottom thread turns into a tangled mess, it’s often a sign of tension trouble or misalignment.
Understanding the common causes, like incorrect threading or a worn needle, can save you time and frustration.
Incorrect Thread Tension
Struggling with thread tension issues causing bottom loop problems? Fix it quickly with these steps:
- Check the tension dial and set it between 3-5 for most fabrics.
- Balance upper and lower tension using tension gauges.
- Match thread weight to fabric stretch and type.
- Clean tension discs to avoid debris disrupting sewing machine loops.
- Troubleshoot any thread tension dial problems for effective sewing.
Small adjustments, smooth stitching!
Improper Machine Threading
Bottom thread looping often stems from improper machine threading.
Check your threading order—missing steps or skipping tension discs can disrupt thread tension control.
Verify the thread follows the correct thread routing through guides and tensioners, and rethread methodically while the presser foot is up.
Don’t overlook needle placement—incorrect insertion causes stitching chaos.
This tiny fix solves big stitching headaches!
Bobbin Issues and Misalignment
Make sure the bobbin is properly aligned by double-checking the placement and winding.
A misaligned bobbin case tension or tangled thread can disrupt stitching. Regular bobbin cleaning keeps lint out, while smooth bobbin thread placement improves control.
Don’t forget, poorly wound bobbins or skimping on tension disks leads to stitch trouble!
Damaged or Worn Needle
A damaged or worn needle can ruin your stitching.
Needle breakage, dulled needle sharpness, or bent tips lead to thread snagging and fabric damage while creating tension loops underneath.
Regular needle replacement solves these needle issues.
Always check for a bent or worn needle! A healthy, sharp needle guarantees smooth stitching and prevents those frustrating bottom thread loops, which can be caused by a bent or worn needle.
Dirty or Damaged Feed Dogs
Dirty feed dogs can mess up your stitches, causing bottom thread looping and sewing machine tension issues.
Gunk buildup or worn teeth disrupt the feed mechanism’s ability to grip fabric.
Regular feed dog cleaning is key—remove lint and debris with a brush.
For damaged feed dogs, consider dog tooth replacement and sewing machine lubrication to restore smooth fabric movement and precise stitching.
Incompatible Thread and Fabric Combination
Using mismatched thread and fabric can throw stitching into chaos.
Lightweight threads on heavy fabrics (or vice versa) ruin tension settings. Stretchy materials without stabilizers? A recipe for bottom thread looping.
Stick to these rules:
- Match Thread Weight to Fabric Types: Balance strength and flexibility.
- Use Stabilizers for Stretchy Materials: Control fabric movement.
- Test Tension Settings First: Avoid stitch quality disasters.
Identifying Tension Problems in Sewing Machines
Spotting tension problems in your machine feels like finding breadcrumbs on a trail. Start with the stitches—are they uneven or loose on one side? If you notice sewing machine tension loops on bottom, or puckering, it’s time to investigate.
Listen for odd sounds; your machine shouldn’t groan like it’s refusing chores. Understanding thread tension basics is essential for identifying and fixing these issues.
Keep these causes in mind:
| Symptom | Possible Cause |
|---|---|
| Puckered fabric | Top tension too high |
| Loops on fabric underside | Loose upper thread tension |
| Stitches skipping | Wrong needle size or dull needle |
| Uneven stitches | Improper machine calibration |
| Thread nests on bottom | Bobbin misalignment |
Stitch issues can also point to thread tension adjustment needs, improper sewing speed, or mismatched needles and fabric stretch. Test regularly and trust your thread monitoring instincts.
Adjusting Upper Thread Tension for Bottom Loops
If your sewing machine’s lower thread is looping, adjusting the upper thread tension might be the key to fixing it.
Start by locating the tension dial and making small, careful adjustments to make sure the threads interlock correctly between fabric layers, which is crucial for a proper fix.
Locating The Tension Dial
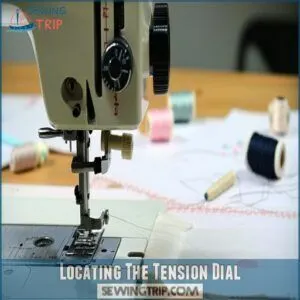
To locate the tension dial, check your sewing machine’s upper front or side near the thread guides.
This small knob or numbered wheel controls thread tension adjustment. Refer to your manual for exact placement since designs vary.
Correct tension dial settings are essential for machine calibration, ensuring smooth stitches and avoiding bottom thread tension issues.
Think of it as your stitching’s heartbeat, where correct tension is crucial for optimal performance.
Incremental Tension Adjustments
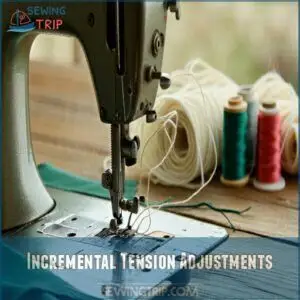
Start small with tension calibration. Turn the dial slightly clockwise for tighter thread balance or counterclockwise to loosen.
Test after each adjustment—machine tuning takes patience. Smooth stitch quality shows progress, while loops mean fine-tuning.
Avoid big jumps; fabric tension reacts subtly. Think of sewing machine calibration like seasoning a dish—a little tweak perfects bottom thread tension and prevents annoying loop formation causes.
Balancing Upper and Lower Thread Tension
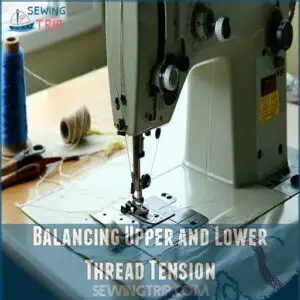
Think of thread tension like a tug-of-war—both the upper and bobbin threads need equal pull.
Adjust the upper tension dial slowly, testing each change on scrap fabric. Watch for loops; they mean imbalance.
Proper tension balance guarantees smooth stitches and prevents sewing machine looping on bottom, giving you reliable stitch quality for perfect seams.
Patience perfects your sewing mechanics! To resolve issues, check the thread tension settings for ideal performance.
Troubleshooting Bobbin-related Tension Issues
When your sewing machine leaves tangles or loops on the bottom, the bobbin is often the culprit.
By checking its placement, tension, and cleanliness, you can quickly resolve most issues and get back to smooth stitching.
Checking Bobbin Insertion
Your sewing machine’s bobbin insertion deserves a quick check when battling bottom thread looping.
Verify:
- Bobbin Placement: The bobbin sits snugly, following your machine’s manual for Bobbin Alignment.
- Thread Winding: It’s evenly wound without loose threads.
- Proper Insertion: Slide the bobbin case in securely—no wobbling, no errors.
Good bobbin alignment prevents chaotic Thread Tension troubles!
Examining Bobbin Case Tension
Bobbin case tension troubles often cause thread tension loops on the bottom of your fabric.
Adjusting it’s simple with a few checks:
- Test the bobbin tension using the "drop test."
- Tighten or loosen the adjusting bobbin screw slightly.
- Inspect the bobbin spring for wear.
- Check bobbin case alignment carefully.
- Different bobbin case types may need specific handling.
Cleaning Bobbin Area Thoroughly
A clean bobbin case is your secret weapon against bottom thread looping.
Regular bobbin cleaning keeps tension balanced and prevents pesky lint buildup. Gently brush away lint with a soft lint brush after each use, and inspect for hidden debris during monthly sewing machine maintenance.
Don’t forget to snip stray threads! Avoid compressed air—it blows lint deeper.
With consistent care, your sewing machine tension stays smooth, ensuring those perfect, hassle-free stitches every time, and maintaining a clean bobbin case is crucial.
Replacing Damaged or Worn Bobbins
A worn or damaged bobbin can sabotage smooth stitching and cause bottom thread looping.
Look for these red flags to know it’s time for a Bobbin Replacement:
- Scratches or cracks: These disrupt Thread Compatibility and even tension.
- Misshapen bobbins: A warped bobbin won’t seat properly in the bobbin case.
- Failed winding: Struggles with winding evenly signal future trouble.
When replacing a bobbin, consider purchasing new sewing bobbins to guarantee best performance.
Proper Threading Techniques to Prevent Looping
If your sewing machine isn’t threaded correctly, it’s almost guaranteed you’ll see looping on the underside of your fabric.
By carefully following the threading path and using guides effectively, you can prevent frustration and keep your stitches neat.
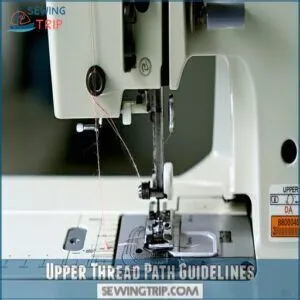
Upper Thread Path Guidelines
Correctly following the upper thread path is key to ending bottom thread looping. Thread routing isn’t just routine; it’s essential for tension control and smooth stitching.
Use this table to guide your steps:
| Step | Action | Quick Hint |
|---|---|---|
| 1 | Place spool on the pin | Make sure it spins without snagging. |
| 2 | Guide thread through first hook | Keep it snug but not tight. |
| 3 | Loop around tension dial | Align properly for upper thread tension. |
| 4 | Pass through take-up lever | Don’t miss this—it’s critical for tension. |
| 5 | Thread all remaining guides | Each guide guarantees smooth thread flow. |
Mastering these steps guarantees better sewing machine tension and reduces thread looping, which is important for smooth stitching.
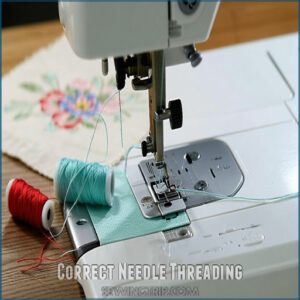
Correct Needle Threading
Needle threading is key to achieving tension balance and smooth stitching.
Start by ensuring the needle alignment is correct, then follow the sewing machine threading diagram precisely.
Keep the threading order in mind—upper thread tension depends on it. Use a needle threader for precision, especially with finer threads.
Proper thread routing prevents issues along the upper thread path, ensuring correct threading and smooth stitching.
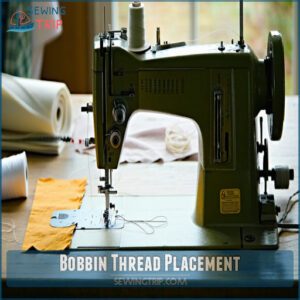
Bobbin Thread Placement
Ever wonder why your sewing machine throws tantrums with bottom thread looping?
Bobbin thread placement plays a big role! Nail it every time with these steps:
- Wind the bobbin smoothly; uneven winding leads to trouble.
- Anchor it firmly into the bobbin case; no wobbling allowed.
- Thread Routing: Guide it into the tension spring properly.
- Arrow alignment matters—don’t skip this!
- Double-check bobbin size to match your machine for ideal Tension Balance.
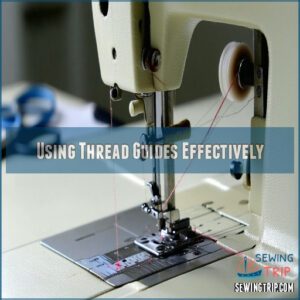
Using Thread Guides Effectively
Thread guides act like trail markers for your sewing machine, ensuring smooth thread tension and consistent stitch quality.
Miss one, and you’ll risk bottom thread looping or uneven stitching. Always check that your thread securely follows each guide alignment.
Pair this with proper bobbin placement and needle threading for flawless results every time.
Think of guides as your tension’s best friend, providing smooth thread tension.
Needle Selection and Maintenance for Optimal Stitching
Using the right needle and keeping it in good condition can solve many tension problems and improve stitch quality.
Don’t ignore bent or dull needles—they can wreak havoc on your stitching and leave you frustrated.
Choosing The Right Needle Size
Picking the right needle size is like finding the perfect dance partner for your thread and fabric.
A smaller needle tackles lightweight fabrics, while thicker needles handle heavier materials.
Match needle size with thread weight and fabric type to maintain tension control and prevent bottom thread looping.
It’s all about harmony for smooth stitches! Understanding needle size options is essential for achieving the perfect stitch.
Replacing Bent or Dull Needles
A bent or dull needle can wreak havoc on your stitching, causing thread breakage, fabric damage, and frustrating sewing errors.
Swap it out right away for clean, precise results. Needle replacement is quick and prevents sewing machine tension loops and poor thread tension.
Remember, a sharp needle works wonders—don’t gamble with tricky sewing machine needle fabric loops!
Proper Needle Insertion
How’s your needle alignment? Incorrect needle insertion could be causing sewing machine tension issues.
Make sure the flat side faces the back, push it all the way up, and tighten the screw snugly. Double-check it’s aligned perfectly.
- Prevent looping disasters with proper needle care.
- Master thread tension balance effortlessly.
- Avoid stitching nightmares by following these insertion tips.
- Protect your bobbin case tension from threading mishaps.
To ensure optimal performance, remember that proper needle care is crucial for preventing issues and achieving the best results.
Matching Needle Type to Fabric
The right needle can make or break your stitch quality, especially with sewing machine tension loops on the bottom.
Match needle size, point, and type to your fabric type for seamless results.
| Here’s a quick guide: | Needle Type | Fabric Type | Thread Choice |
|---|---|---|---|
| Ballpoint Needle | Knits & Stretchy Fabrics | Polyester, Stretch Thread | |
| Universal Needle | Lightweight Woven | Cotton or Polyester | |
| Denim Needle | Heavyweight Fabrics | Heavy Thread |
Get it right for perfect harmony!
Importance of Regular Machine Cleaning and Maintenance
Keeping your sewing machine clean and well-maintained prevents lint buildup and keeps tension issues at bay.
Regular cleaning, oiling, and inspections make sure smooth stitching and extend your machine’s lifespan.
Removing Lint and Debris
A little lint can cause big trouble for thread tension issues.
Make lint removal part of your routine by cleaning the bobbin area, thread path, and tension disks.
Use a soft brush or compressed air, but go easy to avoid pushing debris deeper.
Regular machine maintenance prevents buildup, ensuring smooth stitches, balanced bobbin case tension, and fewer sewing frustrations, which is crucial for regular maintenance.
Oiling Moving Parts
Machine lubrication breathes new life into sewing machine parts and prevents wear.
After cleaning, grab sewing machine oil (not kitchen oil!) and follow these steps:
- Apply a small drop to friction-prone areas, like gears and the tension assembly.
- Gently rotate parts to spread the oil evenly.
- Wipe any excess oil to avoid stains.
Using the right sewing machine oil is important for maintenance.
Your machine will purr smoothly!
Checking for Worn Components
After oiling, it’s time to inspect for worn components like a worn bobbin case or faulty tension disc.
Look out for damaged take-ups, loose screws, or frayed belts, as these can spark thread tension problems and bottom thread looping.
| Component | Issue Detected | Solution |
|---|---|---|
| Bobbin Case | Worn or cracked | Replace it |
| Tension Disc | Faulty or misaligned | Clean or realign |
| Take-Up Lever | Damaged | Replace immediately |
| Belts and Screws | Frayed or loose | Tighten or replace |
Keeping things smooth prevents headaches!
Professional Servicing Recommendations
Sometimes, fixing sewing machine tension issues on your own just isn’t enough.
When that happens, seeking professional help can save you time and stress. Here’s how to proceed:
- Check your warranty: Repairs might be covered, saving on servicing costs.
- Choose a qualified technician: Look for technician training and familiarity with your machine model.
- Ask about maintenance contracts: These can simplify repair scheduling and ongoing machine calibration.
- Evaluate costs and timing: If the machine is old or repairs exceed its value, consider upgrading.
Regular professional care prevents costly breakdowns later!
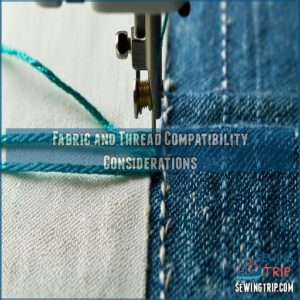
Fabric and Thread Compatibility Considerations
You’ll need to match your thread weight to your fabric type to prevent those frustrating tension loops from forming on the bottom of your work.
When you’re working with different materials, from lightweight silks to heavy denims, you’ll need to adjust your machine’s settings to maintain proper tension and achieve professional-looking results.
This will help you to ensure that your work looks professional and neat, without any unwanted loops or uneven stitching, by adjusting your settings according to the material, whether it’s lightweight silks or heavy denims.
Matching Thread Weight to Fabric
Just as your favorite shoes need to match your outfit, your thread weight must match your fabric type for perfect stitching.
For lightweight fabrics like silk or chiffon, choose fine 60-weight threads. Medium-weight cottons work best with standard 50-weight all-purpose thread.
Heavy fabrics such as denim or canvas require sturdy 30-40 weight thread for effective tension control and stitch quality.
Adjusting Settings for Different Materials
Different fabrics demand different settings on your sewing machine for perfect stitches.
When switching materials, first adjust your thread tension – lighter fabrics need lower tension (2-3), while heavier ones require higher settings (5-6).
Match your stitch length to fabric thickness: use shorter stitches (1.5-2mm) for delicate silks and longer ones (3-4mm) for denim or canvas.
Fine-tune these settings by testing on fabric scraps to ensure the best results for your specific sewing machine.
Special Considerations for Stretchy Fabrics
Stretchy fabrics can challenge even seasoned sewists when dealing with thread tension control. You’ll need specific strategies to prevent those frustrating bottom loops while maintaining elastic seams.
- Use a ballpoint needle to glide between fabric fibers without snagging or creating holes
- Set your machine to a narrow zigzag stitch that moves with the fabric stretch factor
- Keep your sewing speed steady and avoid pulling the material as you guide it
- Adjust both top and bobbin tension slightly looser than normal settings
Remember to test your settings on fabric scraps first – your tension should allow the seam to stretch without breaking threads, which is crucial for elastic seams and overall durability, ensuring a professional finish with steady sewing speed.
Using Appropriate Stabilizers
Proper stabilizer materials act as your fabric’s backbone, preventing those frustrating bottom tension loops while sewing.
Choose cut-away stabilizers for spandex and heavy knits, tear-away types for cotton blends, or water-soluble options for delicate materials.
For heat-sensitive fabrics, heat-away interfacing types provide excellent fabric support.
When working with thick materials like denim, fusible thread stabilizers maintain consistent tension and prevent puckering.
Remember, tension regulators work best with appropriate stabilization.
Advanced Tension Troubleshooting Techniques
You’ll find these advanced techniques helpful when basic tension adjustments aren’t fixing those pesky bottom loops.
When you’re ready to tackle bobbincase tension, timing alignment, presser foot pressure, and feed dog height, you’ll be equipped to solve even the most stubborn tension problems.
Adjusting Bobbin Case Tension
Fine-tuning your bobbins can transform unruly stitches into perfectly balanced seams.
When your bottom thread is really loose or you’re seeing thread tension loops on bottom, it’s time to adjust the bobbin case screws with precision.
- Check the bobbin case spring for proper alignment and tension
- Turn the tension screw clockwise in tiny 1/4 increments for front-loading bobbins
- Test your adjustments on scrap fabric before continuing your project to achieve perfectly balanced seams.
Timing and Hook Alignment
Timing and hook alignment work together like dance partners in your sewing machine.
Your hook should meet the needle slightly above its eye, rising about 1/10 inch from the bottom position.
When these components fall out of sync, you’ll notice thread nesting beneath your fabric.
Keep your hook mechanism clean and debris-free to maintain proper timing.
If you spot persistent bottom loops, inspect the hook’s position relative to your needle to ensure proper alignment.
Presser Foot Pressure Adjustment
Now that you’ve mastered hook alignment, let’s tackle presser foot pressure – a game-changer for perfect stitches.
Your fabric’s thickness determines how much pressure you’ll need. Adjust the dial on top of your machine to maintain steady thread guidance and fabric support.
Too much pressure squishes delicate fabrics, while too little causes uneven feeding and those pesky bottom tension loops. Start at medium pressure and fine-tune from there.
Understanding the correct presser foot settings is essential for achieving smooth stitches and preventing common sewing issues.
Feed Dog Height Inspection
After adjusting your presser foot, check your feed dogs – those little metal teeth that move fabric through your machine.
For perfect stitch consistency, they should rise just enough to grip your fabric without leaving marks.
Test different height settings with scrap fabric of varying thickness. If your feed dogs sit too low or high, you’ll notice uneven stitches and potential bottom thread looping.
When to Seek Professional Sewing Machine Repair
You’ll need a professional repair when your sewing machine makes grinding noises or shows persistent tension problems after trying basic fixes.
While minor issues can often be resolved at home, mechanical failures or unusual vibrations that won’t go away can signal serious problems that require expert attention.
Persistent Tension Issues
When persistent tension issues plague your sewing machine despite careful thread monitoring and tension control, it’s time to seek professional help.
Even experienced sewists face challenging calibration problems that DIY fixes can’t solve.
A certified technician can diagnose hidden mechanical issues, perform precise machine calibration, and restore proper thread tension.
Don’t let stubborn tension problems compromise your fabric handling and sewing techniques.
Unusual Noises or Vibrations
Is your sewing machine humming, shaking, or screeching? Unusual noises and vibrations often point to deeper issues.
Common causes include loose parts, motor problems, or internal misalignment. Don’t ignore these signs, as they can worsen quickly.
- Loud clunks or rattles: May indicate internal damage.
- Shaking or wobbling: Points to misaligned components.
- Whining or grinding: Signals motor trouble.
Seek professional help to avoid further damage!
Mechanical Failures
Strange clunks or grinding sounds could mean machine wear, part alignment issues, or even a screw loose.
If the needle bar snaps, the hook bends, or gears show damage, you’re looking at motor failure risk.
When quick fixes for sewing machine tension or bobbin tension fail, it’s time for professional thread tension solutions to fix sewing machine bottom thread looping, which may indicate a need for professional help.
Cost Considerations for Repairs
Sometimes, repairing your machine is the best option, but it’s smart to weigh repair costs against getting a new one.
Budget planning is key—factor in maintenance fees, labor charges, and replacement parts.
A professional sewing machine repair might include:
- Labor charges for sewing machine troubleshooting and adjustments.
- Replacement parts for thread tension solutions.
- Repair estimates that align with your machine’s value.
Frequently Asked Questions (FAQs)
Why is my sewing machine making loops underneath?
Imagine: your fabric looks like it’s sprouting loops underneath.
This is likely caused by loose top thread tension, incorrect threading, or a badly seated bobbin.
Recheck threading paths and upper tension settings carefully.
How to fix bottom tension on sewing machine?
To fix bottom tension, clean the bobbin case, adjust its screw slightly, and make sure proper bobbin winding and insertion.
Verify upper threading, tighten the tension dial incrementally, and always test stitches on scrap fabric.
Why are my sewing machine stitches loose on the bottom?
Loose stitches on the bottom mean your top tension’s likely too loose or the bobbin’s improperly threaded.
Check the threading path, clean the tension discs, rethread carefully, and adjust the upper tension incrementally for balance.
What are the remedies of bobbin or looper thread breakage?
Check tension settings, rethread the machine entirely, and inspect for tangled thread or lint in the bobbin area.
The needle must match the fabric, the bobbin must be wound properly, and the thread shouldn’t be too tight, to ensure complete functionality and avoid issues.
Why does my bottom thread keep looping?
Ever feel like your sewing’s unraveling before it even starts?
It’s likely tangled bobbin threading, misadjusted top tension, or lint hiding in tension disks.
Clean, rethread carefully, and tweak that tension dial gently!
Why is my brother’s sewing machine looping underneath?
Your brother’s sewing machine loops underneath because of incorrect threading, loose top tension, or bobbin issues.
Rethread carefully.
Adjust the top tension slightly tighter.
Make sure the bobbin is wound evenly and inserted correctly.
Why does my thread keep bunching up on the bottom?
Your thread’s bunching underneath likely means incorrect threading, loose top tension, or a poorly inserted bobbin.
Re-thread your machine, check the bobbin placement, and clean tension disks.
Make sure the presser foot’s down while sewing, and ensure these steps are followed to resolve the issue with incorrect threading.
How to fix uneven tension on a Singer sewing machine?
Start by rethreading your Singer, ensuring the thread follows the correct path.
Adjust the tension dial slowly, testing on scrap fabric.
Clean the tension discs and bobbin area to remove lint or stuck debris.
What causes loose tension on the bottom of the fabric?
Imagine your sewing machine as a misaligned orchestra.
Loose bottom tension happens when the upper thread’s too loose, the bobbin’s misthreaded, or lint clogs tension discs.
Rethread carefully, clean parts, and check settings.
What is the average cost of servicing a sewing machine?
Servicing a sewing machine typically costs $75–$
It depends on the machine type, complexity, and required repairs. Regular maintenance keeps your machine running smoothly and prevents costly breakdowns.
Think of it as a sewing "tune-up"! Regular maintenance prevents costly breakdowns.
Conclusion
Imagine you’re sewing a dress, and tension loops on the bottom ruin your progress.
Addressing this common issue starts with examining your machine. Rethread it carefully, check the bobbin’s position, and tighten the upper tension incrementally.
Don’t ignore the needle—it might need replacing. Regular cleaning also prevents lint buildup.
Matching thread and fabric leads to smoother stitching. By spotting and fixing these sewing machine tension loops on bottom causes and solutions, you’ll get perfect stitches in no time!
- https://www.superiorthreads.com/education/bobbin-tension-guide
- https://ask.metafilter.com/17423/Sewingfilter-loops-on-bottom-of-fabric
- https://www.reddit.com/r/sewhelp/comments/tns1v8/help_with_sewing_backside_of_stitches_forming/
- https://www.craftsy.com/sewing/article/sewing-machine-tension/
- https://sewyoursoul.com/how-to-fix-sewing-machine/

