This site is supported by our readers. We may earn a commission, at no cost to you, if you purchase through links.

Thread breakage usually means you’re using poor-quality thread or the wrong needle size for your fabric weight.
Uneven stitches often signal tension problems or a dull needle that needs replacing.
Skipping stitches typically happens when lint builds up in your machine or you’re using a bent needle.
Fabric puckering occurs when your tension’s too tight or you’re pulling the material through the feed dogs.
The key is matching your needle, thread, and tension settings to your specific fabric type and weight, which transforms frustrating sewing sessions into smooth, professional results.
Table Of Contents
Key Takeaways
- Check your needle first – Replace bent, dull, or wrong-sized needles since they cause 90% of stitch problems, such as skipping, breakage, and fabric damage.
- Match needle size to fabric weight – Use size 60 for silk, 80 for cotton, and 90 for denim to prevent tension issues and ensure smooth stitching.
- Adjust tension settings properly – Keep the upper thread tension between 3-4 and test it on fabric scraps before starting your project to avoid puckering and uneven stitches.
- Use quality thread and rethread completely – Poor thread quality causes breakage and inconsistent stitches, so always rethread with the presser foot up when making adjustments.
Troubleshooting Stitch Issues
When your sewing machine starts producing wonky stitches, don’t panic—most problems stem from three culprits you can fix in minutes.
Check your needle condition first, verify your thread tension settings, and make certain you’re using quality materials.
For consistently beautiful results, ensuring these elements are properly set up is crucial.
Identifying Common Stitch Problems
Every sewing project has its hiccups, but recognizing stitch problems early saves hours of frustration.
Watch for telltale signs like irregular stitch formation, poor fabric feed, or uneven tension balance.
Common culprits include needle marks on delicate fabrics, inconsistent seam appearance, skipped stitches, and frequent thread breakage.
When tension issues create loops or puckering, you’re dealing with classic sewing machine issues that need immediate attention, often resulting from tension issues.
Checking Needle Condition and Size
Your needle’s condition directly impacts stitch quality. Start with needle inspection – check for bent tips, dull points, or burrs that snag fabric.
A damaged needle is your fabric’s worst enemy—inspect it like your project depends on it.
Replace needles every two projects to prevent fabric damage from stress fractures. Match needle size to fabric weight: size 60 for silk, 80 for cotton, 90 for denim.
Use specialty needles like ballpoint for knits to avoid snags. Proper needle compatibility prevents 90% of stitching needle problems.
To guarantee accuracy, consider using specialized tools for detailed examination.
Verifying Thread Tension and Quality
Thread tension problems destroy perfect stitches faster than you’d think.
Check your upper thread tension first—it should sit between 3-4 for most fabrics.
Test stitching on scraps reveals tension balance issues immediately.
Poor thread quality causes inconsistent tension, while mismatched thread types create bobbins tension problems.
Always rethread completely when adjusting settings.
Regular checks can help prevent thread bunching issues and ensure proper stitching, which is crucial for sewing success.
Fixing Uneven Stitches
Uneven stitches can turn your beautiful project into a frustrating mess, but the fix is usually simpler than you think.
You’ll solve most uneven stitch problems by adjusting your tension settings, using the correct needle for your fabric, and preventing that annoying fabric puckering, which can be achieved by making a few simple adjustments to ensure a smooth finish with beautiful results.
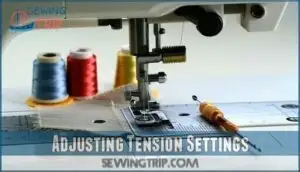
Adjusting Tension Settings
Proper tension balance transforms uneven stitches into professional-looking seams.
Start with upper thread tension between 3-4, then test on fabric scraps.
Adjust bobbin tension by turning the case screw clockwise to tighten, counterclockwise to loosen. A bobbin tension adjuster can help refine this process.
Thread compatibility matters—use matching thread types for consistent results. Always rethread completely after tension adjustments and perform test stitching to verify fabric weight compatibility.
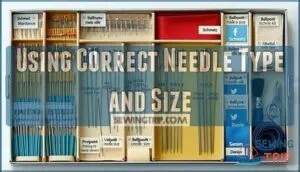
Using Correct Needle Type and Size
Match your needle to your fabric like choosing the right key for a lock.
Size 60 works for delicate silk, while size 90 handles denim’s thickness.
Universal needles suit most projects, but ballpoint needles prevent knit fabric runs.
Sharp needles pierce woven materials cleanly.
Quality needle brands like Schmetz guarantee consistent performance.
Store needles properly to prevent bending and maintain sharp points for precise stitching.
Regular cleaning is important to prevent machine operation issues, ensuring proper maintenance and consistent results.
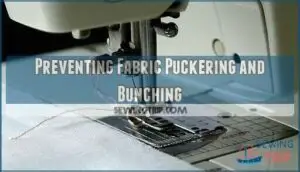
Preventing Fabric Puckering and Bunching
High tension settings create fabric bunching that ruins your sewing projects.
Tension adjustment prevents fabric feeding problems that cause puckering and quilting bunching issues.
- Lower tension settings to reduce fabric puckering on delicate materials
- Increase presser foot pressure for consistent fabric feeding through machine
- Use sharp needles to prevent thread pulling and fabric distortion
- Adjust stitch length settings shorter for better seam control
- Guide fabric gently without forcing it through the feed dogs to maintain consistent fabric feeding and prevent fabric distortion.
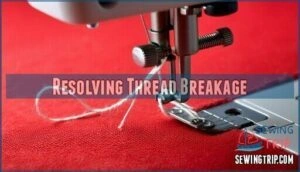
Resolving Thread Breakage
Thread breakage can turn your perfect sewing project into a frustrating tangle of snapped threads and incomplete seams.
When your thread keeps snapping mid-seam, you’re facing every sewist’s nightmare scenario.
You’ll discover that most thread breakage issues stem from improper threading, low-quality materials, or incorrect tension settings that you can fix with simple adjustments.
Causes of Thread Breakage
Understanding why your thread snaps mid-project saves hours of frustration. Several culprits create this headache, but identifying them becomes easier once you know what to look for.
| Primary Causes | Quick Check |
|---|---|
| Thread Quality issues from old or cheap spools | Feel thread texture – rough or brittle? |
| Needle Eye damage creating sharp edges | Inspect needle tip under good light |
| Tension Imbalance between upper and bobbin threads | Test stitch on fabric scraps first |
Spool Issues and Jerky Sewing patterns stress threads beyond their breaking point, while improper Upper Thread Tension settings create uneven pull that leads to snapping. Regularly checking your machine’s thread path can help prevent these issues.
Preventing Thread Breakage With Proper Threading
Following the correct Threading Order prevents most breakages before they start.
Thread your machine with the presser foot up, ensuring proper Tension Balance through each guide point.
The Take-up Lever requires careful attention—missing this step disrupts the entire Thread Path.
Quality Thread Types respond better to consistent thread tension, while proper Spool Placement eliminates unwanted friction that causes sudden snapping during vital seams.
Selecting the right sewing machine thread can also substantially impact thread breakage.
Using High-Quality Thread and Needles
Quality thread material and trusted needle brands dramatically reduce thread breakage and needle breaking incidents.
Invest in branded threads from reputable manufacturers, ensuring fabric compatibility for ideal stitch quality. Premium materials prevent common stitch problems while extending project longevity.
Regular cleaning prevents incorrect tension settings that cause breaks.
Remember: cheap thread costs more when you’re constantly re-threading and fixing broken seams, which is why investing in branded threads and using premium materials can help prevent common stitch problems.
Solving Skipping Stitches
Skipped stitches can turn your perfect seam into a frustrating mess, but you can fix this common problem with a few simple checks.
Most skipped stitches happen when your needle is bent, dull, or the wrong size for your fabric and thread combination, which can be easily identified and fixed.
Checking for Bent or Damaged Needles
Bent needle signs include visible curves, dull points, or burrs that snag thread and damage fabric.
You’ll spot these issues when stitches skip or threads break unexpectedly.
Replace needles every two projects to prevent stress fractures that cause sudden needle breaking.
Proper needle alignment guarantees smooth stitching, while damaged needles create thread snag prevention problems and fabric damage causes that compromise your project’s quality, including sudden needle breaking.
Ensuring Correct Needle Size and Thread Type
Thread thickness acts like a key that must fit perfectly with your needle’s eye. You’ll prevent thread breakage by matching needle size to thread weight – size 60 needles for fine silk thread, size 80 for standard cotton, and size 90 for heavy denim threads.
- Fabric Compatibility: Match needle point type to material – ballpoint needles for knits prevent snags, sharp needles for woven fabrics
- Thread Weight: Use heavier threads with larger needle sizes to prevent fraying and guarantee smooth thread flow
- Material Thickness: Choose needle size based on fabric weight – thin fabrics need smaller needles, thick fabrics require larger ones
- Needle Point: Universal needles work for most projects, but specialty needles improve stitch quality on difficult materials
- Thread Tension: Proper needle-thread pairing maintains consistent thread tension and prevents skipped stitches during sewing
Preventing Tension Issues and Fabric Pull
Allow your machine to pull fabric at its own speed rather than forcing it through. This prevents tension issues that cause skipped stitches.
Support heavy fabrics with a table behind your machine to reduce pull tension.
| Problem | Cause | Solution |
|---|---|---|
| Fabric puckering | Excessive pulling | Let machine feed naturally |
| Thread tension spikes | Unsupported weight | Use fabric support table |
| Skipped stitches | Forced feeding | Match needle to fabric type |
Consistent threading and balanced tension settings work together with proper feeding techniques. When fabric tension matches your thread tension through needle matching, you’ll achieve smooth, even stitches without the frustration of constantly adjusting tension settings. This leads to a more efficient and less frustrating sewing experience, resulting in smooth, even stitches and reducing tension issues.
Advanced Stitch Problem Solutions
When you encounter complex stitch problems that basic troubleshooting can’t fix, you’ll need advanced techniques to restore your machine’s performance.
These solutions address persistent issues like birdnesting, thread jams, and fabric-specific challenges that require specialized approaches.
Identifying and Fixing Birdnesting Issues
Birdnesting happens when your upper thread creates tangled loops underneath your fabric, resembling a bird’s nest.
This frustrating issue stems from improper bobbin threading or tension problems around the take-up lever.
Check your thread quality first—cheap thread causes more tangling than premium options.
Rethread your machine completely, ensuring the take-up lever catches properly and your presser foot stays up during threading to prevent hook timing issues, and always consider the quality of your thread.
Resolving Jammed Stitches and Thread Issues
When your machine jams mid-stitch, you’re likely dealing with improper bobbin threading or take-up lever issues.
Keep thread tails at least 15 centimeters long and make certain proper tension balance to prevent thread jamming and tangling.
- Check bobbin threading alignment in the case mechanism
- Verify take-up lever threading path follows manufacturer’s guide
- Maintain 15cm thread tails to prevent initial stitch tangling
- Use high-quality thread to reduce breakage and jamming risks
- Balance upper and bobbin tension settings for smooth operation
Using Specialty Needles and Threads for Difficult Fabrics
When standard needles fail, fabric specific needles become your secret weapon.
Microtex needles handle silk and microfiber, while jeans needles power through denim without bending.
Match your thread material choice to fabric weight—polyester for outdoor projects, rayon for delicate work.
Proper needle-thread compatibility prevents skipped stitches and fabric damage on challenging materials.
For precision work on fine fabrics, consider using Schmetz Microtex Sharp needles to achieve the best results with delicate work.
Frequently Asked Questions (FAQs)
How do I troubleshoot stitch problems?
Start troubleshooting by checking your needle—replace if bent or dull.
Rethread completely, ensuring proper tension settings.
Clean lint from bobbin area and feed dogs.
Test stitch quality on fabric scraps before continuing your project.
Do sewing machine stitches have problems?
Murphy’s Law strikes again—if something can go wrong with your sewing machine stitches, it probably will.
Yes, sewing machine stitches develop numerous problems including skipped stitches, thread breakage, tension issues, birdnesting, and uneven seams that frustrate sewers regularly, which can be attributed to tension issues.
Why am I still having a problem with my stitches?
You’re likely dealing with incorrect needle size, improper threading, or tension settings that don’t match your fabric. Check these fundamentals first before troubleshooting complex issues.
How to identify the problem in jumped stitches in a sewing machine?
Surprisingly, skipped stitches often appear when you’re rushing through fabric.
Check for a bent or dull needle first, then verify you’re using the correct needle size for your fabric weight and thread type.
How do you fix a stitch problem on a sewing machine?
First, check your needle—replace it if bent or dull.
Rethread completely with presser foot up.
Adjust tension to 3-4 and test on scraps.
Clean bobbin area of lint for smooth operation.
What causes uneven stitches on a sewing machine?
Your beautiful fabric suddenly transforms into a rippled mess, betraying hours of careful work.
Uneven stitches typically stem from low-quality thread, pulling fabric instead of letting the machine feed it naturally.
Or an improperly threaded bobbin case creating inconsistent tension throughout your seam.
What is the most common cause of stitching problems?
Threading mistakes cause about 60% of sewing machine problems. When you’re threading incorrectly or using poor-quality thread, you’ll face skipped stitches, thread breaks, and tension issues that’ll drive you crazy.
Why is my sewing machine not catching every stitch?
Before blaming your machine, check if you’re using the right needle for your fabric.
Skipped stitches typically happen when you’ve got a bent needle or you’re using the wrong needle size for your thread thickness.
What are the common sewing machine problems and remedies?
You’ll encounter skipped stitches, thread breakage, tension problems, and fabric puckering most often.
Check your needle condition, adjust tension settings, rethread completely, and clean lint buildup regularly to solve these issues.
Why is my stitch not working?
Your machine’s throwing a tantrum like a stubborn mule.
Check if your handwheel’s tightened—it loosens during bobbin winding.
Rethread everything completely, ensuring the presser foot’s up when threading.
Replace your needle if it’s bent or dull.
Conclusion
Like a surgeon who scrupulously checks each instrument before an operation, successful sewers master their machine’s basics to prevent costly mistakes.
Mastering common stitch problems solutions transforms your sewing from frustrating guesswork into confident craftsmanship.
You’ll save time, reduce fabric waste, and achieve professional results when you understand needle selection, thread quality, and tension adjustments.
Remember that most issues stem from simple oversights—wrong needle size, poor thread quality, or incorrect tension settings.
Keep your machine clean, use quality materials, and practice these troubleshooting techniques regularly for consistently perfect stitches.
- https://www.sewessential.co.uk/haberdashery/threads
- https://garmentsmerchandising.com/different-causes-of-seam-puckering/
- https://www.fujacn.com/news/why-thread-breaks-happen-and-how-to-avoid-them.html
- https://www.superiorthreads.com/education/troubleshooting-broken-thread
- https://shopwonderfil.com/tips-avoid-thread-breaks/

