This site is supported by our readers. We may earn a commission, at no cost to you, if you purchase through links.
Start with needle size: use 9/70 for delicate fabrics like chiffon, 11/80 for cotton quilting fabrics, 14/90 for heavy cottons and canvas, and 16/100 for denim.
Match your needle type to fabric weight—universal needles work for most wovens, while ballpoint needles prevent runs in knits.
Don’t forget tension adjustments: lighter fabrics need gentler tension, while heavyweight materials require firmer settings.
The right combination prevents puckering, skipped stitches, and that frustrating "**why won’t this work?
**" moment.
There’s more to mastering these settings than meets the eye.
Table Of Contents
Key Takeaways
- Match needle size to fabric weight – You’ll use 70/10 for delicate fabrics like chiffon, 80/12 for medium cottons, 90/14 for heavy materials, and 100/16+ for denim to prevent breakage and ensure clean stitches.
- Choose the right needle type for your fabric structure – You’ll need ballpoint needles for knits to avoid runs, universal needles for most wovens, and specialty needles like microtex for precision work on tightly woven materials.
- Adjust tension settings based on fabric weight – You’ll set lighter tension (2-4) for delicate fabrics to prevent puckering and higher tension (4-6) for heavyweight materials like denim and canvas to handle their density.
- Replace needles regularly and test settings first – You’ll get better results by changing needles every 6-8 hours of sewing and testing your needle-fabric combination on scraps before starting your main project.
Needle Types Explained
You’ll find the right needle for every fabric once you understand the four main types and their specific purposes.
Each needle type is engineered to handle different fabric characteristics, from delicate silks to heavy denim, ensuring your stitches look professional every time, which is crucial for achieving the desired outcome with every fabric.
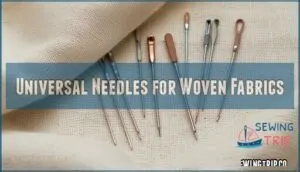
Universal Needles for Woven Fabrics
Universal needles are your go-to choice for most woven fabric projects.
These versatile needles work seamlessly with cotton, linen, and lightweight wool fabrics.
Universal needles are the reliable workhorses that handle your everyday sewing projects with ease.
Size your universal needle between 70/10 and 90/14 based on fabric thickness – lighter fabrics need smaller needles.
Proper needle care and thread choice guarantee consistent stitch quality and prevent fabric damage during sewing, which is crucial for a successful project with universal needles.
Microtex Needles for Precision Sewing
When precision stitching demands perfection, Microtex needles deliver exceptional results.
These sharp, slim-pointed needles excel with delicate fabrics like silk, microfiber, and taffeta.
Their acute point prevents fabric damage while ensuring clean penetration through tightly woven materials.
Choose sizes 60/8 to 80/12 based on fabric thickness.
Proper needle selection and maintenance enhance thread control, making complex sewing techniques manageable for achieving professional-quality seams.
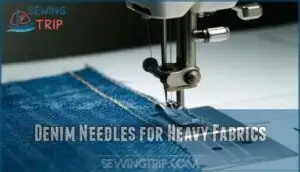
Denim Needles for Heavy Fabrics
When tackling thick fabrics like denim and canvas, you’ll need specialized denim needles that won’t buckle under pressure.
These heavy-duty champions feature reinforced shafts and extra-sharp points designed for fabric piercing through multiple layers.
Choose sizes 100/16 to 110/18 for most denim sewing projects.
The robust construction prevents needle breakage while maintaining clean stitches through thick threads and dense weaves.
To achieve superior results, understanding the correct needle size selection is vital for preventing thread breakage and fabric damage.
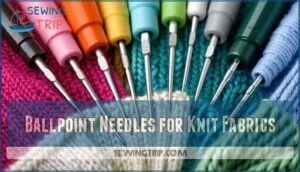
Ballpoint Needles for Knit Fabrics
Ballpoint needles work differently than denim needles by sliding between knit fabric fibers instead of piercing through them.
This prevents runs and snags in stretchy materials like jersey or cotton knits.
Choose needle sizes 70/10 to 90/14 depending on your fabric weight.
The rounded tip protects delicate knit structures while maintaining proper thread control and fabric tension throughout your sewing project.
Choosing Right Needle Size
You’ll need to match your needle size to your fabric weight for professional-looking stitches that won’t damage your material.
Understanding the dual numbering system helps you select the perfect needle every time, whether you’re working with delicate silk or heavy denim, to achieve professional-looking stitches.
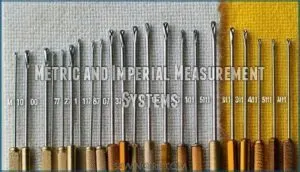
Metric and Imperial Measurement Systems
Needle sizes follow two Measurement Units that work together like a team.
The metric system shows diameter in hundredths of millimeters, while Imperial Equivalents use the older Singer numbering system.
These Size Charts help you match the right needle to your fabric’s needs. Understanding the correct needle size options is essential for perfect stitches.
- Metric Systems: 60 means 0.60mm diameter, 80 equals 0.80mm
- Conversion Tips: Higher numbers indicate thicker needles for heavier fabrics
- Size Charts: Both systems appear on packages (like 80/12) for easy reference
Needle Sizes for Lightweight Fabrics
When working with delicate materials like chiffon or silk, you’ll need smaller needle sizes to prevent fabric damage.
Choose sizes 60/8 through 75/11 for lightweight fabrics, with finer options like 60/8 perfect for sheer materials.
These needle sizes work best with matching thread types and require careful machine settings to achieve professional sewing techniques results.
To guarantee the best outcomes, consider the needle size guidelines for your specific fabric type.
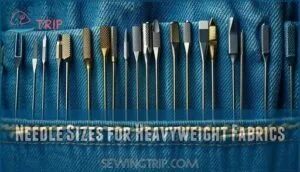
Needle Sizes for Heavyweight Fabrics
Heavy fabrics demand robust needle sizes to prevent needle breakage and guarantee clean stitching.
You’ll need 100/16 to 110/18 needles for denim, canvas, and upholstery materials.
Denim needles feature reinforced shafts that power through fabric thickness without bending.
Match your needle size to fabric weight—thicker materials require larger needles to create proper holes for thread passage and maintain consistent sewing tension throughout your project.
Fabric Specific Needle Settings
Getting your needle settings right for different fabrics transforms your sewing from frustrating to flawless.
Each fabric type demands specific combinations of needle size, thread tension, and stitch length to achieve professional results.
Cotton and Linen Fabric Settings
Cotton and linen fabrics work best with universal needles sized 70/10 for lightweight varieties or 80/12 for medium-weight options.
Set your sewing machine tension between 4-5, with stitch lengths of 2.5-3.0mm for ideal results.
Cotton blends respond well to these same settings, ensuring smooth fabric prep and professional-looking seams with proper cotton thread selection.
To achieve perfect stitches, understanding sewing machine settings is essential for various fabric types, and using the right sewing machine settings can make a significant difference in the quality of your work, especially with cotton thread.
Wool and Silk Fabric Settings
Luxury fabrics like wool and silk demand careful handling.
For wool fabric, select Universal or Microtex needles (70/10 or 80/12) with tension settings between 3-4.
Silk fabric requires similar needle sizes but gentler handling. Set your sewing machine settings for wool at 2.5-3.0mm stitch length.
When working with silk stitches, reduce needle tension slightly to prevent fabric damage and guarantee smooth fabric thread flow. To achieve the best results, understanding silk fabric thread is vital for mastering silk fabric sewing techniques.
Synthetic Fabric Settings
Synthetic fabrics like polyester and acrylic require specific adjustments to your sewing machine settings.
Use universal or ballpoint needles (70/10 to 80/12) depending on fabric stretch.
Set thread tension between 3-4 for most synthetic threads.
Reduce sewing speed when working with fabric blends to prevent heat buildup that can melt fibers.
Polyester typically needs tension setting 4, while stretchy synthetics benefit from slightly lower tension to accommodate fabric movement.
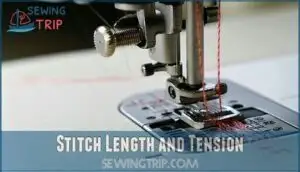
Stitch Length and Tension
Once you’ve selected the correct needle, adjusting stitch length and tension becomes critical for professional results.
These two settings work together to create balanced stitches that won’t pucker, skip, or break your fabric, resulting in professional outcomes.
Adjusting Stitch Length for Fabric Type
Stitch length settings directly correlate with fabric weight and thickness.
Lightweight fabrics require shorter stitch lengths between 1.5-2.0mm to prevent puckering, while heavyweight materials need 3.0-4.0mm for proper seam strength.
Medium fabrics use standard 2.5-3.0mm settings.
Adjust stitch density based on fabric types—shorter stitches increase seam strength, longer ones enhance flexibility for specialty fabrics and decorative stitching applications.
Tension Settings for Lightweight Fabrics
Delicate fabrics demand finesse when adjusting your sewing machine tension.
Lightweight materials like silk and chiffon typically require tension settings between 2-4 to prevent puckering and thread damage. Test stitching on fabric scraps helps you dial in perfect balance before starting your project.
- Start with tension setting 3 for most lightweight fabrics, then make fine adjustments based on thread type and bobbin tension
- Watch for puckering prevention by gradually lowering tension if fabric wrinkles or gathers along seam lines
- Test different thread types since polyester and cotton threads may require slightly different sewing machine tension settings
Tension Settings for Heavyweight Fabrics
Heavyweight fabrics like denim and canvas demand higher tension settings between 4-6 to handle their density.
Denim tension typically starts at 4.5, while canvas tension may reach 5-6.
Leather tension requires careful adjustment around 4-5 to prevent puckering.
When sewing thick fabrics, gradually increase tension adjustment while testing on scraps.
Upholstery tension often needs maximum settings, and heavier thread weight compounds the challenge.
Heavyweight fabrics like denim require precise tension settings to ensure proper sewing.
Troubleshooting Needle Issues
Even the most experienced sewers encounter needle-related problems that can turn a simple project into a frustrating ordeal.
Understanding how to diagnose and fix these issues will save you time, prevent fabric damage, and guarantee your sewing machine runs smoothly for years to come, which is crucial for a smoothly functioning machine.
Common Tension Problems and Solutions
Recognizing tension problems starts with examining your stitches.
Loose upper stitches create visible loops on fabric’s underside, while bobbin thread issues appear as lower thread showing on top.
Skipped stitches cause irregular patterns, often from tension dial problems or incorrect threading.
Fabric puckering signals excessive tightness.
Start troubleshooting tension by rethreading completely before adjusting dials—simple threading errors masquerade as complex tension adjustment needs.
Preventing Needle Breakage and Damage
Several factors cause sewing machine needles to break or sustain damage during stitching.
Wrong needle size for fabric thickness creates the primary culprit—using 70/10 needles on denim guarantees breakage.
Select proper needle size matching fabric types: lightweight fabrics need smaller needles, heavy materials require 100/16 or larger.
Thread tension issues also stress needles excessively, causing premature failure and fabric feeding problems.
Low-quality thread is another factor, as it can lead to frequent thread breakage and put undue stress on the machine.
Maintenance Tips for Sewing Machines
Regular cleaning keeps your machine running smoothly between projects.
Oil your machine every 8-10 hours of heavy-duty sewing, following manufacturer guidelines.
Replace needles at project start to prevent breakage and maintain stitch quality. Clean bobbin areas weekly, removing lint buildup.
Schedule professional servicing annually for peak performance and longevity.
Optimizing Sewing Machine Settings
You’ll achieve professional-quality results when you fine-tune your machine’s stitch settings to complement your needle and fabric choices perfectly.
The right combination of stitch style, length, and tension creates the foundation for flawless seams that look as good as store-bought garments.
Selecting Right Stitch Style and Length
Beyond basic maintenance, choosing the right stitch styles transforms your sewing projects.
Utility stitches like straight and zigzag serve everyday construction, while decorative stitches add flair.
Match stitch length to fabric type: 2.0-2.5mm for lightweight materials, 3.0-4.0mm for heavy fabrics.
Adjust stitch width for seam strength and fabric compatibility.
Your stitch settings directly impact stitch density and overall project quality.
Proper backstitch techniques are essential for reinforcing seams in high-stress areas.
Adjusting Thread Tension for Balanced Stitches
Balanced thread tension creates professional-looking seams by locking upper and lower threads at the fabric’s center. Your tension dial controls this balance, with most machines defaulting to 4-5 for standard sewing.
Thread Tension Basics require these adjustments:
- Upper thread tension – increase dial number for heavier fabrics, decrease for delicate materials
- Lower thread tension – typically factory-set, rarely needs adjustment during normal sewing
- Testing tension – use contrasting threads on fabric scraps before starting your project
- Stitch balance – upper thread should only show on fabric’s right side when properly tensioned
Fine fabrics like silk need tension settings around 2-3, while denim requires 4-6. Make quarter-turn adjustments and test each change. Loops underneath indicate tight upper thread tension; loops on top suggest it’s too loose.
Choosing Right Presser Foot for Fabric Type
Your presser foot choice directly impacts fabric feed and stitch quality.
Standard presser feet work for cotton and linen, while walking feet prevent stretchy fabrics from shifting.
Zipper feet handle bulky seams, and roller feet glide over vinyl without sticking.
Understanding different foot functions can greatly improve sewing outcomes.
Match foot pressure to fabric weight—lighter pressure for delicate materials, firmer pressure for thick fabrics.
Check foot compatibility with your machine’s needle position and specialty feet requirements.
Frequently Asked Questions (FAQs)
What is the best tension setting for stretch fabric?
You’ll want to use a tension setting between 2-3 for stretch fabrics like spandex and Lycra.
This lower tension prevents puckering and allows the fabric to maintain its natural elasticity without breaking threads.
How to choose the right needle for fabric?
Don’t assume needle selection is complicated—it’s simpler than you think!
Match needle size to fabric weight: use 60/8-70/10 for lightweight fabrics, 80/12-90/14 for medium-weight, and 100/16-110/18 for heavy materials like denim.
What is the 80/12 needle used for?
You’ll use 80/12 needles for medium-weight fabrics like cotton, linen, and lightweight denim. They’re perfect when you’re working with everyday materials that aren’t too delicate or heavy.
How often should sewing machine needles be replaced?
Sewing machine needles experience 70% performance degradation after just 6-8 hours of use.
You’ll achieve better stitch quality by replacing needles every project or after 8 hours of sewing time, ensuring crisp seams and preventing fabric damage.
Can one needle work for multiple fabric layers?
Yes, you can use one needle for multiple fabric layers, but choose the size based on your thickest layer. Heavy fabrics need larger needles to pierce cleanly without breaking.
What causes needles to bend during heavy sewing?
Needles bend when you’re pushing them beyond their limits.
Using too small a needle for thick fabrics, forcing layers through too fast, or hitting pins creates excessive pressure.
This excessive pressure is what causes the metal to buckle.
Do specialty threads require different needle types?
Specialty threads absolutely need matching needles for superior results.
Metallic threads require metallic needles with larger eyes and special coatings.
Heavy threads need topstitch needles, while delicate threads work best with embroidery needles.
How does fabric grain direction affect needle choice?
Fabric’s fiber formation fundamentally influences your needle selection strategy.
Cross-grain cutting requires sharper points to pierce tightly woven threads cleanly, while bias cuts need ballpoint needles to slide between loosened fibers without damage.
Conclusion
Like Goldilocks finding the perfect porridge, mastering correct needle settings for fabric requires finding that "just right" balance.
You’ve learned how needle type, size, and tension work together to create professional results. Remember that practice makes perfect—don’t expect immediate mastery.
Start with test scraps before tackling your main project. Keep a needle reference chart handy until these settings become second nature.
With the right correct needle settings for fabric, you’ll transform frustrating sewing sessions into smooth, enjoyable experiences that produce beautiful, lasting results.
- https://www.masterclass.com/articles/types-of-hand-sewing-stitches
- https://www.ageberry.com/stretch-needle-sewing-machine/
- https://sewport.com/fabrics-directory/spandex-fabric
- https://www.sewjersey.com/blogs/quilting-tips/what-do-sewing-machine-needle-sizes-mean
- https://www.sewessential.co.uk/blog/how-to-choose-the-right-sewing-machine-needle/

