This site is supported by our readers. We may earn a commission, at no cost to you, if you purchase through links.
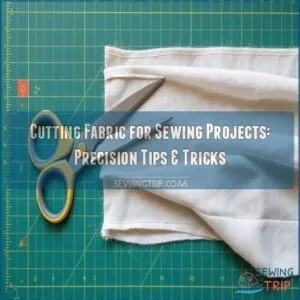 Cutting fabric for sewing projects requires a bit of finesse and the right tools.
Start by pre-washing your fabric to avoid any post-cutting surprises like shrinkage.
Grab some sharp fabric scissors or a trusty rotary cutter, along with a self-healing cutting mat and a clear ruler for precision.
Remember to iron your fabric flat for those picture-perfect cuts.
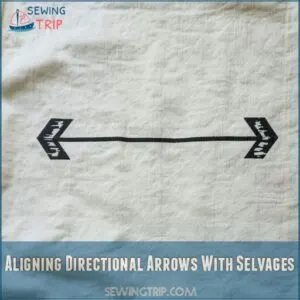
Align the fabric’s selvage with directional arrows to guarantee accuracy.
Whether you’re snipping wool or slippery silk, mastering these basics will make your sewing a delight.
Ready to up your cutting game? Stay tuned for more tips to achieve professional finishes!
Table Of Contents
- Key Takeaways
- Preparing Fabric for Sewing
- Effective Fabric Cutting Techniques
- Mastering Precision Cutting
- Essential Tools for Cutting Fabric
- Understanding Fabric Grain and Selvage
- Cutting Specific Fabric Types With Ease
- Advanced Fabric Cutting Techniques
- Choosing The Right Cutting Method
- Tips for Cutting Stretchy and Versatile Fabrics
- Common Mistakes to Avoid in Fabric Cutting
- Frequently Asked Questions (FAQs)
- Conclusion
Key Takeaways
- Pre-wash your fabric to prevent any unexpected shrinkage and color bleeding before you cut, ensuring your projects come out just right.
- Use sharp fabric scissors or a rotary cutter with a self-healing mat for precise cuts that make sewing easier and more accurate.
- Always iron your fabric before cutting to remove wrinkles, which can lead to cutting errors and poor fit.
- Align your fabric’s selvage correctly and follow directional arrows to maintain grain direction and improve the structure of your finished garment.
Preparing Fabric for Sewing
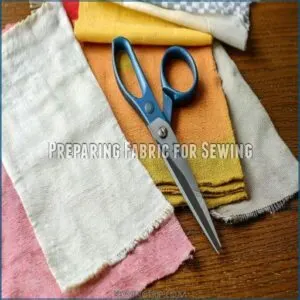
Before you start cutting fabric, it’s important to prepare it correctly by pre-washing to check for shrinkage and remove any chemicals.
Tackle fraying with zig-zag stitching or pinking shears to make sure your fabric is ready for sewing.
Pre-washing and Drying Fabric
Pre-washing fabric is a key first step. Why? Because it prevents those pesky surprises later on! Think of it as insurance against fabric shrinkage and color bleeding.
Using a tool like a quilting ruler to cut your fabric accurately before pre-washing can save you a lot of time in the long run.
Before you start your project, test a small area for colorfastness. Here’s what you need to do:
- Pre-wash a fabric swatch.
- Check for shrinkage.
- Inspect for color bleeding.
- Note any changes in texture.
Proper pre-washing and drying methods prevent those last-minute disasters. For woven fabrics, air drying is usually best. Knit fabrics? Lay them flat to avoid stretching. Remember, a little preparation goes a long way!
Treating Fraying Fabric
You’ve tackled pre-washing, now let’s focus on fraying prevention.
Fabrics that fray easily need some TLC.
Using pinking shears gives edges that zigzag finish, slowing down fraying.
Want more security? Serging techniques or zigzag stitching work wonders.
Fabrics stay stable with these fabric cutting techniques.
It’s all about keeping those edges neat before you pick up those fabric scissors or rotary cutter.
Removing Finishing Chemicals
Tackle those finishing chemicals before fabric cutting like giving your fabric a spa day with prewashing. It’s all about nixing potential skin irritants and ensuring you’re not sewing fabric that shrinks unexpectedly.
- Embrace an eco-friendly wash for fabric finishes.
- Test small swatches first to avoid surprises.
- Consider health concerns—nobody wants itchy fabric.
- Be consistent, as fabric preparation sets your sewing projects up for success.
Effective Fabric Cutting Techniques
Let’s explore effective fabric cutting techniques to make sure your sewing projects turn out beautifully.
By aligning directional arrows with selvages and using a rotary cutter with a cutting mat, you’ll achieve precise results even with tricky fabrics.
Aligning Directional Arrows With Selvages
Identifying the selvage is like finding the edge of your comfort zone.
Place pattern arrows parallel to this edge, aligning with fabric grain lines, much like syncing gears.
This makes sure pattern alignment and fabric cutting accuracy.
Ignore this, and you might end up sewing patterns that don’t match.
Use fabric scissors for precise cuts, and you’ll avoid pesky mismatched seams in your sewing projects.
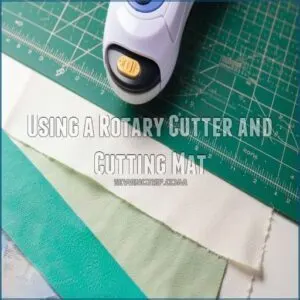
Using a Rotary Cutter and Cutting Mat
When it comes to sewing, a rotary cutter and cutting mat are your best friends.
With safety in mind, keep that rotary cutter sharp to slice through fabric like butter.
Choose a mat size that fits your project and offers plenty of space to maneuver.
Whether you’re tackling delicate silk or rugged denim, remember—precision cuts craft the foundation for sewing success.
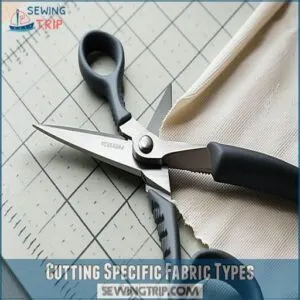
Cutting Specific Fabric Types
You’re mastering the rotary cutter—now let’s tackle the quirks of various fabrics.
Cutting velvet demands a gentle touch to avoid crushing.
Silk’s slipperiness calls for patience, while denim resists precision until tamed by sharp shears.
Lace and linen need careful handling to maintain structure.
Woven fabrics like faux fur or leather need special care: cut them wisely so your seams sing and fit like a dream.
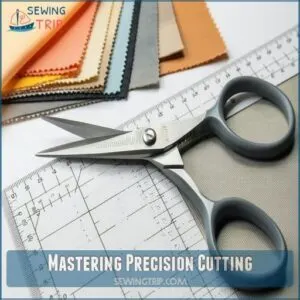
Mastering Precision Cutting
Precise cutting is key to successful sewing; mastering these techniques will transform your projects from frustrating fits to flawlessly finished garments.
Let’s explore how to avoid those pesky mistakes and achieve professional results every time.
Avoiding Inaccurate Seam Allowances
Getting those seam allowances right isn’t rocket science, but a few tricks help.
Keep an eye on the basics and use these tips to stay sharp:
- Measure twice, cut once—don’t rush it.
- Use marking tools like tailor’s chalk.
- Secure fabric to prevent stretching.
- Double-check pattern markings.
- Upgrade cutting tools for precision.
These steps make sure your sewing projects stitch together flawlessly.
Minimizing Fraying and Sewing Difficulty
When you’re tackling fabric types that love to fray, seam finishes like zigzag stitching or serging can be your best friends.
For a quick fix, grab pinking shears to curb those pesky edges.
A rotary cutter provides a clean cut along the selvage edge.
Remember, pressing fabric before cutting helps with accuracy.
Keep those fabric scissors sharp for precise cuts!
Achieving Professional Finishes
Precision in fabric cutting takes your sewing from frustrating to flawless. To achieve professional finishes, focus on:
- Seam Allowance: Make sure it’s accurate to avoid mismatch.
- Straight Lines: Use a rotary cutter for clean edges, or consider investing in high-quality fabric shears tools to guarantee precise cuts every time.
- Pattern Matching: Align patterns carefully for a seamless look.
- Pressing Fabric: Keep fabric tension just right to avoid distortion.
These fabric cutting tips elevate sewing mastery.
Essential Tools for Cutting Fabric
You can’t underestimate the power of the right tools when cutting fabric for your sewing projects.
Fabric shears, a quilter’s ruler, and tailor’s chalk guarantee precision,
so your creations turn out just as you’ve imagined.
Fabric Shears and Cheap Scissors
Using fabric shears is like wielding a trusty sword in your sewing arsenal.
Choose sturdy sewing scissors that glide through fabric smoothly.
Save cheap scissors for paper patterns—don’t dull your prized shears!
Maintain them with occasional sharpening and a drop of oil.
Good fabric shears can transform your project, making cutting fabric a breeze, even on those tricky materials.
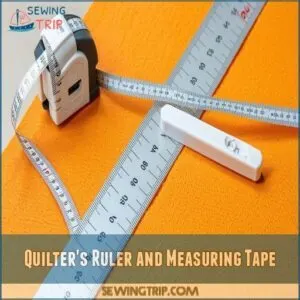
Quilter’s Ruler and Measuring Tape
Moving from scissors, grab a quilter’s ruler and measuring tape to boost your accuracy in fabric cutting.
Mastering these tools means:
- Align edges with precision to maintain fabric grain.
- Measure twice to hit that perfect measurement every time.
- Mark lines confidently, ensuring all pieces fit together like a puzzle.
With the right tools, you’re not just cutting fabric—you’re crafting your vision.
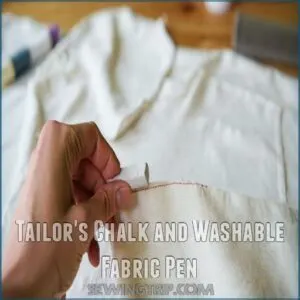
Tailor’s Chalk and Washable Fabric Pen
After measuring with your trusty quilter’s ruler, it’s time to mark your fabric!
Tailor’s chalk and washable fabric pens are your best friends here.
Chalk’s great for a subtle mark, easily dusted off.
Washable pens offer more precision, perfect for detailed patterns.
Choose the tool that works best for your fabric and project.
Remember, practice makes perfect!
Proper marking guarantees clean cuts and a flawless finish.
Store your chalk and pens carefully to keep them working their magic.
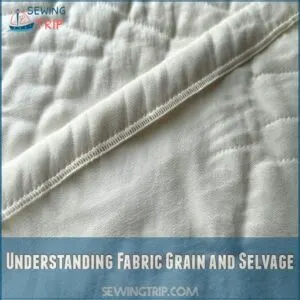
Understanding Fabric Grain and Selvage
Understanding fabric grain and selvage is essential for cutting fabric with precision, like ensuring your seams line up perfectly.
By recognizing grain lines and aligning them parallel to the selvage, especially with knits and woven fabrics, you can prevent your projects from twisting out of shape.
Identifying Fabric Grain Lines
Imagine you’ve got a treasure map, and that map is your fabric’s grain line. Pinning down grain lines is like spotting arrows for a cutting roadmap. Here’s how you can spot them:
- Lengthwise Grain: Strong and straight, like a spine.
- Crosswise Grain: A bit more flexible.
- Bias Grain: A stretchy slant.
- Selvage: The fabric’s edge, a trusty guide.
Cutting Parallel to Selvage
Let’s chat about cutting fabric parallel to the selvage—it’s like following a trustworthy path.
This method helps maintain cutting accuracy, especially for straight lines in sewing projects.
Understanding the importance of fabric grainlines is key to ensuring your patterns behave beautifully on the body.
Fabric grain lines guide you, ensuring your patterns behave beautifully on the body.
Avoid the bias cut here unless intentional; it’s essential for keeping your creations crisp and structured.
Trust the selvage’s silent authority.
Working With Knit and Woven Fabrics
Understanding the properties of knit and woven fabrics is like learning the dance of drape and stability.
Knit fabrics, with their stretchy nature, need careful handling—consider fabric weight and cut with the stretch.
Woven fabrics, firm and stable, call for aligning the selvage edge with precision.
Each fabric type tells its own sewing story—embrace their characteristics for flawless cuts.
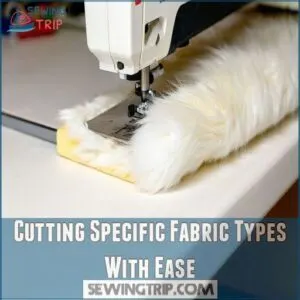
Cutting Specific Fabric Types With Ease
When you’re cutting tricky fabrics like faux fur, leather, or slippery materials, knowing the right techniques can make all the difference.
Cutting from the back side or using a rotary cutter are methods that will help you handle each fabric type with ease, ensuring precise and professional results.
Cutting Faux Fur and Leather
Faux fur and leather cutting can be a cinch if you handle them right.
Start by shearing faux fur from the back to avoid cutting the fibers.
Leather grain direction is key, so lay it flat and cut from the right side up using a rotary cutter.
Keep these in mind:
- Make sure pattern placement is correct
- Use cutting tools wisely
- Provide fabric support
- Follow a reliable fabric cutting guide
Working With Slippery Fabrics
Slippery fabrics like chiffon can be a real pain, right?
Misting them lightly with water before cutting helps tremendously.
It adds just enough weight to keep them from shifting under your fabric shears or rotary cutter.
Another trick? Place tissue paper under the fabric for extra support.
Pinning patterns securely is always key.
These simple techniques will give you much more control and help you achieve beautifully precise cuts every time.
Cutting Printed Fabrics and Matching Patterns
When you’re wrestling with printed fabrics, focus on aligning patterns carefully, keeping in mind that for plaid or striped fabrics, adding extra fabric for pattern matching can save you from running out of material.
It’s like solving a puzzle as you match stripes and repeating patterns just right.
Use pattern weights and make sure alignment along the selvage and grainline.
Scan your fabric’s pattern before cutting; it saves headaches later.
With these pattern matching tips, your creations will boast seamless pattern alignment and precision!
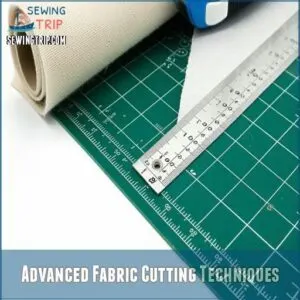
Advanced Fabric Cutting Techniques
To master advanced fabric cutting techniques, you’ll need to refine skills like straight and curved cuts, along with mastering notch cutting and pattern tracing for added precision.
Precision and fussy cutting are methods that guarantee your final projects boast crisp lines and perfect seams, elevating your sewing outcomes.
Straight and Curved Fabric Cutting
Mastering straight and curved fabric cutting can be a real game-changer in sewing. Picture your project smooth as butter:
- Straight Line Tips: Make sure your fabric’s aligned with the selvage. Use fabric shears for clean cuts. For stretchy fabric cutting techniques consider employing a rotary cutter for smoother, cleaner cuts than scissors.
- Cutting Curves: For curves, a rotary cutter is your best friend.
- Pattern Markings: Follow pattern markings closely to keep things accurate.
Cut precisely, and watch your creations flourish!
Notch Cutting and Pattern Tracing
Notch cutting techniques make pattern cutting a breeze.
Imagine identifying notches like connecting dots on a treasure map.
Grab a tracing wheel to make sure you’re tracing patterns accurately.
Fabric notches help pieces fit perfectly, so marking them clearly is key.
Use reliable fabric marking tools and pattern weights to keep everything steady, making sure your sewing patterns align flawlessly for smooth sailing in your sewing projects.
Precision and Fussy Cutting
Moving from notching to precision and fussy cutting, you’ll feel like a fabric magician bringing patterns to life. Ever tried it? Here’s how:
- Fussy cutting tips: Select patterns that tell a story.
- Pattern matching: Make sure the design flows seamlessly.
- Grain alignment: Keep fabric threads in check.
- Rotary cutters and scissors: Essential for crisp, curve-free edges.
Each snip takes you closer to that custom masterpiece!
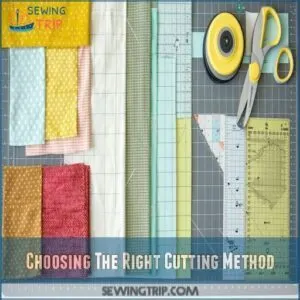
Choosing The Right Cutting Method
Selecting the right cutting method can greatly impact your sewing project’s success, whether you use manual techniques, embrace automated technologies, or work with a trusty cutting table.
Each option comes with unique benefits and challenges,
so understanding them will help you make informed choices.
Manual Cutting Methods
Manual fabric cutting, a time-honored tradition, relies on your trusty hands and a few key tools.
You’ll need sharp fabric shears for precise cuts, a sturdy cutting board to protect your work surface, and a trusty rotary cutter for efficient work on larger pieces.
Proper pattern alignment is key; get it right to avoid frustrating fitting issues.
| Tool | Use | Benefit |
|---|---|---|
| Fabric Shears | Precise cutting of fabric | Clean, accurate cuts |
| Rotary Cutter | Quickly cutting through multiple layers | Speed and efficiency |
| Cutting Mat | Protects surfaces, provides stability | Accurate cuts, prevents damage |
Remember to account for fabric grain and use your chosen tools wisely!
Automated Fabric Cutting Technologies
While manual cutting methods give you that hands-on control, automated fabric cutting technologies can be game-changers.
With tools like laser cutting machines, CNC cutters, and digital fabric software, you can achieve precision that manual methods might miss.
These machines slice through textiles like a hot knife through butter, saving you time and ensuring every piece is cut exactly as needed.
Employing a Cutting Table
Imagine this: a sturdy cutting table becomes the heart of your sewing workspace.
It’s not just a surface; it’s your trusty partner in precision.
To elevate your cutting experience, consider investing in a high-quality best cutting mat self healing, designed to close up cuts from blades, leaving a smooth surface.
Here’s how a cutting table makes life easier:
- Stability: Makes sure your fabric doesn’t slip away.
- Height adjustment: Saves your back during long projects.
- Accessories: Cutting mats and rotary fabric cutters feel right at home.
Tips for Cutting Stretchy and Versatile Fabrics
Cutting stretchy and versatile fabrics doesn’t have to be intimidating if you focus on stability and precision.
Understand the fabric’s drape and stretch characteristics to enhance fit and guarantee effective bias cutting, layering, and working with knits for flawless results.
Draping and Fit Enhancement
Think of draping techniques as the secret sauce that brings fabric to life, enhancing fit with ease.
It’s about fabric manipulation and making smart pattern adjustments for superior garment shaping.
Let’s look at some key differences:
| Technique | Purpose |
|---|---|
| Draping | Creative shaping of fabric |
| Fabric manipulation | Achieving precise adjustments |
| Ease fitting | Comfortable, improved fit |
| Pattern adjustments | Customizing your pattern |
Bias Cutting and Layer Cutting
Bias cutting techniques take your sewing to another level, adding flair and flexibility to garments.
Not just a whimsical notion, cutting fabric on the bias enhances drape and fit, perfect for dressmaking applications.
Layer cutting benefits streamline the process, saving time and ensuring consistent pattern placement.
Keep an eye on fabric grain impact and selvage alignment for professional, polished results that impress.
Working With Knit and Stretch Fabrics
Working with knit and stretch fabrics can feel like taming a wild beast.
But once you understand the fabric’s stretchy properties, it becomes easier.
You can use a rotary cutter for knit fabrics to cut these fabrics with precision.
Always stabilize knit fabrics by using interfacing, and keep them flat while cutting.
For sewing knit seams, use a zig-zag stitch to maintain stretchiness.
Remember, knit fabrics have an easy drape that requires careful handling during fabric cutting for clothing.
Common Mistakes to Avoid in Fabric Cutting
Let’s face it, we’ve all had those "oops" moments with fabric cutting, resulting in wonky seams or ill-fitting garments.
To avoid these common pitfalls, we’ll explore frequent mistakes like inaccurate measurements, improper tool use, and neglecting fabric preparation, ensuring your next project is a success.
Inaccurate Cutting and Seam Allowances
Ever found a perfect fit ruined by seam allowance mistakes? Cutting accuracy impacts the final look of your sewing projects, and avoiding fit issues starts with precise cutting.
- Double-check measurements: Mistakes here lead to garment fitting problems.
- Use proper measurement techniques: Keep seam allowances in mind.
- Review pattern placement: Make sure everything aligns for the best results in cutting fabric.
Improper Use of Cutting Tools
Jumping from seam allowances, let’s talk tools. You wouldn’t use a butter knife to carve a turkey, right?
Using the wrong tool or dull blades in fabric cutting can do more harm than good.
Fabric scissors are for fabric, not paper. Keep them sharp with proper sharpening tools.
A cutting mat isn’t just for show—it’s your fabric’s best friend. Choose wisely for precision!
Not Preparing Fabric Before Cutting
Imagine cutting without prepping—it’s like baking without reading the recipe.
Before prepping, make sure you’re choosing the right fabric for your project by considering its properties, such as weight, drape, and stretch, to avoid top sewing mistakes beginners make.
You’ll find shrinkage, wrinkles, and color bleeding wreaking havoc.
Avoid this by pre-washing to tackle shrinkage and those pesky finishing chemicals.
Prevent fraying with pinking shears on the selvage edge, and iron out wrinkles.
Different fabric types require specific care, whether delicate chiffon or heavy denim.
Get it right, and avoid headache later.
Frequently Asked Questions (FAQs)
How to cut fabric effectively?
Preparing fabric for cutting is an art.
Start by pre-washing to avoid surprises.
Lay out fabric carefully, checking pattern alignment and grain direction.
Use sharp shears for clean cuts.
Precision makes your project shine, frustration-free.
What tools do you need to cut fabric straight?
You’ll need sharp fabric shears for clean cuts, a ruler for accurate measurements, and either tailor’s chalk or a fabric pen for marking.
Don’t forget a cutting mat to protect your work surface!
Is cutting fabric easy?
Cutting fabric isn’t always easy; it requires precision and patience.
Missteps can lead to mismatched seams and uneven hems.
However, with the right tools and careful planning, you’ll achieve clean cuts for a seamless project.
How do you cut fabric straight?
To cut fabric straight, align the grain with the selvage.
Use a sharp rotary cutter or fabric shears.
Mark a straight line with tailor’s chalk or a ruler.
Take your time for precision.
Why do you need a sewing machine to cut fabric?
You don’t need a sewing machine to cut fabric.
Scissors, rotary cutters, and measuring tools handle that job.
Sewing machines come into play once you’re ready to stitch those well-cut pieces into your masterpiece.
How do you prepare fabric for a sewing project?
If you don’t prepare your canvas, your masterpiece might unravel."
Pre-wash fabric to prevent shrinkage and smooth out any creases.
Use a dry iron to remove wrinkles, ensuring accurate cuts for your sewing project.
Do you cut fabric parallel to selvage?
Cut fabric parallel to the selvage for stability, preventing unwanted stretching or distortion.
Fabric grain affects the garment’s shape and structure.
This alignment maintains the fabric’s grain, ensuring your project hangs correctly and fits well.
What is the best tool for cutting fabric?
The best tool for cutting fabric is a pair of high-quality fabric shears.
Their sharp blades provide clean, precise cuts.
For delicate materials, consider a rotary cutter, which offers control and prevents fraying.
Which direction do I cut fabric?
Always follow the pattern’s directional arrows; they’re your roadmap to success!
These arrows tell you which way to cut the fabric for the best results.
Trust them—they’re your secret weapon for perfectly cut pieces!
What are the rules in cutting fabric?
Line patterns with selvage edges for accuracy.
Pin or weigh pieces securely.
Use fabric shears for clean cuts.
Match directional patterns and consider fabric stretch.
Check measurements twice, then proceed with confidence for a perfect cut.
How to handle pre-washed fabric wrinkles?
Imagine wrinkles like stubborn clouds on your fabric.
Use a steam iron on the wrong side or a garment steamer to gently coax them out.
Ironing can restore flatness, giving you a professional start before cutting.
Should fabric be ironed before cutting?
Ironing fabric before cutting is essential to eliminate wrinkles and guarantee accurate cutting for your sewing projects.
It prevents distorted pieces, leading to better-fitting garments and a professional finish.
Don’t skip this important step!
How to prevent fabric from shifting?
Use pattern weights instead of pins to keep fabric stable, and apply a spray starch lightly for added stiffness.
Consider laying fabric on a large non-slip mat to minimize movement while cutting for precise results.
What to do with fabric scraps?
Don’t toss those scraps!
Use them for patchwork quilts, unique appliqué designs, or crafting tiny decorative items.
Scraps are perfect for practicing new techniques or creating personalized gifts.
Every little piece has its creative potential!
How to safely handle sharp cutting tools?
Grip cutting tools firmly and always cut away from your body to stay safe.
Keep blades sharp for precision and never rush.
Store tools in a secure place, out of children’s reach, to prevent accidents.
Conclusion
Remember that time you accidentally cut your fabric crooked? Avoid that disaster by carefully prepping your fabric before cutting.
Mastering the art of cutting fabric for sewing projects dramatically improves your projects. Ironing and aligning your fabric properly makes a world of difference.
Using the right tools – sharp shears, a rotary cutter, and a self-healing mat – guarantees accurate cuts.
With practice, you’ll be confidently cutting fabric for any sewing project, achieving professional results every time.
So grab your scissors and let’s get cutting!




Wendi
February 27, 2025 at 09:11 PM
Wow, what wonderful information on preparing fabric! I have a question about grain/bias. I am cutting drapery lining and I did a test 'tear' of the fabric to determine the bias, and its crooked. Should I ignore the bias, or try to tug the fabric into 'straight' bias? I hope my question makes sense! Thanks.