This site is supported by our readers. We may earn a commission, at no cost to you, if you purchase through links.
 Shirring and smocking are two sewing techniques often intertwined in discussions, yet distinct in their craft and outcome.
Imagine you’re embarking on a sewing project, and you stumble upon these terms. Shirring involves sewing parallel lines with elastic thread in the bobbin, gathering fabric to create elasticity and texture, perfect for adding shape to necklines, busts, or waists.
On the other hand, smocking is an art of hand embroidery over pleated fabric, transforming it with intricate patterns that both secure and decorate. While both techniques aim to gather fabric, their methods, tools, and aesthetic impacts diverge, offering unique ways to enhance garments.
Whether you’re aiming for the functional elasticity of shirring or the decorative allure of smocking, understanding these differences is key to choosing the right technique for your next sewing adventure.
Table Of Contents
Key Takeaways
- Shirring involves using elastic thread to gather fabric, resulting in stretchy sections that are ideal for necklines, busts, and waists, and is typically done with a sewing machine.
- Smocking is a form of hand embroidery on pleated fabric that creates decorative and intricate patterns without the use of elastic, often used for embellishment rather than elasticity.
- The key difference between the two techniques is that shirring uses elastic to create functional stretch, while smocking is non-stretchy and focuses on decorative elements.
- In terms of fabric manipulation ratio, shirring typically gathers fabric by a ratio of 1.5 or 2 to 1, whereas smocking gathers fabric more extensively, by a ratio of 3 to 1.
Shirring Vs. Smocking Overview
When exploring the realms of shirring and smocking, it’s crucial to grasp their distinct characteristics and applications in sewing.
Shirring involves sewing with elastic thread to gather fabric, creating stretchy sections that add both decorative and functional elements to garments.
On the other hand, smocking is a more intricate hand embroidery technique that gathers fabric into pleats, secured with decorative stitches, often without the use of elastic, resulting in a non-stretchy, embellished fabric.
Understanding these differences is key for any sewer looking to add texture, elasticity, and decorative flair to their projects.
Definition of Shirring
Shirring is like the fairy godmother of sewing techniques, magically transforming flat fabric into stretchy, textured wonders with just a few rows of stitching. Imagine your fabric as a caterpillar, and shirring is the cocoon stage before it emerges as a beautiful, gathered butterfly.
- Elastic tension: This is the secret sauce that brings the fabric together, creating a snug but comfortable fit.
- Stitch length: Think of this as the dial on your fabric’s accordion, controlling how much it pleats and gathers.
- Bobbin winding: It’s like loading a spring into your sewing machine; a well-wound bobbin ensures even, consistent shirring.
- Decorative threads: These are the sprinkles on your sewing sundae, adding a dash of flair to your shirred sections.
Definition of Smocking
Smocking is like the yoke of a finely tailored shirt—it’s all about precision and detail. Imagine you’re an artist, and your fabric is the canvas. You’re about to create a masterpiece with nothing but a needle, thread, and your own two hands.
Smocking isn’t just a stitch; it’s a symphony of pleats and patterns that come together to create texture and elasticity without the need for elastic thread.
Now, let’s break down the essentials of smocking in a table that’s as neatly organized as your sewing kit:
| Aspect | Details |
|---|---|
| Technique | Hand embroidery over pre-pleated fabric |
| Stitching | Decorative smocking stitch variations that hold pleats and add design |
| Fabric Prep | Smocking fabric preparation involves creating a grid for even pleating |
| Thread | Smocking thread selection is key—no elastic thread, just pure finesse |
| Tension | Smocking tension adjustments ensure the fabric gathers just right |
| Pattern Design | Smocking pattern design is where your creativity shines |
Key Differences
When you’re ready to add texture and shape to your sewing projects, understanding the key differences between shirring and smocking is crucial.
Shirring involves sewing with elastic thread to gather fabric, creating a stretchy effect that’s perfect for snug fits.
On the other hand, smocking is a form of hand embroidery that produces fine pleats, often without the use of elastic, resulting in intricate patterns that don’t stretch.
Both techniques manipulate fabric to enhance the garment’s aesthetic, but they differ in their approach to gathering and the final look they provide.
Technique and Tools
When diving into the world of fabric manipulation, you’ll find yourself at a crossroads: shirring vs smocking. These two techniques are like the fork in the road of sewing—each path leading to a unique destination in garment texture and design.
Shirring is your trusty sewing machine’s playground, where elastic thread becomes your best friend, creating gathers that hug the fabric in a cozy 1.5 or 2 to 1 embrace. Imagine your fabric shrinking in delight as it transforms, with each parallel stitch line dancing half an inch apart.
It’s like a magic trick where the fabric scrunches up, ready to add that perfect fit and flexibility to your garment.
On the other hand, smocking is the realm of hand embroidery, where your needle and thread weave intricate patterns over pleated fabric. It’s the meticulous art of folding fabric into pleats, securing them with decorative stitches that aren’t just for show but hold the very essence of the pleat together.
It’s a 3 to 1 ratio of fabric gathering that’s more than just a technique—it’s a craft that turns a simple piece of cloth into a canvas of texture and pattern.
So, whether you’re machine shirring with all-purpose thread or hand smocking to create decorative possibilities, remember that each stitch length and technique plays a pivotal role in the final outcome.
Fabric considerations are crucial, as both techniques sing best with lightweight fabrics. And if you’re thinking of switching lanes from smocking to shirring or vice versa, be prepared for some pattern alterations to keep the fabric’s flow just right.
In the end, whether you choose the path of shirring with its machine-driven gathers or the handcrafted beauty of smocking, you’re not just sewing—you’re sculpting with thread.
Fabric Manipulation Ratio
When you’re diving into the world of fabric manipulation, you’ll find that gathering elasticity isn’t just about pulling things together—it’s an art form. Take shirring and smocking, for instance. They’re like the con artists of the sewing world, tricking fabric into shrinking down to size.
Shirring is like a magician with a sewing machine, using elastic thread to coax the fabric into a cozy embrace, reducing its length by about a third.
On the other hand, smocking is the grandmaster of pleats, using no elastic but relying on sheer stitch wizardry to create a fabric reduction that’s more like a crowd in a concert—three times the people in the same space.
It’s the heirloom look that makes a garment sing with decorative embroidery, and it’s all done by hand. So, while shirring might gather your fabric in a 1.5 or 2 to 1 ratio, smocking goes the extra mile with a 3 to 1 ratio.
Both techniques may share the stage when it comes to adding texture and a bit of give to your garments, but they each have their own solo acts. Shirring steps up with its sewing machine applications, while smocking takes the spotlight with intricate, decorative stitches that can transform a simple piece of fabric into a masterpiece.
Use of Elastic Thread
Continuing from the fabric manipulation ratio, let’s talk elastic thread. It’s the secret sauce in shirring, giving your fabric that comfy stretch.
Imagine waist shirring that hugs without the squeeze—elastic tension done right. You’ll want to wind that bobbin with care, not too tight, not too loose, just like Goldilocks’ porridge.
Choose lightweight fabric and watch as your stitch length and bobbin tension conspire to create decorative effects that are nothing short of magic.
Just remember, when it comes to shirring, it’s all about that elastic thread.
Aesthetic Outcomes
When it comes to shirring vs. smocking, the aesthetic differences are like night and day.
Shirring, with its elastic thread use, cinches fabric into round tucks, giving your bodice a snug fit that’s as comfy as a hug.
Smocking, on the other hand, is the pin-up of fabric manipulation—meticulously pleated and embroidered to flaunt intricate patterns that can turn a simple neckline into a work of art.
So, whether you’re aiming for a dress that fits like a glove or a decorative masterpiece, the difference between shirring and smocking is clear as day.
Shirring Process
To kick off your shirring adventure, you’ll need to set up your machine just right.
As you prepare your fabric, remember to mark your shirring lines evenly. This will ensure a consistent gather.
Once you start sewing, the fabric will begin to take shape. A final touch of steam will bring out the full effect of your shirring.
Machine Setup
After diving into the differences between shirring and smocking, let’s get your machine ready to shirr.
First, wind the bobbin with elastic thread by hand, keeping the elastic tension firm but not stretched.
Set your machine to a straight stitch, length 3-4, and test on a scrap. Remember, the right setup is the secret sauce to perfect shirring—think of it as prepping your canvas before unleashing your creativity with embellishments.
Use a ruler to ensure your rows are as straight as a pattern template.
Preparing Fabric
Before you dive into the world of shirring, it’s crucial to prep your fabric like a pro. Start by giving your fabric the spa treatment it deserves—pre-wash it as you would when it’s all sewn up and ready to strut its stuff.
Next, it’s time to play dress-up with your fabric. Grab your chalk and ruler, and mark those shirring lines with the precision of a cat stalking its prey—half an inch apart, no more, no less. If you’re working with a pattern, you might need to tweak it like a DJ adjusts a track, ensuring the fabric width is on point after shirring does its magic.
Don’t forget to consider seam allowance adjustments and interfacing considerations, as they’re the unsung heroes that can make or break your masterpiece.
Now, with your fabric marked and your machine set up, you’re ready to transform that flat piece of fabric into a textured treasure trove of gathers.
Sewing and Finishing
Dive into the world of shirring with these steps:
- Thread the Needle: Unlike smocking’s intricate handwork, shirring’s simplicity starts with your sewing machine.
- Mark Your Territory: Precision is key; evenly spaced lines are your roadmap.
- Let It Gather: As you sew, watch the fabric magically bunch, a satisfying contrast to smocking’s meticulous pleats.
- Steam to Perfection: A little heat, and voilà, your masterpiece tightens up.
Shirring’s ease and speed make it a go-to for quick transformations, offering a different satisfaction than the deliberate art of smocking. Whether you’re budget-conscious or time-strapped, mastering shirring could be your next creative leap.
Smocking Process
When embarking on the smocking journey, you’re diving into a world where fabric manipulation meets artistry.
You’ll start by pleating your fabric, either by hand or with the help of a pleater, to prepare it for the decorative stitches that won’t only hold the pleats in place but also add intricate designs to your project.
This initial step is crucial as it sets the foundation for your smocking work, ensuring that the pleats are evenly spaced and ready for the embroidery techniques that will follow.
Once your fabric is pleated, you’ll use embroidery stitches to create patterns that are both decorative and functional, securing the pleats and adding a unique texture to the fabric.
Finally, after your embroidery is complete, you’ll remove the holding threads, revealing the final smocked design that gathers the fabric in a 3 to 1 ratio, providing both decoration and structure to your garment or project.
Pleating Fabric
After mastering the shirring process, you’ll find pleating fabric for smocking to be a delightful change of pace. Pleating methods are key to creating the fabric texture and drape that make smocking stand out.
As you embark on this sewing experience, you’ll weave decorative effects into your fabric, transforming it into a canvas of intricate folds. Remember, the right pleats can turn a simple piece of cloth into a work of art, so take your time to get them just right.
Your patience will pay off in the stunning results that only hand-pleated smocking can achieve.
Embroidery Techniques
Once you’ve pleated your fabric, it’s time to dive into the world of embroidery techniques. Think of your needle as a magic wand, ready to transform those neat folds into a canvas of creativity.
With embroidery, you’re not just stitching; you’re embellishing your fabric with a personal touch of artistry. Whether you’re aiming for a subtle hint of elegance or a bold statement piece, the design considerations are endless.
Let your creative inspiration flow as you explore various embellishment options, from simple stitches that whisper to intricate patterns that shout from the rooftops. Remember, each stitch is a step on the journey to a masterpiece that’s uniquely yours.
Finalizing Pleats
Once you’ve mastered the embroidery stitches and pleating techniques, it’s time to finalize those pleats.
This is where your smocked garment starts to sing, with decorative patterns emerging like magic from the pleated fabric.
Think of it as the grand finale of a fireworks show, where all the sparks come together to create a dazzling display.
Your careful work with needle and thread transforms simple pleats into a stunning garment embellishment.
Choosing the Right Project
When selecting a project, it’s crucial to consider the fabric and pattern adjustments required for shirring or smocking.
For shirring, choose patterns with ease and lightweight fabrics like voile or rayon challis, as the technique reduces width significantly.
Smocking, while intricate, doesn’t use elastic, so patterns may need altering for the right fabric width.
Fabric Selection
Continuing from the smocking process, let’s dive into the art of selecting the perfect fabric for your project. It’s not just about picking a pretty pattern; it’s a dance with fabric weight, drape, transparency, stretch, and texture.
- Fabric Weight: Go for lightweight champions like voile or rayon challis that will gracefully pirouette with every gather.
- Fabric Drape: Seek out fabrics that flow like a river, ensuring your shirring or smocking falls just right.
- Fabric Stretch: While shirring befriends a bit of stretch, smocking prefers the stability of non-stretchy companions.
Pattern Adjustments
When you’re diving into the world of sewing, pattern adjustments are like your secret sauce for a perfect fit. Imagine you’ve found the dreamiest lightweight fabric, as light as a feather and just right for shirring.
You’re halfway there! But before you get stitching, you’ll need to tweak that pattern like a maestro tuning an instrument.
You see, shirring cinches your garment’s width like a gentle hug, roughly halving it. So, if you’re not keen on playing sardines with your dress, you’ll need to size up the ease.
And here’s a nugget of wisdom: always, and I mean always, give your fabric a get to know you wash and dry. It’s like a first date for your fabric and the future washes it will endure. This way, you avoid any post-sewing shrinkage surprises that could turn your chic dress into a doll-sized debacle.
So, grab your ruler and chalk, and let’s mark those shirring lines with the precision of an archer. Remember, it’s not just about making it smaller; it’s about keeping that silhouette flattering and free.
With a bit of patience and some savvy sizing adjustments, you’ll be crafting garments that fit like they were made just for you.
Troubleshooting
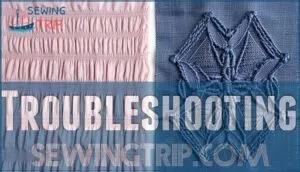
When tackling shirring and smocking, it’s crucial to understand that each technique comes with its own set of challenges.
You’ll find that shirring might require adjustments in bobbin tension or stitch length to achieve the desired elasticity and gather.
On the other hand, smocking, being more intricate, demands precision in pleating and embroidery to maintain its decorative appeal.
Both techniques, while rewarding, may necessitate a bit of troubleshooting to perfect, whether it’s managing thread tension for shirring or mastering the art of pleating for smocking.
Shirring Issues
When tackling shirring, you might feel like you’re trying to tame a wild beast with just a needle and thread. But fear not! If your fabric’s not gathering like a flock of sheep, it’s time to play detective with your machine settings.
First, check that bobbin tension—think of it as the reins that control the elastic thread. Too loose and your shirring will be as flat as a pancake; too tight, and you’ll snap that thread faster than a rubber band in a tug-of-war.
Next up, stitch length. This is the stride of your shirring journey. A longer stitch will gather your fabric like a crowd at a concert, while a shorter one might leave you with more space than a ghost town.
And let’s not forget fabric choice. Pick a lightweight contender, or you’ll be wrestling with your shirring like trying to fold a map in the wind.
If you’re still in a pickle after all that, remember, troubleshooting is your friend. Test on scraps before you dive into the real deal, and don’t be afraid to adjust as you go.
Smocking Challenges
After wrestling with the shirring, you might think smocking will be a walk in the park, but hold your horses! Smocking preparation is an art in itself, requiring pleating precision that would make a Swiss watchmaker nod in approval.
You’ll need the patience of a saint and the steady hand of a surgeon to ensure your pleats are as even as a freshly mowed lawn.
Embroidery tension is another beast to tame; too tight, and your fabric puckers like a prune, too loose, and it’s as wavy as the sea. And let’s not forget pattern adjustments; they can be as tricky as a Rubik’s Cube.
But once you’ve mastered the delicate dance of decorative smocking, you’ll be stitching with the pride of a peacock. Just remember, it’s all about the details, so take a deep breath, and let’s dive into the smocking sea.
Variations and Creativity
When you’re ready to add a touch of elegance and functionality to your sewing projects, consider the artistic possibilities of shirring and smocking.
While shirring brings in fabric with elasticated rows to create a stretchy, textured effect, smocking takes it a step further with hand-embroidered pleats that form intricate patterns.
Both techniques not only gather fabric but also infuse your garments with a unique aesthetic that’s as practical as it’s beautiful.
Decorative Elements in Shirring
When you’re ready to add a pinch of pizzazz to your sewing projects, shirring is your go-to technique for a touch of stretch and a dash of decorative delight. Imagine transforming a plain piece of fabric into a textured treasure trove with rows of elasticized stitches that hug the fabric like a cozy blanket on a chilly evening.
Now, let’s talk threads and thrills. Swap out your regular bobbin thread for a spool of colored elastic, and watch the magic unfold under your presser foot. As you guide your fabric through, each row of stitching becomes a wave of wonder, creating a concertina of comfort that adds shape and style to your garment.
But why stop there? Let’s sprinkle some extra sparkle onto this fabric feast. Grab some patterned fabric that sings with color, and let those shirred rows dance across it like a painter’s brush strokes.
And for the grand finale, why not add a smattering of fabric embellishments? A few well-placed beads can turn your shirring from simple to simply stunning.
Intricate Patterns in Smocking
As you dive into the world of smocking, you’ll find that the devil is in the details—and what delightful details they are! Smocking motifs are the heart and soul of this technique, turning simple pleats into a canvas of intricate patterns.
Imagine the precision of pleating methods, where every stitch is a deliberate step in a dance of thread tension and fabric. It’s like painting with needles, where color combinations bring life to historical inspiration, each stitch a stroke of the past.
Now, don’t think for a second that smocking is just a walk in the park. It’s an art form that demands your full attention. But oh, when you get it right, the results are nothing short of spectacular. You’ll be threading a story with every pleat, creating a masterpiece that’s as functional as it’s beautiful.
Practical Applications
When you’re ready to add a touch of elegance or a snug fit to your sewing projects, consider the techniques of shirring and smocking.
Shirring, often applied to areas like the yoke, bodice, and sleeves, uses elastic thread to gather fabric, providing both flexibility and a form-fitting shape.
On the other hand, smocking, suitable for necklines, cuffs, and bodices, involves hand embroidery over pleated fabric to create decorative patterns without the need for stretch.
Both methods are perfect for lightweight fabrics and can transform the fit and style of your garments.
Garment Types for Shirring
As you dive into the world of sewing, you’ll find that shirring is a nifty technique to add a pinch of magic to your creations. Imagine transforming a plain Jane bodice into a work of art with just a few rows of elastic thread—voilà, you’ve got bodice gathering that’s both functional and fetching! And don’t even get me started on sleeves; a simple sleeve variation can take a garment from meh to marvelous faster than you can say bobbin.
Now, if you’re looking to add a touch of elegance to a neckline, shirring can be your secret weapon. It’s like the fairy godmother of sewing techniques, turning a drab neckline accent into a Cinderella story.
So, grab your lightweight fabrics and let your creativity run wild. Whether it’s a shirred summer dress that dances in the breeze or a blouse that hugs just right, shirring is your ticket to a wardrobe that’s as unique as you are.
Just remember, while shirring may seem like a spellbinding trick, it’s all in the technique—and you, my friend, have the power to master it.
Garment Types for Smocking
When you’re diving into the world of smocking, think of it as sculpting with thread on the canvas of fabric. Smocking on collars transforms a plain neckline into a statement piece, whispering of old-world charm.
Picture a baby’s dress, the yoke smocked with care, each pleat a testament to the love stitched into it. Smocking for baby clothes isn’t just about aesthetics; it’s practical, allowing for growth and movement.
Now, let’s talk sleeves. Smocking on sleeves is like adding a secret ingredient that turns a simple sleeve into a puff of magic, elastic enough to dance around little arms. And don’t get me started on smocking for embellishments—it’s like the cherry on top of a sundae, the final flourish that says, I’m no ordinary garment; I’m a masterpiece.
Whether it’s smocking with lace to add a touch of elegance or creating a smocked masterpiece on a summer dress, this technique is your ticket to turning the ordinary into the extraordinary.
Frequently Asked Questions (FAQs)
Can shirring or smocking be used to repair stretched-out garment areas, such as a sagging neckline or waistband?
Yes, shirring or smocking can be a creative fix for stretched-out areas like a sagging neckline or waistband.
Just remember, it’s a bit like giving your garment a facelift—precision and patience are key. Shirring, with its elastic thread magic, can cinch things back into shape, while smocking can add a pinch of charm to the fix.
So, grab your needle or sewing machine and let’s give those beloved pieces a second chance to dazzle.
How do environmental factors like humidity and temperature affect the durability of shirring and smocking over time?
Humidity and temperature can be the Achilles’ heel of your shirring and smocking. They may cause the elastic to become brittle or the fabric to lose its gathered texture over time.
Are there any historical or cultural significances associated with the use of shirring or smocking in clothing design?
Shirring and smocking aren’t just sewing techniques; they’re threads woven into the fabric of history.
Shirring, with its elastic thread magic, brings a stretchy charm to garments, making them fit like a glove without a corset’s squeeze.
Smocking, on the other hand, is like the embroidery world’s show-off, turning simple pleats into intricate patterns that have danced through fashion’s evolution from practical peasant wear to high-end couture.
Both techniques have shaped clothing design, echoing the whispers of past eras where functionality met beauty. Whether it’s the smocked Liberty dresses that freed women from tight lacing or the shirred tops that hug you just right, these methods stitch together stories of innovation, tradition, and the timeless quest for comfort and style.
Can shirring and smocking techniques be applied to non-fabric materials for artistic or practical purposes?
You’re in for a treat if you’ve ever wondered whether the art of shirring and smocking could leap off the fabric and onto other materials.
Imagine, just for a second, turning the mundane into the magnificent. Yes, both shirring and smocking techniques can indeed be applied to non-fabric materials for both artistic and practical purposes.
Think about paper crafts, where shirring could add texture to handmade cards or scrapbook pages. Or envision smocking patterns enhancing the surfaces of polymer clay projects, adding a touch of elegance to jewelry or decorative items.
The sky’s the limit when creativity takes the wheel, so why not give it a whirl on your next project?
What are the ergonomic considerations for sewers when performing extensive shirring or smocking, especially in a professional setting?
Ensure you’re sitting pretty with good posture and taking regular breaks to avoid strain when you’re lost in the rhythm of shirring or smocking.
It’s a marathon, not a sprint, so pace yourself!
Conclusion
Funny how things turn out, isn’t it? Just when you thought shirring and smocking were one and the same, you’ve discovered they’re as different as chalk and cheese.
Shirring, with its elastic thread magic, brings a stretchy, gathered charm to garments, making them fit snugly and comfortably.
Smocking, on the other hand, is the grand display of embroidery over pleated fabric, adding a decorative flourish that’s both intricate and stunning.
Whether you’re leaning towards the practical elasticity of shirring for a summer dress or the ornate beauty of smocking for a special blouse, you’re now equipped to choose wisely.
So, go ahead, pick your project, and let your creativity flow!

