This site is supported by our readers. We may earn a commission, at no cost to you, if you purchase through links.
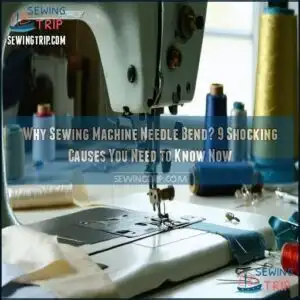 A sewing machine needle bends when it’s under stress it wasn’t built to handle.
Using the wrong needle size for your fabric, sewing over pins, or tackling thick layers without proper adjustments can all cause bending. Misaligned machine parts or improper threading can also throw things out of whack.
Even a worn or damaged needle is more prone to bending. Think of it like trying to cut a steak with a dull knife—it’s bound to fail.
Slow down, use the right tools, and keep your machine well-maintained to avoid the headache (and heartbreak) of bent needles. Curious about more fixes?
Table Of Contents
- Common Causes of Sewing Machine Needle Bending
- Signs of a Bent Sewing Machine Needle
- Impact of Bent Needles on Stitch Quality
- Preventing Sewing Machine Needle Bending
- Diagnosing Bent Needle Issues in Sewing Machines
- Consequences of Using Bent Sewing Machine Needles
- Proper Needle Installation to Prevent Bending
- Addressing Specific Fabric Challenges Causing Needle Bending
- Machine Settings Affecting Needle Bending Risk
- When to Replace Vs. Attempt Straightening Bent Needles
- Frequently Asked Questions (FAQs)
- Conclusion
Common Causes of Sewing Machine Needle Bending
You’ll find several common culprits behind those frustratingly bent sewing machine needles that interrupt your creative flow.
From using the wrong needle size for your fabric to accidentally hitting pins while stitching, understanding these causes will help you avoid that telltale snap that every sewist dreads, and this knowledge can prevent frustratingly bent needles and the telltale snap.
Incorrect Needle Size for Fabric
Frequently, sewing machine needles bend simply because they’re mismatched with your fabric. Choosing the right needle size is like finding the perfect key for a lock—it prevents frustration and damage.
- Delicate fabrics need smaller needles: Using a size 16 needle on silk is like writing with a sharpie when you need a fine-point pen—it’ll leave holes and potentially bend under tension.
- Heavy fabrics require sturdy needles: Trying to push a size 9 needle through denim is asking for trouble—it’ll bend immediately.
Pay attention to both fabric thickness and density. Thread compatibility matters too! A needle that’s too thin for thick thread will struggle and bend. Your sewing speed also impacts needle stress—slower is safer when working with challenging materials.
Hitting Pins or Hard Objects
When your needle strikes pins or hard objects during sewing, you’re asking for trouble.
Pin strikes against zipper teeth, buttons, or the metal bobbin case can cause immediate needle deflection or breakage.
These sewing obstacles damage your machine and also create frustrating fabric snags.
Always remove pins before sewing over them, and hand-crank carefully near metal elements.
Keep your workspace free from debris to prevent bent needle causes.
Remember, most needle bending reasons stem from avoidable collisions – so stay vigilant to avoid costly sewing machine issues.
Misaligned Machine Parts
After dealing with pins that snag your fabric, let’s look at how your machine’s internal parts can cause needle bending problems.
Misaligned machine parts are silent needle killers. When your sewing machine’s internal components shift out of position, your needle takes the hit.
Three common alignment culprits:
- Feed dog height set incorrectly
- Loose screws causing frame damage
- Worn bearings affecting needle position
Part wear happens gradually, often unnoticed until you’re facing repeated needle bending. Check your presser foot pressure—it shouldn’t feel too tight or loose. Machine settings matter too! Regular maintenance prevents bearing failure and keeps your needle perfectly aligned for smooth stitching.
Excessive Fabric Thickness
Moving from machine alignment issues, your fabric stack can be just as problematic. When you tackle excessive fabric thickness, your needle faces serious resistance.
- Choose heavyweight needles (size 90-110) for dense materials
- Set longer stitch lengths to reduce fabric resistance
- Reduce your sewing speed by half when handling multiple layers
- Use a walking foot to evenly feed thick fabrics
Hand-turning the wheel through tough spots prevents needle bending and breakage. Understanding thread tension issues is essential to avoid further damage.
Worn or Damaged Needles
A worn needle dooms your sewing project before it begins. Like a dull knife, it causes more harm than good.
Watch for these damage signs:
- Bent tips creating uneven stitches and fabric pulls
- Burrs or roughness along the shaft causing thread breakage
- Dulled points that push fabric instead of piercing cleanly
Replace needles after 8-10 hours of sewing to prevent needle breakage and maintain stitch quality.
Improper Threading Technique
Many threading troubles stem from simple mistakes that lead to major headaches.
When your Thread Path is incorrect, tension becomes uneven, putting stress on your needle and causing needle bending. The Needle Eye must be threaded properly—front to back—to prevent resistance that leads to breakage.
Always check your Thread Tension when you notice problems. It’s surprising how often a simple rethread solves what seems like a complex issue!
Signs of a Bent Sewing Machine Needle
Your sewing machine’s needle may be secretly bent without you noticing right away. Watch for these clear bent needle symptoms that signal trouble brewing. Listen carefully for unusual clicking sounds – your machine shouldn’t sound like it’s popping popcorn!
When examining your needle, look for visible bending or slight wobbling during operation, which are classic signs of needle damage. You’ll notice fabric-related issues too – thread that breaks repeatedly, mysterious holes in your material, or fabric that puckers unnaturally.
Your stitches might start looking irregular or completely skipped in sections. Many sewists miss the subtle signs of needle wear until bigger problems develop. Run your finger gently down the needle’s shaft – any roughness indicates bending or damage.
Understanding thread tension issues is essential to prevent such problems. Don’t ignore these warning signs! Replacing a bent needle costs pennies compared to the machine repairs that might follow if needle bending issues continue unchecked.
Impact of Bent Needles on Stitch Quality
You’ll notice immediate problems in your stitching when you’re working with a bent needle, from skipped stitches to puckered fabric and broken threads.
Even a slightly bent needle can throw off your machine’s timing and transform your perfect project into a frustrating mess faster than you can say "seam ripper.
Skipped Stitches
Once you’ve spotted a bent needle, skipped stitches often follow as your first warning sign.
When your needle bends, even slightly, it fails to deliver thread properly to your bobbin hook.
Why does this happen? Bent needles create several issues:
- The needle deflects during fabric penetration, missing the timing with the hook mechanism
- Incorrect Needle Alignment prevents proper loop formation needed for complete stitches
- Thread Tension becomes erratic as the bent needle creates inconsistent thread paths
- Fabric Slippage increases as the needle struggles to maintain proper contact
Using the right needle size options can help prevent such issues.
Replace that needle before your project becomes a frustrating mess!
Uneven Stitch Patterns
When a needle bends, your once-perfect stitch patterns turn into a chaotic mess. You’ll notice uneven stitch patterns that can ruin your entire project.
| Issue | Cause | Solution |
|---|---|---|
| Zigzag Wobble | Needle Vibration | Replace needle |
| Thread Bunching | Thread Tension problems | Adjust tension dial |
| Wavy Lines | Fabric Stretch issues | Use stabilizer |
| Irregular Spacing | Stitch Alignment failure | Slow Sewing Speed |
Don’t ignore these signs – a bent needle causes more damage the longer you use it, leading to irregular stitch patterns and potentially causing further problems with your project.
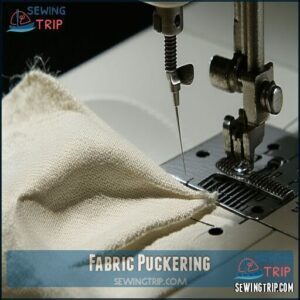
Fabric Puckering
When projects pucker, a bent needle is often the culprit.
Fabric tension goes haywire as the needle tugs instead of cleanly piercing your material.
Four main causes of puckering include:
- Bent needles struggling against fabric thickness
- Mismatched fabric choice for your needle type
- Incorrect seam quality settings on your machine
- Poor stretch control with knit materials
For effective pucker prevention, let your feed dogs do the work instead of pulling fabric manually.
Watch for rippling along seams—it’s a classic sign in your needle bending diagnosis.
Replace bent needles immediately to restore smooth stitching.
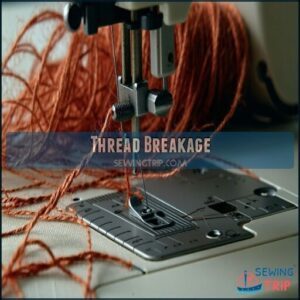
Thread Breakage
When you notice persistent thread breakage, bent needles are often the hidden culprit.
Like a kink in a garden hose disrupting water flow, needle bending creates uneven thread tension that weakens stitches and causes frustrating snaps.
Your thread simply can’t glide smoothly through a misaligned eye, leading to fabric fraying and inconsistent results.
Always check for needle wear before blaming your machine or threading technique.
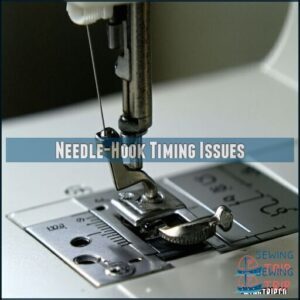
Needle-Hook Timing Issues
Timing issues can turn your peaceful sewing session into a frustrating ordeal. When needle-hook synchronization fails, needle bending often follows.
How to identify timing troubles:
- You’ll hear metallic clicks when the needle strikes the hook
- Your fabric shows irregular stitch patterns or thread loops
- The needle position seems off during rotation cycles
Poor hook clearance creates friction that weakens needles over time. A professional timing adjustment restores proper needle rotation and prevents future bending issues.
Preventing Sewing Machine Needle Bending
You can save yourself the headache of constantly replacing bent needles by implementing a few simple prevention techniques.
Matching the right needle to your fabric and maintaining proper machine settings won’t just extend your needle’s life—it’ll keep your sewing projects running as smoothly as your favorite sewing machine should.
Selecting Appropriate Needle Types
Stitch problems often reveal the wrong needle at work. Like choosing the right tool for a job, selecting appropriate needle types prevents bending and extends your machine’s life.
A wide variety of sewing needle products are available for various needs. Match needle sizes to fabric weights: size 70/10 for delicate silks, 90/14 for medium cottons, and 100/16 for denim.
Consider these pairings:
Needle Type Fabric Thread Compatibility
Your needle materials matter too—quality needles resist bending. Replace them after 8-10 hours of sewing regardless of appearance.
Regular Machine Maintenance
While quality needles matter, even the best will bend without proper sewing machine maintenance.
- Clean machine regularly by removing lint buildup after each project
- Oil moving parts according to your manual’s guidance
- Check timing often to prevent misalignments that stress needles
- Tighten loose screws that can create wobble and bent needles
- Inspect bobbin case for damage or burrs that catch threads
Your machine will thank you with smoother operation and fewer bent needles!
Proper Fabric Handling Techniques
Beyond good machine maintenance, mastering proper fabric handling is your next defense against bent needles.
Your Fabric Choice directly impacts needle stress—thicker materials need stronger needles. When guiding material, provide gentle Needle Guidance without pulling. Let the feed dogs do their job while you maintain minimal Fabric Tension.
For successful Seam Preparation, remove pins before stitching over them—they’re notorious needle-breakers. When working with heavy fabrics, slow your speed and use a walking foot for even Thread Control.
Stretchy knits? Use stabilizers to prevent pushing and pulling that leads to needle bending. Delicate silks need a light touch and appropriate needle size.
Remember: your fabric handling technique isn’t just about aesthetics—it’s essential protection against needle damage.
Adjusting Machine Settings
With proper machine settings, you can substantially reduce needle bending incidents.
Dial in these essential adjustments:
- Thread Tension Control – Find that sweet spot where threads interlock smoothly without straining your needle
- Stitch Length Regulation – Match to your fabric thickness; shorter for heavyweight materials
- Presser Foot Pressure Settings – Adjust just enough to secure fabric without forcing the needle through resistance
These calibrations prevent unnecessary stress that leads to bent needles.
Using Needle Insertion Tools
A specialized needle insertion tool can be your best defense against bent needles in your sewing machine.
These clever devices guarantee perfect needle alignment while eliminating the awkward fumbling that often leads to improper positioning.
When selecting a tool, look for options with comfortable grips and clear needle guides that match your machine model.
Master basic handle techniques by holding the tool steady and inserting with confident pressure.
Follow these insertion tips: align the flat side correctly, slide the needle up completely, and secure the clamp with moderate force.
You’ll notice immediately how proper tool usage prevents needle bending and maintains precise needle position—transforming a frustrating task into a simple one!
Diagnosing Bent Needle Issues in Sewing Machines
You’ll know your sewing machine needle has bent when your stitches suddenly look like they were sewn by a caffeinated squirrel.
Finding the root cause quickly can save you hours of frustration and prevent damage to your valuable machine, which is a critical aspect of maintaining your equipment.
Visual Inspection Techniques
Spotting a bent needle calls for keen Visual Checks before problems pile up.
Place your needle on a flat surface—if it wobbles instead of lying flat, you’ve caught a culprit.
Examine these critical areas:
- Needle tip – Look for bluntness or tiny burrs
- Needle eye – Check for asymmetry or warping
- Shank area – Should be perfectly straight
- Needle plate – Inspect for scratches that signal alignment issues
Thread Inspection and Fabric Examination can also reveal needle bending issues before damage spreads.
Sound and Vibration Analysis
Your sewing machine speaks through sound and vibration when facing needle issues. By recognizing distinct acoustic patterns, you can detect problems before they worsen.
- Metallic clicking sounds: Indicates needle striking the plate due to bending
- Progressive vibration intensification: Signals potential needle bar failure
- Thread tension sounds: Creates distinctive patterns before visible stitch problems
- Timing mechanism changes: Occurs when needle-hook synchronization becomes affected
Regular vibration monitoring helps identify needle positioning issues and prevents costly repairs.
To maintain the sewing machine regularly and prevent frequent needle plate collisions, regular upkeep is necessary.
Stitch Quality Assessment
While listening for unusual sounds is helpful, your stitch quality offers the most visible clues to needle bending.
Look closely at your work—uneven tension, puckered fabric, or skipped stitches often signal a bent needle. Check stitch consistency across the fabric grain; irregular patterns suggest needle issues.
Thread quality deteriorates with bent needles, causing breakage or shredding. You’ll notice sections where tension control seems impossible despite adjustments.
Compare a test stitch to normal samples—differences in appearance or feel indicate needle problems. Don’t waste time troubleshooting threading and tension if the real culprit is needle material integrity or needle sharpness.
Needle-Plate Interaction Check
Inside your machine, proper needle-plate interaction prevents bending disasters.
Listen for these troubling signs:
- Scraping sounds that make your heart sink when the needle hits the plate
- Unusual resistance that fills you with dread during fabric feeding
- Visible scratches that signal alarming plate damage and imminent needle failure
Check needle clearance regularly and maintain perfect plate alignment for smooth sewing success.
Consequences of Using Bent Sewing Machine Needles
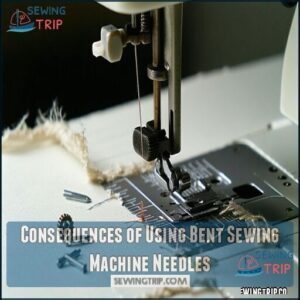
You’ll risk serious damage to both your machine and projects when you continue sewing with a bent needle.
A bent needle can tear your fabric, break internal machine parts, create uneven stitches, and even send dangerous metal fragments flying toward your face if it shatters.
Machine Damage Risks
Operating your machine with bent needles frequently causes serious internal damage.
When needles bend, they disrupt timing mechanisms, causing needle collision with bobbin components. Metal fragments accumulate inside precision parts, increasing wear on needle plates and hook assemblies.
Continued use leads to motor overload, strains drive systems, and damages thread delivery components. Bearing failure and gear damage often follow, resulting in costly repairs that exceed the price of regular needle replacement, which can lead to costly repairs and ultimately serious internal damage.
Fabric Damage Potential
Using a bent needle wreaks havoc on your precious fabrics in three devastating ways:
- Fabric Tears: Distorted needles create jagged punctures, causing thread snags and unsightly fabric frays.
- Seam Distortion: Irregular needle penetration leads to uneven stitches and puckered seams.
- Material Breakage: Repeated stress from bent needles weakens fabric structure, especially on delicate materials.
Don’t risk fabric damage! Always match needle size to fabric thickness and replace bent needles immediately.
Decreased Sewing Efficiency
Sewing with a bent needle drastically reduces your efficiency, transforming simple projects into frustrating ordeals.
Like driving with a flat tire, you’ll experience slow stitching speed and frequent fabric jams that interrupt your creative flow.
You’ll spend precious time dealing with broken threads and needle breakage instead of completing your project.
Each fabric jam requires troubleshooting and frequent adjustments to tension settings, robbing you of productive sewing time.
Regular sewing machine maintenance prevents needle damage and maintains peak efficiency.
Don’t let needle bending slow you down—that beautiful quilt or garment deserves your best equipment and uninterrupted attention.
Safety Hazards for Operators
Bent needles pose serious safety hazards that extend beyond machine damage.
When needles break unexpectedly, flying metal fragments can cause eye injuries or finger punctures.
Your hands may experience increased fatigue from fighting against a misaligned machine.
Needle damage often leads to fabric burns as threads snag and tension increases.
Even electrical shocks can occur if needle breakage damages internal wiring.
Don’t gamble with your safety—replace bent needles immediately rather than continuing to sew.
Remember, sewing safety isn’t just about protecting your project—it’s about protecting you, and it’s crucial to avoid serious safety hazards and potential electrical shocks by taking immediate action when a needle is bent.
Proper Needle Installation to Prevent Bending
You’ll save yourself countless headaches and broken needles by mastering proper needle installation in your sewing machine.
Proper installation includes inserting the needle to the correct depth, positioning the flat side in the right direction, and securing the needle screw tightly to prevent the annoying mid-project bends.
This will help you avoid the frustration that makes us all want to throw our machines out the window when we encounter mid-project bends that are caused by improper installation, highlighting the importance of securing the needle screw tightly.
Correct Insertion Depth
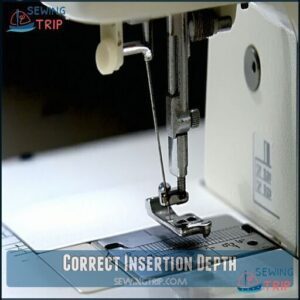
Your machine doesn’t come with a crystal ball, so proper needle insertion depth is your first defense against future headaches.
Think of it as parking—go all the way in! Fully seat your needle to the top of the clamp for perfect needle alignment.
- Push needle firmly upward until it stops
- Check clamp security with a gentle tug
- Confirm straight entry angle
- Use insertion tools for steady hands
- Test depth control before starting projects
Aligning Needle Flat Side
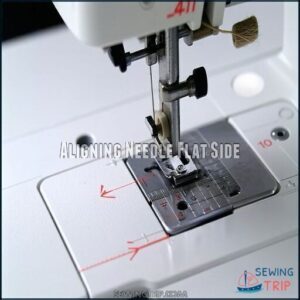
Beyond setting the right depth, properly aligning your needle’s flat side acts as your machine’s compass for smooth sailing.
Always position the flat side toward the back for perfect alignment.
Here’s why it matters:
- Maintains proper needle positioning in the needle slot adjustment
- Maintains your sewing machine calibration
- Prevents wobbling that leads to needle bending
- Guards your fabric edge control during stitching
Get this right and you’ll avoid the bent needle fix altogether!
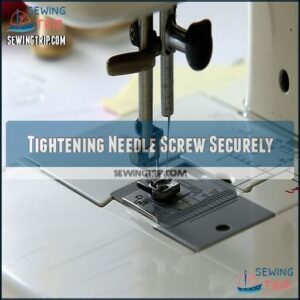
Tightening Needle Screw Securely
Once you’ve properly aligned your needle, securing the needle screw is your critical next step.
Think of needle screw tightening as finding the sweet spot—firm enough for stability without damaging your machine.
Issue Result
For secure fitting, turn the screw clockwise until you feel resistance, then a tiny bit more.
This technique prevents needle bending while maintaining proper needle installation.
Check before sewing—a properly tightened screw is your best insurance against bent needles!
Addressing Specific Fabric Challenges Causing Needle Bending
You’ll face unique challenges when working with different fabric types that can turn your trusty needle into a pretzel before you know it.
From denim that fights back to silky material that slides away, understanding how to match your needle and technique to each fabric’s personality will save you countless headaches and needle casualties, as it requires technique to handle each fabric type correctly.
Sewing Heavy Fabrics
Now that you’ve mastered proper needle installation, let’s tackle heavy fabrics—the notorious needle benders in your sewing adventures.
Heavy fabrics demand special attention to prevent needle bending.
There are several strategies to manage heavy fabrics:
- Choose industrial strength needles (size 90/14-110/18) designed specifically for dense fabrics
- Support fabric weight during free motion work to reduce needle stress by 40%
- Slow your sewing speed to 500 SPM or less when working with multiple layers
- Use specialized presser feet with greater clearance for thick materials
Working With Stretchy Materials
When tackling stretchy materials, your needle selection becomes critical to prevent bending disasters.
Choose ballpoint or stretch needles specifically designed to slide between fabric fibers rather than piercing them.
These specialized needles reduce resistance and minimize needle bending while creating elastic seams that maintain flexibility.
Set your machine to a stretch stitch and lower your thread tension for ideal results.
Don’t rush—slower sewing speeds give you better material handling control and reduce stress on the needle.
Support fabric from both sides to prevent pulling, which can force needles to flex and eventually bend.
Always test your fabric choice and machine settings on scraps first.
Remember, successful stretch fabric sewing isn’t about power—it’s about finesse and proper technique.
Handling Delicate or Slippery Fabrics
While stretchy fabrics challenge your machine with their give, delicate and slippery fabrics present their own needle-bending risks.
When handling silks, chiffons, or satins, select ultra-fine needles (size 8/60 or 9/65) with sharp points to prevent fabric damage and needle stress.
Lower your thread tension and reduce presser foot pressure to let these fabrics glide smoothly without resistance. Always stabilize slippery fabrics before sewing by using tissue paper underneath or spray starch.
Take your time and use shorter stitch lengths (1.5-2.0mm) to maintain control. Remember, excessive speed with delicate fabrics is the fastest route to bent needles and ruined projects.
Multi-Layer Sewing Techniques
While delicate fabrics require gentle handling, multi-layer projects present their own needle-bending challenges.
Tackling thick fabric stacks demands specialized techniques for success.
- Use a heavy-duty needle (size 90/14 or larger) designed for layered fabric
- Adjust presser foot pressure to accommodate sewing depth
- Practice proper fabric stacking to maintain needle alignment
- Slow your machine speed when crossing seams
- Hand-crank through the thickest sections to prevent needle breakage
When fabric thickness increases, so does needle bending risk. Your patience here prevents costly needle problems and frustrating project delays.
Machine Settings Affecting Needle Bending Risk
You’ll be surprised how your machine’s settings can turn your trusty needle into a bent disaster waiting to happen.
Your thread tension, stitch width, feed dog height, and presser foot pressure all work together like a finely tuned orchestra—when one setting is off, your needle often pays the price, because they are all critical components that must be properly adjusted to prevent damage, and ensuring their harmony is key to maintaining your machine’s performance and preventing a bent disaster.
Thread Tension Adjustments
After handling those tricky fabrics, you’ll want to check your thread tension – it’s a common culprit behind bent needles.
You can find helpful sewing machine tension products online.
Your tension dial works like a relationship counselor between your top and bottom threads. When tension is too tight, your needle strains against bobbin components, eventually bending during high-speed operation. Too loose, and the needle moves erratically, creating lateral stress.
Adjust gradually based on fabric thickness and thread type for ideal results, ensuring a smooth operation and preventing needle strain.
Stitch Length and Width Settings
With thread tension sorted, your stitch settings play a huge role in needle health.
Improper settings can turn your needle into a fragile liability.
- Match stitch length to fabric type: Using short stitches on heavy materials forces your needle to punch through dense layers repeatedly, causing stress that leads to bending.
- Watch your stitch width: Wide decorative stitches make your needle swing dramatically side-to-side, hitting parts it shouldn’t.
For thicker fabrics, increase stitch length slightly and reduce width.
Delicate materials need shorter, narrower stitches.
Remember, your machine settings directly impact needle longevity—adjust them wisely to prevent bent needles!
Feed Dog Height Regulation
While stitch settings influence needle performance, your feed dog height regulation is just as vital for preventing needle bends.
Feed dogs—those metal teeth below your stitch plate—need proper height adjustment based on fabric thickness.
| Fabric Type | Ideal Feed Dog Height | Impact on Needle | Signs of Wrong Height | Fix |
|---|---|---|---|---|
| Lightweight | Slightly lower | Less stress | Seam slippage | Raise gradually |
| Medium | Standard position | Balanced pressure | Uneven stitches | Check manual |
| Heavy | Slightly higher | Better control | Fabric jamming | Adjust for thickness |
| Stretchy | Lower with gentle pressure | Prevents distortion | Wavy seams | Balance with presser foot |
| Multiple layers | Higher than normal | Prevents bent needle | Stitch inconsistency | Increase gradually |
Proper regulation guarantees smooth fabric movement without forcing your needle to fight through material, ensuring better control and preventing needle bends with the right feed dog height for each fabric type, which is crucial for balanced pressure and to prevent distortion.
Presser Foot Pressure Control
Now that you’ve mastered feed dog height, let’s tackle presser foot pressure control – a vital element in preventing needle bends.
Your presser foot pressure directly impacts how fabric moves under the needle:
- Too much pressure crushes fabric, forcing the needle to fight through layers
- Too little pressure allows fabric to shift unpredictably
- Proper adjustment maintains needle clearance settings at their best
- Seasonal fabric changes require pressure adjustments
Adjust your foot pressure until fabric glides smoothly without resistance, substantially reducing needle bending risks.
When to Replace Vs. Attempt Straightening Bent Needles
You’ll save yourself time and headaches by knowing when to toss that bent needle instead of trying to straighten it.
While slightly bent needles might seem salvageable, they can damage your machine’s timing and leave your fabric with holes that no amount of seam-ripping can fix, which is why recognizing when to replace them is critical.
Assessing Degree of Needle Bend
A skilled seamstress knows that detecting bent needles early saves hours of frustration. When examining your needle, you’ll need to assess both the severity and location of any bend.
The severity and location of the bend can be assessed using the following guidelines:
| Bend Severity | Visual Signs | Action Required |
|---|---|---|
| Slight | Minor thread tension issues | Monitor closely |
| Moderate | Visible curve, skipped stitches | Replace immediately |
| Severe | Obvious bend, needle hitting plate | Replace and check machine |
| Partial | Bent only at tip | Never reuse |
| Total | Multiple bends or twists | Replace and adjust settings |
For proper needle inspection, roll the needle on a flat surface—any wobbling indicates bending. Hold it against a ruler’s straight edge to check needle alignment. Even minor bends can cause significant fabric impact and lead to needle breaking.
Remember: stitch analysis often reveals damage assessment before visual detection. If your stitches suddenly look uneven, your needle bend prevention failed. Trust your ears too—clicking sounds mean it’s replacement time.
Risks of Using Straightened Needles
Attempting to straighten a bent needle might seem like a money-saving hack, but it’s a risky gamble. When you straighten a bent needle, you compromise its structural integrity.
| Risk Factor | Consequence | Prevention |
|---|---|---|
| Needle Fatigue | Sudden breakage during projects | Replace at first sign of bending |
| Sewing Accuracy | Skipped stitches and uneven seams | Use fresh needles for precision work |
| Machine Damage | Timing issues and hook damage | Change needles regularly |
| Fabric Tears | Snags and pulls in your material | Inspect needle before each project |
| Safety Hazards | Flying needle shards | Never use compromised needles |
Even invisible micro-fractures can cause needle breakage, potentially damaging your machine or injuring you, which is why it’s crucial to prioritize safety hazards and avoid using compromised needles.
Proper Needle Disposal Methods
A bent sewing machine needle isn’t just annoying—it’s a sharp accident waiting to happen.
Safe disposal matters for needle care and waste management. Tossing it carelessly invites sewing needle problems. Instead, create a protective plan.
| Disposal Method | Why It’s Smart |
|---|---|
| Sharps Container | Stops accidental pricks |
| Recycled Pill Bottle | Keeps everyone safe |
| Eco-Friendly Box | A step toward greener disposal |
| Labeled Storage Bags | Simplifies needle recycling |
| Craft Store Drop-Off | Many offer free take-back options |
Make needle storage safe and Eco-Friendly by labeling containers. Prevention saves pricks—and frustration.
Choosing Replacement Needles
Choosing the right replacement needle is like finding the perfect puzzle piece—it just fits. Your needle selection depends on fabric types, thread compatibility, and sewing techniques.
Always match the needle size and type to your project to prevent needle bending and guarantee smooth stitching. Proper needle replacement techniques are vital for maintaining your sewing machine’s performance.
Here’s a quick guide:
| Fabric Type | Needle Size | Key Feature | Replacement Time |
|---|---|---|---|
| Lightweight | 60/8 – 70/10 | Sharp point | Every 6-8 hours |
| Medium | 80/12 – 90/14 | Universal tip | Every 8-10 hours |
| Heavy | 100/16 – 110/18 | Strong shaft | Every 4-6 hours |
| Stretch | 75/11 – 90/14 | Ball point | Every 6-8 hours |
Don’t skimp on quality—titanium-coated needles last longer, especially for tough fabrics.
Frequently Asked Questions (FAQs)
Why is my sewing machine bending pins & stitches?
Your sewing machine bends needles because of mismatched needle and fabric types, incorrect threading, or tension issues.
Check your manual, adjust tension, and use the right needle size for smooth, frustration-free stitching.
Why does my sewing machine bend or break needles?
Your needle bends or breaks when it’s mismatched with the fabric, poorly threaded, or under incorrect tension.
A zigzag stitch on a straight foot can also hit edges, causing trouble.
Always match tools to tasks!
Should you use a sewing machine if your sewing machine is bending?
Stop using the machine immediately if needles are bending.
It’s like driving with a flat tire—things will only get worse.
Check needle size, fabric compatibility, threading, and tension before continuing to prevent further damage.
Should you use a bent or dull needle when sewing?
Using a bent or dull needle is like driving on a flat tire—it’s a disaster waiting to happen.
It damages fabric, ruins stitches, and strains your machine.
Always replace it for smooth sewing.
Why does my sewing machine keep bending?
A bent needle often points to mismatched fabric and needle types, improper thread tension, or a zigzag stitch hitting the wrong foot.
Check your manual, adjust tension, and match needle size to fabric weight, which can help resolve issues related to a bent needle.
Can a sewing machine needle be bent?
Yes, it can.
A sewing machine needle bends when it’s under too much pressure, like sewing thick fabrics without the right needle size.
It’s like asking a toothpick to hold up a brick!
Why are some sewing needles curved?
Every cloud has a silver lining—curved needles aren’t always a mistake.
They’re designed for specialty tasks like embroidery or tufting, letting you sew at unique angles.
Just don’t confuse them with bent needles!
What problems occur when the needle is bent or dull?
A bent or dull needle causes skipped stitches, uneven seams, or fabric snags.
It might even jam your machine.
Think of it like driving with a flat tire—you’re asking for trouble and frustration!
How do you fix a sewing machine needle alignment?
A stitch in time saves nine—start by turning off your machine.
Loosen the needle clamp screw, realign the needle so it’s straight, and tighten the screw firmly.
Test with scrap fabric to verify alignment.
Why does my sewing machine needle keep snapping?
Your needle snaps because it’s mismatched to the fabric, poorly threaded, or under incorrect tension.
Check your needle type, size, and threading.
Also, make certain your presser foot and stitch settings match your project.
Conclusion
Ever wonder why sewing machine needle bend and how to stop it?
It’s all about using the right tools, techniques, and maintenance. From choosing the correct needle size to avoiding pins and adjusting for thick fabrics, small changes can save you big headaches.
Don’t ignore signs like skipped stitches or puckering—those bent needles can damage your machine and fabric.
Stay proactive, replace worn needles, and keep your machine in top shape for smoother sewing every time.
- https://www.quiltingboard.com/main-f1/please-help-brother-sewing-machine-keeps-bending-needles-t283017.html
- https://sewingmachineman.substack.com/p/sewing-machine-troubleshooting-101
- https://sewing.patternreview.com/SewingDiscussions/topic/54838
- https://www.reddit.com/r/sewhelp/comments/10slihg/why_do_my_needles_keep_bending_and_breaking/
- https://ask.metafilter.com/376260/Why-do-my-sewing-machine-needles-keep-bending

