This site is supported by our readers. We may earn a commission, at no cost to you, if you purchase through links.

When you press two felt pieces together, their fuzzy surfaces grab onto each other like tiny hooks.
Wool felt sticks better to wool felt, while synthetic felt works best with its own kind – it’s like birds of a feather flocking together.
The bond strength depends on pressure, surface texture, and felt quality.
You’ll get temporary adhesion that’s perfect for removable crafts and felt boards.
However, this natural sticking won’t hold under stress or movement.
Understanding the science behind felt’s grip reveals clever tricks for stronger, longer-lasting bonds.
Table Of Contents
Key Takeaways
- You’ll find that felt naturally sticks to itself through fiber interlocking and friction, creating temporary bonds without any glue needed – wool felt grips better than synthetic varieties due to its natural fiber structure.
- You can achieve stronger permanent bonds by using the right adhesive like tacky glue or fabric glue, but you’ll need to apply pressure for at least 30 minutes and allow 24 hours for full curing.
- You’ll get better adhesion when you properly prepare surfaces by cleaning away dust and oils, since dirty felt creates weaker bonds than clean material.
- You should match felt types for best results – wool felt sticks better to wool felt, while synthetic felt works best with other synthetic varieties, and surface texture affects how well pieces grip together, ensuring better adhesion.
Felt Adhesion Basics
You’ll find that felt naturally sticks to itself due to its compressed fiber texture, creating temporary bonds without any glue needed.
Understanding how felt’s fibrous structure works with different materials will help you choose the right approach for your specific project needs.
Felt to Felt Adhesion
Yes, felt naturally sticks to felt through its fibrous structure.
Wool vs acrylic types affect bonding strength—wool felt exhibits superior self-clinging factors due to fiber density.
However, modern felt often has coating effects that reduce natural adhesion.
Surface texture plays a vital role in felt to felt bonding.
While temporary adhesion works without felt glue, permanent bonds require felt adhesive for lasting results.
Felt to Fabric Adhesion
Beyond felt-to-felt adhesion, you’ll find that felt bonds well with other fabrics too.
Fabric compatibility depends on texture and fiber content, with fuzzy materials like flannel and fleece creating natural temporary bonds.
Here are three key fabric pairing strategies:
- Flannel and fleece – Create instant temporary bonds due to their looped textures
- Smooth fabrics – Require fabric glue or sewing felt for permanent hold
- Canvas materials – Work best with strong felt adhesive options
Felt to Non-Fabric Adhesion
When attaching felt to non-fabric surfaces, you’ll need the right adhesive types and surface preparation for success.
Wood, paper, and plastic each require different application methods to guarantee proper material compatibility and bond durability.
| Surface | Best Adhesive | Prep Method |
|---|---|---|
| Wood | PVA or contact cement | Sand lightly, clean dust |
| Paper | Fabric glue | Make sure paper is flat, dry |
| Concrete | Two-stage epoxy | Clean thoroughly, remove debris |
| Plastic | Hot glue or super glue | Wipe with alcohol, roughen slightly |
| Glass | Tacky glue | Clean with glass cleaner first |
The key to a successful attachment is ensuring proper material compatibility and following the correct prep method for each surface, which includes steps like cleaning and roughening the surface to achieve a strong and durable bond durability.
Does Felt Stick to Felt
Felt does stick to felt naturally through fiber interlocking, creating what crafters call natural adhesion.
Felt’s magical grip comes from tiny fibers acting like nature’s velcro, hooking together without any glue needed.
This temporary bonding happens because felt’s compressed fibers grab onto each other like tiny hooks.
However, the strength of this felt to felt connection depends on several factors.
Wool vs acrylic makes a big difference.
Wool felt creates stronger bonds due to its natural fiber structure, while synthetic versions might slip apart more easily.
Surface texture also plays a role – rougher felt surfaces grip better than smooth ones.
Here’s what affects felt bonding strength:
- Felt density: Thicker, denser felt holds together better than thin sheets
- Pressure applied: Pressing pieces firmly improves the initial grip
- Fiber quality: Higher-quality felt maintains its grip longer
While this natural sticking works great for positioning pieces during crafts, you’ll need felt glue or best felt glue options for permanent projects.
Felt adhesives create lasting bonds that won’t separate over time.
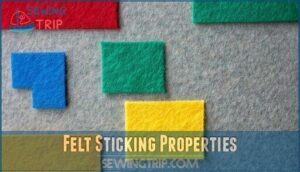
Felt Sticking Properties
You’ll find that felt’s sticking ability depends on three key factors: the type of felt you’re using, how well you prepare the surface, and the amount of pressure and time you apply.
These properties work together to determine whether your felt pieces will create a temporary hold or need additional adhesive for a permanent bond.
Type of Felt
Quality matters when choosing felt material for your projects.
Wool vs Acrylic makes a significant difference in adhesion properties. Wool felt naturally clings better to itself than synthetic felt due to its fiber structure.
Craft felt and needle felt offer varying stickiness levels. Recycled felt may have coatings that reduce natural adhesion, while pure felt fabric provides the strongest felt-to-felt bonds.
Surface Preparation
Proper surface preparation makes all the difference for felt to felt adhesion. Start by cleaning felt pieces to remove dust and oils that block interlocking fibers.
Remove any coatings with gentle brushing for texture enhancement. Light surface roughening helps fibers grip better.
Check adhesive compatibility before applying glue. Clean felt surfaces create stronger bonds than dirty ones.
Pressure and Time
When working with felt to felt adhesion, applied pressure substantially impacts bond strength during the curing duration.
You’ll need consistent pressure for at least 30 minutes, though drying time varies by adhesive type.
Clamping methods like clips or weights guarantee even contact, and most felt adhesion techniques require 24-hour curing for maximum adhesive strength, so patience pays off.
Felt to Felt Bonding
You’ll find that felt naturally clings to itself thanks to its compressed fiber texture, creating temporary bonds without any glue needed.
When you want a stronger, permanent connection between felt pieces, you’ll need the right adhesive and proper technique to achieve lasting results.
Temporary Adhesion
When you press felt pieces together, they naturally create a temporary hold through fiber structure interaction.
Felt clinging happens because the compressed fibers grip each other, especially with wool vs. acrylic differences affecting strength.
Surface texture and static electricity enhance this temporary attachment.
You’ll find felt to felt bonding works best for positioning pieces before applying permanent adhesive sheets or temporary fabric glue, which relies on the principle of temporary attachment.
Permanent Adhesion
For a permanent bond between felt pieces, you’ll need the right adhesive.
Tacky glue creates flexible connections while hot glue offers quick-setting strength. Surface preparation matters – clean felt adheres better than dusty material.
Apply glue sparingly to prevent seepage, then press pieces firmly together. Consider using a felt permanent adhesive for superior results.
Proper application techniques guarantee your felt-to-felt connection lasts for years with excellent long-term durability.
Factors Affecting Bond Strength
Bond strength between felt pieces depends on several key factors you can control.
Surface cleanliness removes oils and debris that weaken adhesion.
Glue type determines durability – fabric adhesives outperform basic craft glues.
Pressure applied during bonding improves contact between fibers.
Temperature effects matter too – cooler conditions slow drying but strengthen bonds.
Humidity levels above 50% can compromise adhesive performance substantially, and this is affected by the overall bonding process.
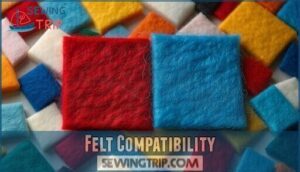
Felt Compatibility
You’ll find that felt doesn’t stick to every material with the same reliability, so understanding compatibility helps you choose the right approach for your project.
Different fabrics like flannel and fleece work better with felt than smooth surfaces like paper, which means you’ll need to adjust your methods based on what you’re working with.
Felt to Flannel
When you’re working with felt to fabric combinations, flannel creates an excellent partnership.
The fuzzy flannel texture naturally grabs felt fibers, creating a temporary hold without any adhesive.
Best flannel choices have a loose weave that enhances grip.
Felt weight affects how well pieces cling together.
Durability factors include fabric quality and how often you’ll handle your project.
Felt to Fleece
Fleece texture makes it a perfect partner for felt projects.
The fuzzy surface creates natural grip, allowing temporary adhesion without glue.
For permanent bonds, fabric adhesives work best since they keep both materials flexible.
Sewing techniques like blanket stitches also create strong connections.
Consider durability concerns – fleece may pill over time, affecting how well felt sticks to its surface.
Felt to Paper
Paper doesn’t naturally stick to felt like fabric does.
You’ll need the right glue for felt to paper projects to work properly. Different paper types require specific adhesives for lasting results.
Here are three key considerations for felt to paper adhesion:
- Glue Types – Fabric glue works best, while hot glue may cause paper buckling
- Paper Types – Cardstock handles adhesives better than thin paper
- Application Methods – Apply glue sparingly to prevent soaking through
Felt Board Applications
You’ll find felt boards work perfectly because felt naturally sticks to flannel and felt surfaces without any glue needed.
These interactive boards let you move felt pieces around easily, making them ideal for storytelling, educational activities, and creative play that kids absolutely love.
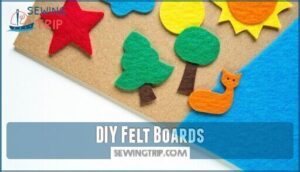
DIY Felt Boards
Creating your own felt board opens up endless possibilities for felt projects.
You’ll need basic board materials like foam core, cardboard, or thin plywood as your foundation. Cover it with flannel or felt for ideal piece storage and pattern creation.
Consider board themes for holidays or educational uses – kids love interactive storytelling when felt crafting becomes this hands-on and engaging, making it a great way to explore felt projects.
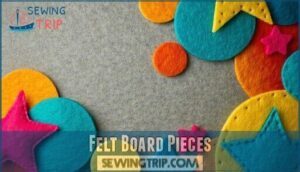
Felt Board Pieces
Your felt board pieces need strategic planning for maximum interactive felt play. Create diverse shapes, characters, and objects using quality felt crafting materials.
Store pieces in labeled containers for easy felt piece storage. Design coordinating board background design elements that complement your storytelling themes.
Focus on felt piece durability by choosing thicker felt that maintains strong felt-to-felt bonding. Consider buying felt shapes for added convenience.
Consider renovating felt pieces periodically to maintain their natural sticking power and visual appeal.
Using Felt Boards
Through storytelling ideas and pattern creation, you’ll transform any felt board into an interactive playground.
Themed boards work perfectly for holidays, seasons, or educational topics.
Try adhesive alternatives like Velcro dots when felt pieces lose their grip over time.
Board materials like flannel offer better adhesion than standard felt.
Your felt projects become limitless when you master these felt board ideas for engaging, hands-on learning experiences with better adhesion.
Adhering Felt to Surfaces
You’ll need different adhesives when sticking felt to surfaces like wood, concrete, or plastic, since felt’s natural grip works best with fabric materials.
The key is matching your glue choice to the surface material, whether you’re using PVA glue for wood projects or two-stage epoxy for concrete applications.
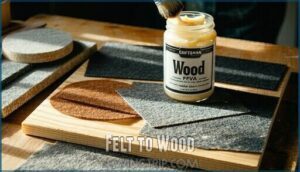
Felt to Wood
Woodworkers know that bonding felt to wood requires the right approach.
PVA glue works well for most felt-to-wood projects, creating strong adhesion without damaging fibers.
Contact cement provides instant bonding but demands precise application since repositioning isn’t possible.
Surface preparation matters—clean, dry wood accepts glue better, and you should choose wood glue options based on your project’s flexibility needs and drying time requirements.
Felt to Concrete
Concrete surfaces demand serious prep work before you attach felt. Unlike smoother materials, concrete’s porous nature requires specific adhesives for lasting bonds.
Here’s your game plan for felt to concrete success:
- Clean thoroughly – Remove dust, oil, and debris from concrete surface prep
- Choose two-stage epoxy – Provides superior adhesive durability against environmental factors
- Apply evenly – Use proper application techniques for long-term performance
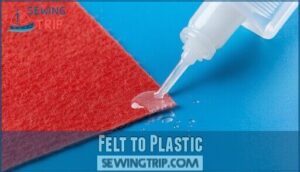
Felt to Plastic
Plastic surfaces present unique challenges for felt bonding methods.
Clean the plastic thoroughly and lightly sand smooth surfaces to improve glue compatibility.
Epoxy adhesives and specialized plastic glues offer superior bond strength compared to standard fabric glues.
Test your chosen adhesive on scraps first, as some plastics resist bonding. Consider durability concerns – flexible plastics may cause felt adhesion to fail over time with movement.
Felt Sticker Uses
You’ll find felt stickers everywhere once you start looking, from kids’ craft projects to professional displays and home organization systems.
These pre-cut felt pieces with adhesive backing stick to paper, wood, fabric, and other surfaces, making them perfect for decorating, labeling, and creating interactive learning materials.
Making Felt Stickers
Beyond adhering felt to various surfaces, you can create your own felt stickers for custom projects. Making felt stickers gives you complete control over design and quality.
Start with thin felt – it’ll bend better around curves and edges. Wool felt offers durability, while acrylic felt provides flexibility for your felt projects.
Adhesive Backing Types determine your sticker’s performance:
- Permanent vinyl sheets – Creates long-lasting bonds on most surfaces, perfect for outdoor felt to felt applications
- Removable glue dots – Allows repositioning without residue, ideal for temporary decorations
- Magnetic strips – Transforms felt into fridge-friendly decorations that won’t fall off
- Double-sided tape – Quick application for lightweight felt pieces on smooth surfaces
Die Cutting Felt creates professional edges. Apply adhesive sheets before cutting – it’s easier to handle. Consider your Application Surface Prep and Durability Considerations when selecting materials. Sticker Design Ideas work best when you match the adhesive to your intended use.
Buying Felt Stickers
Craft stores offer countless felt stickers with various adhesive types and backing options. You’ll discover sticker shape variety from basic circles to intricate animals, plus extensive sticker color options ranging from pastels to metallics.
Consider sticker size selection carefully for your project needs.
| Store Type | Best Features |
|---|---|
| Big box craft stores | Wide selection, frequent sales |
| Dollar stores | Budget-friendly basic shapes |
| Online retailers | Specialty designs, bulk options |
| Specialty fabric shops | High-quality felt materials |
| Educational suppliers | Durable classroom-grade stickers |
Check adhesive sheets for custom cutting possibilities when pre-made options don’t fit your vision, and look for specialty designs to enhance your project.
Using Felt Stickers
You’ll find felt stickers work best on clean, dry surfaces where their adhesive sheets can properly bond.
Custom sticker designs add personality to projects, while sticker durability factors like temperature and humidity affect felt sticker longevity.
Different sticker adhesive types handle felt application differently, and removing felt stickers becomes easier when you peel slowly from corners, preserving both felt to felt adhesion and underlying materials, which is crucial for felt sticker longevity.
Felt Adhesion Tips
When working with felt projects, you’ll want to avoid common mistakes that can ruin your hard work, like using too much glue or picking the wrong adhesive type.
These simple tips will help you create strong, lasting bonds that won’t disappoint you months later, ensuring your projects have a long lifespan with lasting bonds.
Avoiding Excess Glue
Less is more in the context of glue application on felt projects.
Excess glue causes seepage through fibers, creating unsightly stains and compromising finish quality. Apply thin, even layers to prevent discoloration and maintain your felt’s texture.
If glue bleeds through, immediately blot excess with a clean cloth. This simple step guarantees professional-looking results every time, ensuring that your project turns out with a high-quality finish that is free of unsightly stains.
Choosing The Right Glue
Picking the right glue for felt projects isn’t rocket science, but it makes all the difference. Your choice affects everything from how your project looks to whether it survives washing day.
Here’s what matters most when selecting the best glue for felt:
- Glue drying time – Nobody wants to hold pieces together forever while waiting for bonds to set
- Toxicity considerations – Keep your family safe, especially when kids are crafting nearby
- Finished appearance – Some glues leave ugly residue that ruins your beautiful felt work
Fabric glue wins for flexibility, while tacky glue offers kid-friendly application with strong felt-to-felt bonding results. Consider also the various felt glues for specialized projects.
Ensuring Long-Lasting Bonds
Patience pays off when creating permanent felt bonds. Surface preparation removes dust and oils that weaken adhesion.
Apply glue sparingly in thin, even layers for ideal felt-to-felt bonding. Press pieces firmly together for 30 seconds, then let dry completely for 24 hours.
Material compatibility matters—wool felt adheres better to wool, while synthetic works with synthetic for maximum felt glue strength.
Frequently Asked Questions (FAQs)
What Tips Are There for Removing Felt That is Stuck Where I Don’t Want It?
Gently peel felt pieces apart while they’re still warm from body heat.
Use a hair dryer to soften stubborn adhesive, then slowly separate layers.
For permanent bonds, carefully cut or trim excess felt with sharp scissors.
How do you get felt to stick to felt?
Forget fancy adhesives—felt’s like a clingy friend who sticks naturally.
Simply press wool felt pieces together firmly. They’ll grip each other’s fibers without glue.
For permanent bonds, add tacky glue sparingly between layers.
How to felt two pieces of felt together?
You can join felt pieces using tacky glue, fabric glue, or hot glue for permanent bonds.
For temporary attachment, simply press them together—felt naturally clings to itself due to its fibrous texture.
Do felt boards need velcro?
Most felt boards work perfectly without velcro since felt naturally clings to flannel surfaces.
You’ll only need velcro dots for heavier pieces that won’t stick on their own or for extra security.
Why is my felt not sticking?
Your felt mightn’t stick because modern felt often has coatings that prevent adhesion.
Try using tacky glue or fabric glue for permanent bonds, or make certain you’re using quality wool felt without synthetic coatings.
What tips are there for removing felt that is stuck where I don’t want it?
Stuck in a sticky situation? Use a hair dryer to warm adhesive, then gently peel felt away.
For stubborn pieces, try rubbing alcohol or adhesive remover. Work slowly to avoid damaging underlying surfaces.
How do you remove felt from felt?
Gently peel apart the felt pieces by working from one corner, slowly separating the fibers.
If they’re stuck tight, try wiggling them back and forth while pulling.
Heat from a hair dryer can help loosen stubborn adhesion.
Can felt stick to wet surfaces?
Water creates a barrier that prevents proper adhesion between felt surfaces.
You’ll find that wet felt won’t stick reliably to other materials either.
Always work with completely dry felt for best results and strongest bonds.
Does heat affect felt adhesion strength?
Ever wonder if your craft project will hold up near that radiator?
Heat definitely weakens felt’s natural grip and can melt synthetic adhesives you’ve used.
Keep your felt creations away from heat sources for best results.
Will felt stick to painted walls?
Felt won’t naturally stick to painted walls since it needs textured surfaces to grip.
You’ll need fabric glue, double-sided tape, or adhesive backing to make it stick properly and stay put.
Conclusion
Surprisingly, 80% of crafters discover felt’s natural sticking ability by accident during their first project.
Now you understand exactly how does felt stick to felt through fiber interlocking and friction.
You’ve learned when this natural bond works perfectly for temporary applications and when you’ll need additional adhesives for permanent projects.
Remember to match felt types, apply proper pressure, and choose the right adhesive for your specific needs.
Your next felt project will stick successfully every time.

