This site is supported by our readers. We may earn a commission, at no cost to you, if you purchase through links.

Choose tear-away stabilizers for stable fabrics like cotton, cut-away for knits and stretchy materials.
Position your fabric smoothly in the outer hoop, press the inner ring down evenly, and adjust tension until it sounds like a drum when tapped.
Avoid common mistakes like hooping too loosely, which causes puckering, or too tightly, which distorts fabric grain, by understanding the secret lies in how different fabric weights respond to pressure and stabilizer combinations.
Table Of Contents
Key Takeaways
- You’ll achieve drum-tight fabric tension by tightening gradually and checking all sides – the fabric should sound like a drum when tapped, but don’t overstretch it.
- You’ll prevent puckering and distortion by choosing tear-away stabilizers for stable fabrics like cotton and cut-away stabilizers for stretchy materials and knits.
- You’ll get professional results by selecting the right hoop size for your design – match circular hoops for even tension distribution and rectangular frames for larger linear patterns.
- You’ll avoid common mistakes by aligning fabric grain with hoop edges, removing fabric immediately after stitching to prevent hoop burn, and never pulling fabric while it’s secured to ensure stable fabrics.
Mastering Hoop Fundamentals
Perfect hooping forms the foundation of professional embroidery results, preventing common issues like puckering, misalignment, and poor stitch quality that frustrate many stitchers.
You’ll achieve consistent, smooth embroidery when you master proper tension control, select appropriate hoop sizes, and avoid the typical mistakes that lead to fabric distortion, ensuring smooth results.
Importance of Proper Hooping
Beyond simply holding fabric in place, proper hooping serves as your foundation for professional embroidery results.
When you master hoop tension and fabric stabilization, you’ll prevent thread breakage and eliminate frustrating hoop marks that plague amateur work.
Perfect embroidery hooping transforms your projects from wobbly disasters into crisp, aligned masterpieces that showcase your skills and attention to detail, ultimately leading to work that embodies attention to detail.
Common Hooping Mistakes
You’ll encounter several embroidery hooping mistakes that can sabotage your projects.
Pulling fabric while it’s secured creates fabric puckering and tension issues. Over-tightening causes hoop burn and permanent hoop marks on delicate materials.
Under-tightening leads to fabric distortion and shifting during stitching. Over stretching damages fabric fibers and creates uneven surfaces.
These embroidery hooping mistakes compromise embroidery stabilization and require proper hoop tension management.
Achieving Even Tension
How do you achieve that perfect "tambourine-tight" fabric stretch without overdoing it?
Start by placing your fabric gently in the hoop, then gradually tighten the screw while checking tension control on all sides.
You’ll want fabric tension that feels firm but not stretched beyond its natural state.
Proper hoop tightening creates embroidery stability without causing thread tension issues or hoop alignment problems during stitching.
Preventing Fabric Distortion
Fabric distortion ruins your embroidery projects when hoop tension isn’t balanced correctly.
Uneven stretching creates puckering, while excessive force damages delicate materials.
Master these distortion repair techniques through proper stabilizer selection and controlled fabric stretching methods:
- Align fabric grain with hoop edges for consistent stretch control
- Check hoop tension regularly during stitching to prevent pucker formation
- Use floating techniques for delicate fabrics requiring gentle embroidery hooping techniques
Choosing Right Hoop Size
Selecting the right hoop size directly impacts your embroidery quality and determines whether you’ll achieve professional results or face frustrating stitching problems.
You’ll need to examine your design dimensions, fabric type, and project complexity to choose between circular and rectangular frames that provide ideal stability.
Factors to Consider
When choosing the right hoop size, consider your project’s dimensions, fabric weight, and complexity.
Match hoop materials to fabric types—wooden frames grip delicate materials better, while metal hoops offer superior tension control for heavy fabrics.
Select embroidery hoop sizes that accommodate your design with minimal excess fabric to maintain embroidery quality and prevent shifting during stitching.
For best results with thick fabrics, consider using magnetic embroidery hoops.
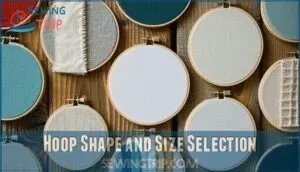
Hoop Shape and Size Selection
Your embroidery hoop shape and size selection directly impacts your project’s success.
Circular hoops provide superior even tension distribution, while rectangular frames suit linear designs better.
Consider your fabric thickness, design density, and machine compatibility when selecting embroidery hoop sizes.
Understanding available hoop dimensions is essential for project planning.
Match hoop materials to project complexity—wooden hoops offer consistent grip, plastic provides affordability, and metal delivers precision adjustments for professional results.
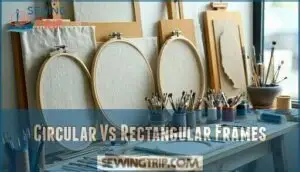
Circular Vs Rectangular Frames
Why choose between circular and rectangular embroidery frames when each offers distinct advantages?
Circular hoops provide superior tension differences with even pressure distribution, making them perfect for delicate fabric compatibility. They excel in frame stability for intricate designs.
Rectangular hoops suit larger project aesthetics and specific design suitability requirements, offering better coverage for wide patterns while maintaining consistent embroidery hoop tips standards.
Beginners often find plastic hoops advantageous due to their lightweight design.
Commercial-Grade Solutions
When you’re running a professional embroidery business, automated hooping systems revolutionize production efficiency on multi-needle machines.
These commercial-grade solutions maintain embroidery consistency while boosting embroidery efficiency through precise positioning.
Industrial stabilizers paired with durability testing guarantee your embroidery machine delivers professional embroidery results that withstand rigorous use, making them essential investments for serious operations that require high efficiency.
Selecting Ideal Stabilizer
You’ll need to match your stabilizer choice to both your fabric type and design complexity for professional embroidery results.
The right stabilizer provides essential support that prevents puckering and maintains fabric integrity throughout the stitching process, which is crucial for achieving professional embroidery results.
Types of Stabilizers
Understanding embroidery stabilizer types transforms your projects from frustrating disasters into masterpieces.
You’ll encounter tear-away, cut-away, wash-away types, and fusible stabilizers, each serving specific purposes.
Adhesive stabilizers work perfectly for difficult fabrics, while specialty stabilizers tackle unique challenges.
Exploring different stabilizer options can greatly improve your project outcomes.
Stabilizer weight determines support strength—match heavier weights to dense designs and delicate fabrics to lighter options.
Your embroidery adhesive choice affects final results substantially, making it a crucial aspect of your embroidery process to consider for optimal results.
Tear-Away Stabilizers
Your fabric becomes a perfect canvas when you select the right tearaway stabilizer weight for your embroidery project.
This temporary support dissolves cleanly after stitching, making it ideal for delicate fabrics that can’t handle permanent backing materials.
- Light tearaway stabilizer works best for thin cottons and lightweight fabrics requiring minimal directional stability
- Medium-weight options provide balanced support for standard embroidery designs without compromising fabric integrity
- Adhesive tearaway varieties eliminate hooping stress on delicate materials through gentle layering techniques
Cut-Away Stabilizers
Cutaway stabilizers provide permanent support that remains beneath your embroidery even after completion.
Unlike tear-away options, you’ll trim excess cutaway stabilizer close to your design’s edges rather than removing it entirely.
This makes cutaway stabilizers perfect for stretchy fabrics, high-density designs, or garments that need lasting structural support.
Your embroidery machine handles these stabilizers smoothly, while proper layering techniques guarantee maximum fabric compatibility and professional results.
Choosing Right Stabilizer Weight
Stabilizer weight selection becomes your secret weapon for professional-quality embroidery results.
Match your fabric type and design complexity to achieve perfect stitch density without compromising project lifespan.
- Lightweight stabilizers (1.0-1.5 oz) work best with thin cottons, silks, and jersey fabrics for delicate projects
- Medium stabilizers (2.0-2.5 oz) support standard cottons and polyesters with average stitch counts up to 6,000 stitches
- Heavy stabilizers (3.0+ oz) control dense designs on thick fabrics like denim and canvas effectively
- Test multiple stabilizer layers on sample fabric before committing to full production runs
To enhance stability, consider adjusting weight distribution for ideal results.
Hooping Techniques and Tools
You’ll master hooping techniques faster when you understand the proper tools and methods that prevent common embroidery problems.
These essential skills transform your projects from amateur attempts into professional-quality results that showcase precise stitching and flawless fabric presentation.
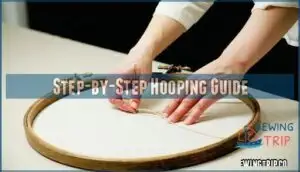
Step-by-Step Hooping Guide
Now that you’ve chosen the right stabilizer, proper embroidery hooping becomes your next focus.
Start by placing stabilizer in the outer hoop, ensuring smooth surface coverage.
Position your fabric carefully, checking fabric alignment before lowering the inner ring.
Press down evenly while maintaining tension balance across all edges.
Secure fabric by tightening gradually, creating that perfect tambourine-like surface for flawless embroidery design alignment.
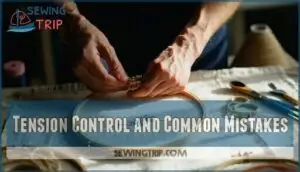
Tension Control and Common Mistakes
Achieving proper fabric tension requires finesse, not force.
You’ll want to stretch fabric taut like a tambourine surface without overdoing it.
Screw tightening should happen once after placement to prevent fabric stretching and grain alignment issues.
Watch for hooping mistakes like uneven tension that causes fabric distortion and embroidery puckering.
Re-hooping techniques become necessary when initial embroidery hoop tightening creates problems, so practice gentle, consistent pressure for avoiding puckering.
Specialized Tools for Challenging Fabrics
When working with tricky fabrics, you’ll need specialized solutions beyond basic hooping.
Magnetic hoops eliminate distortion on delicate silks and thick towels. Sticky stabilizers with adhesive backing secure slippery materials without stretching.
For floating techniques, spray adhesive bonds fabric to hooped stabilizer perfectly. Double-sided embroidery tape prevents shifting on heat-sensitive fabrics like synthetics.
Beginners often find success using 100% cotton fabric for its ease of use.
Proper stabilizer selection guarantees successful embroidery results, which is crucial for achieving successful embroidery.
Core Hooping Methods
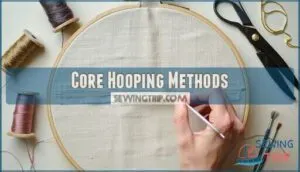
Perfect hooping techniques form the backbone of professional embroidery results. Master these fundamental methods to achieve consistent fabric tension and precise design placement every time.
Master tension control and fabric alignment – your foundation for flawless professional embroidery every time.
- Fabric Grain Alignment: Position your fabric with the grain running parallel to the hoop’s edges, ensuring proper fabric tension and preventing distortion during stitching
- Floating Fabrics Method: Hoop only the stabilizer first, then attach your fabric using spray adhesive for delicate materials that can’t withstand direct hooping pressure
- Layering Fabrics Technique: Stack multiple fabric layers with stabilizer underneath, maintaining even hoop placement across all materials for complex in-the-hoop projects
Consider purchasing a quality embroidery hoop for best results.
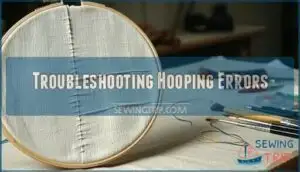
Troubleshooting Hooping Errors
Even experienced embroiderers encounter hooping challenges that can ruin an otherwise perfect project.
You’ll learn to identify and fix common problems like hoop burn, fabric distortion, and puckering before they damage your work.
Common Beginner Mistakes
Even experienced embroiderers make hooping mistakes that derail perfect projects. You’ll commonly see accidental layering when fabric bunches beneath the hoop, creating uneven surfaces.
Tension issues plague embroidery for beginners—too tight damages delicate materials, while loose fabric causes puckering. Wrong direction placement misaligns designs completely.
Incorrect marking leads to off-center embroidery. Using oversized hoops for small designs creates fabric movement and stitch distortion during embroidery troubleshooting sessions.
Beginners should also consider using plastic hoops for their lightweight design. This approach can help mitigate common issues such as tension issues and improve overall embroidery quality.
Preventing Hoop Burn and Fabric Distortion
Smart tension adjustment prevents both embroidery hoop burn and fabric distortion through careful pressure control.
Use these proven techniques for flawless results:
- Apply minimal pressure—just enough for drum-tight fabric tension without over-stretching
- Consider hoop padding with twill tape to distribute pressure evenly across delicate materials
- Remove fabric immediately after stitching to prevent permanent marking and allow natural fabric relaxation
Steaming solution helps restore minor impressions, while marking prevention starts with proper hooping technique, ensuring flawless results through proper hooping and careful pressure control.
Fixing Minor Hoop Burn and Puckering
Most hoop burn vanishes with gentle steaming solutions or washing, while masking layers protect non-washable fabrics during treatment.
Fix puckering through careful re-hooping techniques, ensuring proper grain alignment and balanced tension adjustment.
Steam fabric gently to relax fibers, then rehoop with even pressure to eliminate embroidery ripples and fabric distortion permanently.
Maintaining Hoop Quality and Longevity
Your embroidery hoops deserve better than a dusty drawer. Store hoops in cool, dry places to prevent wood warping and plastic brittleness.
Clean surfaces regularly, removing thread lint that weakens grip strength. Lubricate metal screws with light oil to prevent rust.
Rotate hoop usage between projects to extend durability and prevent material degradation from overuse.
Frequently Asked Questions (FAQs)
Do you need a hooping station for embroidery?
Like assembling a race car, you don’t need a fancy hooping station—but it’ll turbo-charge your speed and precision.
Basic hoops work fine for beginners, though stations boost consistency for larger projects.
How do you put a hoop in an embroidery machine?
Position your fabric and stabilizer in the hoop with even tension, then attach the hoop securely to your machine’s hoop arm using the provided clamps or mechanisms.
How do you hoop a fabric?
Oddly enough, many think hooping’s just clamping fabric tight, but you’ll place stabilizer first, center your fabric, then adjust the inner ring with gentle, even tension for professional results.
Why is embroidery hoop so important?
Proper hooping creates the foundation for flawless embroidery by maintaining even fabric tension, preventing puckering, and ensuring your stitches align perfectly every time.
What makes a good hoop design?
Think of a hoop as your fabric’s steady dance partner – it needs the right grip without crushing your delicate moves.
You’ll want even tension, smooth inner surfaces, and sturdy construction that won’t warp or slip during stitching sessions.
How do you practice hooping?
Start with scrap fabric and practice achieving even tension without overstretching.
Use different hoop sizes and stabilizer combinations to create that firm, tambourine-like surface.
Then check alignment before stitching test designs, focusing on achieving even tension.
How to keep an embroidery hoop from slipping?
Like a steadfast anchor holding firm against choppy waters, you’ll secure your hoop by tightening just enough to prevent movement without damaging fabric.
Check tension regularly and retighten screws as needed during stitching sessions to ensure the hoop remains secure, and this process will help you maintain the tension.
Can you reuse hoops for different projects?
You can definitely reuse hoops across different projects. Clean off any adhesive residue, check for damage, and store them properly between uses. Quality hoops last for years when maintained well.
How do you hoop thick materials?
Thick materials are like stubborn fabric that needs gentle persuasion.
Use larger hoops, reduce tension slightly, and consider using cutaway stabilizer underneath.
You’ll want to avoid over-tightening since heavy fabrics resist compression and can damage your hoop’s grip mechanism.
Whats the best hoop cleaning method?
Clean your hoops regularly with mild soap and warm water, then dry thoroughly. Remove thread lint with a soft brush. For wooden hoops, avoid soaking to prevent warping and cracking.
Conclusion
Perfect hooping, like tuning a musical instrument, requires practice and patience to achieve mastery.
These essential embroidery hoop tips will transform your stitching from frustrating to flawless. You’ll avoid common mistakes by selecting appropriate hoop sizes, matching stabilizers to your fabric types, and maintaining proper tension throughout your projects.
Remember that consistent practice with different fabric weights and stabilizer combinations builds muscle memory. With these proven techniques, you’ll create professional-quality embroidery that showcases your skills and creativity.
- https://www.echidnasewing.com.au/echidna-hooping-station-various-sizes
- https://weallsew.com/embroidery-basics-the-machine-embroidery-hoop/
- https://www.hooptalent.com/blogs/news/embroidery-hoops-and-frames-ultimate-guide-for-perfect-fabric-tension
- https://www.ibaima.com/common-mistakes-made-by-beginners-in-embroidery/
- https://stitchfloral.blogspot.com/2019/12/top-10-beginner-mistakes-in-hand.html


