This site is supported by our readers. We may earn a commission, at no cost to you, if you purchase through links.
Pre-wash fabrics to prevent shrinkage surprises later.
Use floating techniques for delicate items instead of hooping directly.
Choose natural fibers over synthetics when possible, as they hold stitches better.
Always test your design on scraps first – it’s like a dress rehearsal for your fabric.
Keep stretchy materials taut with water-soluble film overlays.
Clean your machine regularly, since lint buildup affects stitch quality.
Don’t rush the hooping process; tight, even tension prevents puckering.
The real magic happens when you master these professional techniques that separate amateur work from stunning results.
Table Of Contents
Key Takeaways
- You’ll prevent most embroidery disasters by choosing the right stabilizer for your fabric weight and pre-washing materials to avoid shrinkage surprises that ruin finished projects.
- Don’t fight difficult fabrics—use floating techniques for delicate items and magnetic hoops for thick materials instead of forcing them into traditional hoops that’ll damage your work.
- Natural fibers like cotton and linen hold stitches better than synthetics and handle machine tension more consistently, so choose them over stretchy fabrics that cause puckering and distortion.
- Test every design on fabric scraps first and keep your machine clean—lint buildup affects stitch quality, and proper tension prevents thread breakage that’ll stop your project cold, ensuring you can maintain a consistent machine tension and avoid shrinkage surprises with the right fabric weight.
Hooping Techniques Matter
Getting your fabric properly positioned in the hoop sets the foundation for every successful embroidery project, and the right technique can save you hours of frustration and rework.
You’ll discover that mastering different hooping methods, from traditional hoops to magnetic systems and floating techniques, transforms your embroidery from amateur attempts into professional-quality results.
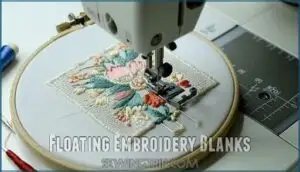
Floating Embroidery Blanks
Sometimes you’ll encounter embroidery blanks that just won’t cooperate with traditional hooping methods.
Floating these tricky items outside the hoop using temporary adhesive gives you the control you need. This technique works perfectly for small, thick, or oddly-shaped pieces that resist standard hooping.
Master tricky embroidery pieces with floating techniques—sometimes the best control comes from working outside the hoop.
Consider using specialized embroidery supplies for best results. Simply secure your embroidery fabric to stabilizer with adhesive, ensuring proper alignment for flawless results.
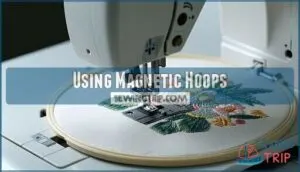
Using Magnetic Hoops
Magnetic hoops revolutionize your hooping techniques when traditional embroidery hoop methods fail.
They excel with thick fabrics, delicate materials, or awkward project shapes that resist standard hooping fabric approaches.
The magnetic grip provides superior fabric stabilization without crushing fibers or leaving marks.
Consider using specialized embroidery tools for improved results.
Different hoop sizes accommodate various project versatility needs, while proper hoop alignment guarantees professional results every time, regardless of fabric thickness or metal sensitivity concerns.
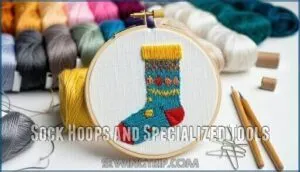
Sock Hoops and Specialized Tools
Embroidering socks requires specialized hooping techniques that traditional embroidery hoops can’t handle. Cylinder hoops and sock-specific frames maintain the fabric’s natural shape while preventing unwanted stretching during stitching.
Magnetic hoops can also reduce setup time and guarantee even tension.
- Use ballpoint needles to prevent snags on knit materials
- Pre-wash wool socks to avoid post-embroidery shrinkage issues
- Secure curved surfaces with binder clips for precise placement
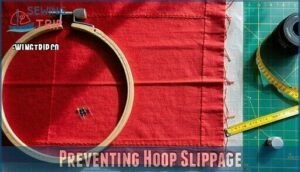
Preventing Hoop Slippage
Slippery fabric can turn your embroidery project into a frustrating mess.
Combat fabric slippage with non-slip mats like DIME’s gridded version that boost hoop friction and stabilizer grip. Match your hoop size to fabric thickness for proper tension balance.
Different fabric types need specific fabric preparation techniques. T-pins and double-sided tape create nonslip hooping conditions, ensuring your fabric tension stays drum-tight throughout stitching, and maintaining proper tension balance is crucial, which can be achieved with the right non-slip mats.
Fabric Management Tips
Proper fabric management keeps your embroidery projects looking professional and prevents costly mistakes.
You’ll learn which fabrics work best with your machine and how to handle them correctly for smooth stitching.
Choosing Natural Fibers
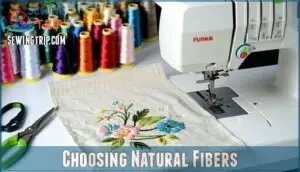
Natural fibers like cotton, linen, and wool offer superior fiber compatibility with embroidery threads.
These fabric types maintain consistent thread tension and deliver excellent stitch density for project stability.
Cotton’s balanced weight works perfectly for most designs, while linen’s tight weave provides exceptional durability.
Choose natural fabrics over synthetics—they handle heat exposure better and create professional results every time.
For example, woven fabrics are stable and less stretchy, making them ideal for professional results and providing exceptional durability.
Avoiding Stretchy Fabrics
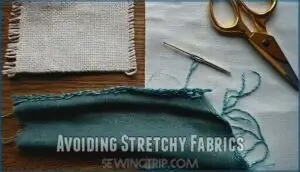
Stretchy fabrics spell trouble for machine embroidery. Your fabric choice directly impacts final results.
Knit Fabric Woes include puckering, distortion, and poor stitch quality. Fabric Weave Matters because loose weaves create unstable foundations.
Here’s your fabric selection strategy:
- Choose stable cotton or linen – These natural fibers provide excellent fabric tension control
- Test fabric handling – Stretch test before committing to projects
- Consider Stabilizer Importance – Cut-away backing prevents fabric distortion during stitching
Using Water-Soluble Film
Water-soluble film prevents thread from sinking into textured fabrics like towels or fleece.
Place this clear stabilizer on top of your fabric before hooping. The film keeps stitches crisp and defines your design perfectly.
You can find various types available for different embroidery needs.
After embroidery, simply wash the project in warm water. The film dissolves completely, leaving no residue behind for professional results, making it a great tool for achieving perfect embroidery designs.
Applying Stabilizer Correctly
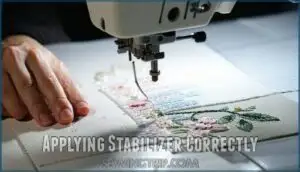
Before hooping your fabric, always apply embroidery stabilizer to the wrong side first.
Choose tearaway stabilizer for stable fabrics or cutaway stabilizer for stretchy materials.
Use water-soluble spray adhesives for secure attachment without permanent marks.
When layering stabilizers, make certain proper fabric compatibility by testing adhesive application on scraps.
Fabric weight considerations are vital for smooth stitching.
This foundation prevents distortion during stitching.
Thread and Stitching Solutions
Thread problems can turn your perfect embroidery project into a tangled mess, but the right techniques will keep your stitches smooth and strong.
You’ll master thread handling tricks that prevent breakage, reduce tangles, and guarantee your machine runs like a dream from start to finish.
Using Thread Stands
Around your embroidery machine, thread stands become game-changers for smooth stitching.
These standalone spool pins guarantee tension consistency while preventing metallic threads from snarling.
Place your thread stand behind the machine for ideal thread unwinding.
Thread Stand Benefits include reduced breakage and better thread management.
You’ll notice improved embroidery thread flow and fewer frustrating tangles during complex projects.
Preventing Thread Breakage
Thread-breakage troubleshooting starts with identifying the root cause. Quality embroidery thread paired with proper tension settings prevents most snapping issues.
Master your thread tension first—it’s the difference between frustrated tears and flawless stitches.
Your embroidery machine needs regular maintenance to keep the thread path smooth and consistent.
- Check Thread Quality – Replace old or cheap thread that frays easily
- Adjust Proper Tension – Balance upper and bobbin tension for your fabric
- Match Needle Type – Use correct needle size for thread weight
- Clean Machine Maintenance – Remove lint from thread path regularly
Correctly Threading Machines
Getting your embroidery machine threading right from start to finish makes all the difference.
Follow the thread path exactly as your manual shows, checking each guide and tension disc.
Wind bobbins smoothly without overfilling them, and match your needle choice to thread weight and fabric type.
Regular machine maintenance keeps the thread path clean and tension consistent, preventing frustrating breakage mid-project.
Choosing High-Quality Thread
Quality makes all the difference when selecting embroidery thread for your projects.
Choose cotton thread for heat-exposed items like potholders, as it won’t melt.
Consider thread weight, color fastness, and tensile strength for durability. Cotton thread works well across all machine weights, while rayon thread may cause issues in certain machines.
Proper embroidery thread selection guarantees professional results every time.
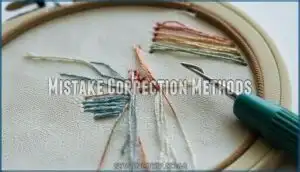
Mistake Correction Methods
Even the best embroiderers make mistakes, but you don’t need to start over when things go wrong.
These correction methods will help you fix errors quickly and keep your projects looking professional.
Fixing Embroidered Mistakes
Mistakes happen, but they don’t have to ruin your project.
Smart embroidery mistake correction tools can save even the most damaged pieces from the scrap pile.
- Stitch Erasers remove embroidered mistakes more efficiently than seam rippers on irreplaceable blanks
- Bo-Nash powder seals accidental snip holes in fabric
- Color frays with permanent markers matching thread colors
- Re-stitching area after carefully removing unwanted stitches
- Concealing mistakes transforms errors into design features
Removing Excess Thread
Clean finishes separate amateur work from professional results.
Your embroidery machine leaves loose threads that need careful attention.
Snip carefully with embroidery scissors to avoid cutting fabric underneath.
Cuticle scissors work perfectly for tight spaces.
Thread burning with a gas lighter melts synthetic threads cleanly.
Marker fill covers small gaps using matching colors.
Regular lint removal keeps your machine running smoothly.
| Tool | Purpose | Pro Tip |
|---|---|---|
| Embroidery scissors | Precise thread cutting | Keep blades sharp for clean cuts |
| Cuticle scissors | Tight space trimming | Curved tip prevents fabric damage |
| Gas lighter | Thread burning excess | Test on scraps first to ensure safe and effective thread burning, and always use matching colors for marker fill to achieve a professional look. |
Using Decorative Touches
When your embroidery design needs extra pizzazz, decorative touches can transform ordinary machine embroidery into stunning artwork.
Adding beads along stitch lines creates texture and catches light beautifully. Using paint pens lets you fill gaps between embroidery threads with precise color matching.
Incorporating lace edges softens harsh applique borders, while applying sequins adds glamorous sparkle to any embroidery design.
You can also use creative patches to conceal mistakes, making your embroidery look more professional and adding a touch of glamorous finish.
Burning Excess Loops
A simple gas lighter works wonders for thread melting those pesky excess loops on your finished embroidery.
Test burn testing on scrap fabric first—fabric safety matters. This technique refinement creates a clean finish by melting thread ends seamlessly.
Your embroidery machine fabric projects will look professional after proper fabric trimming. Always work in ventilated areas for safe embroidery finishing results, ensuring a clean finish.
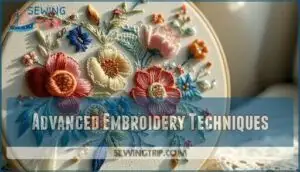
Advanced Embroidery Techniques
You’ve mastered the basics, but now it’s time to take your embroidery skills to the next level with professional techniques that save time and money.
These advanced methods will help you tackle complex projects, work with larger designs on smaller machines, and create stunning results that look like they came from a high-end shop.
Saving Money on Stabilizer
Your wallet doesn’t have to suffer for quality embroidery.
Bulk buying stabilizer cuts costs dramatically, while stitching pieces together extends smaller scraps.
Hunt for free designs online and explore discount options at craft stores.
Save stabilizer scraps from previous projects – they’re perfect for small designs.
Smart embroidery cost management means more creativity, less spending on embroidery supplies, allowing for more creativity.
Repositioning Hoops
Your repositionable hoop becomes your best friend when tackling large designs that exceed your machine’s standard capacity.
Split oversized patterns into manageable sections, then carefully realign your embroidery hoop between each phase.
This section stitching method prevents fabric distortion while maintaining perfect hoop alignment.
Proper stabilizer use, like choosing the right stabilizer, is also essential for preventing distortion.
Check your machine compatibility before starting—some models handle repositionable hoops better than others for seamless embroidery fabric handling, ensuring perfect hoop alignment and preventing distortion.
Mastering Basic Stitches
Building your foundation starts with four fundamental stitches that’ll transform your embroidery machine work:
- Running Stitch – Creates clean lines and outlines
- Backstitch mastery – Provides solid, continuous coverage
- Stem stitch – Perfect for curved details and lettering
- Satin stitch – Delivers smooth, filled areas
These embroidery basics form the backbone of professional results, giving you control over fabric tips and advanced embroidery techniques.
Experimenting With Transfer Methods
Finding the right design transfer method transforms your embroidery projects from good to exceptional.
Water-soluble pens work perfectly for light fabrics, while iron-on transfers speed up the process.
Pouncing techniques deliver unmatched transfer accuracy on dark materials.
Each method offers unique advantages for design placement, so experiment to discover what works best for your fabric tips and project needs.
| Method | Best For | Pros |
|---|---|---|
| Water-soluble pens | Light fabrics, detailed work | Clean lines, removable marks |
| Iron-on transfers | Quick projects, beginners | Fast application, permanent |
| Pouncing techniques | Dark fabrics, large designs | Works on any color, traditional |
| Printable transfer papers | Complex patterns, precision | Exact reproduction, versatile |
Frequently Asked Questions (FAQs)
What tension should my embroidery machine be on?
Your embroidery machine’s tension should typically be set between 2-4, with 3 being the sweet spot for most projects.
Test on scrap fabric first—proper tension creates balanced stitches without puckering or loose threads.
How do you keep fabric from bunching when embroidering?
You’ll prevent fabric bunching by using proper stabilizer, maintaining drum-tight hoop tension, and choosing stable fabrics like cotton or linen.
Avoid stretching fabric when hooping, and pair stretchy materials with non-stretch backing for best results, which will help achieve the desired outcome with stable fabrics.
How to keep fabric tight in machine embroidery hoop?
Loosen your outer hoop, stretch fabric drum-tight, then secure it properly. Use T-pins or self-adhesive bandage wrap for extra grip. Double-sided tape around the inner hoop prevents slipping during stitching.
What is the best fabric to machine embroider on?
You’ll get best results with natural fibers like cotton or linen.
They hold stitches well and don’t stretch when hooped.
Avoid stretchy fabrics – they’ll cause puckering and distortion that’ll ruin your design.
How do I prevent fabric puckering during embroidery?
Choose stable, tight-weave fabrics like cotton or linen.
Use proper stabilizer on the fabric’s wrong side.
Keep your hoop drum-tight without overstretching.
Match thread tension to your fabric weight for smooth, pucker-free results.
What needle size works best for different fabrics?
Match your needle to your fabric’s weight and weave.
Use size 75/11 for lightweight cottons, 80/12 for medium fabrics, and 90/14 for heavy materials.
Sharp needles pierce tight weaves while ballpoint needles slide between knit fibers, utilizing the correct needle type is crucial for the fabric.
How often should I change my embroidery needle?
Change your embroidery needle after every 8-10 hours of stitching or when you notice thread breaks, skipped stitches, or fabric damage.
Dense designs and heavy fabrics dull needles faster, requiring more frequent changes.
Can I embroider on leather or vinyl materials?
Leather embroidery is like taming a wild beast – absolutely possible with the right approach.
You’ll need leather needles, strong polyester thread, and lighter stabilizer.
Skip the hoop; use adhesive spray instead for best results.
Whats the best way to store embroidered items?
Store your embroidered pieces flat in acid-free tissue paper or breathable cotton bags.
Avoid plastic storage that traps moisture.
Keep items in cool, dry places away from direct sunlight to prevent fading and fabric deterioration.
Conclusion
Mastering these embroidery machine fabric tips transforms your projects from amateur attempts into professional masterpieces.
You’ve learned the foundation skills that separate successful embroiderers from frustrated beginners.
Remember, every expert started exactly where you’re now.
Practice these techniques consistently, and you’ll develop the confidence to tackle any fabric challenge.
Your embroidery machine becomes a powerful creative tool when you understand proper fabric handling.
Start with simple projects, then gradually advance to complex designs as your skills grow.
- https://sewconcept.com/hoop-shield.html
- https://blog.sulky.com/water-soluble-stabilizer/
- https://wunderlabel.com/en-gb/blog/p/17-common-sewing-machine-problems-solve/
- https://www.gathered.how/needlework/embroidery/embroidery-for-beginners-guide
- https://www.lilipopo.com/journals/embroidery-101-backstitch-and-stitching-tips-and-tricks

