This site is supported by our readers. We may earn a commission, at no cost to you, if you purchase through links.
Your embroidery machine stops mid-design, thread tangled in a stubborn knot, and suddenly that custom jacket order feels impossible. Over half of all embroidery machine breakdowns stem from motor and power failures, but most issues—from tension problems to bobbin malfunctions—don’t require a service call.
Understanding the mechanics behind common failures gives you control over your equipment and keeps your projects on schedule. Whether you’re dealing with shredded thread, skipped stitches, or mysterious grinding noises, the right diagnostic approach saves both time and money.
Professional embroidery machine repair starts with knowing which fixes you can handle yourself and which problems demand expert intervention.
Table Of Contents
Key Takeaways
- Over half of all embroidery machine breakdowns stem from motor and power failures, but thread tension issues alone account for nearly half of all repair calls—making proper tension calibration your first troubleshooting step before seeking professional help.
- Most embroidery problems don’t require a technician: approximately 70% of issues trace back to improper threading, while simple maintenance like daily bobbin area cleaning prevents 80% of malfunctions and regular needle replacement every 6-8 hours cuts service calls in half.
- When annual repair costs hit 50-70% of your machine’s current value or the unit exceeds 10-15 years old with declining part availability, replacement delivers better ROI than continuing to repair an aging machine.
- Professional servicing intervals depend on usage intensity—heavy users running 15+ hours weekly need twice-yearly maintenance, while lighter users can maintain peak performance with annual service appointments that include tension calibration, inspection, and parts replacement.
Common Embroidery Machine Problems
Your embroidery machine can develop issues that range from minor annoyances to complete work stoppages. Most problems fall into predictable categories that you can learn to recognize and address quickly.
Here are the most common issues you’ll encounter and what they mean for your machine’s performance.
Thread Tension Issues
Thread tension sits at the heart of nearly half of all embroidery machine repair calls—and it’s probably affecting your stitch quality right now. When your upper thread tension‘s off, you’ll see loopy stitches, puckered fabric, or thread breakage that halts production.
Proper tension calibration transforms embroidery errors into impeccable stitch formation, making tension adjustment your first troubleshooting step before considering professional sewing machine repair services. Understanding the importance of thread tension settings is vital for ideal embroidery results.
Frequent Thread Breakages
Beyond tension adjustments, breakage rates tell you exactly where your machine calibration is failing. Low thread quality alone increases breakage by 23%, while incorrect threading causes over 30% of all incidents.
You’ll need proper tension settings and regular bobbin case cleaning—which cuts breakage by 35%—to maintain consistent stitch formation.
When embroidery troubleshooting doesn’t resolve persistent breaks, professional sewing machine repair services can diagnose worn thread guides or alignment issues. Understanding thread quality factors is essential for minimizing embroidery thread breakage.
Needle Problems
Worn needles degrade after just 8 hours of run time, triggering thread shredding and skipped stitches that derail production. Needle breakage spikes when you’re pushing through dense fabrics or running at excessive speeds.
Watch for these warning signs during embroidery troubleshooting:
- Needle wear causing popping sounds through material
- Bent needles from lateral force or improper handling
- Needle alignment errors creating timing faults
- Thread shredding from undersized needle eyes
- Installation mistakes with the flat side positioned incorrectly
Systematic needle replacement cuts embroidery machine repair calls in half.
Bobbin Malfunctions
Bobbin thread problems account for 27% of all service calls, making them your second most common headache. Poor winding or incorrect insertion creates tension issues that trigger machine jamming and visible thread loops.
Lint buildup in the bobbin case causes over a third of all maintenance visits. Regular bobbin replacement and proper cleaning slash embroidery machine repair costs while keeping your stitching perfect.
Motor and Power Failures
Motor failure accounts for over half of all embroidery machine breakdowns, with bearing issues driving 51% of AC motor problems.
Power surges, faulty wiring, and blown circuit breakers stop your machine cold, often costing $100–$200 in embroidery machine repair or servicing.
Electrical issues from incorrect voltage or loose connections demand immediate embroidery machine maintenance to prevent permanent damage to your investment.
Abnormal Noises and Vibrations
Grinding or rattling sounds signal loose belts, worn bearings, or a dry hook race needing lubrication—critical signs during sewing machine troubleshooting. Excessive vibrations at high speeds stress components and compromise stitch quality, demanding immediate embroidery machine maintenance.
Proper machine balance on rigid tables aids vibration control and noise reduction.
Regular hook maintenance and oiling prevent costly embroidery machine repair while preserving embroidery machine servicing intervals.
Diagnosing Embroidery Machine Issues
Before you can fix your embroidery machine, you need to know what’s actually wrong with it. A methodical approach to diagnosing issues saves you time, money, and prevents you from making the problem worse.
Here’s how to pinpoint the most common problems and get your machine back on track.
Identifying Threading Mistakes
Most embroidery machine repair calls trace back to threading errors—they’re responsible for over 65% of troubleshooting cases. When thread misses the take-up lever or skips tension discs, you’ll see uneven stitches, breakage, or birdnesting.
Check if your presser foot was raised during threading; if not, tension won’t engage properly. Sewing machine troubleshooting starts here: rethread carefully, following your manual’s exact path.
Checking for Timing Errors
When your needle and hook refuse to sync, you’re facing a timing error—responsible for up to 70% of documented defects. Watch for skipped stitches, thread bunching, or needle collisions during test patterns. These timing error detection signals demand immediate attention.
Professional diagnostic tools can improve machine calibration accuracy by 38%, restoring stitch quality and preventing costly downtime in your embroidery machine repair journey.
Inspecting for Mechanical Jams
Your handwheel tells the truth—if it won’t budge, you’ve got a mechanical jam locking the works. Over 70% of jams first show up as sudden stoppages or frozen handwheels, demanding jam detection methods that pinpoint thread nesting, rotary hook issues, or bobbin case problems fast.
- Remove the needle plate and inspect beneath for tangled thread or broken needle fragments
- Check the rotary hook for thread buildup—38% of jams involve visible accumulation around this critical area
- Test for burrs or snags with a cotton swab along contact surfaces
Thorough machine maintenance and repair prevent repeat failures.
Recognizing Electrical Faults
When your machine won’t power up or suddenly goes dark mid-stitch, you’re likely facing voltage issues or circuit breakers tripped by power surges. Check for blown fuses—they’re behind 37% of electrical faults—and inspect faulty wiring before fires start.
Embroidery machine repairs demand technical support for sewing machines and proper computerized embroidery machine troubleshooting. Machine maintenance prevents costly disasters.
Assessing Needle and Bobbin Placement
After ruling out power problems, turn your attention to positioning components. Needle alignment and bobbin seating account for 75% of pickup failures and drive 31% of stitch quality issues. Check these five critical points during machine calibration:
- Needle insertion depth and orientation
- Bobbin direction and case fit
- Needle-to-hook timing synchronization
- Thread tension balance between top and bobbin
- Needle centering in the throat plate
Proper embroidery machine maintenance tips prevent costly embroidery and serging machine repair calls.
Step-by-Step Embroidery Machine Repair
Once you’ve pinpointed what’s wrong with your embroidery machine, it’s time to roll up your sleeves and fix it. Most common issues don’t require a technician—you can handle them yourself with the right steps.
Here’s how to tackle the most frequent repairs, from basic re-threading to keeping your machine running smoothly.
Re-threading The Machine Correctly
Approximately 70% of embroidery machine problems stem from improper threading. Start by removing all thread, then follow your manual’s thread path optimization precisely through every guide and tension disc. Lower the presser foot and gently tug—you should feel resistance. This simple embroidery machine repair step reduces thread breaks by over 50%.
Regular tension disc cleaning with threading tool kits maintains thread quality and prevents costly sewing machine maintenance issues.
Adjusting Thread Tension Settings
Once threading is correct, tension calibration becomes your next priority. Turn the dial clockwise to tighten, counterclockwise to loosen—start between settings 2 and 6. Test on fabric scraps matching your project; loops underneath mean you need more needle tension, while breaks signal it’s too tight. Polyester thread requires 120-150 grams, rayon needs 100-130 grams for proper stitch balance.
- Adjust in small increments and test each change
- Check fabric types—silk needs lower tension than denim
- Use a tension gauge for precise thread quality measurements
- Clean the bobbin case to maintain consistent tension
- Balance shows one-third bobbin thread on the fabric back
Replacing Needles and Bobbins
After tension adjustments, worn components need attention. Change needles every 6-8 hours of stitching—dull points cause thread breaks and puckering. Use your machine-specific Allen wrench for proper needle alignment with the flat side positioned correctly.
For bobbin maintenance, clean the case regularly and check tension springs. Chrome needles last roughly 10 hours, improving thread quality and stitch optimization between sewing machine repair visits.
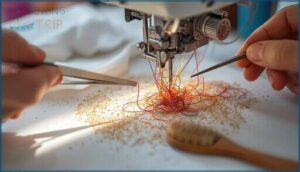
Clearing Jams and Cleaning Parts
Jam resolution requires immediate action: power off, raise the needle, and carefully cut tangled threads. Use a soft brush for debris removal from the bobbin area, never compressed air that pushes lint deeper.
Check for bent needles or burrs causing repeat issues. This thread management and jam prevention step is critical before part lubrication.
For persistent problems after clearing, schedule professional embroidery machine repair to diagnose mechanical faults.
Lubricating Moving Components
Proper lubrication transforms machine longevity by reducing friction on critical moving parts. Apply white sewing machine oil to needle bars every 10-12 hours, and mineral oil to rotary hooks every 4-6 hours during operation.
- Use synthetic grease on take-up levers and hook shaft gears semi-annually
- Apply specialized aerosol lubricants for precise, non-staining oil application
- Clean debris thoroughly before applying lubricant types
- Schedule professional embroidery machine repair and technical support for sewing machines when over-oiling or performance issues persist
Essential Maintenance Tips
Keeping your embroidery machine in peak condition doesn’t require a degree in mechanical engineering—just consistent attention to a few key areas. Regular maintenance prevents most breakdowns before they happen and extends your machine’s lifespan considerably.
Here are the essential habits that’ll keep your machine running smoothly for years.
Daily Cleaning of Bobbin Area
Think of the bobbin area as your machine’s lungs—when lint clogs them, performance suffers. Daily maintenance routines demand you remove the bobbin case after each project, using a soft brush and cotton swabs for effective lint removal tips.
This simple bobbin area cleaning prevents 80% of malfunctions, protecting your investment and keeping embroidery machine performance at its peak without constant sewing machine repair service calls.
| Cleaning Frequency | Fabric Type | Performance Impact |
|---|---|---|
| Daily | Standard cotton | Smooth, consistent stitching |
| 2-3 times daily | High-lint (fleece) | Prevents thread breaks |
| Weekly deep clean | Mixed materials | Extends machine lifespan |
Regular Oiling of Moving Parts
You’ll extend your machine’s lifespan two to four times with proper lubrication—that’s moving part care done right.
Apply 1-2 drops of clear sewing machine oil to needle bars, rotary hooks, and tension discs every 8-10 hours of use. These oil change tips reduce friction, dissipate heat, and prevent costly embroidery machine repair visits.
For technical support on lubricant selection, consult your manual or contact a professional sewing machine repair service.
Preventing Lint Build-up
Cotton thread sheds twice as fast around your needle bar and threader—that’s why smart thread selection and regular cleaning determine your machine’s future. Here are proven lint prevention strategies:
- Use smoother, stronger threads to cut lint formation and reduce cleaning frequency
- Remove lint gently with soft brushes after each session, never compressed air
- Store your machine in dust-free environments to minimize external debris intrusion
Professional sewing machine repair and servicing once yearly tackles hidden accumulation.
Maintaining Proper Needle and Foot Use
Your needle and foot choices make or break stitch quality—commercial operations replacing needles weekly after 1–2 million stitches cut breakdowns by 30%.
Here’s your maintenance schedule:
| Task | Frequency |
|---|---|
| Needle Inspection | Before every project |
| Needle Replacement | Every 6–8 hours of stitching |
| Foot Selection verification | Per fabric/stitch type |
| Thread Tension adjustment | When switching materials |
| Professional sewing machine repair and servicing | Yearly for hidden wear |
Open-toe embroidery feet prevent needle collisions during free-motion work, while proper presser foot pressure stops fabric puckering that forces premature needle replacement.
Scheduling Routine Professional Service
Even with perfect daily care, your embroidery machine needs professional attention every 12 months—commercial users should aim for 6-month intervals.
Service contracts from authorized centers include inspection, tension calibration, and parts replacement that catches wear before failures happen.
Technician selection matters: specialists in embroidery equipment spot timing issues general repair services miss.
Warranty repairs through certified providers protect your investment while maintaining coverage.
Repair Costs and Service Options
Understanding what you’ll pay for embroidery machine repairs helps you budget wisely and avoid surprises when problems arise. Costs vary depending on whether you need a simple diagnostic or a full mechanical overhaul, and knowing your options makes the difference between a quick fix and a lengthy hassle.
Here’s what you can expect regarding fees, services, and deciding whether to tackle repairs yourself or hand things over to a pro.
Typical Diagnostic Fees
Most repair shops charge diagnostic fees between $25 and $80 to assess your embroidery machine’s issues. Single-needle models usually fall at the lower end, while multi-needle and computerized machines like Bernina units often require $50 to $80 for thorough evaluation.
Some service centers credit this fee toward your repair if you proceed, though many keep it as a non-refundable bench charge covering the technician’s time and expertise.
Average Repair Cost Ranges
Once you move past diagnostic charges, actual repair estimates depend heavily on machine type and what’s broken. Basic tension adjustments or needle replacements run $60 to $95, while motor work hits $100 to $200. Computerized boards push costs toward $150 to $300.
Labor fees average $65 to $80 per hour, and appliance and textile equipment repair shops often require minimum service charges around $75.
Warranty and Authorized Service Centers
Factory warranties usually cover one to two years, protecting you against manufacturing defects and faulty parts—Brother Authorized Dealers even extend coverage up to 25 years on select models.
Filing warranty claims through authorized service centers ensures certified technicians handle repairs without voiding protection.
Extended coverage options exist before your initial period expires, shielding you from unexpected repair costs while maintaining appliance and textile equipment repair standards across service networks.
Preparing Your Machine for Service
Before scheduling your embroidery unit service, you’ll need proper machine preparation: remove all threads, fabric, and accessories completely. Clean the bobbin area and needle plate thoroughly to save your technician time.
Don’t forget your power cord, foot control, and a properly placed presser foot—diagnostic fees start at $30 for embroidery machines, and incomplete setup delays repair logistics while impacting maintenance planning timelines across textile equipment maintenance schedules.
Choosing Between DIY and Professional Repair
Simple fixes like needle replacement work well for DIY—about 60% of users handle routine tasks successfully. However, complex timing errors or motor failures demand professional diagnosis to avoid warranty voidance and costly damage.
Professional benefits include diagnostic precision, repair warranty options, and maintenance schedules that cut downtime by 40-50%. Weigh repair cost analysis carefully: DIY saves money upfront but risks expensive mistakes on your embroidery machine repair.
Preventing Future Embroidery Machine Issues
The best repair is the one you never have to make. With consistent care and smart habits, you can avoid most common embroidery machine problems before they start.
The best repair is the one you never have to make—consistent care prevents most embroidery machine problems before they start
Let’s walk through the practical steps that’ll keep your machine running smoothly for years to come.
Best Practices for Thread and Fabric
Matching thread weight to fabric selection forms the foundation of trouble-free embroidery. You’ll want 40 wt polyester for medium-weight fabrics, while lighter materials need finer 60 wt threads.
Proper stabilizer choice prevents puckering during stitch formation and tension control.
Replace needles every 7-8 hours to avoid thread shredding, and always pair fabric and thread management practices with appropriate needle sizes for consistent fabric embroidery results.
Safe Machine Storage and Handling
Think of your embroidery machine as a precision instrument—it thrives in a stable environment. Climate control between 65–75°F with 50% humidity prevents rust and component degradation, cutting storage-related damage by 30%.
Use dust-proof covers and upright storage solutions to protect sensitive parts. Always disconnect power cords and secure accessories before transport.
These protective measures and handling techniques guarantee your machine stays ready for embroidery machine repair-free operation.
Using Genuine Parts and Accessories
Your machine’s lifespan depends on what you feed it. Authentic accessories and genuine parts aren’t just about warranty coverage—they reduce thread breakages by 30% and operational jams by 15% through premium part compatibility.
Genuine part benefits extend far beyond initial cost—they’re your best defense against repeated breakdowns.
- Purchase from authorized dealers to guarantee quality assurance and embroidery machine parts and accessories authenticity
- Verify model-specific compatibility using official catalogs before ordering sewing machine accessories
- Maintain detailed part records for future embroidery machine repair needs
- Connect with sewing and embroidery community resources for trusted embroidery services and sales recommendations
Monitoring Machine Performance Over Time
Tracking your embroidery machine’s health isn’t guesswork—it’s data-driven protection. Real-time monitoring of stitch counts, thread breaks, and downtime patterns reveals subtle performance shifts before they escalate into costly embroidery machine repair needs.
| Performance Metrics | What to Track | Action Threshold |
|---|---|---|
| Stitch accuracy rate | Quality consistency | Below 95% |
| Thread break frequency | Breaks per 1000 stitches | Above 3 breaks |
| Downtime duration | Minutes per shift | Exceeds 15 min |
Smart sewing machine owners log these efficiency optimization indicators weekly. Connect with sewing and embroidery community resources for benchmarking templates, and consider predictive analytics tools that flag textile equipment servicing needs early—extending your machine servicing intervals by 40% through proactive monitoring rather than reactive repairs.
When to Upgrade or Replace Your Machine
Beyond tracking metrics, you’ll face a bigger question: repair or replace? When annual embroidery machine repair costs hit 50-70% of your sewing machine’s value, replacement benefits outweigh maintenance thresholds.
Machines over 10-15 years old struggle with part availability and technological compatibility.
Cost analysis reveals that investing in newer textile equipment repair options—or upgrading sewing embroidery and cutting machines entirely—often delivers better ROI than prolonging an aging workhorse.
Frequently Asked Questions (FAQs)
How often should I service my embroidery machine?
Your machine needs professional servicing based on how much you actually use it. Heavy users running 15+ hours weekly should schedule maintenance twice yearly, while lighter users can stick with annual service intervals.
Can I upgrade my machines software during repair?
Yes, most modern computerized embroidery machines support firmware fixes during service appointments. Authorized Brother resellers can install software updates via USB, enhancing stitching precision and design compatibility.
Always confirm upgrade benefits and perform compatibility checks beforehand.
Whats the average lifespan of an embroidery machine?
With proper sewing machine care and maintenance schedules, professional embroidery machines usually last 10+ years.
Operational lifespan depends on usage intensity—light use extends machine longevity considerably more than heavy daily embroidery durability demands.
Are there environmentally friendly repair options available?
Green repair options for fabric cutting machine repair and serging machine repair now include biodegradable parts, eco-friendly materials, and energy efficiency improvements.
Sustainable practices help reduce your environmental impact while maintaining performance.
How do I prepare my machine for shipping?
A single bump during transit can turn your machine into a pile of broken parts. Start by wrapping it in at least 2 inches of bubble wrap, then double-box with packing peanuts between layers.
How long does embroidery machine repair usually take?
Most embroidery machine repair takes 7 to 15 days on average, depending on workload and parts availability at your service center. Rush repair options can cut wait times to 3 to 5 days.
Can antique embroidery machines still be repaired today?
Yes, about 80% of antique embroidery machines can still be repaired with skilled technicians who source vintage restoration parts, fabricate custom components, and recalibrate mechanical systems—though restoration costs usually exceed standard embroidery machine repair fees.
What warranty coverage applies to refurbished embroidery machines?
Most refurbished embroidery machines include a 1-year warranty covering defects in materials and workmanship.
Some authorized resellers offer 30-day to 90-day coverage, while factory-recertified units may carry full manufacturer support equivalent to new machines.
Do repair shops offer loaner machines during service?
Finding a repair shop that offers loaner machine policies feels like striking gold—these temporary replacements keep your workflow alive.
Larger dealerships and authorized service centers generally provide this customer convenience through service contracts, minimizing production downtime during appliance repair.
How often should computerized embroidery machines be serviced?
Your machine needs professional attention annually under normal use, but heavy commercial operations should schedule service every six months to maintain peak performance and prevent costly breakdowns.
Conclusion
The best embroidery machine repair strategy isn’t fixing problems—it’s preventing them from starting. Your consistent cleaning, proper threading, and timely maintenance determine whether you’ll spend hours troubleshooting or minutes stitching.
Master the basics now: tension adjustments, bobbin care, and lubrication schedules.
When complex electrical or timing issues arise, professional service protects your investment. You’ve got the knowledge to keep your machine running smoothly. Put it into practice before the next breakdown forces your hand.

