This site is supported by our readers. We may earn a commission, at no cost to you, if you purchase through links.
Match your hoop size to your design; round hoops help with even tension, while square ones are great for large patterns. Keep the fabric taut but don’t stretch it; wrinkles can ruin your stitching.
Try using spray adhesive or wonder tape to hold tricky fabrics in place. Adjust hoop tension carefully—too loose or tight can cause puckering. And always place the fabric smoothly to avoid marks.
A little practice makes hooping second nature. Ready to level up and master embroidery techniques?
Table Of Contents
- Key Takeaways
- Choosing The Right Stabilizer
- Selecting The Ideal Hoop Size and Shape
- Achieving The Right Hoop Tension
- Mastering Basic Hooping Techniques
- Hooping for Large and Complex Projects
- Hooping Difficult Fabrics With Ease
- Exploring Different Hooping Methods
- Essential Materials for Successful Hooping
- Troubleshooting Common Hooping Issues
- Frequently Asked Questions (FAQs)
- Conclusion
Key Takeaways
- Pick the right stabilizer for your fabric—use tear-away for lightweight fabrics, cut-away for stretch knits, and wash-away for delicate materials.
- Keep fabric drum-tight in the hoop without overstretching to avoid puckering or distortion.
- Use tools like magnetic hoops, wonder tape, or adhesive stabilizers to keep tricky fabrics secure and steady.
- Break large designs into smaller sections and align carefully to maintain precision and prevent mistakes.
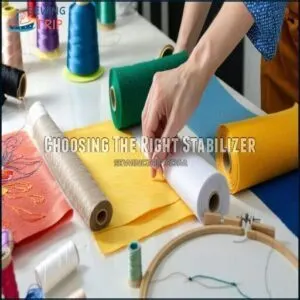
Choosing The Right Stabilizer
Picking the right stabilizer is key to keeping your fabric smooth and your stitches steady. Match it to your fabric type and design to avoid puckering and guarantee lasting results.
The right stabilizer makes all the difference—keep fabric smooth, stitches steady, and embroidery flawless every time.
Types of Stabilizers for Different Fabrics
Choosing the right stabilizer is key to perfect embroidery.
Each stabilizer shines for specific fabrics and designs:
- Tear-away stabilizers: Best for lightweight fabrics, offering clean removal.
- Cut-away stabilizers: Essential for stretchy knits, providing firm, lasting support.
- Wash-away stabilizers: Great for lace or delicate fabrics, leaving no residue.
Here’s your stabilizer selection guide:
- Fusible stabilizers: Prevent stretching and puckering.
- Match stabilizer weight to fabric and design.
- Always prioritize fabric stabilization methods over guesswork.
Many embroiderers purchase this stabilizer for its versatility.
Tear-Away Stabilizers for Light Fabrics
Light fabrics like cotton and linen pair well with a tearaway stabilizer.
It supports while stitching but removes easily without leaving residue. Use a lightweight stabilizer for delicate designs and make certain your fabric is taut but not stretched in the hoop.
For tighter details, balance design density and needle choice to prevent puckering. Stabilizer weight matters!
Cut-Away Stabilizers for Stretch Knits
Stretch knits demand stability for flawless embroidery.
A cutaway stabilizer is your go-to for providing steady Knit Fabric Support, even on intricate designs.
It prevents puckering, controls Stitch Density Impact, and stays in place after stitching.
Always trim the excess without stretching the fabric—Preventing Stretchback is key!
- Pro Tip: Use cutaway stabilizers for stretchy fabrics to handle Design Complexity Matters effortlessly.
How to Select The Right Stabilizer for Your Project
The right stabilizer depends on fabric compatibility and design complexity.
Use a tearaway stabilizer for sturdy, lightweight fabrics, or a cutaway stabilizer for stretchy knits.
Tackling sheer or delicate fabrics? Wash-away might work best.
Match stabilizer size to your hoop, extending it beyond the edges.
| Stabilizer Types | Best For | Stitch Density | Application Methods |
|---|---|---|---|
| Tearaway | Light fabrics | Low | Hoop with fabric |
| Cutaway | Stretchy knits | Medium to high | Hoop, trim excess |
| Wash-Away | Delicate fabrics | Varied | Rinse post-stitching |
| Fusible | Stretch materials | Medium | Iron-on for stability |
Selecting The Ideal Hoop Size and Shape
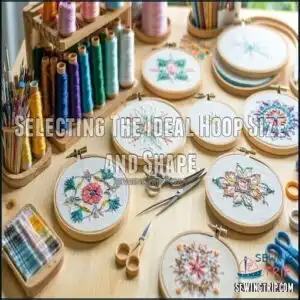
Choosing the right hoop size and shape guarantees your fabric stays stable and your stitches align perfectly.
Use a round hoop for better tension or a square hoop for larger designs, depending on your project needs.
Factors to Consider When Choosing a Hoop
Your embroidery hoop should match the fabric type, design size, and your budget.
Lightweight fabrics work well with plastic frames, while heavier ones need a sturdier wooden or metal hoop material.
Circular hoops are great for even tension, but rectangular hoops handle larger designs better.
Verify the tension system keeps your fabric snug but not stretched.
Many crafters find success when using various hoop dimensions for different projects.
Always pick a hoop size just big enough for your design—it prevents puckering and boosts embroidery hooping results by ensuring the right fit for your fabric type and design size.
Round Hoops for Consistent Tension
For consistent results, round hoops are unbeatable, thanks to their circular advantages in maintaining even fabric tension.
They’re ideal for precise embroidery techniques, offering excellent tension control and preventing puckering or uneven stitching.
Whether you’re working on delicate fabrics or complex designs, round hoops’ design suitability simplifies hooping techniques.
Their shape outshines alternative shapes, consistently delivering the stability you need for professional-looking embroidery results.
Square Hoops for Larger Designs
Square hoops are perfect for tackling large designs, like sweatshirt fronts or jacket backs, thanks to their shape and ability to reduce fabric distortion.
They offer great project stability and corner tension, holding fabric and stabilizer securely throughout embroidery.
Choose a hoop size that matches your design placement needs while supporting the fabric evenly.
By combining square hoops with proper embroidery techniques, you’ll maintain fabric tension and achieve smooth, professional results on your machine, which is crucial for professional outcomes.
Achieving The Right Hoop Tension
Getting the right hoop tension is essential for smooth, professional-looking embroidery.
By adjusting the tension evenly and avoiding common mistakes, you’ll prevent distortion and keep your fabric stable for perfect results.
This will help ensure that your embroidery looks professional and is of high quality, with smooth execution being key to achieving this goal.
Importance of Proper Tension for Successful Embroidery
How can you keep your stitches sharp and designs steady? The secret lies in Tension Consistency. Controlling your fabric tension guarantees flawless embroidery while avoiding Fabric Distortion or Thread Breaks.
Here’s how to balance it:
- Over-tight tension warps fabric, compromising Stitch Quality.
- Loose tension leads to sloppy designs lacking stability.
- Even hoop tension gives you smooth, professional results.
- Proper tension control keeps everything taut without damage.
Maintain steady tension, and enjoy perfect Design Stability. Puckered seams often indicate tension issues.
How to Use a Hooping Aid for Optimal Tension
Getting tension right makes hooping so much easier.
Hooping aids, like magnetic hoops or adhesive stabilizers, simplify tension control by securing fabrics neatly while avoiding mistakes like puckering. Wrapping inner hoops with grip tape improves fabric compatibility by holding everything snugly.
Secure fabrics easily with these tools. Consistent placement is a breeze with alignment tools, helping you nail those tricky setups. Use aids to match tension settings with fabric type, ensuring stability.
| Aid Types | Usefulness | Fabric Compatibility | Tips |
|---|---|---|---|
| Magnetic Hoops | Secure, easy setup | Thick or heavy fabrics | Avoid overtightening. |
| Adhesive Stabilizers | Holds slippery fabrics | Sheer or stretchy fabrics | Pair with fusible backing when needed. |
| Grip Tape | Boosts hoop grip | Most fabric types | Wrap inner hoops neatly. |
| Alignment Tools | Even tension, consistent | All fabrics | Use for complex design placement. |
Tips for Adjusting Tension for Different Fabrics
Adjusting tension is key to flawless embroidery.
Tighten your fabric tension just enough—loose settings cause misalignment, while over-tightening creates puckering.
Match fabric thread compatibility with stabilizers to refine tension control.
Use advanced hoop material effects when handling stretchy fabrics.
Test your setup with scrap fabric to perfect embroidery hooping techniques.
A Tension Troubleshooting Guide prevents mistakes, ensuring smooth, wrinkle-free results.
Common Mistakes to Avoid When Adjusting Hoop Tension
Finding balance with hoop tension is simple when you know what to avoid:
- Over-tightening fabric crushes elasticity, leaving puckers and distortion.
- Uneven tension causes skipped stitches and messy designs.
- Ignoring fabric needs or using the wrong hoop size leads to poor results.
- Rushing adjustment without testing hoop screws first invites trouble.
To master tension, stay mindful, test setups, and respect your fabric’s limits—it’s worth the extra effort!
Mastering Basic Hooping Techniques
Getting the basics right is key to achieving smooth, professional embroidery. By mastering simple hooping techniques, you’ll guarantee your fabric stays taut and your stitches come out perfectly aligned.
Stretching Fabric Taut Within The Hoop
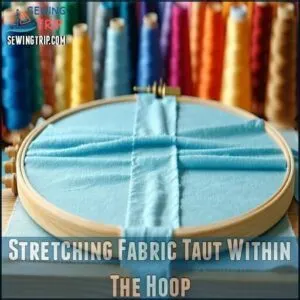
A taut surface is key for embroidery perfection.
Lay your stabilizer and fabric flat on the bottom hoop, guaranteeing a smooth surface.
Press the top hoop down gently and tighten evenly, use small pulls around the edges to balance tension, but avoid overstretching—this prevents fabric distortion and maintains wrinkle prevention.
Perfect tension control guarantees crisp, clean stitching every time.
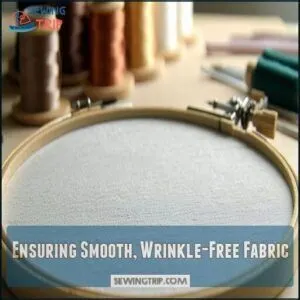
Ensuring Smooth, Wrinkle-Free Fabric
In the pursuit of embroidery perfection, smooth, wrinkle-free fabric is non-negotiable.
Proper fabric preparation and tension consistency are key to preventing fabric puckering. Follow these steps:
- Fabric Pre-Treatment: Wash your fabric to remove finishes or coatings that prevent proper tension.
- Wrinkle Removal: Iron while the fabric is slightly damp using low heat, avoiding scorch marks.
- Layer Alignment: Ensure fabric and stabilizer are evenly layered to eliminate wrinkles when hooping.
- Hooping Techniques: Maintain balanced tautness without over-pulling, which can distort fabric tension.
Smooth fabric guarantees crisp stitches, perfect alignment, and prevents hoop burn or puckering.
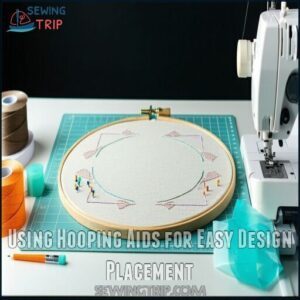
Using Hooping Aids for Easy Design Placement
Proper alignment is key to flawless embroidery, and hooping aids make it easier.
Use hooping stations for a stable base and Magnetic precision to secure fabric tightly. T-pin anchoring adds grip for stubborn fabrics, while painter’s tape offers Tape security for slippery materials.
These tools guarantee Consistent placement, preventing mishaps. Hooping aids like templates simplify design placement, facilitating perfect alignment and design registration every time, ensuring perfect alignment.
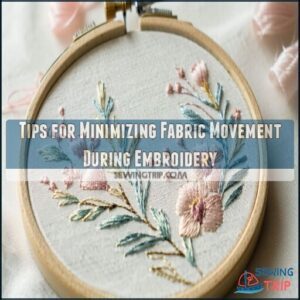
Tips for Minimizing Fabric Movement During Embroidery
Keeping fabric from moving during embroidery calls for precision.
Use these tips:
- Pair the right stabilizer with your fabric type.
- Achieve fabric tension that’s drum-tight yet wrinkle-free.
- Maintain strong tension control by adjusting your hoop snugly.
- Lower machine speed or explore floating alternatives for tricky fabrics.
- For dense designs, consider needle choice and stitch density adjustments.
These hooping techniques minimize hoop burn and guarantee flawless results.
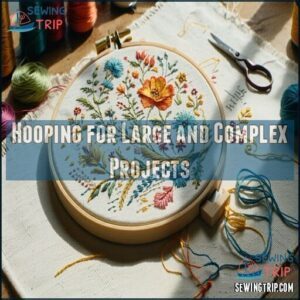
Hooping for Large and Complex Projects
When working on large and complex embroidery projects, it’s important to plan your hooping carefully to maintain precision and avoid mistakes.
Breaking the design into sections and using tools like pins or basting stitches can help keep everything secure and aligned.
Breaking Down Large Projects Into Manageable Sections
Tackling large embroidery projects is easier when you break them into smaller, manageable sections. This approach improves multi-hooping accuracy and design alignment while reducing sectioning complexity.
Create a project plan outlining natural breaks in your design, ensuring proper registration across sections. Carefully adjust hoops and stabilizers to avoid fabric movement and secure seamless embroidery design placement.
- Use a template to segment design and plan embroidery placement.
- Maintain alignment by re-hooping with precision.
- Adjust stabilizer for each section’s requirements.
- Conceal seams for a polished look.
- Take your time for clean, consistent results.
Using Pin-Basting for Smaller Projects
For small projects, pinbasting is a lifesaver. Secure fabrics to stabilizers with pins, ensuring even tension and no shifting. It’s ideal when embroidery hooping risks marks on delicate items like baby clothes.
Carefully plan pin placement for added fabric security. Prefer straight pins, and consider basting alternatives for tricky fabric placement. Master these compact embroidery techniques for precision.
| Project Size | Pin Type | Basting Alternatives | Stabilizer Choice | Needle Choice |
|---|---|---|---|---|
| Small napkins | Straight pins | Fusible stabilizers | Lightweight tear-away | Embroidery needle 75/11 |
| Baby clothes | T-pins | Adhesive stabilizers | Soft cut-away | Ballpoint needle 70/10 |
| Delicate fabrics | Fine pins | Water-soluble sprays | Wash-away | Sharp needle 80/12 |
| Sheer fabrics | Safety pins | Double-sided tape | Transparent stabilizers | Universal needle 70/10 |
| Intricate designs | T-pins | Floating (last resort) | Fusible cut-away | Titanium needle 80/12 |
How to Avoid Hoop Marks on Your Fabric
Hoop marks, or hoop burn, can ruin your work.
Try these simple fixes to avoid them:
- Use Padding Fabrics or a thin stabilizer layer under hoops.
- Adjust Tension Rings to prevent fabric distortion.
- Explore Hoopless Embroidery for minimal pressure.
- Use Fabric Softeners or Steaming Techniques post-embroidery to erase marks.
With these hooping techniques, you’ll achieve flawless results without compromising your fabric.
Tips for Embroidering Personalized Messages
When embroidering personalized messages, start with thoughtful font selection and align the lettering size to fit your design space perfectly.
Keep message placement centered using proper hooping techniques and stabilize the fabric securely.
Vibrant thread colors and creative layout options add flair, and using quality floss guarantees optimal embroidery results.
Double-check centering embroidery designs for balance to confirm your message stands out beautifully, showcasing your mastery in embroidery hooping, with attention to thread colors and font selection.
Hooping Difficult Fabrics With Ease
Tackling tricky fabrics doesn’t have to feel impossible if you’ve got the right techniques.
With tools like wonder tape and proper stabilizers, you can keep even the slipperiest materials secure and ready for embroidery.
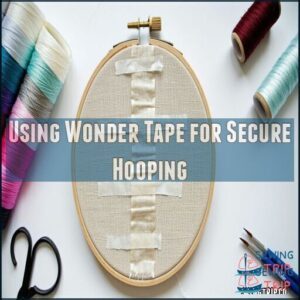
Using Wonder Tape for Secure Hooping
Securing tricky fabrics, like stretchy knits or slippery silks, can feel overwhelming, but Wonder Tape simplifies the process. This double-sided tape guarantees strong fabric adhesion and smoother embroidery, no matter the material.
Here’s how to use it effectively:
- Apply strips of Wonder Tape along the hoop’s edge to keep fabric and stabilizer from slipping.
- Press lightly to secure without overstretching, as pulling too hard risks puckering.
- Add extra tape to the top hoop for additional stability during stitchwork.
- Swap with alternatives like masking or painter’s tape if Wonder Tape isn’t available.
With these hooping techniques, your embroidery projects benefit from adhesive stabilizers, reducing fabric movement and errors. Plus, it’s water-soluble, making residue removal a breeze!
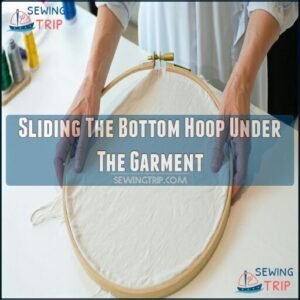
Sliding The Bottom Hoop Under The Garment
Sliding the bottom hoop under your garment is essential for great hooping techniques. Smooth insertion guarantees precise alignment, keeping fabric layers and stabilizers wrinkle-free.
Choose a hoop size that fits your design snugly to avoid snags. Gently adjust the tension to secure the fabric without overstretching.
This floating method is especially helpful for garments with limited access. With careful embroidery hooping, you’ll master hoop placement while minimizing issues like puckering or fabric distortion.
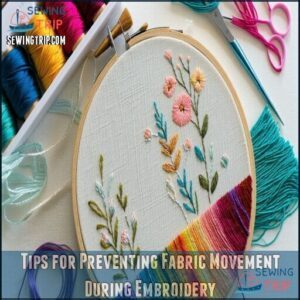
Tips for Preventing Fabric Movement During Embroidery
Preventing fabric movement starts with secure hooping and matching fabric tension to your project.
Here’s how:
- Fabric Grip: Verify fabric is taut like a drum, avoiding overstretching.
- Proper Stabilizer: Pair stabilizers with stitch density and fabric type.
For unhoopable items, tape or pin material over the stabilizer. Using fabric stabilizers can also help prevent shifting.
Small details like these keep your stitches flawless!
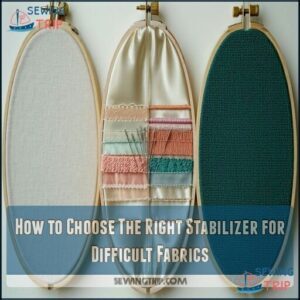
How to Choose The Right Stabilizer for Difficult Fabrics
Tackling a fabric challenge starts with choosing the right stabilizer.
Match stabilizer weight to fiber content and stitch density.
For slippery satins, use adhesive-backed stabilizers like Sulky Sticky.
Stretchy fabrics need a cut-away stabilizer for project longevity.
Sheer materials work best with a wash-away stabilizer.
Always test stabilizers before starting your design to guarantee smooth results and save yourself frustration later on!
Exploring Different Hooping Methods
In the context of embroidery, choosing the right hooping method can make all the difference in achieving smooth, professional results.
From combining fabric and stabilizer in one hoop setup to using adhesive-backed options, each method offers unique benefits depending on your project’s needs.
Hooping Fabric and Stabilizer Together
In the context of embroidery hooping, hooping fabric and stabilizer together is your ticket to clean, professional results.
By combining these two elements in the hoop, you create a stable foundation that minimizes fabric shifting and guarantees precise stitching.
Key tips to master this method:
- Layer Orientation: Place the stabilizer under the fabric, aligning them perfectly.
- Even Security: Avoid over-pulling fabric; aim for a smooth, drum-tight surface.
- Stabilizer Extension: Use a stabilizer large enough to extend beyond the hoop’s edges for added support.
- Avoiding Basting: Proper hooping eliminates the need for basting stitches.
This simultaneous hooping approach works especially well for structured fabrics like tea towels.
The result? Wrinkle-free material, consistent tension, and bold designs that’ll make your stitching shine.
Layer properly for professional machine embroidery.
Hooping Adhesive-Backed Stabilizer for Easy Embroidery
Adhesive-backed stabilizers simplify embroidery on challenging fabrics.
After hooping the stabilizer, gently score its surface and press your fabric in place. This eliminates fabric movement, spray adhesive mess, and hoop residue.
| Adhesive Tips | Details |
|---|---|
| Adhesive Types | Tear-away, water-soluble |
| Needle Stickiness | Reduced with proper application |
| Floating Benefits | Easier for non-hoopable items |
| Spray Adhesive Alternative | Cleaner, less residue |
| Layering Stabilizers | Adds stability for tricky fabrics |
Experience smooth stitching with fewer disruptions!
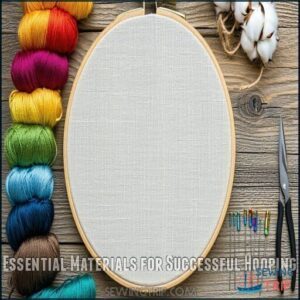
Essential Materials for Successful Hooping
Getting the right materials is key to achieving flawless hooping every time.
Achieve flawless hooping by pairing quality stabilizers, needles, and threads—small details that make all the difference in perfect embroidery.
From sturdy stabilizers to sharp needles and smooth thread, each choice guarantees your embroidery project stays secure and professional-looking, with flawless hooping being the ultimate goal.
High-Quality Thread for Optimal Embroidery Results
Choosing high-quality embroidery thread is essential for stunning results.
Think of it as the lifeblood of your project—without it, even great hooping can fall flat.
Pay attention to thread types, thread weight, and needle compatibility.
Consistent thread tension guarantees smooth stitching, while colorfast threads prevent fading over time.
- Pick professional-grade threads like Isacord or Sulky—they deliver unmatched durability.
- Match the thread weight to your fabric for superior results.
- Confirm needle and thread compatibility to avoid breakdowns during machine embroidery.
Premium Stabilizers for Different Fabric Types
For flawless embroidery, match the stabilizer weight to your fabric weave and design density.
Light fabrics love tear-away options, while stretchy knits need cut-away stabilizers.
Adhesive-backed stabilizers, like Sulky Sticky, simplify tricky materials, and wash-away stabilizers are perfect for delicate projects.
Combining sticky stabilizers with the right fabric guarantees needle compatibility and crisp results.
The right stabilizer transforms embroidery from ordinary to extraordinary.
Titanium Needles for Smooth, High-Speed Embroidery
Titanium needles are a game-changer for embroidery techniques, offering unmatched durability and precision.
They maximize stitch quality while reducing thread and needle breaks. Perfect for embroidery hooping, they handle high-speed demands with ease, saving time and frustration.
- Needle Durability: Lasts 5-8 times longer.
- Speed Enhancement: Performs at top speeds.
- Stitch Quality: Keeps stitches clean.
- Fabric Compatibility: Works with tough fabrics.
- Cost Analysis: Higher price, great value.
How to Choose The Right Materials for Your Project
The success of embroidery hooping hinges on fabric compatibility, thread selection, and proper stabilizer weight.
Use threads that resist breaking, and match needle types to fabric weight and design considerations.
Stabilizer choice impacts your results—pick one that supports your material without adding bulk.
These embroidery techniques guarantee smooth machine embroidery, turning designs into polished, professional creations every time, with the right approach to thread selection.
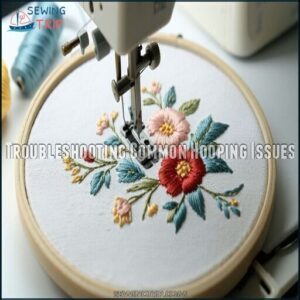
Troubleshooting Common Hooping Issues
When your fabric shifts or puckers, your embroidery design can quickly lose its charm.
Addressing these common hooping issues requires careful adjustments and the right techniques to keep your project on track, which involves complete concepts and understanding of the embroidery process.
How to Prevent Fabric Movement During Embroidery
Keeping fabric steady during embroidery is a must for clean, polished results.
Fabric movement can ruin your design, but these tricks will help:
- Choose the right stabilizer—it works like a grip for your fabric.
- Check hoop tension—tight, but not overly so, minimizes slips.
- Apply temporary adhesive spray—a quick, secure boost.
- Try floating embroidery with magnetic hoops to avoid stretching delicate fabrics.
Preventing movement guarantees every stitch lands perfectly!
Tips for Avoiding Puckering and Distortion
Embroidery hooping mistakes often lead to fabric distortion or puckering, but you can avoid these issues with precision.
- Balance fabric tension by keeping it taut but avoid over-tightening effects to prevent ripples.
- Mind fabric relaxation post-hooping—iron before, never after.
- Check layer awareness to guarantee stabilizer and fabric are aligned for smooth, wrinkle-free results.
How to Fix Common Hooping Mistakes
If your embroidery isn’t perfect, don’t panic—mistakes can be fixed.
Puckering? Adjust the hoop tension and switch to a lightweight stabilizer. Misaligned designs? Reposition the hoop carefully or try magnetic hoops for better alignment.
For fabric tearing or slippage, verify the fabric is taut but not overstretched. Struggling with hoop burn? Smooth the fabric softly and loosen the tension slightly.
To prevent repeated distortion, always prep materials properly and test adjustments before restarting your project.
Troubleshooting Tips for Specific Fabric Types
Troublesome fabrics ruining your embroidery flow? Let’s tackle common hurdles like knit puckering or leather damage with these simple tips:
- Use cut-away stabilizers for hooping stretchy fabrics; they prevent slippage and fabric distortion.
- Stop sheer shifting by securing materials with lightweight stabilizers and double-sided tape.
- Protect velvet from marks by floating it on top of the stabilizer and hoop.
- Reinforce thick materials like denim to avoid distortion and hoop burn by pairing heavyweight stabilizers with sturdy needles.
These small adjustments guarantee smooth, pucker-free stitching every time! Addressing rayon sewing problems often requires similar attention to detail, ensuring a successful embroidery experience with common hurdles like fabric issues.
Frequently Asked Questions (FAQs)
How do you make embroidery hooping easier?
Use hooping aids like magnetic hoops or stations to improve accuracy and speed.
Match your hoop size to the design, stretch fabric taut without over-tightening, and pair the right stabilizer for flawless results.
What is the correct way to use an embroidery hoop?
Did you know 90% of stitching issues come from improper hooping?
Loosen the hoop screw, center your fabric and stabilizer, then gently tighten it.
Aim for drum-tight fabric without wrinkles or overstretching.
What is the floating method of embroidery?
Floating means placing fabric on a hooped stabilizer without securing it inside the hoop.
You can tape, pin, or baste the fabric to keep it stable, making it perfect for tricky items or delicate materials.
How to make an embroidery hoop tight?
Think of an embroidery hoop like tuning a drum.
Gently tighten the screw to secure fabric, ensuring drum-tight tension.
Avoid over-tightening; instead, gradually adjust while smoothing wrinkles until it’s firm and evenly taut.
How to properly hoop for embroidery?
Start by placing your fabric and stabilizer in the hoop with even tension.
Avoid overstretching, and gently adjust the edges for a drum-tight feel.
Verify there are no wrinkles, puckers, or excessive pull.
What is multi-hooping embroidery?
Picture a puzzle coming together seamlessly—multi-hooping embroidery lets you tackle oversized designs across multiple hooping areas.
You realign your fabric and hoop each section precisely, creating one cohesive masterpiece without limits on size.
What makes a good embroidery hoop?
A good embroidery hoop provides even tension, fits your design closely, and matches your fabric type.
Avoid ones that over-stretch or damage fabric.
Look for quality materials, reliable tension control, and the right shape.
How to hoop large embroidery?
Use a sturdy hooping station or magnetic hoop for large embroidery.
Stabilize fabric edges with clips or T-pins, ensuring it’s taut.
Work in sections, aligning carefully to avoid puckering or distortion for smooth results.
What are the benefits of using a multi-position hoop?
A multi-position hoop lets you tackle larger designs in sections without rehooping, saving time and ensuring accuracy.
It works great for intricate projects, reducing fabric movement, and helping maintain smooth, professional-looking results, which is a key aspect of using a multi-position hoop for larger designs.
How to choose the right stabilizer for my embroidery design?
In the context of embroidery, don’t put all your eggs in one basket—match your stabilizer to your fabric and design.
Choose cut-away for stretch, tear-away for stable fabrics, and water-soluble for delicate projects.
Conclusion
Imagine finishing a design only to find puckering or wrinkles—it’s frustrating, right?
With the right embroidery techniques for best hooping, you can avoid those headaches.
Choose the perfect stabilizer for your fabric, match your hoop size with your design, and pay close attention to fabric tension.
Smooth fabrics, proper hooping aids, and steady adjustments make all the difference.
Mastering these skills takes practice, but soon, flawless embroidery will become second nature.
Now, get hooping!

