This site is supported by our readers. We may earn a commission, at no cost to you, if you purchase through links.
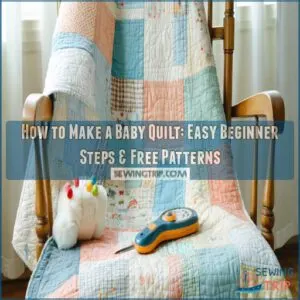 To make a baby quilt, start by choosing soft, durable fabrics like cotton or flannel. Pre-cut sets like jelly rolls make cutting easier.
Pick a simple pattern, like blocks or strips, and lay out your pieces. Stitch rows together with straight seams, pressing after each step for neatness.
Add a batting layer for warmth, then place your backing fabric underneath. Quilt the layers together using straight or decorative stitches, keeping lines even.
Table Of Contents
Key Takeaways
- Choose soft, durable fabrics like cotton or flannel, and pre-wash them to prevent shrinkage and maintain quality.
- Use simple patterns and pre-cut fabric sets like jelly rolls or charm packs to save time and ensure easy assembly.
- Layer the quilt top, batting, and backing carefully, then quilt with straight-line stitches for a clean finish.
- Bind the edges neatly, add personal touches like labels, and wash gently before gifting the quilt.
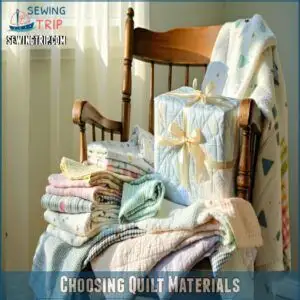
Choosing Quilt Materials
Pick fabrics like cotton or flannel for a soft, durable quilt that’s gentle on baby’s skin.
Use batting to add insulation and consider pre-cut sets to save time and guarantee precise measurements.
Selecting Fabric for Durability
Choose durable fabric for baby quilts by focusing on quality and comfort. Tight weaves resist wear and fading, while 100% cotton fabric lasts longer.
Soft textures like flannel fabric add warmth. High thread counts improve strength. Pre-washed fabrics prevent shrinkage.
When selecting fabric, consider the quality fabric guide to guarantee the best results.
- Tips:
- Use cotton fabric.
- Try tight weave patterns.
- Pre-wash fabric for baby quilts.
- Check texture options.
- Consider fabric scraps.
Cotton and Flannel Options
Cotton and flannel fabrics both shine in baby quilt tutorials for their softness and practicality.
Cotton fabric offers breathable, durable texture choices, while flannel fabric adds cozy warmth perfect for cuddles.
In fabric selection, consider cotton blends for easy care.
This DIY baby quilt guide recommends flannel types for chilly climates and cotton blends for year-round use.
| Feature | Cotton Fabric | Flannel Fabric |
|---|---|---|
| Texture Choices | Smooth, breathable | Soft, fuzzy |
| Softness Levels | Moderate | High |
| Durability | Long-lasting | Moderate |
| Best Use | Year-round quilts | Cozy winter quilts |
| Care | Easy to wash and dry | Requires gentle handling |
Quilt Batting for Insulation
For cozy baby quilts, batting matters. Quilt batting options include Cotton, Polyester, and blends, each with distinct thermal properties.
Low Loft provides a thinner layer, while High Loft offers extra warmth—great for insulation.
Consider the loft and fiber type when making your selection.
Natural fiber fillings like Wool or Bamboo feel luxurious but cost more. Choose based on desired thickness and warmth for effective insulation materials in your baby quilt tutorial.
Pre-Cut Fabric Sets
Pre-cut fabric sets simplify quilt projects.
Options like fat quarters, jelly rolls, or layer cakes save time and reduce waste. A jelly roll baby quilt or fat quarter baby quilt uses these pre-cut pieces, offering great fabric selection in coordinated bundles.
Beginners can explore various color palettes for inspiration.
Quilting kits often include pre-cut squares for easy assembly, perfect for beginners creating vibrant designs effortlessly.
Quilt Patterns and Design
You can start with simple quilt patterns that are easy to follow, like blocks or geometric shapes.
These designs are great for beginners and often come with free online tutorials to guide you, which can help you learn simple quilt patterns.
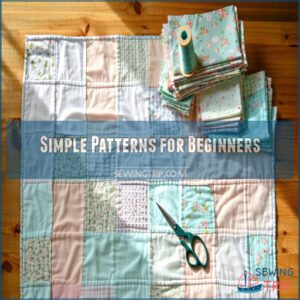
Simple Patterns for Beginners
Start with an easy baby quilt using simple strips or easy blocks.
Patterns like patchwork squares or brick rows are great for beginners.
Look for a baby quilt tutorial with clear steps to learn quilt basics.
Beginner tips include using pre-cut fabrics and repeating patterns for a simple baby quilt, these beginner baby quilt designs are quick and forgiving.
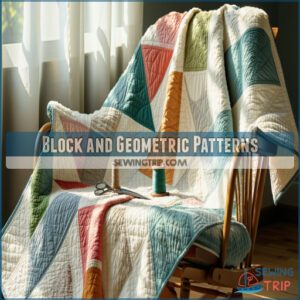
Block and Geometric Patterns
Block designs and geometric shapes add charm to any patchwork baby quilt.
Start simple with quilt blocks like squares, rectangles, or triangles. Mixing patterns and choosing vibrant color schemes creates stunning geometric baby quilt patterns.
This baby quilt tutorial focuses on quilt textures, highlighting how combinations of shapes and colors bring visual interest to triangle quilts or other geometric designs, making geometric baby quilt patterns a great choice.
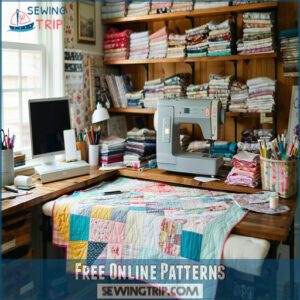
Free Online Patterns
For easy baby quilt patterns, explore free options online.
Websites like Polka Dot Chair and AllPeopleQuilt offer hundreds of baby quilt tutorials featuring Quilt Templates, Digital Downloads, and step-by-step instructions.
Missouri Star’s Online Tutorials show practical techniques, and Annie’s Catalog provides cute, beginner-friendly designs.
You can utilize free quilt design software to customize or create your own patterns.
These resources offer endless inspiration, making pattern selection simple for crafting your ideal baby quilt, with the help of step-by-step instructions.
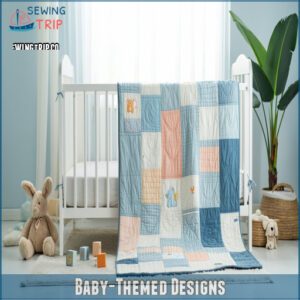
Baby-Themed Designs
Baby quilt designs work best with timeless themes like Baby Blocks or soft nursery colors.
Look for baby quilt ideas that match your nursery’s style. Fabric choices can include pastels or playful prints.
Use an easy baby quilt pattern with adjustable quilt sizes to fit cribs. A quick baby quilt tutorial simplifies creating fun and memorable quilt themes.
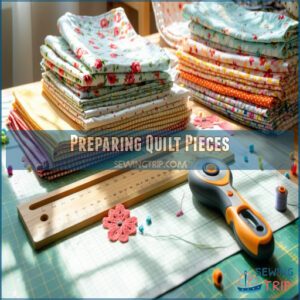
Preparing Quilt Pieces
Start by pre-washing and drying your fabrics to prevent shrinkage and maintain their colors. Use a rotary cutter and mat for clean, accurate cuts, ensuring each piece is measured precisely.
Precise Measurements and Cutting
When working with quilt patterns, accurate seams depend on precise baby quilt measurements.
Use a rotary cutter and a cutting mat for clean edges.
Measurement tools like rulers guarantee uniform fabric cutting.
Aim for baby quilt sizes that match your design.
Cutting techniques, including straight lines and consistent shapes, help maintain precision methods.
This assures the quilt fits together perfectly, using clean edges.
Ironing and Pressing Fabrics
Ironing is essential for fabric preparation.
Smooth each piece to remove wrinkles using gentle pressing techniques.
For seam pressing, set the iron to a moderate heat.
Don’t skip this step—it guarantees clean edges and accurate sewing for your baby quilt.
Proper ironing tips like pressing seams flat help align layers perfectly.
Follow these baby quilt instructions for flawless results.
Using Rotary Cutters and Mats
To cut fabric precisely for your baby quilt, use a rotary cutter and a self-healing mat.
Follow these steps:
- Position the fabric flat for stability.
- Hold the rotary cutter correctly to avoid slips.
- Align fabric edges with mat gridlines for accuracy.
- Replace dull blades to guarantee clean cuts.
For precise cutting, explore the best rotary cutters available for quilting. This tool simplifies quilting for beginners!
Pre-Washing and Drying Fabrics
Pre-washing prevents color bleeding and fabric shrinkage.
Use cold water and mild detergent to protect the thread count and weave density. Precut fabrics, like fat quarters or jelly rolls, benefit from a quick rinse to soften textures.
Press the fabric after washing to remove wrinkles. Skipping this step adds charm but risks uneven baby quilt materials, which can affect the overall thread count and weave density.
Sewing Quilt Layers
You’ll start by stacking the quilt top, batting, and backing fabric carefully to create the quilt “sandwich.”
Make sure everything is smooth and secure with pins to prevent shifting while you sew, which is a complete concept to ensure your quilt turns out as expected.
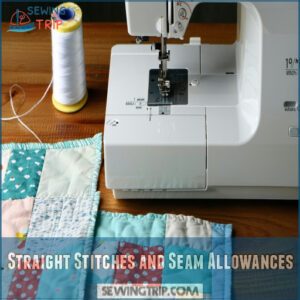
Straight Stitches and Seam Allowances
Set your sewing machine with a ¼-inch seam allowance for accurate piecing.
Use a medium stitch length and check fabric tension to prevent puckering. Sew at a steady quilting speed for smooth stitching.
Choose strong thread that complements your fabric. Consistent seams are key in every baby quilt tutorial.
Follow this step-by-step baby quilt guide for an easy quilt top.
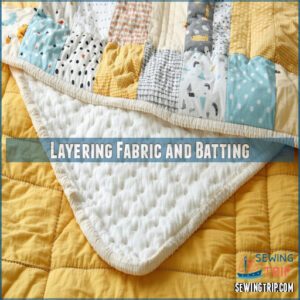
Layering Fabric and Batting
Start by laying the backing fabric flat with the right side down.
Place the batting on top for quilt insulation. Align the quilt top, right side up, ensuring layer alignment.
Smooth each layer to avoid wrinkles. Fabric layering is key in this baby quilt tutorial.
Whether using fat quarters or a layer cake baby quilt, precision matters.
Quilting Stitches and Techniques
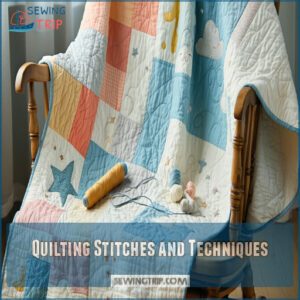
Once layers are set, quilting stitches connect fabric and batting, adding detail and texture.
Straight-line stitching is a simple sewing technique ideal for beginners. Free-motion options let you play with creative stitch patterns.
Use these easy baby quilt tutorial tips to match stitch density with quilt embellishments. Explore how to quilt designs for soft, visually appealing quilts, and learn to create quilts with creative stitch patterns and visually appealing designs.
Binding The Quilt
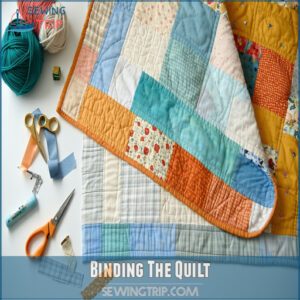
Binding the quilt gives it a polished finish.
Cut fabric strips for the binding, ensuring they’re slightly longer than the quilt’s edges.
Attach them around the quilt borders using sewing binding techniques.
Fold binding over the edges for fabric edging.
Stitch carefully for neat edge finishing.
This step completes your baby quilt, showcasing the quilt pattern beautifully in your baby quilt tutorial.
Quilt Construction Techniques
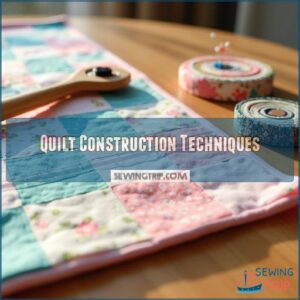
You’ll start building your quilt by piecing blocks and rows with accuracy.
Press seams flat and use pre-cut fabrics like jelly rolls to save time and create neat, textured designs.
Piecing Quilt Blocks and Rows
Piecing quilt blocks and rows is key in any baby quilt tutorial. Focus on block construction by aligning edges precisely.
Use patchwork techniques to create a cohesive quilt top. Explore free quilt block tutorials for design inspiration.
During row assembly, make sure proper seam management for smooth stitching. Follow your quilt pattern carefully, checking each section.
Successful quilt blocks and rows bring your baby quilt’s design to life effortlessly, which is the result of careful block construction.
Pressing Seams and Preventing Shrinkage
Pressing seams matters for smooth quilt layers and precise alignment.
Use a hot iron to press seams flat, alternating directions to reduce bulk. Ironing tips include pressing, not dragging, to avoid fabric distortion.
Pre-wash fabrics to prevent shrinkage. Maintaining seam allowances guarantees quilt finishing looks neat.
Seam pressing is key for an easy baby quilt that showcases professional results, and it is essential for smooth quilt layers.
Using Jelly Rolls and Pre-Cut Fabrics
Pre-cut fabrics like jelly rolls and fat quarters make baby quilt patterns easier and faster.
Jelly Roll Tips: each roll has 2.5-inch strips perfect for efficient strip piecing. You can buy baby quilt jelly roll products.
Use fewer tools, reduce cutting time, and minimize waste. Follow an easy baby quilt tutorial to create neat rows.
Pre-cut strips also simplify roll binding techniques for a polished finish.
Adding Texture and Visual Interest
Mix textures like soft cotton and plush minky for a sensory baby quilt.
Combine fabric choices with a bold color scheme for visual balance. Play with patterns by alternating geometric blocks and smooth solids.
Use texture mixing to enhance a modern baby quilt design. Try an easy charm baby quilt or fat quarter baby quilt from a quilt tutorial.
Finishing and Presenting Quilt
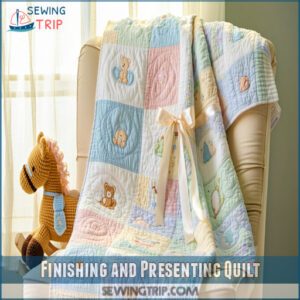
Finish your quilt by adding a clean binding around the edges to cover raw seams.
Attach a label or decorative touch to personalize it.
Then wash it gently to prepare it for gift-giving or everyday use.
Binding and Edging Techniques
Finish your quilt with clean edges by using simple binding techniques.
- Cut fabric strips or bias tape to create binding.
- Attach binding to the quilt’s front using precise sewing techniques.
- Fold the fabric to the back and hand-stitch for professional edge finishing.
- Trim excess fabric to achieve smooth quilt borders.
This baby quilt tutorial simplifies edging beautifully.
Adding Labels and Embellishments
Adding a personal touch through labels and embellishments completes your baby quilt journey.
For beginners, essential quilting tools are important for success.
Use fabric markers or personalized tags to create quilt signatures. Simple additions like embroidery or appliqué elevate any easy baby quilt.
For inspiration, explore the baby quilt tutorial example below:
| Idea | Tools Needed | Difficulty |
|---|---|---|
| Fabric Markers | Permanent Markers | Easy |
| Personalized Tags | Sew-On Labels | Easy |
| Quilt Signatures | Embroidery Needles | Moderate |
| Appliqué | Iron-On Patches | Moderate |
| Embellishment Tips | Scrap Fabric | Easy |
The table provides a clear overview of the different ideas, including fabric markers, personalized tags, and appliqué, along with the necessary tools and difficulty levels, making it easier to get started with your baby quilt project.
Caring for and Washing Quilts
To maintain your baby quilt, use gentle washing methods like handwashing in cold water to prevent fabric shrinkage and preserve colors.
Avoid harsh detergents; opt for mild soap instead. Air drying is best for quilt fabrics.
For quilt storage, keep it flat in a cool, dry place, away from sunlight. This guarantees long-lasting durability and vibrant colors.
Gift Ideas and Presentation Tips
Now that your baby quilt is complete and clean, showcase it beautifully for gifting.
Add a quilt label with a personalized message, marking the occasion.
Use baby-themed gift wrapping or a decorative presentation box to enhance its charm.
For a baby shower gift, pair the quilt with care instructions or a printed baby quilt tutorial tied with a ribbon, which can include a quilt label.
Frequently Asked Questions (FAQs)
What is the fastest baby quilt to make?
Speed matters, right?
Try a simple patchwork quilt using pre-cut charm packs.
Just sew the 5-inch squares row-by-row.
Add batting, backing, and binding, and you’re done!
It’s quick, straightforward, and beginner-friendly.
What size of squares are best for a baby quilt?
Cut 5-inch squares for a baby quilt.
They’re easy to handle, create balanced designs, and fit well into quilt patterns like patchwork.
Pre-cut charm packs simplify the process, saving you time and ensuring uniformity.
What is the best filling for a baby quilt?
Go with cotton or bamboo batting for a soft, lightweight feel, perfect for babies.
They’re breathable, machine-washable, and hypoallergenic.
Wool adds warmth but isn’t as baby-friendly.
Avoid heavy polyester; it traps heat unnecessarily, and consider the benefits of breathable materials for a comfortable feel.
What is the best backing for a baby quilt?
Think smooth and snug! Use cotton or flannel for a soft and breathable quilt backing.
Both materials wash well, feel gentle on sensitive skin, and hold up to frequent washing—perfect for a cozy, durable finish.
What are the best baby quilt tutorials?
Check out free tutorials on sites like YouTube or Pinterest.
Try “hourglass baby quilt” or “rail fence” patterns for beginners.
Look for step-by-step instructions, using pre-cut fabrics like charm packs or jelly rolls.
How easy is it to make a baby quilt?
Ever wonder if making a baby quilt is simple?
It’s surprisingly easy!
Use pre-cut fabrics, simple patterns, and straightforward stitches.
With basic tools and patience, even a beginner can craft a heartfelt, cozy quilt.
Are there Easy Baby Quilt Patterns for beginners?
Yes, beginners can try simple baby quilt patterns like patchwork squares, rail fence, or brick designs.
Pre-cut fabrics like charm packs or jelly rolls make it easy.
Straight seams and minimal cutting simplify the process.
Are baby quilts easy to sew?
Sewing a baby quilt is like following a simple puzzle—gather pieces, stitch them carefully, and watch it come together.
Start with straightforward patterns and pre-cut fabrics, and you’ll create a beautiful, functional quilt easily.
Do baby quilt patterns work for baby showers?
Baby quilt patterns are perfect for baby showers.
They’re thoughtful, personal, and practical gifts.
You can customize colors and themes to match the nursery, creating a keepsake that parents will treasure for years to come.
Can a beginner make a quilt?
Over 67% of beginner quilters start with small projects like baby quilts.
You can make one by choosing simple patterns, pre-cut fabrics, and practicing straight stitches.
Tools like rotary cutters and sewing machines simplify the process.
Conclusion
Practice makes perfect" applies to crafting too, so don’t rush your baby quilt project.
Choose durable fabrics, follow a simple pattern, and take it step-by-step.
Press your seams, layer batting neatly, and bind securely to finish your quilt with care.
With free patterns and beginner-friendly designs, it’s easy to learn how to make a baby quilt while creating a personal and thoughtful gift.
Enjoy the process, and your handmade quilt will be cherished for years.
- https://www.quora.com/How-do-I-make-a-baby-quilt-for-beginners
- https://thediymommy.com/a-handmade-christmas-sew-an-easy-beginners-baby-quilt/
- https://www.seasonedhomemaker.com/beginner-baby-quilt/
- https://blog.treasurie.com/how-to-make-a-baby-quilt/
- https://www.youtube.com/playlist?list=PL2cUZAw3heqI-ASDlVjNzR9k7l04ZFqQv

