This site is supported by our readers. We may earn a commission, at no cost to you, if you purchase through links.
Your first embroidery project doesn’t fail because you lack talent. It fails because you grabbed the wrong needle, fought with tangled floss, or watched your fabric pucker into waves. Professional embroiderers know this truth: mastery starts with having the right embroidery tools and supplies in your workspace.
A sharp pair of snips changes everything. So does a hoop that actually holds tension. The difference between frustration and flow often comes down to spending fifteen dollars on proper equipment instead of wrestling with whatever you found in a drawer.
Quality tools don’t just make stitching easier—they teach you what’s possible when resistance disappears and your hands can finally execute what your mind envisions.
Table Of Contents
- Key Takeaways
- Essential Embroidery Tools and Their Uses
- Choosing The Right Embroidery Needles
- Selecting Embroidery Threads and Floss
- Best Fabrics and Stabilizers for Embroidery
- Top 10 Embroidery Tools and Supplies Reviewed
- 1. Mudder Embroidery Starter Kit
- 2. Fiveizero Seam Ripper Tool Set
- 3. Heat Erasable Fabric Marking Pens
- 4. Beadnova Needle Threader Tool
- 5. Embroidery Floss Storage Box Organizer
- 6. BUTUZE Embroidery Sewing Kit
- 7. Similane Embroidery Starter Kit
- 8. DMC Embroidery Transfer Pen Blue
- 9. Cross Stitch Embroidery Kit Supplies
- 10. Deeinn Sewing Scissors
- Frequently Asked Questions (FAQs)
- Conclusion
Key Takeaways
- Quality embroidery tools eliminate frustration and enable precision—sharp scissors, tension-holding hoops, and proper needles make the difference between fighting your materials and executing your vision cleanly.
- Needle selection directly impacts stitch quality: match needle type (tapestry, chenille, sashiko, milliner) and size (7-10 for standard floss) to your fabric weight and thread thickness to prevent snagging and fraying.
- Thread choice shapes your work’s texture and durability—embroidery floss offers adjustable strand counts for shading while pearl cotton delivers bold, even coverage, and specialty threads like metallic or conductive expand creative possibilities.
- Fabric stabilizers prevent puckering and distortion: use tear-away for wovens, cut-away for stretch fabrics, and water-soluble for delicate lace effects, testing adhesive removal methods before committing to your project.
Essential Embroidery Tools and Their Uses
You can’t stitch your vision into fabric without the right tools in your hands. The essentials aren’t complicated, but choosing quality over convenience will set you free to create without frustration.
The right embroidery tools aren’t complicated, but quality choices free you to create without frustration
Here’s what you actually need to master your craft and work with confidence.
Embroidery Hoops and Frames
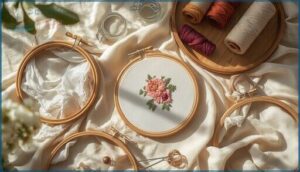
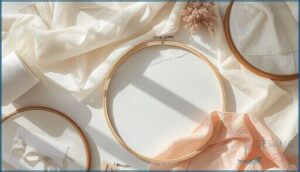
You’ll need the right hoop tension to keep fabric taut without damaging fibers. Embroidery hoops range from 4 to 12 inches, while frame systems like scroll frames support larger work.
Elbesee embroidery hoops offer reliable fabric mounting, and embroidery stands free your hands for precision stitching.
These sewing and embroidery tools form your foundation—choose wisely, and your embroidery supplies will serve you for years.
Scissors, Snips, and Thread Cutters
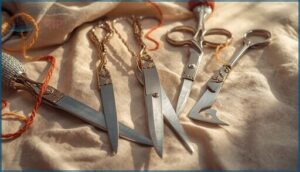
Sharp blades cut embroidery scissors through multiple fabric layers without fraying—that’s liberation from messy edges. You need stainless steel or titanium-coated blades for durability and rust resistance.
Excellent Snippers ($17.50) and Quick Snips deliver precision. Consider these blade materials and ergonomic grips:
- Micro-serrated edges grip slippery thread
- Pointed tips reach tight spaces
- Non-slip grips reduce hand fatigue
- Lightweight designs enable extended stitching
- Protective sheaths guarantee safety precautions
Master your cutting techniques with quality sewing supplies.
Needle Threaders and Accessories
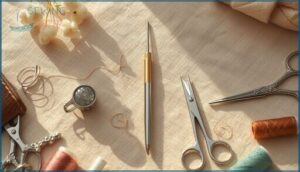
Threader materials matter—stainless steel and plastic wire loops handle threads up to 1.5mm thick. You’ll thread embroidery needles faster with Clover’s tool. Accessory kits include replacement loops and compact cases.
Bead needle threaders feature larger loops for fine beadwork. Metallic thread? Grab threaders with blunt tips to prevent fraying. Pair them with thimbles and embroidery scissors for complete control.
Marking Pens and Fabric Markers
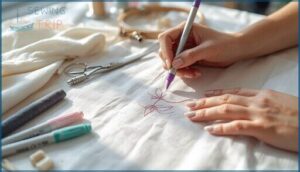
Fabric markers trace your design with precision—heat-erasable pens vanish under an iron, while water-soluble ink washes clean after stitching. Chalk markers show up on dark fabric. Test ink types on scraps first.
Marking tools like a scoring pen create subtle grooves without chemicals. Keep embroidery scissors nearby to trim thread as you follow those lines—thread visibility depends on clean, accurate marks.
Ensuring the accuracy of embroidery designs requires careful consideration of scientific study methods to achieve professional results.
Choosing The Right Embroidery Needles
Your needle is the bridge between thread and fabric. Get this wrong, and you’ll fight every stitch—blunt points that snag, eyes that won’t thread, shafts that bend under pressure.
Here’s how to match the right needle to your project and technique.
Standard Embroidery Needles
Your embroidery journey starts with the right needle in hand. Size 8 embroidery needles dominate general work, cutting through woven fabrics with sharp-pointed precision. Here’s what matters:
- Eye Size – Must hold two floss strands without fraying your thread or patience
- Needle Material – Stainless steel and nickel-plated options deliver corrosion resistance and smooth gliding
- Point Type – Sharp points penetrate cleanly, preventing fabric snags
Thread compatibility determines your success rate.
Specialty Needles (Sashiko, Tapestry, Milliner, Chenille, Beading)
Innovative projects demand specialized tools. Sashiko needles, stretching 25 to 60 millimeters, are ideal for running stitches through cotton and denim, accommodating multiple floss strands. Tapestry needles feature blunt tips, perfect for counted cross-stitch without piercing weaves.
Milliner needles deliver precision in hatmaking with their slender 20 to 34-millimeter shafts. Chenille needles punch through dense felt with chunky eyes, while beading needles navigate seed beads with flexible, ultra-fine points.
Needle Sizes and Eye Types
Needle material and eye configuration transform your stitchwork. Size 7 to 10 embroidery needles suit standard floss, balancing thread compatibility with stitch formation precision. Master needle selection by testing fabric weight against eye type.
- Tapestry needles feature blunt tips and large eyes for counted cross-stitch
- Chenille needles accommodate thicker threads through generous eye openings
- Sashiko needles use elongated eyes for multiple thread passes
- Stainless steel construction prevents corrosion during intensive needlework sessions
Selecting Embroidery Threads and Floss
Thread choice makes or breaks your embroidery work. You’ll need to understand floss versus pearl cotton, explore specialty options like metallic and conductive threads, and master storage that keeps everything untangled.
Here’s what you need to know to build your thread collection.
Embroidery Floss Vs. Pearl Cotton
Your thread choice shapes every stitch. Embroidery Floss offers six strands you can split for delicate shading, while Pearl Cotton delivers bold, even coverage in one pass. Here’s what sets them apart:
| Feature | Embroidery Floss | Pearl Cotton |
|---|---|---|
| Thread Weight | Adjustable (1-6 strands) | Fixed thickness (size 5, 8) |
| Stitch Texture | Soft, textured finish | Smooth, uniform fill |
| Color Fastness | Wide color range, brand-dependent | Fewer colors, mercerized durability |
Choose Floss Types for shaded details on even-weave fabrics. Select Cotton Threads like pearl for crewel work requiring crisp fills.
Specialty Threads (Metallic, Conductive, Flame-Resistant)
You’ve mastered standard Embroidery Floss and Threads—now push boundaries with specialty options.
Metallic Thread adds reflective shimmer through foil-wrapped cores, perfect for Novelty Embroidery Floss applications. Conductive Materials enable Electrical Embroidery in wearables, with silver-coated fibers balancing strength and conductivity. Flame Resistance comes from meta-aramid blends for protective gear.
Thread Properties like Metallic Coatings require adjusted tension, while OverDyed Thread offers unique color depth for bold, rebellious designs.
Thread Storage and Organization
Your stash spirals out of control when Thread Management fails. Storage Solutions save hours—stackable boxes and wall racks cut retrieval time by 30 percent.
- Color Coding with standardized charts prevents brand mix-ups
- Labeling Systems using waterproof numeric tags speed batch prep
- Inventory Tracking apps sync stock levels across devices
- Embroidery Floss organizers with foam padding prevent snags
- Specialty Threads and Notions need anti-static, moisture-controlled compartments
Best Fabrics and Stabilizers for Embroidery
Your fabric is the foundation—pick the wrong one and your stitches won’t hold up. Whether you’re working with smooth wovens, textured felt, or need stabilizers to keep everything taut, each choice affects your final result.
Here’s what works best for different embroidery styles and how to keep your fabric steady while you stitch.
Woven Fabrics (Muslin, Linen, Aida Cloth)
Your fabric choice dictates stitch clarity and project longevity. Muslin works for practice pieces and backings—affordable, soft, but prone to uneven shrinkage. Linen delivers crisp definition with high tensile strength, perfect for heirloom work. Aida cloth‘s grid structure makes counted cross-stitch foolproof for beginners.
Pre-wash muslin to prevent distortion. Pair linen with stabilizers for dense stitching. Choose weave types based on thread count and embroidery stability needs.
| Fabric | Best Use |
|---|---|
| Muslin | Practice, backing, prototypes |
| Linen | Heirloom, fine detail work |
| Aida Cloth | Cross-stitch, beginner projects |
| Linen + Stabilizer | Dense satin stitch designs |
| Pre-washed Muslin | Garments, wall hangings |
Non-Woven Fabrics and Felt
Non-woven stabilizers and felt crafting reveal embellishment techniques that woven fabrics can’t match. Felt—dense, grain-free—won’t fray, making it perfect for appliqué edges. Stabilizers prevent distortion on knits:
- Tear-away for wovens
- Cut-away for stretch fabrics
- Adhesive-backed for temporary holds
- Heat-away for delicate work
- Water-soluble for lace effects
Choose wool felt for textile innovation. Synthetic blends suit needlework essentials. Adhesive stabilizers eliminate hooping trauma.
Using Fabric Stabilizers and Adhesives
Your stitches demand the right stabilizer weights—lightweight for silk, heavyweight for dense satin-stitch logos. Fabric preparation starts with adhesive backing: spray baste or peel-and-stick films grip without hoop damage.
Tear-away stabilizers vanish after you finish; cut-away types become permanent embroidery backing. Water-soluble varieties dissolve completely, leaving zero trace.
Adhesive removal matters—test first, wash gently. Master fabric stabilization, and puckering becomes history.
Top 10 Embroidery Tools and Supplies Reviewed
You’ve learned the basics. Now it’s time to build your toolkit. Here are ten embroidery tools and supplies that’ll help you stitch with confidence and precision.
1. Mudder Embroidery Starter Kit
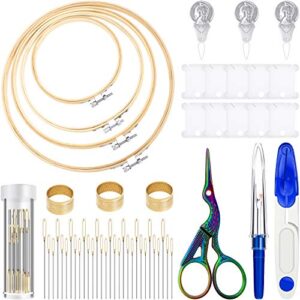
Your first project deserves better than guesswork. The Mudder Embroidery Starter Kit packs 53 pieces—bamboo hoop, needles in three sizes, scissors, needle threaders, and floss bobbins—into one beginner-friendly package. You’ll find everything for embroidery basics without hunting down sewing accessories separately.
Kit reviews highlight its value for starter projects, though the needle threaders can snap and scissors vary in sharpness. Still, this hand embroidery supplies bundle gets you stitching fast. Sand those rough bamboo hoops, and you’re ready to master embroidery tools on real fabric.
| Best For | Beginners who want an affordable, all-in-one kit to start learning basic embroidery stitches without buying tools separately. |
|---|---|
| Primary Use | Embroidery & cross-stitch |
| Skill Level | Beginners to experienced |
| Material Type | Bamboo & metal |
| Item Count | 53 pieces |
| Portability | Moderate |
| Durability Concern | Needle threaders break |
| Additional Features |
|
- Includes 53 pieces covering all the basics—bamboo hoop, needles in three sizes, scissors, threaders, and floss bobbins in one package
- Great value for money compared to purchasing individual embroidery supplies separately
- Large-eye needles and beginner-friendly design make it easy to jump into your first project right away
- Needle threaders tend to break easily with regular use
- Scissors sharpness is hit-or-miss according to customer feedback
- Bamboo hoops can feel rough and may need sanding before they’re comfortable to work with
2. Fiveizero Seam Ripper Tool Set
Mistakes don’t have to mean starting over. The Fiveizero Seam Ripper Tool Set delivers five pieces—two large, two small rippers, plus ultra-sharp sewing scissors—so you can correct embroidery errors fast. Stainless steel blades cut threads cleanly without snagging fabric. Red protection balls guard against accidental tears, essential for fabric safety on delicate work.
Ergonomic grips reduce hand fatigue during alterations and quilting. Regular tool maintenance keeps blades sharp across projects. Reviews note durability varies, but for sewing accessories at this price, you’ll tackle seam ripper tasks confidently.
| Best For | Sewers and crafters who need an affordable, versatile toolkit for removing stitches, fixing mistakes, and handling alterations across different fabric types. |
|---|---|
| Primary Use | Seam ripping & sewing |
| Skill Level | Beginners to experienced |
| Material Type | Plastic & stainless steel |
| Item Count | 5 pieces |
| Portability | High |
| Durability Concern | Quality varies |
| Additional Features |
|
- Five-piece set gives you size options for different seam removal tasks without buying separate tools
- Stainless steel blades stay sharp through multiple projects and cut threads cleanly
- Red protection balls prevent accidental fabric tears when working on delicate materials
- Durability can be inconsistent based on user experiences
- No storage case mentioned in official specs, though some users report receiving one
- Limited to five pieces total, so no backup blades if one gets damaged
3. Heat Erasable Fabric Marking Pens
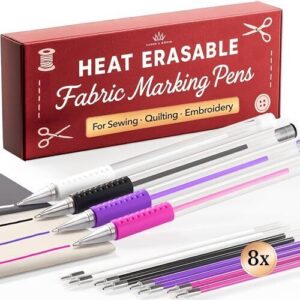
Heat Erasable Fabric Marking Pens transform embroidery techniques—four pens plus eight refills cover up to 3,000 feet of markings. Iron away lines in seconds with no ghost marks, leaving fabric spotless.
Pen ink quality receives mixed reviews; some note refills drain fast. White pens struggle on dark fabrics. Still, for sewing notions at this price, you’ll mark patterns confidently.
Test erasable tips on scrap fabric first—heat resistance varies. These crafting supplies suit quilting and embroidery needs when pen durability matters less than convenience.
| Best For | Sewists and embroiderers who want quick, mess-free fabric marking that irons away without leaving residue, especially if you’re working on light-colored fabrics. |
|---|---|
| Primary Use | Fabric marking |
| Skill Level | Beginners to experienced |
| Material Type | Plastic |
| Item Count | 4 pens + 8 refills |
| Portability | High with case |
| Durability Concern | Ink runs out quickly |
| Additional Features |
|
- Markings disappear in seconds with heat, saving you time compared to scrubbing or washing lines away
- Comes with 4 pens and 8 refills covering up to 3,000 feet total, plus a carrying case for solid value
- Glides smoothly on most sewing fabrics for clear, precise lines on quilting and embroidery projects
- Ink runs out quickly according to some users, and refill longevity varies
- White pen doesn’t show up well on dark fabrics, limiting use on darker materials
- Markings can vanish prematurely if you iron before finishing your project, requiring careful heat management
4. Beadnova Needle Threader Tool
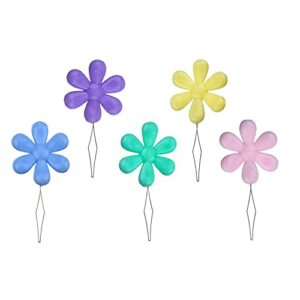
Beadnova’s compact threader tool overcomes needle threading frustrations—five color-coded pieces with flexible copper wire loops thread standard embroidery needles in seconds. At 1.73 inches, you’ll slip this stitching accessory into any project bag for hand sewing, cross stitch, or weaving in yarn ends.
Threading techniques improve with the wire loop mechanism, though durability varies. Some crafters report breakage with heavy use. Still, for embroidery supplies and tools at entry-level pricing, you’ll master needle threading basics without squinting.
Test on scrap first—embroidery aid performance depends on gentle handling and proper alignment with your needles.
| Best For | Beginner embroiderers and crafters who struggle with threading small-eye needles for cross stitch, hand sewing, or weaving in yarn ends. |
|---|---|
| Primary Use | Hand & machine sewing |
| Skill Level | All skill levels |
| Material Type | Plastic & copper alloy |
| Item Count | 5 pieces |
| Portability | High with storage box |
| Durability Concern | Breaks quickly |
| Additional Features |
|
- Compact design at 1.73 inches fits easily in any project bag with included storage box for portability
- Color-coded set of five threaders makes it simple to grab one quickly during stitching sessions
- Works across multiple crafts including embroidery, quilting, crochet, and machine sewing projects
- Durability issues reported with wire breaking quickly under regular use or rough handling
- Some customers received broken or damaged products upon arrival
- Requires careful alignment and gentle handling to prevent the fine copper wire from wearing out
5. Embroidery Floss Storage Box Organizer
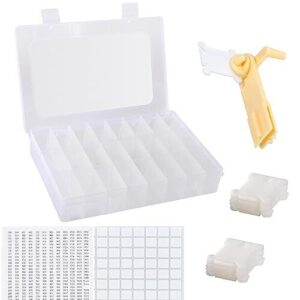
Tangled threads derail momentum—your embroidery materials deserve better. This 24-grid detachable storage box transforms floss organization with 40 hard plastic bobbins, pre-printed color coding stickers, and an integrated bobbin winder. At 7.7″ × 5.2″, you’ll organize threads, needles, and beads for cross-stitch or hand embroidery without hunting through chaos.
Thread management improves immediately, though clasps feel flimsy and the winder detaches easily. For embroidery supplies and tools at beginner-friendly prices, you’ll master storage solutions that save stitching time. Test clasp strength before travel—sewing and embroidery accessories need secure transport.
| Best For | Crafters who need affordable, compact storage for embroidery threads and small tools but don’t require heavy-duty durability. |
|---|---|
| Primary Use | Thread organization |
| Skill Level | All skill levels |
| Material Type | Plastic |
| Item Count | 24-grid box + 40 bobbins |
| Portability | Moderate |
| Durability Concern | Flimsy clasps |
| Additional Features |
|
- Includes 40 bobbins, a winder, and labeling stickers—everything needed to organize threads right out of the box
- 24-grid layout with detachable compartments lets you customize storage for threads, needles, and beads
- Compact 7.7″ size fits easily on desks or in project bags without taking up much space
- Flimsy clasps may pop open during transport, risking spills
- Bobbin winder doesn’t stay attached securely to the box
- Limited capacity may feel cramped if you work with large thread collections
6. BUTUZE Embroidery Sewing Kit
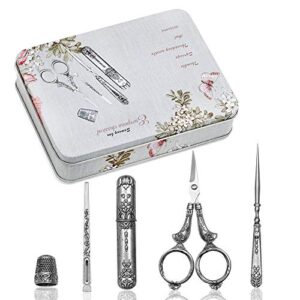
Vintage style meets modern embroidery materials in BUTUZE’s compact tin—five stainless steel sewing basics (scissors, thimble, needle case, punch, threader) built for durability. Kit reviews praise portability, though the thimble sizing varies and tin dents easily.
You’ll tackle beginner projects or experienced embroidery tools work with kit contents designed for quilting, cross-stitch, and needlework. For sewing and embroidery on-the-go, you’ll find embroidery supplies that organize essentials fast.
Check embroidery tips on fit before committing—your sewing kit needs tools that match your grip and style perfectly.
| Best For | Hobbyists who want a portable vintage-style sewing kit with essential stainless steel tools for embroidery, cross-stitch, and on-the-go needlework projects. |
|---|---|
| Primary Use | Sewing & needlework |
| Skill Level | Beginners to experienced |
| Material Type | Stainless steel |
| Item Count | 5 tools |
| Portability | High with case |
| Durability Concern | May arrive damaged |
| Additional Features |
|
- Includes five durable stainless steel tools (scissors, thimble, needle case, punch, and threader) in one compact tin that’s easy to carry
- Works well for both beginners learning embroidery and experienced sewers who need organized, grab-and-go essentials
- Vintage aesthetic with modern materials makes it a thoughtful gift for sewing enthusiasts
- Thimble sizing doesn’t fit everyone comfortably, so check measurements before buying
- Tin case can arrive dented or get damaged easily during shipping or regular use
- Some tools may feel too small or too large depending on your hand size and grip preference
7. Similane Embroidery Starter Kit
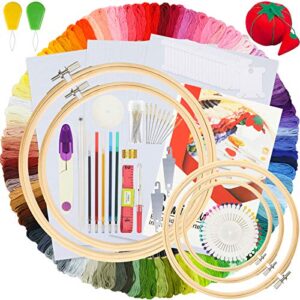
You’ll receive 215 pieces—100 embroidery floss colors, five bamboo hoops, Aida cloth, and cross-stitch basics—in Similane’s starter kit designed for embroidery for beginners tackling hand embroidery and sashiko embroidery. Budget options rarely deliver this range for embroidery projects under $25, though experienced stitchers note dull needles struggle with thicker fabrics.
Kit contents suit friendship bracelets and holiday decorations perfectly. For beginner projects exploring technique without premium investment, you’ll find embroidery tips suggest pairing this starter kit with sharper needles later—your embroidery floss palette starts strong here.
| Best For | Beginners who want a complete, budget-friendly embroidery kit with a wide variety of floss colors to explore different techniques like cross-stitch and hand embroidery without a big upfront investment. |
|---|---|
| Primary Use | Embroidery & cross-stitch |
| Skill Level | Adults & beginners |
| Material Type | Bamboo & cotton |
| Item Count | 215 pieces |
| Portability | Low |
| Durability Concern | Dull needles |
| Additional Features |
|
- Includes 100 embroidery floss colors and five hoops, giving you plenty of options for different projects right out of the box
- Great value at under $25 for 215 pieces, making it easy to try embroidery without spending much
- Works well for beginner-friendly projects like friendship bracelets, cross-stitch patterns, and holiday decorations
- Needles tend to be dull and struggle with thicker fabrics, so you’ll likely need to buy sharper ones for certain projects
- Floss quality doesn’t match premium brands like DMC, which experienced embroiderers might notice
- The tomato pincushion doesn’t accept needles easily, and overall tool quality is basic compared to higher-end kits
8. DMC Embroidery Transfer Pen Blue
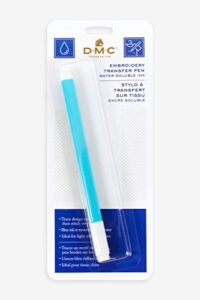
Water-soluble blue ink transforms DMC’s transfer pen into your precision marking tool for hand embroidery—you’ll trace patterns onto cotton or linen, then watch markings vanish after rinsing. Fabric testing prevents unexpected bleeds on textured weaves.
At 0.6 x 3 x 7.5 inches, this marker suits embroidery for beginners learning stitch placement and embroidery projects requiring temporary guidelines. Transfer techniques improve when you cap the nib properly—ink removal depends on pen maintenance and laundering method.
Your embroidery floss work benefits from visible marks during stitching, though the thick tip limits intricate designs on delicate fabrics.
| Best For | Beginners and experienced crafters working on cotton or linen embroidery projects who need clear, temporary markings that wash out easily after stitching. |
|---|---|
| Primary Use | Design transfer |
| Skill Level | Beginners to experienced |
| Material Type | Plastic |
| Item Count | 1 pen |
| Portability | High |
| Durability Concern | Tip wears quickly |
| Additional Features |
|
- Water-soluble blue ink disappears completely with rinsing, making corrections simple and leaving no permanent marks on your fabric.
- High visibility on light-colored fabrics helps you trace patterns accurately and follow guidelines while stitching.
- Compatible with most natural fabrics like cotton and linen, making it versatile for cross-stitch, quilting, and general embroidery work.
- The thick tip makes it difficult to mark detailed designs or work on delicate, fine-weave fabrics.
- Ink runs out quickly with regular use, so you’ll need to buy replacements more often than expected.
- Not suitable for dark or heavily textured fabrics where the blue ink won’t show up or may bleed unpredictably.
9. Cross Stitch Embroidery Kit Supplies
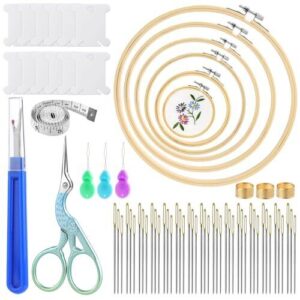
ZXIIXZ’s 72-piece cross stitch starter bundle delivers embroidery hoops in six sizes, 45 needles, and crafting supplies under ten ounces. Kit contents simplify fabric types like cotton for your embroidery projects—adjustable tightening screws secure cloth during stitch patterns, though needle quality disappoints experienced stitchers.
You’ll complete pillows, tablecloths, and clothing faster with organized bobbins and measuring tape, but the dull needles and flimsy plastic thimbles won’t survive heavy sashiko techniques.
For cross stitch beginners testing various embroidery machine alternatives, this $15-range collection offers decent value despite manufacturing shortcuts on essential hardware.
| Best For | Beginners looking for an affordable starter kit to try cross-stitch and embroidery without a big investment, or casual crafters who need basic supplies for simple projects. |
|---|---|
| Primary Use | Cross-stitch & embroidery |
| Skill Level | Beginners to experienced |
| Material Type | Fabric & metal |
| Item Count | 72 pieces |
| Portability | Moderate |
| Durability Concern | Poor quality hoops |
| Additional Features |
|
- Includes 72 pieces covering most essentials—six hoop sizes, 45 needles, scissors, bobbins, and measuring tape in one lightweight package
- Works for multiple projects like pillows, clothing, tablecloths, and curtains without buying separate supplies
- Budget-friendly price point makes it easy to start embroidery without spending much upfront
- Needles are dull and bend easily, making them frustrating to work with on tougher fabrics
- Hoops feel cheap with unreliable tightening screws that don’t hold fabric securely during detailed work
- Several items like the plastic thimbles and inaccurate tape measure are basically unusable due to poor quality
10. Deeinn Sewing Scissors
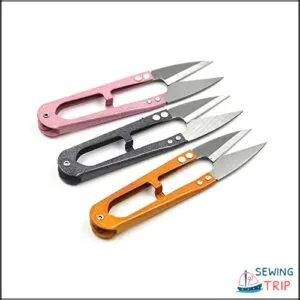
Deeinn’s alloy steel scissors—4.1 inches, multicolored three-pack—cut thread and stabilizer cleanly when blade sharpness holds. You’ll appreciate the lightweight 0.7-ounce grip during marathon stitching sessions, though quality control lapses mean some units arrive dull or defective.
For embroidery accuracy on fabric types like muslin and linen, these entry-level sewing tools deliver adequate cutting techniques without the durability of premium brands. No blade sheath means careful storage protects your investment.
Scissor maintenance through regular sharpening extends performance, making this budget option workable for hobbyists exploring sewing accessories beyond embroidery machine basics.
| Best For | Budget-conscious embroiderers and hobbyist sewers who need lightweight scissors for trimming threads and stabilizer but can tolerate inconsistent quality control. |
|---|---|
| Primary Use | Sewing & trimming |
| Skill Level | All skill levels |
| Material Type | Alloy steel |
| Item Count | 3 scissors |
| Portability | High |
| Durability Concern | Some defective units |
| Additional Features |
|
- Lightweight 0.7-ounce design reduces hand fatigue during extended stitching sessions
- Sharp alloy steel blades cut through thread and light fabric cleanly when functioning properly
- Three-pack offers backup scissors or multiple workstation coverage at an entry-level price
- Quality control issues mean some units arrive dull or defective out of the package
- No protective sheath included, requiring careful storage to prevent accidents or blade damage
- Durability and edge retention fall short of premium brands, requiring more frequent sharpening
Frequently Asked Questions (FAQs)
What are the 6 basic tools for embroidery?
Think of embroidery as building a house—you need six essentials. Start with needles, scissors, thread, hoops, fabric, and marking tools.
Master these embroidery basics, and you’ll handle any stitch guide confidently.
What are the materials needed for embroidery?
You’ll need embroidery frames to stabilize your work, plus fabric types like muslin or linen.
Thread and yarn selection matters—use thread conditioners to prevent tangling.
Don’t forget stitch markers and embellishments for dimension.
What supplies do I need to start embroidering with a machine?
You’ll need the right Machine Setup and Embroidery Software first.
Stabilizer keeps fabric steady. Thread Management tools prevent tangles. Hoop Accessories secure your work.
Proper Thread and Yarn Selection makes stitches shine.
What is the most essential tool in hand embroidery?
Your embroidery hoop is the foundation—it stabilizes fabric, preventing puckering while you work.
Proper tension ensures stitch accuracy and consistency. Without it, thread management suffers and needles can’t maintain control through weaving motions.
How do I organize my embroidery threads?
Overwhelmed by tangled floss? Sort your Thread Storage by Color Coding and Thread Types—cotton, metallic, silk.
Use Label Management for quick Inventory Tracking. Clear organizers prevent Floss Organization chaos while keeping your Stitching and Sewing Techniques smooth.
What are the best lighting options for embroidery?
You’ll need LED task lamps with 5000–6500K color rendering for true thread shades. Natural light through diffused windows works daytime.
Position lamps at 45 degrees—shadow minimization matters when your scissors meet delicate sashiko stitching.
How can I avoid tangling embroidery floss?
You control tension like a maestro—keep your thread 18–22 inches, separate strands as needed, and store floss in labeled compartments. Thread conditioners reduce friction. Organized workspace, smooth needlework every time.
What is the ideal chair for embroidery work?
Your chair should cradle you through countless stitches. Seek ergonomic design with back support, adjustable armrest height, and footrest adjustment.
Proper seating comfort transforms needlework techniques from taxing to tranquil, whether you’re mastering sashiko or traditional stitching tools.
How do I clean and store finished embroidery projects?
Hand wash your textile crafts in cold water. Dry flat, away from sunlight.
Store with acid-free tissue in breathable bags. Use UV-protective glass when framing.
These preservation techniques help your fabric crafting last decades.
How do you transfer embroidery patterns onto fabric?
Pattern transfer is like building a roadmap for your stitches. Use iron-on methods, fabric marking pens, or lightbox tracing with stabilizers.
Design placement matters—secure fabric taut in hoops for accurate sashiko stitching patterns and material choices.
Conclusion
Most embroiderers abandon their first project within three days. Don’t let bad embroidery tools and supplies write your story.
You’ve seen what works: sharp scissors that actually cut, hoops that grip, needles that glide. These aren’t just purchases—they’re permission to create without fighting your materials.
Your hands already know what to do. Now they’ve equipment that won’t betray them. Pick your tools. Start stitching. Make something that lasts.

